
Hello, dears!
If you’re on Pinterest or any other form of social media, you’ve probably seen the hand lettering trend going around. And I think it’s great! Hand lettering is a beautiful and useful skill. Unfortunately, it seems like I see the same type of post (“how to make faux calligraphy for beginners”) EVERYWHERE, and not much information beyond that.
So today I’m going to give you all some ideas and inspiration for how to take your hand lettering to the next level! I’ll be showing you some quick tips for how to format quotes, add flourishes and other fun extras, and more. If you need a refresher on basic hand lettering, check out my first post on that subject here.
Now that we’ve got that covered, let’s begin!
1. My first tip concerns formatting. This is one of the most important tips, in my opinion. Even if you have beautiful lettering, writing out the words in straight lines can cause the piece to look flat and uninteresting. Instead, make the words interact with each other – fit them into the gaps and spaces between each other like a jigsaw puzzle. Bounce lettering helps add gaps for other letters to fill, like the irregular space underneath “words” in the top example below.

2. Another way to make letters interact with each other is to write the most important words first, and then nestle in other words around them. Bonus tip: try using shapes like circles to format your quote.

3. Usually, you can achieve a faux calligraphy look by simply writing the quote in cursive and then thickening the downstrokes. But some letters look different in the brush lettering alphabet than they do in the cursive alphabet. See photo below for examples.

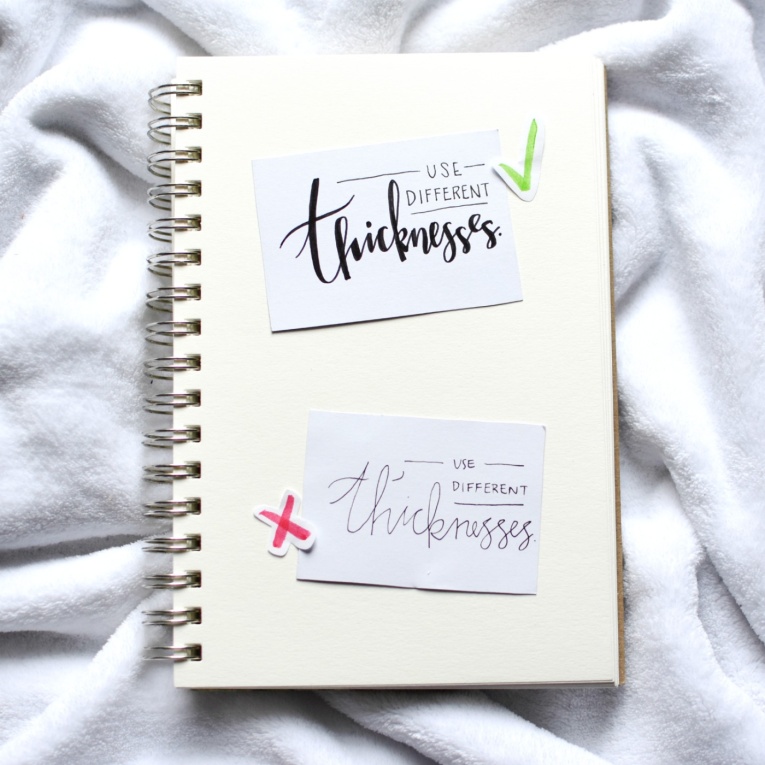
4. Using different stroke thicknesses will go a long ways to adding interest and contrast to your lettering. Otherwise nothing stands out.
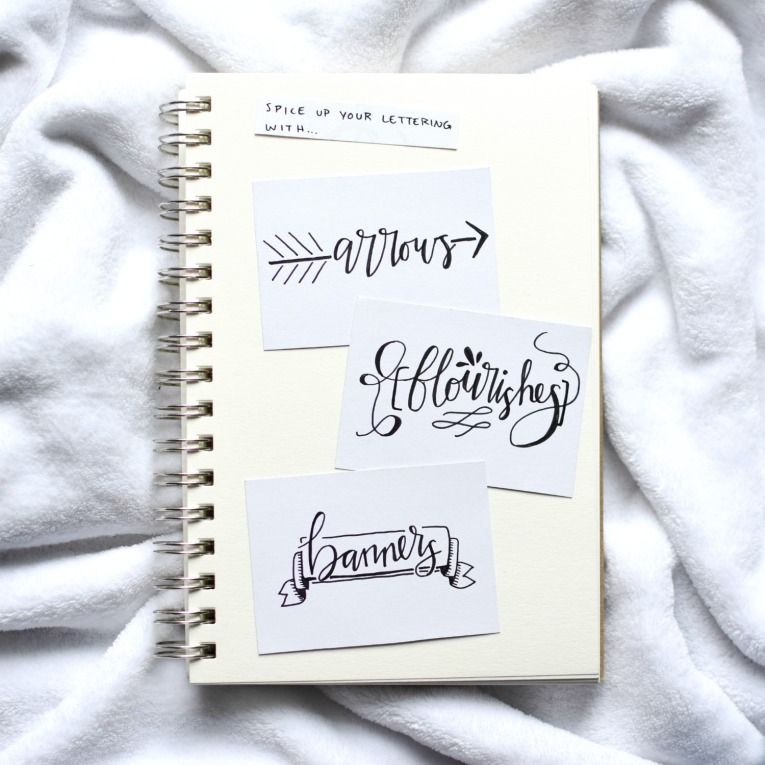
5. Now we’re getting to the fun part! Once you have your words planned out, you can fill in gaps and add interest with flourishes like these.
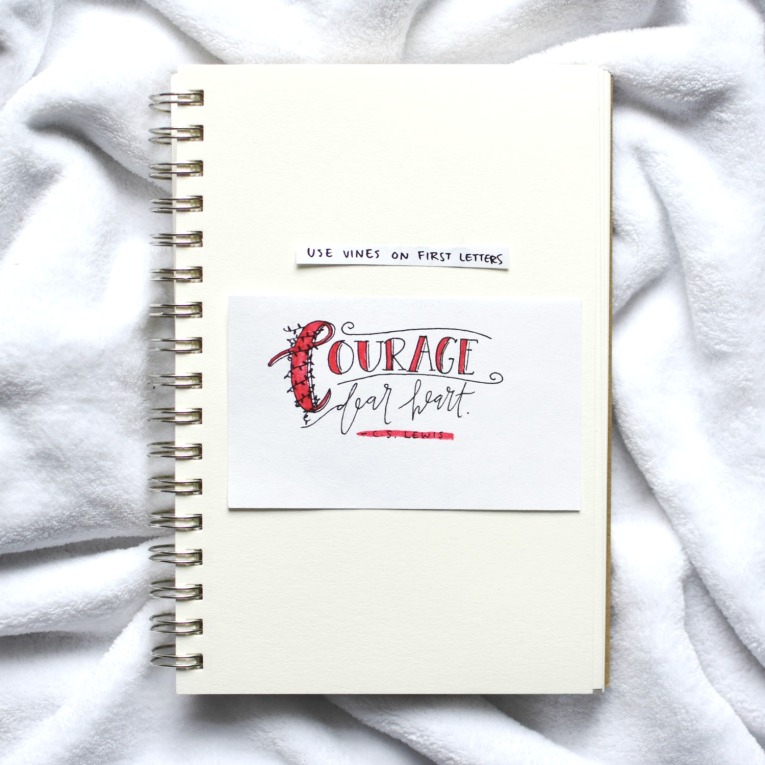
6. I used quite a short quote for this example, but drawing faux-illuminated letters works great for long quotes as well. Just thicken the first letter, color it in, and wrap it with some vines. This adds a pop of color and interest and allows you to write the rest of the quote in a more normal, straight font.
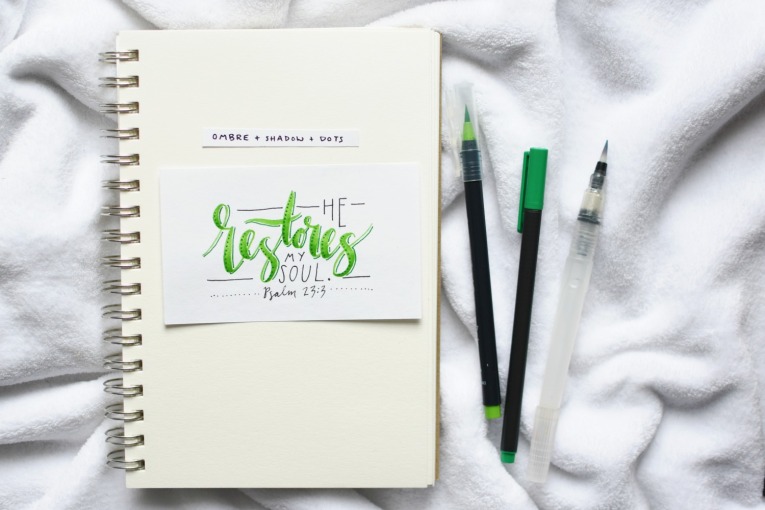
7. Making ombre lettering is surprisingly easy. You can use different colors, or just one, as I did here. Go over the bottom tips of each letter with another layer or two of ink, then blend the pigment upwards with an aqua brush or damp paintbrush. Here I added a line of dots on the thickest parts of each letter and a thin shadow line on the right of all vertical-ish lines. A fineliner pen works well for adding details since, remember, using different thicknesses adds interest!
8. For this verse, I combined ombre with white gel pen highlights. I love these two effects together! Doesn’t it make the letters look juicy and almost 3D? For more natural-looking highlights, add dots and dashes instead of a straight, unbroken white line.

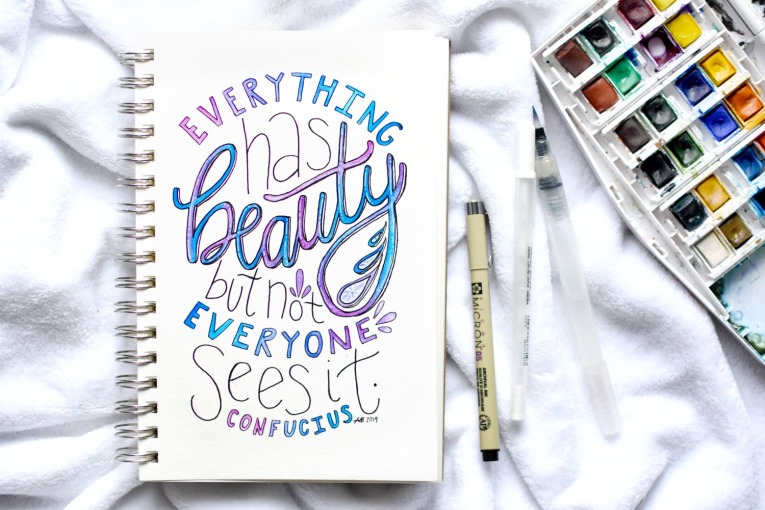
Here’s a finished piece that combines a lot of the tips we’ve talked about so far. I wrote the keyword “beauty” first, adding highlights and details to it after filling it in with watercolor. Then I fitted the secondary words around the main one, curving some fonts for interest, and adding flourishes for a finishing touch. I love how it turned out! Stay tuned, because I might make it into a printable for my Etsy shop. 🙂
And there you go! I hope you found these tips helpful, my friends. If you did, I’d greatly appreciate it if you pinned this post or any of the pictures in it so others can read it too!
Which tip did you like best? Do you enjoy hand lettering too? What tips do YOU have for how to improve lettering?
Thanks so much for reading, dears, and have a great day!
***Allison***


This is a great post!!
LikeLiked by 1 person
Why thank you!
LikeLiked by 2 people
I just L❤️VE your art. 🖼
It’s SO pretty!! 🥰😍🙂
~Sara 💕
LikeLiked by 1 person
Aww, thanks so much. ❤
LikeLiked by 2 people
It`s my pleasure. 😊
LikeLiked by 2 people
I’ve recently really gotten into hand lettering, so this post came at the perfect time for me. 😁👍
LikeLiked by 1 person
Hurrah, I’m so glad to hear that, Jenna! 🙂
LikeLiked by 2 people
This is a great post, Allison! I have new pens I’m trying to get and others I have to make this work. 😀 I love your trips/tricks and those little arrows. 🙂
LikeLiked by 1 person
Thanks so much, Ariana! Ooh, that’s so exciting! I hope you enjoy using your new pens. 🙂 Hee hee, I like the arrows too. 😉
LikeLiked by 1 person
You’re welcome! Thanks, me too!
LikeLike
Ooh, your hand lettering is so pretty Allison! Great tips!
LikeLike
Why am I just now seeing this? XD But anyway, THANKS!
LikeLiked by 1 person
I’ve been looking for good lettering tips to improve mine! This is super helpful. Thank you! 😊
LikeLike
Hooray, I’m so glad to hear that! Have fun lettering. 🙂
LikeLiked by 1 person
AGGGGHHHH THIS IS SO GOOD MY FRIEND! My hand lettering is rather…sad. Yours has gotten so much better over the last while and this was super helpful and very lovely to look at at the same time. 🙂
LikeLike
AWW THANK YOUUU. Well I don’t think it’s THAT bad, gracious. I know, hasn’t it? I’m so glad you found it helpful and beautiful – that’s just what I was hoping. 🙂
LikeLike
Oh it’s rather dreadful.
LikeLike
Well then. I stand corrected.
LikeLike
Beautiful!! Thank you so much for making this post; I’d love to get into doing hand-lettering and I will DEFINITELY reference this post. <33
LikeLike
My pleasure, dear! Thanks for reading!
LikeLiked by 1 person
Ugh everything is so gorgeous as always! 😀 ❤
How did you make all the different colors in the last one blend so well? It's all so beautiful! 🙂
You make all this look so easy! Now I know how to actually do all this stuff. XD
And oh the other day I got some of those micron pens and the white gelly roll pen that you mentioned in an art supplies post a while ago and I really like them! ❤
I didn't have a white gel pen, just silver, so it's nice to have one to do more artsy stuff with! And I needed more smooth black pens to write/bujo with, and at first I was concerned about the microns cuz I didn't know they were more like markers, but I had a coupon for Michael's and couldn't find any regular black gel pens so I ended getting a pack of the 005, 02, and the 08 for half off and they're so nice!!!! They don't bleed! I'm happy. XD You're a good pen reviewer. 😛
LikeLike
D’aww, you’re so sweet. ❤
Oh! I used watercolor for the last piece so everything blended a lot easier. 😉
Well yay, I'm glad I didn't make it look hard! 😉
Ooh, really? That's GREAT! I'm so glad you like them. I love my Microns too! Hee hee, THANK YOU. I'm so glad I'm a good pen reviewer. 😛
LikeLike
Really nice work, thanks for the tips!
LikeLike
Thanks, and my pleasure!
LikeLike
This is awesome!
LikeLike
Thanks so much! ❤
LikeLiked by 1 person
yayayay this post is so goood. we’re doing this calligraphy unit in my school’s art class, and it really perked my interest in handwriting. it looks so beautiful when you do it!
LikeLike
Oh, I’m SO happy to hear that! I hope you enjoy the calligraphy unit! And thanks, dear. 🙂
LikeLike
That’s amazing!! Your hand lettering is mind-blowing!! All the little things you add to your writing make’s it unique and very beautiful!!
LikeLike
Aww, you’re so kind – thank you! ❤
LikeLiked by 1 person
You are so good at hand lettering, and these tips are great! I love hand lettering. It’s so much fun! ☺
-Sara
LikeLike
Aww, thank you! And YES, me too!
LikeLiked by 1 person
Great post, Allison! I love doing calligraphy, so this post really helped! Thanks for the tips! 😉
LikeLike
Thanks, Carissa! I’m so glad it was helpful – my pleasure!
LikeLike
Great post! Thanks for sharing your tips! (:
LikeLike
My pleasure, Clare! 🙂
LikeLiked by 1 person
These look so amazing! xx
LikeLike
Thanks so much. ❤
LikeLiked by 1 person
Awesome tips!! Thank you so much for sharing them with us! 😀
LikeLike
My pleasure, Pearl! Thanks for reading! 🙂
LikeLiked by 1 person
This is so beautiful! My Mother does Hand Lettering. I’m going to have to show this post to her! She’ll love it. You’re really talented!
LikeLike
Aww, thank you so much! ❤
LikeLiked by 1 person
Ahhh YASS!! I love this post! I reallyy needed inspiration for filling elements!! Thanks for all the tips!! I love these kind of posts! 🙂
LikeLike
Aww, thank you! I’ll have to make them more often then, because I do enjoy creating them. 🙂
LikeLiked by 1 person
Yes yes yes! And I’ll love to see them too!! 😉
LikeLiked by 1 person
This was such a helpful post, and your examples were all so pretty! 😀 I LOVE that last quote – I definitely think you should add it to your Etsy shop. 🙂
-Clara ❤
LikeLike
Hurrah, I’m so glad it was helpful! And aww, thank you. ❤ Hopefully I will!
LikeLiked by 1 person
Super!!!
LikeLike
😀 ❤
LikeLike
Thank you for this post! I found it from Lisa (https://thisinkwell.blogspot.com) and it was so nice learning some new hand-lettering tips! As a self-taught hand-letterer, it’s usually down to me to figure out things, but having tips written out is so nice! I particularly like the A, b, s, G example: it makes so much sense but I didn’t think of it before!
LikeLike
My pleasure, Hanne! I’m so glad to see you here (and thanks, Lisa, for the referral 😉 )! I’m happy to hear that you found these tips helpful. Thanks for visiting!
LikeLike