Today I have a little crafty tutorial for you, my friends. Bring out your scrapbook paper and that huge stash of cardboard rolls you have tucked away in the closet, and… um, read this tutorial! XD
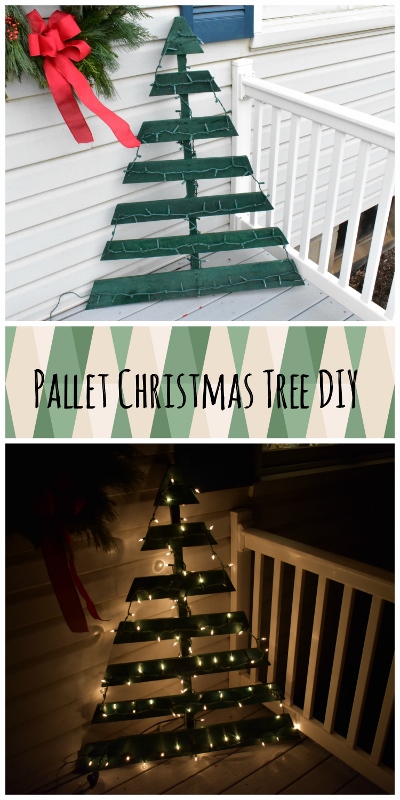
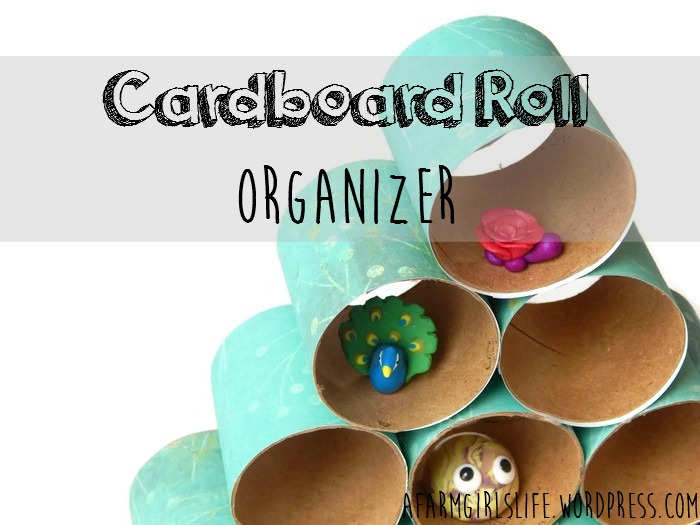
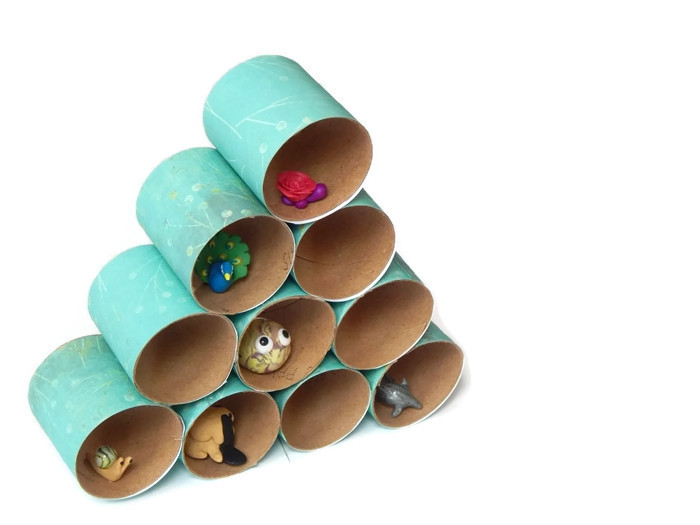
We are going to make this handy-dandy organizer. It’s perfect for organizing those stray but important knickknacks, or showing off a collection.
What you’ll need:
- Toilet paper rolls or similar cardboard rolls
- Pretty scrapbook paper
- Cutting tools: an X-acto knife and scissors
- Glue stick
- Hot glue gun (with hot glue, of course 😉 ), or super glue might also work
- Pencil
- Cut the cardboard rolls into even lengths. It is quite tiring to measure each tube, so I found a much easier and faster way! First, make a template. You will have to measure this one: make marks all the way around the tube using a pencil and ruler, then connect the dots. 😀 I made my template roll about 2 inches long. The longer the knickknacks, the longer the template should be. (As you can see, most of my knickknacks are small, so a shallow organizer worked perfectly.) Use an X-acto knife (and scissors if need be) to cut around the line. Trim the top rough edge with a scissors, and cut a slit all the way down one side, like so:
 Ta-daa! You have made a template. Now slip it on to the tubes you want to cut, and simply trace around the top with a pencil. No measuring needed!
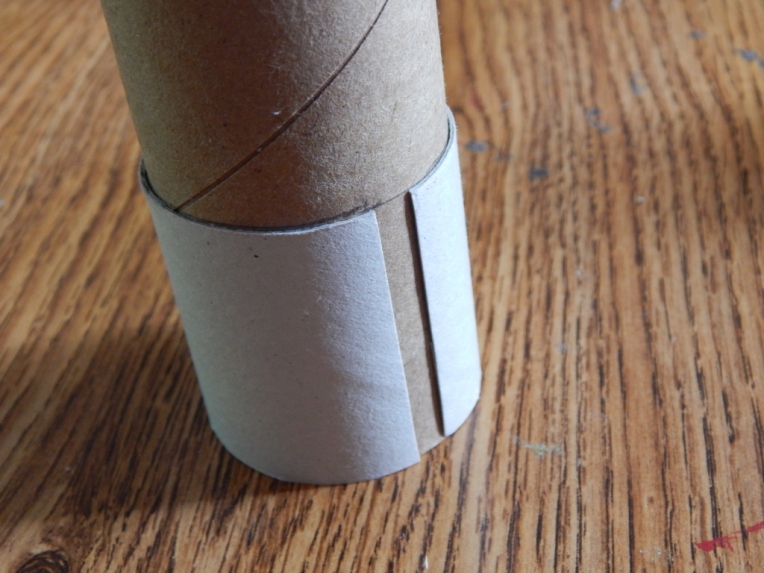
 I cut 10 lengths for my organizer, which used about 5 tubes (not counting the template tube).
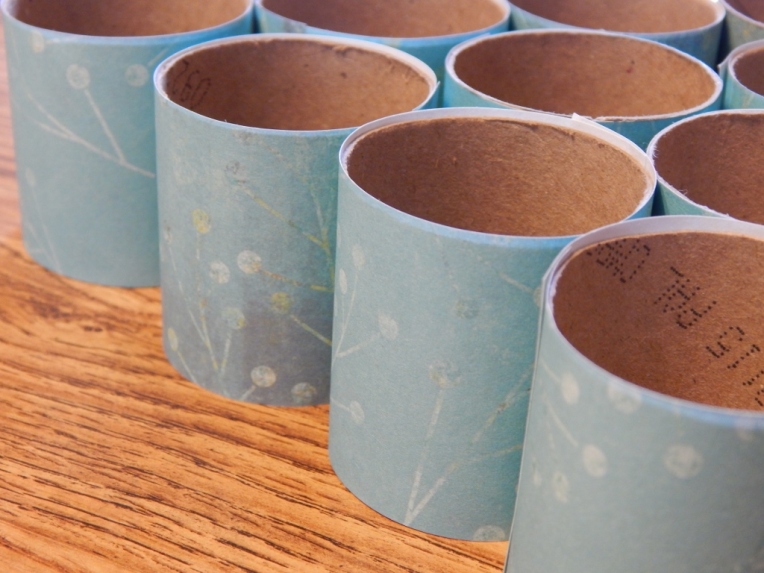
- Cut strips of paper to cover the rolls. Choose a pretty pattern or color of scrapbook paper to decorate your organizer. Cut the strips as wide as your tubes are – if your tube lengths are 2 inches, cut 2-inch wide paper strips. (Yes, you’ll have to measure this time. 😦 ) Glue a strip around each tube and neatly cut off the excess if your strip is too long.

- Hot glue your paper-covered tubes into a pyramid shape. Arrange the tubes so the paper seams don’t show on the outside, and hot glue them. I think it works best to glue one row at a time – glue the bottom row of four tubes together first, etc., then glue the rows to each other. Also, don’t glue them vertically on top of each other like it shows here. 😉 You can stand it up like this after you’re done.

- Use it! You are done! Give yourself a pat on the back, then go put the organizer to good use. Congratulations on a craft well done!

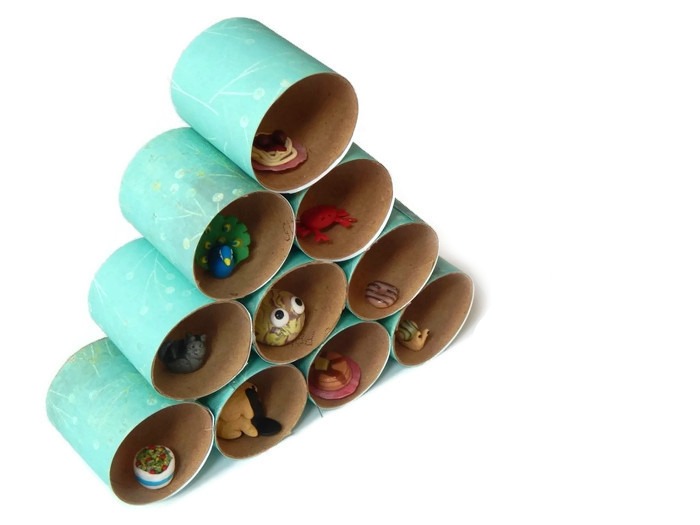
By the way, the little critters and food in the organizer are polymer clay miniatures made by my sister Megan and me. I made all of the miniatures except some in the last picture, where Megan added some of hers to help fill it up. Which knickknack is your favorite? Of mine I might like the peacock best, and of Megan’s I think I like the cute little crab. 🙂
I hope you enjoyed crafting along with me!
Oh, oops! I almost forgot the BIBPC photo. BIBPC is fun photo contest that my sister Megan is doing. (Read about it here.)The prompt this time was “Funny.” Here’s my entry!

Story behind the picture: This is a hilarious photo of Diamond, my little sister’s rabbit. We sometimes bring our rabbits in the house for a bit, and here Diamond is just hangin’ out like a cool dude with sunglasses. XD You can see more funny bunny pictures in this post.
***Allison***
P. S. I made the white background of some of the photos with FotoFuze. It’s a really neat program! I made the poster with PicMonkey, which I also LOVE. 😀