Setting Up My New Bullet Journal + Tips & Tricks

featured image 17

Hello, dears!

I’ve been looking forward to posting this for quite a while! I recently used up my second bullet journal and bought a new one, which I absolutely LOVE so far! Today I’ll show you how I set it up, as well as some tips and tricks I’ve learned along the way.

For those of you who don’t know, bullet journaling is kind of like a planner, but it’s more of a system than a certain notebook you buy. Part of its appeal is the limitless options for customization, which makes the system pretty hard to define. But basically it’s a way to keep all your lists and notes and journals in one notebook. Click here to see the BuJo website for more information. And reading the rest of this post might help too. 😉

THE MATERIALS

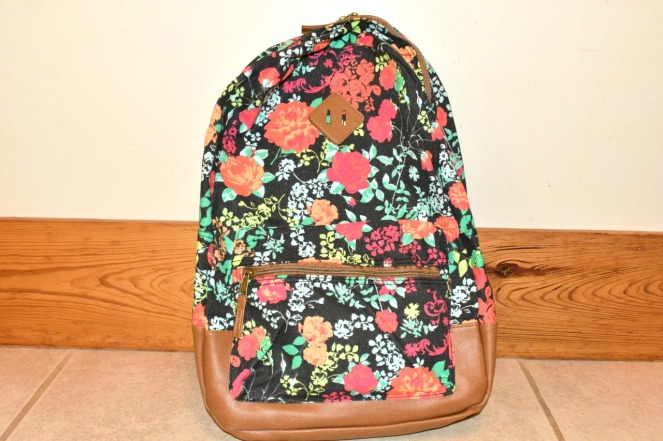
To begin with: the actual journal itself. I got this Essentials grid dot journal from Amazon, and it’s my favorite bullet journal I’ve owned so far!

DSC_0070

Its features include…

  • a hardcover, easy-to-manage size of 8 1/4″ X 5 3/4″
  • light, evenly spaced grid dots for writing/drawing guidelines
  • decently thick paper
  • an elastic strap to keep the notebook closed
  • a ribbon bookmark
  • a paper pocket on the inside back cover

The cover is kind of a boring black, but you can decorate it with washi tape, metallic Sharpies, paint pens, etc. So far I just put a strip of washi tape down the spine and wrote a title with a white gel pen.

DSC_0088

SETTING IT UP

My supply list for setting up my bujo includes the following:

  • Essentials grid dot journal
  • washi tape
  • ruler
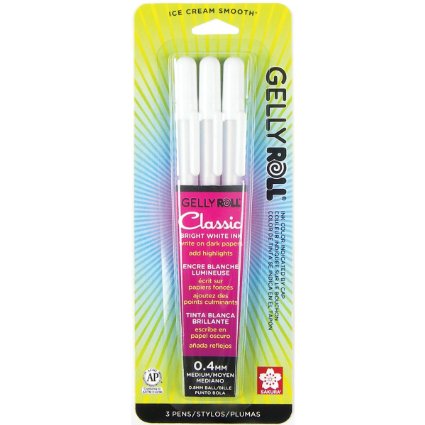
  • micron pens (sizes 04 & 08)
  • regular pencil
  • Pilot G-2 07 black ballpoint pen

Here’s my simple cover page. I’ve always kept my bullet journals pretty simple because I do most of my journaling in the evening before bed, when I don’t have a lot of time to make it fancy. This BuJo is very minimalistic, but I still think it’s pretty. 🙂

DSC_0071

On the first spread I have a “Fonts” page on the left and a “Quotes” page on the right. (Well obviously. XD)

bujo 1

I do my Bible journal in the evening as well, where I copy down my favorite verse from the chapter I read. I added the “Fonts” page because I often run out of interesting font ideas. 😛 Do you guys have any handwritten font suggestions? I also like having a place to put quotes I find in the books I’m reading, hymns I’m singing, songs I’m listening to, etc.

bujo 8
Ugh, you can tell there’s no more softbox lighting here. XD

I love this page! Maybe because it took forever. XD Seriously though, it was one of my most time-consuming spreads. :[] I allowed myself space to fill in 17 books each month, but sadly I don’t think I’ll fill them all up. In my last journal I did read 17 books in a month (in May), but I only read 4 books in January and March. *ashamed look*

bujo 2

Here we have “Birthdays” on the left and combination of a wishlist and prayer list on the right. I was so happy I thought of this 12-layer cake for the birthday page format, but… it didn’t turn out quite as cake-like as I’d hoped. XD Oh well, it still works fine. For the opposite page, I divided the page in two because in my past bullet journals I didn’t use a whole page for either subjects.

bujo 3

I kept this whole spread blank for writing down notes – ideas I thought of, questions to ask pen pals, blog posts I want to make… anything else that doesn’t fit in my other pages.

bujo 4

The left page is available for either more notes or a new list. The right page is a place for my goals, whether unrealistic or practical. 😉 It’s pretty much a long-term to-do list.

bujo 5

Now for my monthly set-up! I used my 08 micron to write the name of the month in a font that’s both simple and pretty (are you starting to see a theme here? XD). I’m also going to use the gorgeous navy washi tape for each new month. I thought about adding doodles of important happenings on each month’s cover page as I go along, but I’m not sure I want to ruin the nice clean page now. XD Maybe I can use the blank page to the left?

bujo 6

On the left I have a sort of monthly overview, and on the right I start in with my daily journaling. I’ve never used a calendar before, but I think it will be nice to see at a glance what important events are coming up. Monthly goals are pretty self explanatory, so…

The right page is the part of my bujo I use the most, and the only daily section I have. I don’t have habit trackers for everyday chores and such because, well, I do them every day anyway. 😛 Instead, I just write a few sentences about what I did/what happened that day, and then make a short to-do list for tomorrow.

bujo 7

And that about wraps it up! Before you go, here are a few things I’ve learned from bullet journaling so far:

TIPS & TRICKS

  • If you make your BuJo too complicated, chances are you just won’t use it. (Or if you’re like me you’ll still use it and just be frustrated. XD) The time it takes to set up a page should correspond with how long it will last. Time-consuming pages are just fine for spreads that will last all bullet journal long (like my “birthdays” page, for instance), but don’t go as all-out for pages you’ll have to remake each month. For daily things, I like to keep it as simple and easy as possible.
  • Make a halfway mark in pencil for ease-of-use. It’s nice to have things centered, but it’s sooo tedious to count the dots and divide them up each time you make a new page. Instead, do that just once, and mark the center on the edges of the pages for a great shortcut. Now you can check the mark before centering your titles.

DSC_0087

  • Use washi tape for easy pops of color, and to mark important pages. Washi tape is a nearly fool-proof way to add color and interest to your bujo. If you wrap the tape over the edge of the page like I did with my “June” page, you can see it even when you close the journal.
  • Get a bullet grid journal and one with a pocket for random lists. I suppose I’m a bit biased since I’ve only used a bullet grid journal, but I HIGHLY recommend them over just a regular lined notebook. It makes measuring and writing things a whole lot easier, plus it looks prettier! I’m also really enjoying the paper pocket at the back of the Essentials journal. It’s great for holding lists that I thought of after I already set everything up, or temporary lists that I don’t need to put in the BuJo anyway.

bujo 9

Hopefully this post was enjoyable and helpful! Do you have a bullet journal, and if so, do you have any tips for me? What lists/page is your favorite in YOUR BuJo? What was your favorite of my pages?

Thanks so much for reading, dears, and please have a lovely day!

***Allison***

Advertisement

Birthday Harvest {2018}

featured image 13

Hello, dears!

Today I am excited to FINALLY show you guys some of the gifts I got for my birthday! It took me a while to get this all prepared, but I’m pretty pleased with the pictures because… well, I shall tell you in a bit. 😉

Anyway, first the obligatory disclaimer about how this is the obligatory disclaimer that no, for those of you who have a nagging doubt, I am NOT trying to brag about my gifts (I never saw any posts like these that were, but oh well), I am simply making one of the practically useless but quite entertaining birthday posts that I enjoy reading for some reason. XD So hopefully you enjoy it too!

Now that that confusing paragraph is out of the way, let us move onto…. another disclaimer: these gifts are in no particular order. 😉 Also for the background I used a white sheet (that took a while to iron) and some confetti from Clara’s amazing birthday box.

NOW! First, some super cute succulents from my sister Megan! (Also I REALLY REALLY LIKE THIS PICTURE. 😀 )

gift 1

These succulents are really fuzzy and soft – kind of like Lamb’s Quarter.

gift 2

She got these succulents from Leaf & Clay, by the way, which I think is a great site!

gift 3

Sweet Laura sent me this adorable pot – I actually had seen it before on Amazon and loved it. 😀 (Fun fact: I was obsessed with pandas when I was little, and I still like them.) Doesn’t it look SO CUTE holding a succulent?

gift 13

My Grandma and Grandpa gave me this lovely dish. I believe it was my great-great-grandmother’s. O.o So that’s pretty neat. 🙂

gift 4

My dear friend Aria gave me this bath bomb, which I can’t wait to use! I always take showers, but Megan and I actually have a jacuzzi ( :O ) in our new bathroom at the big house, so I shall use it when we move in to celebrate. 😀

gift 5

I don’t wear very much makeup at all, so my makeup collection is pretty sad. XD Aria sent me this and I think it’s so pretty!

gift 6gift 7

I was so happy to get this paper because my other scrapbook paper isn’t cardstock, and I love the thicker paper. Plus this is so cute! The amazing Clara gave me this gift. ❤ (Psst, if you like this, you should check out Megan’s giveaway to have a chance of winning it!)

gift 8gift 9

I love the metallic accents on this journal from Aria! Also it’s good to have new notebooks since I use mine up for school, like *cough, cough* CHEMISTRY. Eh.

gift 10

Stickers! I actually have very few stickers, so yayyyy! Also I love these colors. One that cracks me up says “buy more stickers.” XD

gift 11

Clara gave me this really fun washi tape crafts book! I got a lot of good ideas from this, heh heh. I really want to do some sort of washi tape wallpaper in our new bedroom like in the second picture.

gift 19gift 12

Clara also gave me this fun doodle prompt book! I was originally going to do one every week but decided that probably wasn’t realistic, so. XD It has some neat ideas in it, like…

gift 14gift 15

Aria also gave me this very pretty and dainty best friends’ necklace. ❤ (The blurry spots have cutouts of the states where we live under them.) I’m trying not to wear it every day… 😉

gift 16

Aria found me this other giraffe thingy… not quite sure what it’s called, but it’s SPARKLY, and it’s PURPLE! Particularly PURPLE! 😀 It’s also quite fun to shake up.

gift 17

My grandparents gave me this camera remote, which will be SO nice for using instead of the self-timer. YAY!

gift 18

Megan gave me these super cute and pretty washi tapes. ❤ I love them, particularly the gold succulent one! 😀

gift 20

Aria gave me several pretty tapes too. I figured out that the plain white ones are great for painting, like with watercolors, and the gold ones are actually shaped cutouts instead of your regular rectangular tape! Pretty neat. 🙂

gift 21

Also I took all of the above pictures with my next present: softbox lighting from my Gram and Grandaddy! 😀 Ironically the softboxes themselves are rather hard to take pictures of, so I’ll just use one from Amazon. 😉 Their lights are super bright and especially good for indoor and project photography, which is not my strong suite. Let me know if you guys would be interested in a full-scale review sometime!

 LimoStudio 700W Photography Softbox Light Lighting Kit Photo Equipment Soft Studio Light Softbox 24"X24", AGG814

I had these next two presents on the table, but for some reason forgot to take pictures of them with the rest, so that’s why they don’t have the same background. :/ Anyway, Aria gave me these pretty paint pens! They’re very opaque so you can color over printed words and such – it’s basically like paint in a marker.

gift 25

She also gave me this mug, which I love. XD Isn’t it so cute and funny? (She calls me a giraffe since I’m tall (5’10”), by the way. That’s why she got me giraffe presents. ❤ 😉 )

gift 24

And one last present… A DESK FOR MY ART STUDIO! My parents let me pick out a desk I liked and they bought it for me, which I was so happy about! I picked this lovely desk from Ikea:

LINNMON / ALEX Table IKEA Pre-drilled leg holes for easy assembly. Drawer stops prevent the drawers from being pulled out too far.

{via}

Here it is in my art studio! Except… we accidentally ordered the wrong (larger) size, so we’re going to get a new table top that should fit better soon. But otherwise, I LOVE it! I think it’s perfect for the space. 😀

gift 23


Welp, I suppose that’s it. 🙂 So many other people gave me the sweetest cards and envelopes and little birthday packages, but I didn’t have enough space in this already very long post to show everything. 😦 If I didn’t show something you gave, please know that I still truly and honestly loved it and you made my day by sending it. ❤ THANK YOU SO MUCH, EVERYONE, for a great birthday! I felt incredibly loved – my family, and myfriends online and offline were so, so sweet! I am now officially 18 – strange but true. Yikes. 😛 Am I too old to use emojis now? I hope not, because they’re very helpful…

Before you go… what is one thing on your birthday list? Did you find anything here to add? 😉 And isn’t the softbox lighting great?

Thanks so much for reading, dears, and please have a lovely day! ❤

***Allison***

Macro Photography + Lens Review

featured image 5

Hello, dears!

Well that was a rather unanticipated mini-hiatus, huh? I think this is the longest break from blogging I’ve taken in… I don’t know, a very long time. 😛 As usual, it was because of our agonizingly slow internet and hectic moving schedule. *sigh* Anyway, I won’t elaborate on my excuses anymore – must make the most of fast Wi-Fi while I have it! XD

Today I am excited to present a review of this Fotodiox Macro Extension Tube Kit, plus some close up pictures I got with it!

macro lens

I got the kit for Christmas but have only lately really learned how to use it. It definitely has its quirks and difficulties, but overall I LOVE it and I’ve had so much fun playing with it.

The kit comes with five pieces…

macro (16)

only three of which are the actual extensions (the other two attach the extensions to the lens and camera body).

macro (15)

The extensions are 28mm, 14 mm, and 7 mm: the higher the number, the more macro the photo will be. You can screw them on and off individually and in any combination. The pieces all seem very sturdy. It IS a little hard to screw the normal camera lens onto the respective attachment, but it works okay.

Here are some variations of… um macro-ness? XD

DSC_2694

DSC_2688

DSC_2683

The amazing thing about this kit is that it’s only $12.59 on Amazon! Isn’t that incredible? Considering how high lenses – or really anything DSLR related – usually cost, I think it’s a huge bargain.

macro 9.jpg

Now granted, it isn’t the easiest to use at first, as aforementioned, but once you get the hang of it it’s pretty fun.

For one thing, you have to use manual mode. This isn’t a problem for me because I always do anyway, but it’s something to consider.

macro (8)

You also have to manually focus the lens, by which I mean move your camera back and forth until you get just the right distance away from it that the subject is (mostly) in focus. This makes it practically impossible to get a clear picture of a moving subject or an object that’s spiky or generally not very flat, like these:

macro (6)

DSC_4196

Not surprisingly, the longer your lens extends, the closer up it gets. Also basically the closer up you get, the harder it is to take pictures. Because besides the things I just said, one, it will require pretty bright light (or high ISO/low shutter speed) to compensate for the zoom; and two, it will have a TINY f-stop/aperture, which means the portion of the picture in sharp focus is very small, like the first picture below.

(By the way, this EXTREMELY WEIRD thing is called a cedar apple – and no, it’s not edible. XD You should look them up – they’re so strange!)

macro (4)

You can see how much more subject area is in focus when you use a 14mm versus a 28mm:

macro (2)

And I believe this is just with the 7mm, although I’m not entirely sure what extensions I used for any of these pictures because it’s rather hard to keep track of. XD

macro (3)

I prefer to use something like the 7mm + 14 mm instead of all three together. Even the 7 mm by itself is a lot of fun, though it isn’t super macro. However, you can still get some super neat photos with the full extension, it’s just a bit harder to work with:

DSC_4208

One thing I love about these extensions is how soft and dreamy they make the lighting. ❤ They’re also super good for bokeh, although this specific picture isn’t a great example of that…

DSC_3069

The colors are also usually quite vibrant, as you can see here. I didn’t edit this at all!

DSC_4233

And there you have it! I hope you guys found the review helpful and interesting. 🙂 Before I go I wanted to show you a few more macro photos I’ve taken recently. Enjoy!

Weeds are great for macro photography because they look a lot prettier closer up. 😉

DSC_4252

macro (10)

macro 7

I also love how the extensions work with water drops! (Well let’s be honest – I just love water drop photography in general. XD)

DSC_2679

DSC_2681

DSC_2676

Another photography subject I love is eyes. ❤ I tried to get some shots of my own eyes, but it was pretty hard to do as a selfie. :[] Oh well, I think the blurry ones still actually look pretty!

macro (1)

macro (3)

eye 1

Ahh, I really like this last one! Se the reflection of me holding the camera? It looks like my pupil is the lens. 😀

eye 2

OKAY OKAY I LOVE THESE NEXT ONES TOO EEP. I’ve always wanted to get a good picture of a cat’s eye, and I finally did! Ahh, the color and texture is just gorgeous. ❤

DSC_3039

Good thing Tom was sleepy or he would have moved around way too much. XD

DSC_3042

Hee hee, isn’t his nose cute?

DSC_3045

This is an ear, in case you were wondering. XD I actually like the softness of this picture too.

DSC_3054

I could go on, but this is a long post already, so we’ll stop here. XD *sigh* That was fun.

So tell me. Would you consider buying this extension kit? What was your favorite photo? Do you like taking close-ups, or do you prefer a different genre?

Thanks for reading, dears, and have a wonderful day! ❤

***Allison***

P. S. I was going to do photography tips in this post, but then I was like, “Clara has done such a good job saying what I would just repeat, so…” XD Click here to read a super helpful and beautiful post with lots of great photography tips! And follow her blog while you’re at it – IT’S ABSOLUTELY WONDERMOUS. ❤ 😉

If you DO happen to have any photography questions left over afterwards, by all means please let me know in the comments and I will do my best to answer them, perhaps in a later post. 🙂

ART STUDIO {Part 1 + Photowall Review}

featured image 800X800

GUYS GUYS GUYS I AM SO INCREDIBLY EXCITED. Because, as you probably guessed, I’M GETTING AN ART STUDIO. 😀 I have wanted my own space for arts and crafts for practically forever, and I can’t believe I finally get to have one!

My new studio is actually in a closet. XD We definitely don’t need all four closets in our bedroom + bathroom at the new house, so Mom thought I could make the biggest walk-in closet into my studio!

It’s basically a small room, complete with a window and shelves for storage. It’s only about 60 square feet, but I think it will work great for just me. 🙂 However, it certainly wasn’t set up for a studio at first, and that’s what I’ll be showing you today: how I turned a closet into a space for a studio!

PLUS, Photowall contacted me and wondered if I wanted to do a review for them in exchange for a free product, and I was like, “OH YES PLEASE.” (I didn’t actually say that.) XD Are you as excited about this post as I am? I DOUBT IT. XD

Alright, let’s get started! First, this is how the closet looked to begin with:

1

2

3

Doesn’t exactly look like a studio yet, huh? Well the first step toward that goal was to get rid of the shelves and to take off the door for more space. I decided to keep the shelves in that little cubby above because really, it was too small and had too low of a ceiling to turn into anything else.

My brother Jeff helped me with the demo, and then Dad spackled (or plastered) over the marks where the shelves and hinges had been (and where Jeff had applied the crowbar a bit too vigorously, heh heh). After a few coats of plaster and some sanding, it was ready to be painted! I painted it in Valspar’s “Dove White” because I want the studio to look clean and bright, with pops of color.

5

I’ll get more into my color scheme and décor in a later post, but I’m thinking white, navy, purple, pink, and gold. ❤ Ahh, I can’t WAIT!

Anyway, here’s what it looked like after taking out the shelves and door, plastering, and painting. So much better already! Doesn’t it look a lot bigger?

7

Next, it was time to put up the wallpaper, and now it’s time for the review part of the post. As I said, I did get this product for free, but obviously I’m going to be honest about my likes and dislikes, because otherwise what use would a review be? 😉

Photowall is a Swedish design company that sells both canvases and wall murals/wallpaper. Also, one super neat part of their site is that you can upload your own image! So if you have a high-res picture, you can get wallpaper or a canvas with your own photo or art on it! I considered that, but decided to go with a more clean, modern look, like the White Grafo pattern I ended up choosing.

DSC_317921

I went with the premium wallpaper instead of the standard, because hey, why not? It was wonderfully thick and almost rubbery-feeling, like it would wipe off easily. The pattern was printed beautifully as well.

I ordered about 6.7 square meters, which cost $243. Preeetty expensive, especially considering you can get wallpaper at Home Depot for $0.79/sq. ft., compared to $3.67/sq. ft. at Photowall. :[] I also ordered the wallpaper kit, which you can get separately for $20.

However the shipping was free – and super fast! The customer service was also great, in my experience. Here are the boxes the products were shipped in:

DSC_3159

The wallpaper box included the following:

DSC_3174.JPG

  • wallpaper (duh)
  • wallpaper paste powder
  • instructions

And as for the kit box, I was surprised at how many different things were included! It seriously has EVERY SINGLE THING you need to put up wallpaper, except supplies pertaining to mixing up the paste (water, a bucket, and a stir stick).

DSC_3163

  • paste brush
  • wallpaper brush
  • trim guide
  • seam roller
  • spirit level
  • knife
  • pencil

And now for putting it up! It took a bit to mix up the paste and let it set, and it was definitely more work than using pre-pasted wallpaper (or so my mom tells me), but it seemed to work pretty well. Thanks to my mom for taking the next two pictures. 😉

108

One helpful feature of this wallpaper is that the panels are numbered. It’s not just one big sheet, it’s split into several sheets that you cut apart and then paste on. You do have to match up the seams, but it feels more manageable. 🙂 It still took about 2 ½ hours, though, with Mom and I putting it up together.

DSC_3178

It looked SO good once we got it all up, eep! But one thing that really scared me was these brown patches that appeared on the paper as it was drying:

19
Yikes, what a terrible picture. :[]
Thank goodness they don’t stay! It must just take a really long time to dry (more than three days, in fact), but that’s probably because it was cold in there and not super well ventilated. And now, this is how the studio looks thus far:

15
Thanks to my sister Megan for taking this picture. 🙂

14

1312

AHHH I LOVE IT. The wallpaper actually made the space feel bigger for some strange reason, and it definitely made it feel more like a room than a closet. I’m really happy with my pattern choice and with the product itself. 🙂

To recap…

PROS

  • Fast, free shipping
  • Excellent quality wallpaper
  • ENORMOUS selection of beautiful prints and patterns
  • Easy-to-use website and instructions
  • Great customer service

CONS

  • Very pricey
  • Doesn’t come pre-pasted
  • Fairly long application and drying times (at least for the premium paper)

Basically, I absolutely love everything but the price. I would highly recommend the product and company itself – the wallpaper is beautiful, high quality resolution, and scratch/tear-resistant – but I personally would go with a cheaper option if I did it again and not for free.

If the price doesn’t worry you, though, or if you just want one of their beautiful and unique murals you can’t get anywhere else, then Photowall is the company to buy from! Even if you don’t need any wallpaper at the moment, you should totally check out their website – remember they also have a huge selection of canvases, and I’ve heard they’re pretty great too! 🙂

I hope you enjoyed reading this rather lengthy post, and stay tuned for Part 2! In the next art studio post, I’m going to furnish the studio and put up at least some of the decorations. ❤ YAY!

Thanks for stopping by, dears, and have a lovely day!

***Allison***

Black Friday Surprises!

Guys, (or rather girls) I super excited to show you the things I bought for Black Friday! We went shopping late Thursday night and a little bit on Black Friday too. Did you go Black Friday shopping? Anyway, let me show you my goodies. 🙂

camera

A cute backpack, a beautiful ESV Study Bible, and… (wait for it) a new camera! 😀 😀 😀 Woohoo!

The backpack: My old backpack has seen its better days, so I was really happy to find this pretty one at JCPenny. (And if you’re wondering why I need a backpack when I’m homeschooled – I use it to hold my co-op things. 😉 )

camera-2
Yuck. Not a very good picture.


dsc_0181-1280x853

The Bible: Family Christian Bookstores had a 50% discount off of the whole line of ESV Study Bibles! My old Bible barely had any notes, so I really wanted a Study Bible. And I love this one! It’s beautiful and has lots of footnotes and cross-references and even a few illustrations. (Why why why didn’t I get any pictures of the inside? *facepalm*)

camera-5

The cover is imprinted with swirly ivy designs that were quite fun to photograph…

dsc_0169-1280x960

dsc_0164-1280x853

dsc_0166-1280x960

And the camera! I’m really excited because it’s my first dSLR camera. 😀 It’s a Nikon d3400, and it came with two lenses – a standard lens and a zoom lens (I think). I might do a review of it later, but for now I’m still learning how to use it. 😉 There are several things I miss about my old camera (mostly ease-of-use), but I do like how this one has manual aperture and shutter speed options! I can’t wait to take some softened photos of a waterfall.

camera-3

camera-4

For the rest of the post I’m going to dump heaps and heaps of experimental photos on you, so take a deep breath and do some scrolling-finger exercises before we begin. XD

dsc_0003-1280x854
Aww, Casey kitty!
dsc_0006-1280x853
WILLOW FLUFFBALL!
dsc_0007-1280x853
Oh my goodness this might be one of the cutest pictures I’ve ever taken of Willow. XD

dsc_0008-1280x853dsc_0012-1280x853

dsc_0013-1280x853
Can you see the improvement on photo quality here versus my last camera? (Snickers does not look impressed with my new equipment, but he DOES look cute. XD)
dsc_0017-1280x853
I don’t know if it was the camera or what, but Lily was super scared when I took this picture. She was racing around like crazy!

dsc_0023-1280x853

dsc_0024-1280x853
I love the blurred background and bokeh here! My new camera is good at that.

dsc_0026-1280x853

dsc_0034-1280x853
Random chicken. XD (I think I was experimenting with aperture.)
dsc_0038-1280x853
This photo looks dSLR-ish, doesn’t it? I love how the top is in focus and the bottom is blurred. That’s my favorite. 😀 *Happy sigh*
dsc_0039-1280x853
Funny Fact: Casey loves this plant. As in, she loves to eat it. XD

dsc_0041-1280x853dsc_0044-1280x853

dsc_0056-1280x853
I got a few decent photos in the dark. (And heh heh, I kind of stole this photography idea from my sister who did a beautiful post about it here: https://abarefootgal.wordpress.com/2016/11/27/christmas-light-photography/

dsc_0057-1280x853dsc_0059-1280x853

dsc_0062-1280x853
We’re revamping our Schoolroom. This is the Nature Shelf, and more specifically, this is a duck egg in an I-don’t-know-what-kind-of-nest.
dsc_0065-1280x853
The classic camera-with-its-human picture. XD

dsc_0067-1280x853

dsc_0100-1280x960
When I turned on the flash it made these little rainbow-y circles appear.
dsc_0073-1280x853
I really like how these drippy photos turned out. 🙂

dsc_0074-1280x853dsc_0075-1280x853

dsc_0076-1280x853
For some reason, I kinda like this one too. I guess it’s the reflection on the stone or something?

dsc_0078-1280x853

dsc_0079-1280x853
BOKEH!

dsc_0080-1280x853dsc_0082-1280x853dsc_0083-1280x853dsc_0087-1280x853dsc_0095-1280x853dsc_0096-1280x853

dsc_0098-1280x853
In case you haven’t noticed, I l♥ve waterdrops.
dsc_0134-1280x853
SUPER CREEPY PHOTO OF OLAF ALERT! She has some serious red eye (perhaps because her eyes are already pinkish-red XD). Yikes. That really is quite creepy. XD


dsc_0133-1280x853
Aww, Liliputian again! I’m pretty pleased that this photo turned out pretty well even though I used flash. My old camera did’t take very good pictures with flash.

Oh my. That was a LOT of photos, wasn’t it? Yikes. Hee hee, I hope you enjoyed this post in spite of (or because of) that!

***Allison***

P. S. I always think of so many things to write for P. S.’s, but when it comes time to actually write them I can never remember what I was thinking… 😦 XD

Birthday Stuff Reviews :D

I finally finished this birthday haul post a month after my birthday. XD It’s not really a birthday haul post, actually. It’s more just reviews of some of the things I got for my birthday. Get ready for a really long post!

____________________________________________________

Mysterious Benedict Society Series:

benedict society Amazon (433x500).jpg

Click here to see the Amazon listing

(The link is for the hardcover collection which I have. You can also get a paperback collection on Amazon.)

I absolutely LOVE this series by Trenton Lee Stewart. It’s probably my favorite series! “The Mysterious Benedict Society” is a group of extraordinary children who are sent on several extraordinary missions. The characters are so fun to read about – there’s Reynie, Sticky (you’ll understand his name when you read the books), Kate, and Constance. Once you pick up these books, it’s hard to put them down! They’re filled with exciting action, surprising plot twists, hilarious anecdotes, and riddles and puzzles that will stretch your brain.

Notes: The synopses are not actual back-of-the-book summaries, I just wrote them myself. Also, the pictures of each book are from their Amazon listing. If you click on the “via” links, it will take you to the listing. Some of the covers on the books below are a little different than mine, but mainly the same.

***************************

The Extraordinary Education of Nicholas Benedict


{via}

Pages: 470

This book is a prequel to the series although you don’t necessarily have to read it first. (I didn’t.) Like in the rest of the series, the plot twists, clues, and riddles throughout the book keep your brain whirling. There are a bunch of mysteries in this book, and some of their conclusions may surprise you. It’s exciting to read how Nicholas uses his genius mind to solve problems and outsmart the Spiders and other fearsome foes. Nicholas also has a condition called narcolepsy (which is real by the way), which means he falls asleep at random times.

Synopsis: This story covers about a year in the childhood of Nicholas Benedict, the man behind The Mysterious Benedict Society. Nicholas moves to a new orphanage filled with surprises – from a huge library to a secret overlook, tough bullies to loyal friends, and maybe even a treasure! Nicholas will need all of his talents and genius to unpack the mysteries surrounding him – and to do so before it’s too late.


The Mysterious Benedict Society

{via}

Pages: 485

This is probably my favorite book in the series. I especially love the beginning when everything is so mysterious and there are gobs of strange riddles and puzzles that bend your brain. The book is exciting and clever, and some of the plot twists just blow you away. At the end you learn something totally unexpected and funny about Constance. You HAVE to read this, guys!

Synopsis: An advertisement in the newspaper starts it all: “Are you a gifted child looking for special opportunities?” Join Reynie, Sticky, Kate, and Constance on the adventure of their lives. After passing a series of mind-bending tests, they are sent on a very important mission: to save the world from an evil genius with a terrifying plan to control the world – and the minds of everyone in it. They will have to work as a team and put all of their extraordinary gifts to use after arriving at a strange institute. What is Mr. Curtain’s evil plan? Who is Milligan really? What is the Whisperer? These are just a few of the puzzling questions the Mysterious Benedict Society has to answer.


The Mysterious Benedict Society and the Perilous Journey

{via}

Pages: 440

This isn’t my favorite book of the series, but it’s still great. I love that you learn something new about Constance in this book. Her newly discovered talent really adds to her personality. You also meet some new characters like Cannonball and the Bullfrogs. The duskwort plot thread is really interesting and exciting too. (See synopsis.) Here is a quote I like from this book: (Cannonball is comforting Constance, who is quite short, by the way.)

” ‘You know what I like about buttons?… They’re very small things that hold bigger things together. Awfully important, buttons – little but strong.’ ” – page 154

Isn’t that sweet? “Little but strong.” 😀

Synopsis: After a year apart the Mysterious Benedict Society reconvenes. They have been anticipating a surprise Mr. Benedict planned for them when they find out that someone has unpleasantly surprised him. Their beloved Mr. Benedict is in danger! Will the scavenger hunt lead them to their heart’s desire, or into a trap? In the meantime, Constance discovers a new talent, and a plant named duskwort is of imminent importance. If the duskwort falls into the wrong hands, everyone is doomed.


The Mysterious Benedict Society and the Prisoner’s Dilemma

{via}

Pages: 391

The Prisoner’s Dilemma is the last book in the series. (Except for the puzzle book, but that doesn’t really count.) I really like it! It’s fun and suspenseful to follow the clues with the Mysterious Benedict Society gang, but not everything is as simple as it seems. You might be surprised – actually you probably will be! The end is quite satisfactory. 😀

Synopsis:

The Mysterious Benedict Society is bored, bored, bored. They have been cooped up together in Mr. Benedict’s house for months because it’s not safe to leave: Mr. Curtain will do anything to get back his precious Whisperer, including snatching up certain children in his way. But when Constance disappears after an appointment with the Whisperer, boredom is flung to the winds. Reynie, Sticky, and Kate are on a race against time to find their grumpy companion before the Ten Men do. They must decode secret messages and follow curiously easy clues… that lead them to an unexpected place. This adventure includes two brave girls and two smart boys, a Salamander, a missing friend, sneaky clues, a couple of “S” pies, a red bucket, and a few daring leaps.


The Mysterious Benedict Society – Mr. Benedict’s Book of Perplexing Puzzles, Elusive Enigmas, and Curious Conundrums

Whew! Why do the titles have to be so long? XD I’ll just abbreviate it “Perplexing Puzzles.” Perplexing Puzzles is a really fun book filled with… well, riddles and puzzles. It is a gorgeous book – it’s printed on glossy pages and the whole book is in color instead of black and white. Most of the puzzles are quite hard, but a few of them are easy. (There are hints in the back of the book to help you along. If you need another hint, I might be able to help you too! 😀 ) Scattered throughout the book are quotes from the series, illustrations and profiles, and other “archival materials” as it says. I love the a riddle at the very end that requires you to use letters and numbers from previous puzzles to reveal a last secret message.

Here is one of the riddles: (your answer has to fit in the blanks)

001 (800x600)

Umm… I can’t really do a synopsis of this one. XD

************************

Pros and cons: The covers all have delightful illustrations on them, and the books are all beautiful and well-made. Like I said, the Perplexing Puzzles book is particularly gorgeous. The box that they come in is really nice too! The inside looks like it has been plastered with newspaper clippings from the first puzzle in Perplexing Puzzles. Umm… there aren’t many cons. 😀 Of course I liked some books better than others, but I enjoyed them all. The one problem is that it’s a little hard to pry a book out of the case, but that’s okay. 🙂 I highly recommend both this series and this hardcover collection.

______________________________________________________

Premo Polymer Clay

Polyform Premo Clay Sampler Pack, Assorted Colors, 24-Pack

Click here to see the Amazon listing

(I’m pretty sure you can find a pack like this for cheaper if you shop around Amazon or stores like Michael’s or Hobby Lobby, but this is the listing I found.)

Premo brand polymer clay is a very good quality clay. (At least in my opinion and from what I’ve read.) You can see lots of things I made with it here.

Let me compare and contrast it with Sculpey III, a popular brand of clay made by the same company. Premo is more of a professional clay, while Sculpey III is more of a recreational, hobby-type clay, not meant to be super durable. Premo is much stronger when baked than Sculpey III, and not as gooey and hard to work with as Sculpey III can be. (But see “Pros and cons.”) Although I do think Sculpey III has more colors available. They are both good for different reasons, but I prefer Premo to Sculpey III.

Pros and cons: Usually I love this brand of polymer clay, but the pack I got this time was a lot softer than normal. That is really helpful for conditioning and mixing clay, but not so good for sculpting. Normally though, it’s a really great clay – not too hard, not too soft – and this sampler pack comes with some really neat options, such as translucent clay (which looks transparent-ish when you brush a gloss over it), and faux rock clay which really looks like rock! The sampler pack lasts a long time if you make small things, like I do, but I found it helpful to get an extra pack of white Premo clay because I use white a lot. Even though the changeable pliability is annoying, I would still recommend this product.

____________________________________________________

Artist’s Pastels

Pro Art Square Artist Pastel Set, 48 Assorted Colors

Click here to see the Amazon listing

I requested these to use on polymer clay. They’re kind of like chalk. First you scrape them on paper to obtain colored powder, then you use a paintbrush to paint the powder onto baked or unbaked clay for more realistic shading effects. It’s kind of like paint, only more subtle. Pastels work very well for shading miniature food. The cookie on the left is not shaded with artist’s pastels, and the one on the right is. (Sorry, it’s not a very good picture, but trust me, some clay artists can do amazing things with artist’s pastels! Like Tracey, for instance.)

clay (3) (800x600)

Pros and cons: Certain shades of brown are missing that would be helpful, but at least you can mix colors. I haven’t had much experience with artist’s pastels, but these work quite well for my purposes! I would recommend this product.

______________________________________________________

“Gelly Roll” White Gel Pens:

gel pens on Amazon (425x425)

Click here to see the Amazon listing

These pens are really nice! Not to mention there are three of them, so they should last me a while. 🙂 They have a fairly fine tip and write smoothly as long as you don’t write too fast. You can use them to mark highlights on your drawings, for things such as hair and eyes:

-Allison(kitten, baby bird) 015 (800x600)

The ink is almost marker-resistant – you can see on the left of her hair one of the squiggles is slightly more muted. That’s where I drew over it with marker and the gel pen still showed through. When you draw on top of marker, the marker ink bleeds a tiny bit with the gel pen ink, so it’s usually not quite completely white. (In the picture above, the ink turned a little grayish.)

The white ink looks stunning on black paper! Here is an ATC I made with one of the gel pens:

art lab (3) (800x600)

Pros and cons: The pens write quite smoothly unless you write fast; then they’re a little scratchy. The optimum background seems to be black paper. The ink will smudge if you’re not careful, but it’s not super smudge-prone. I would recommend this product.

_________________________________________________________

PicMonkey Royale

I was really excited about getting this, because I use PicMonkey a lot. (Royale gives you access to lots more features – extra effects, overlays, collage options, and more. But you do have to pay for Royale. 😉 ) Three of my favorite things about PicMonkey Royale are the “Custom Effect” feature, Clone feature, and the Royale collage options. You make a custom effect by adding different effects to a photo like usual, then saving all the things you did as one effect that you can use over and over again.

Here is a photo I edited with Royale: (More kitten pictures coming soon! 😀 )

-Allison(kitten, baby bird) 006 (1280x960)
Before
edit (1280x960)
After


I used clone to “wipe off” some dirt, Miniature Effect, Eye Brighten, and then several other non-Royale effects and features. So cute!

Pros and cons: It’s definitely nice to be able to use features like clone, Custom Effect, extra Overlays and Collage layouts, and more. Pretty much the only con is the price. If you don’t use PicMonkey a lot, or don’t use it much besides the basic touch-ups which are free, you probably won’t need this. However, if you love photo-editing or PicMonkey or both, I recommend this feature!

__________________________________________________

Of course I got a bunch more things for my birthday, but it would take a few more months to review them all at this rate. XD I hope you enjoyed this! Which was your favorite item? Do you have any of these things?

***Allison**