Bunny Fashion

I recently crocheted a few little accessories for the bunnies to wear, so here is a bunny fashion show!

First, we have Willow. (Of course!)

Willow with flower headband… uh, earband:

002

Willow the athlete!

017 016

And last but not least, a still (ish) life: “Willow with hat.”

002

Next is Lily, sporting the flower earband and an unimpressed look.

005

Diamond “wanted” to try on the hat. (As you may have noticed, my camera doesn’t like black bunnies too well. 😦 )

006

And we musn’t leave Olaf out! Isn’t he handsome in the hat? He looks like the white rabbit from Alice in Wonderland. 🙂

008And thus ends the fashion show. I wish my camera took better pictures of black (and gray) bunnies, but at least Olaf and Lily are pretty clear.

So which was your favorite entry – who’s the winner?

***Allison***

P.S. If you’re wondering why Mango wasn’t included in the show, it’s because she died a couple of days ago. *Sniff, sniff.* Yet another tragedy: Joy the kitten died too. We aren’t sure how she was killed, but she may have gotten hit by a car or something. Two tragedies in a row… *snnniifff!* But my sister Megan is probably going to get another bunny soon to replace Mango, and we still have Coffee Bean the kitten.

Advertisement

DIY Paper Pennant Banner

I made this banner as a present for one of my cousins for her birthday. It was actually pretty easy, although it did take some time. It turned out to be a beautiful, approximately 6 foot long banner. You probably have most if not all the supplies need for this pretty lil’ garland –

  • Pretty scrapbook paper in 5 different patterns (I used two pinks and three neutral colors)
  • Cardstock paper or something stiff for triangle template
  • Jute twine or similar string for hanging
  • Single-hole puncher
  • Scissors
  • Pencil
  • Ruler
  1. First you need to make your template. Don’t get freaked out here but… it does involve a little bit of math. Just a tiny bit. And it’s really easy. This is what I did for my template: Mark a line 5 inches long. Make another mark in the middle of that line. (Here comes the math, guys: 2.5 is half of 5, so make a dot 2.5 inches from the end of the 5 inch line.) Now make a line 5 inches down from the middle-mark. Connect the dots from each end of the top horizontal line to the bottom of the vertical line. Like so:030
  2. Cut out the template.
  3. Using the template, trace three triangles on the back of each of the five sheets of scrapbook paper. Cut out the triangles.
  4. Use a hole punch to punch to holes in the two top corners of each triangle.031 It works well to do the first triangle, then put another triangle behind it, line it up, and punch through the holes you just made so all the holes will line up. Now you can arrange them in whatever pattern you like. 032
  5. Time to string them all up! You can string them two ways, so choose the one that looks best to you. Leave about 10 inches of string extra on the front and end of the banner for tying.034
  6. To tie the knots, bring the end of the string back through the nearest hole, making a loop.035 Turn the triangle over and just tie a knot around the loop to make this:036
  7. And you are done!

037 040 039 038Enjoy!

***Allison***

Tassel Doll Tutorial

allison-tassel-doll-025

This cute little gal is fun to make and very customizable.  I think it would be cute to make several of these with different hair/skin/dress colors and create a little house or village for them to live in.  These dolls can also be used as dolls for your other, bigger dolls (like American Girl Dolls).

So let’s get started!

You will need:

**************************************************************

Yarn in several different colors: skin color, dress color(s), and hair color

Scissors

Needle and thread or fabric glue

******************************************************************

1.  Choose your yarn colors and separate them into hair, skin, and dress colors.  I used two colors of yarn for her dress, but you can use more or less as you choose.

allison-tassel-doll-014

2.  Wrap the dress yarn around your hand several times until you have a nice thick bunch of yarn.  You can vary the amount of yarn to vary the fullness of the dress.

allison-tassel-doll-015

3.  Snip the yarn from the yarn balls and carefully take the loops of yarn off of your fingers.  Use the skin color yarn to tie a knot near the top of the dress.  The dress yarn above the knot will be the head, so size it accordingly.

allison-tassel-doll-016

4.  Wrap the skin color yarn around the loops of dress yarn above the knot to make the head.  Snip off the end of the yarn, leaving a tail.

allison-tassel-doll-017

5.  Tie a knot around the head with the tail, and cut off the extra yarn.

allison-tassel-doll-018

6.  A little down from the head, tie a strand of skin color yarn for the arms.  Tie some knots at each end of the yarn for hands.-Allison (Tassel doll) 0197.  If you like, you can tie a strand of dress yarn over where the arms knot in the middle to hide the knot.

allison-tassel-doll-020

8.  Great!  Now for the hair.  Take your hair color yarn and unravel the ends, like so.

allison-tassel-doll-021

9.  Once you have unraveled a few strands of yarn, wrap them around your hand like you did for the dress.  This time when you take the yarn off, tie it in the middle and cut both ends.

allison-tassel-doll-022

9.  It probably works best to attach the hair by sewing it on, but you can try gluing it if you really don’t want to sew.

allison-tassel-doll-023

10.  Ta-daa!  You’re finished!

allison-tassel-doll-024

Here are some pictures with the finished doll:

allison-003 allison-001 allison-004

I hope you enjoyed making a tassel doll!  I know I did!

***Allison***

Crochet Lesson #2: The Single-Crochet Stitch and Project

***Update: This is going to be my last crochet lesson post. I’ve decided that there are many better tutorials out there that teach crochet, and, since it takes a lot of work to put these together, I will not be continuing this series. But feel free to read these two “introductory lessons!”***

Finally!  Here is the next part of the learn-how-to-crochet series!  (You can read the first one here.)

Unlike the foundation stitch, with single-crochet you can actually make things!  Exciting, right?

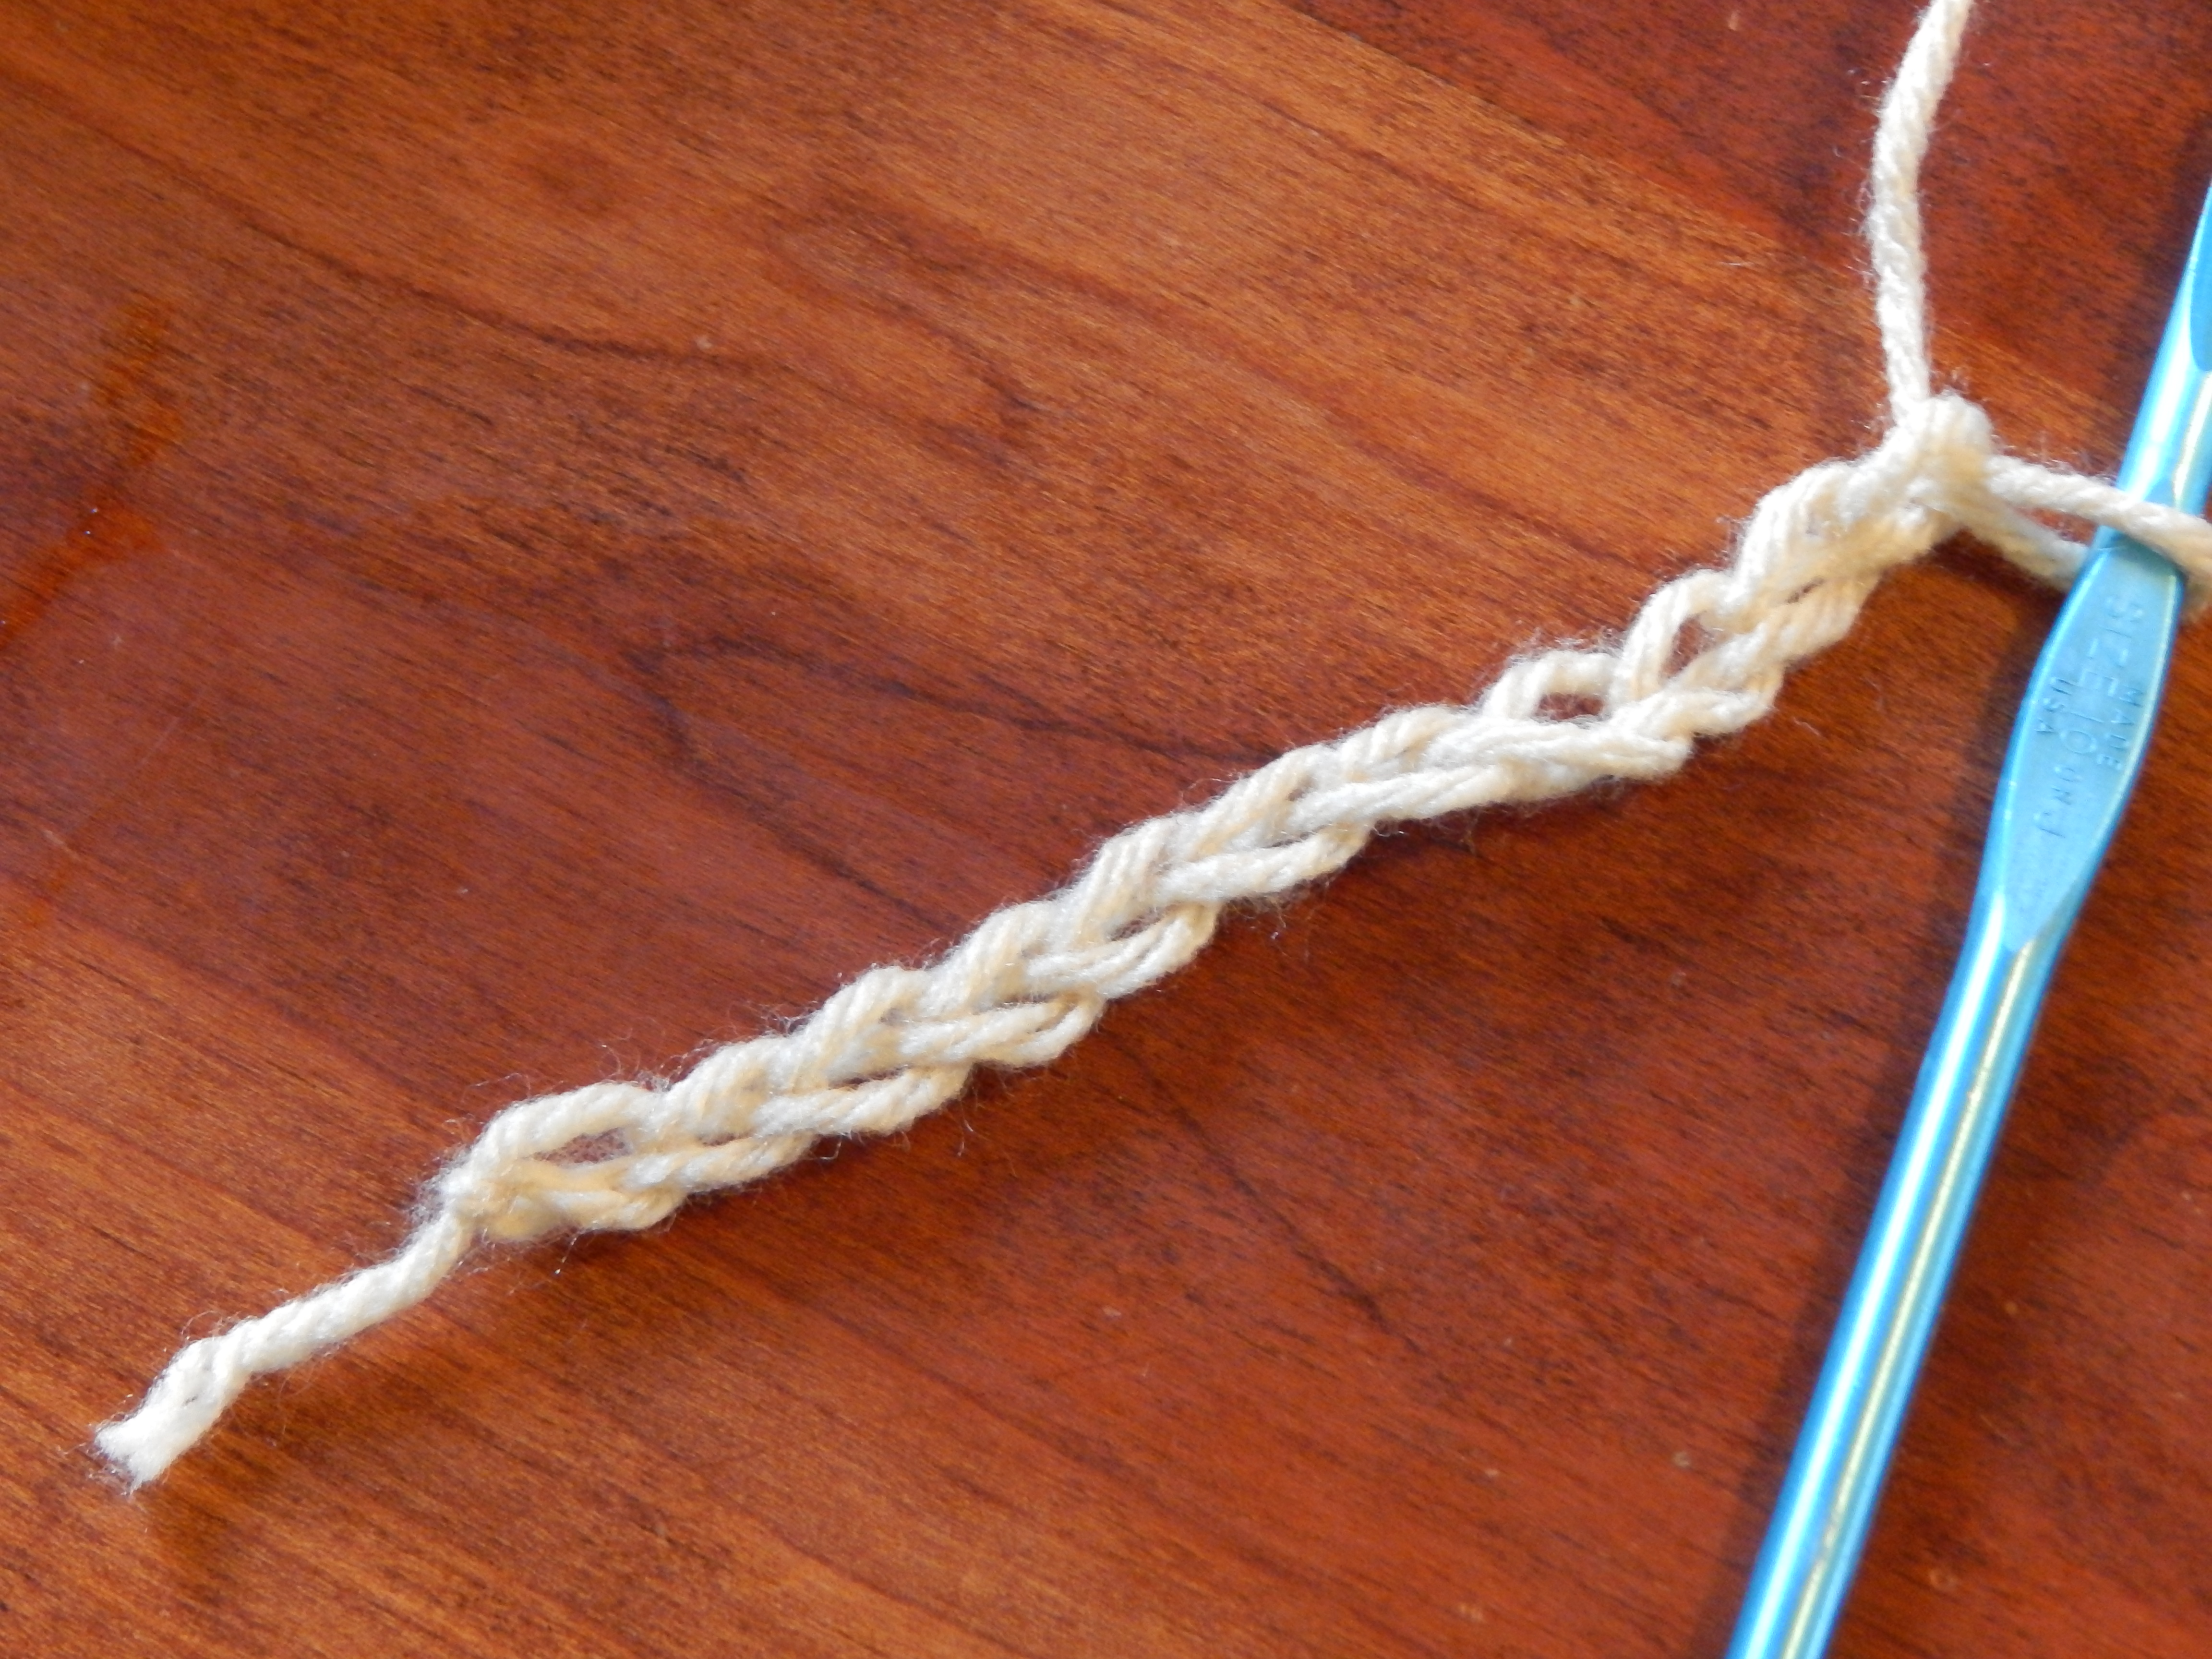
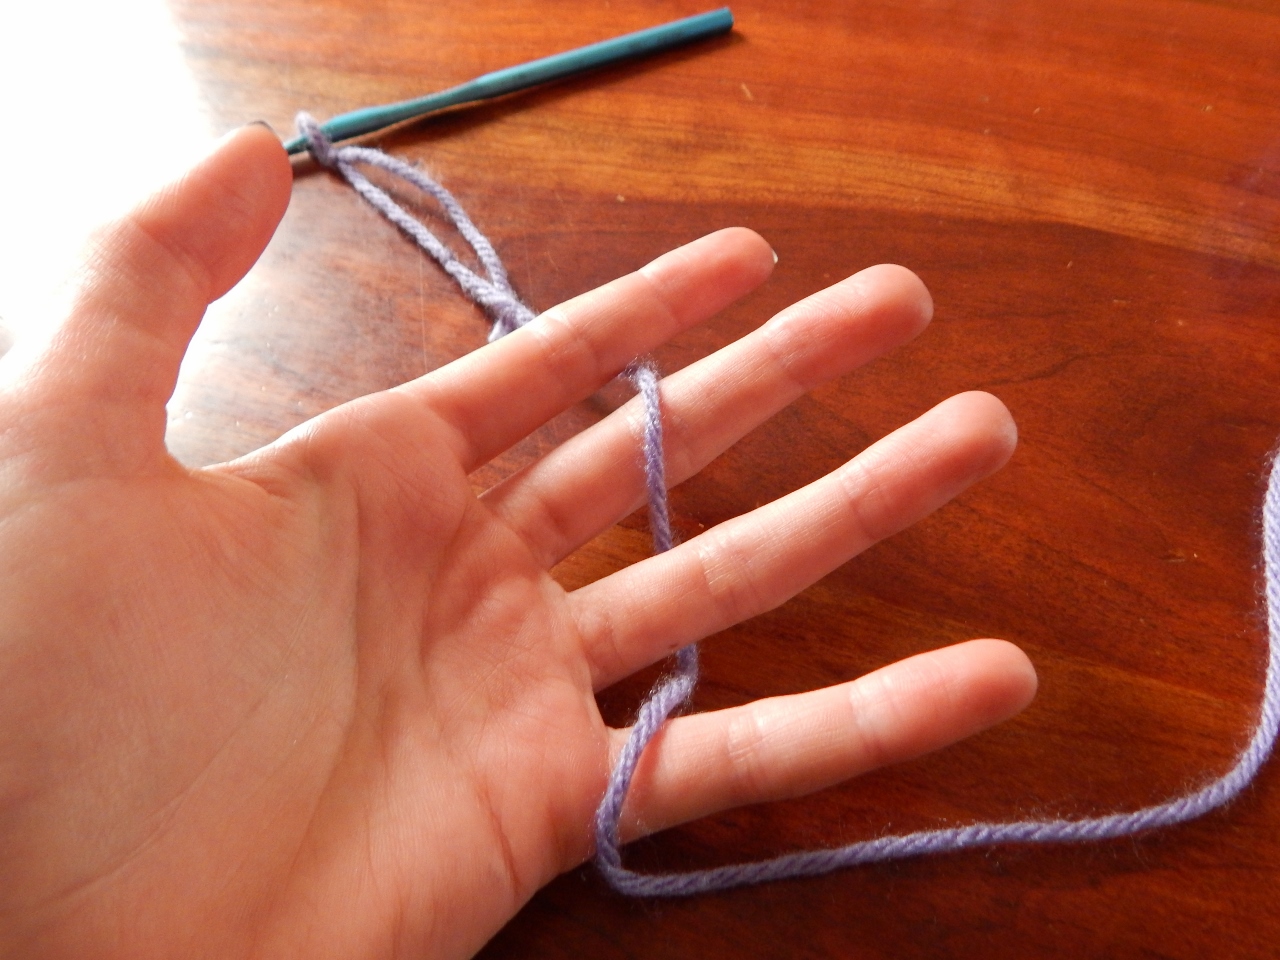
To begin you have to make a foundation chain (I showed you how to make that in the first lesson).  I think it works well to crochet about 10 stitches for practicing.  One thing you must remember is that you always need to crochet one extra stitch at the end (or beginning) of each row so that the rows turn out nice and even.  So actually if you want to crochet something 10 stitches long, you need to start with 11 foundation stitches, and if you wanted to crochet something 23 stitches long, you need to start with (can you guess?) 24 stitches.

Since we’re making a practice sample 10 stitches wide, crochet 11 stitches for the foundation chain.

-Allison (crochet lesson 2) 041

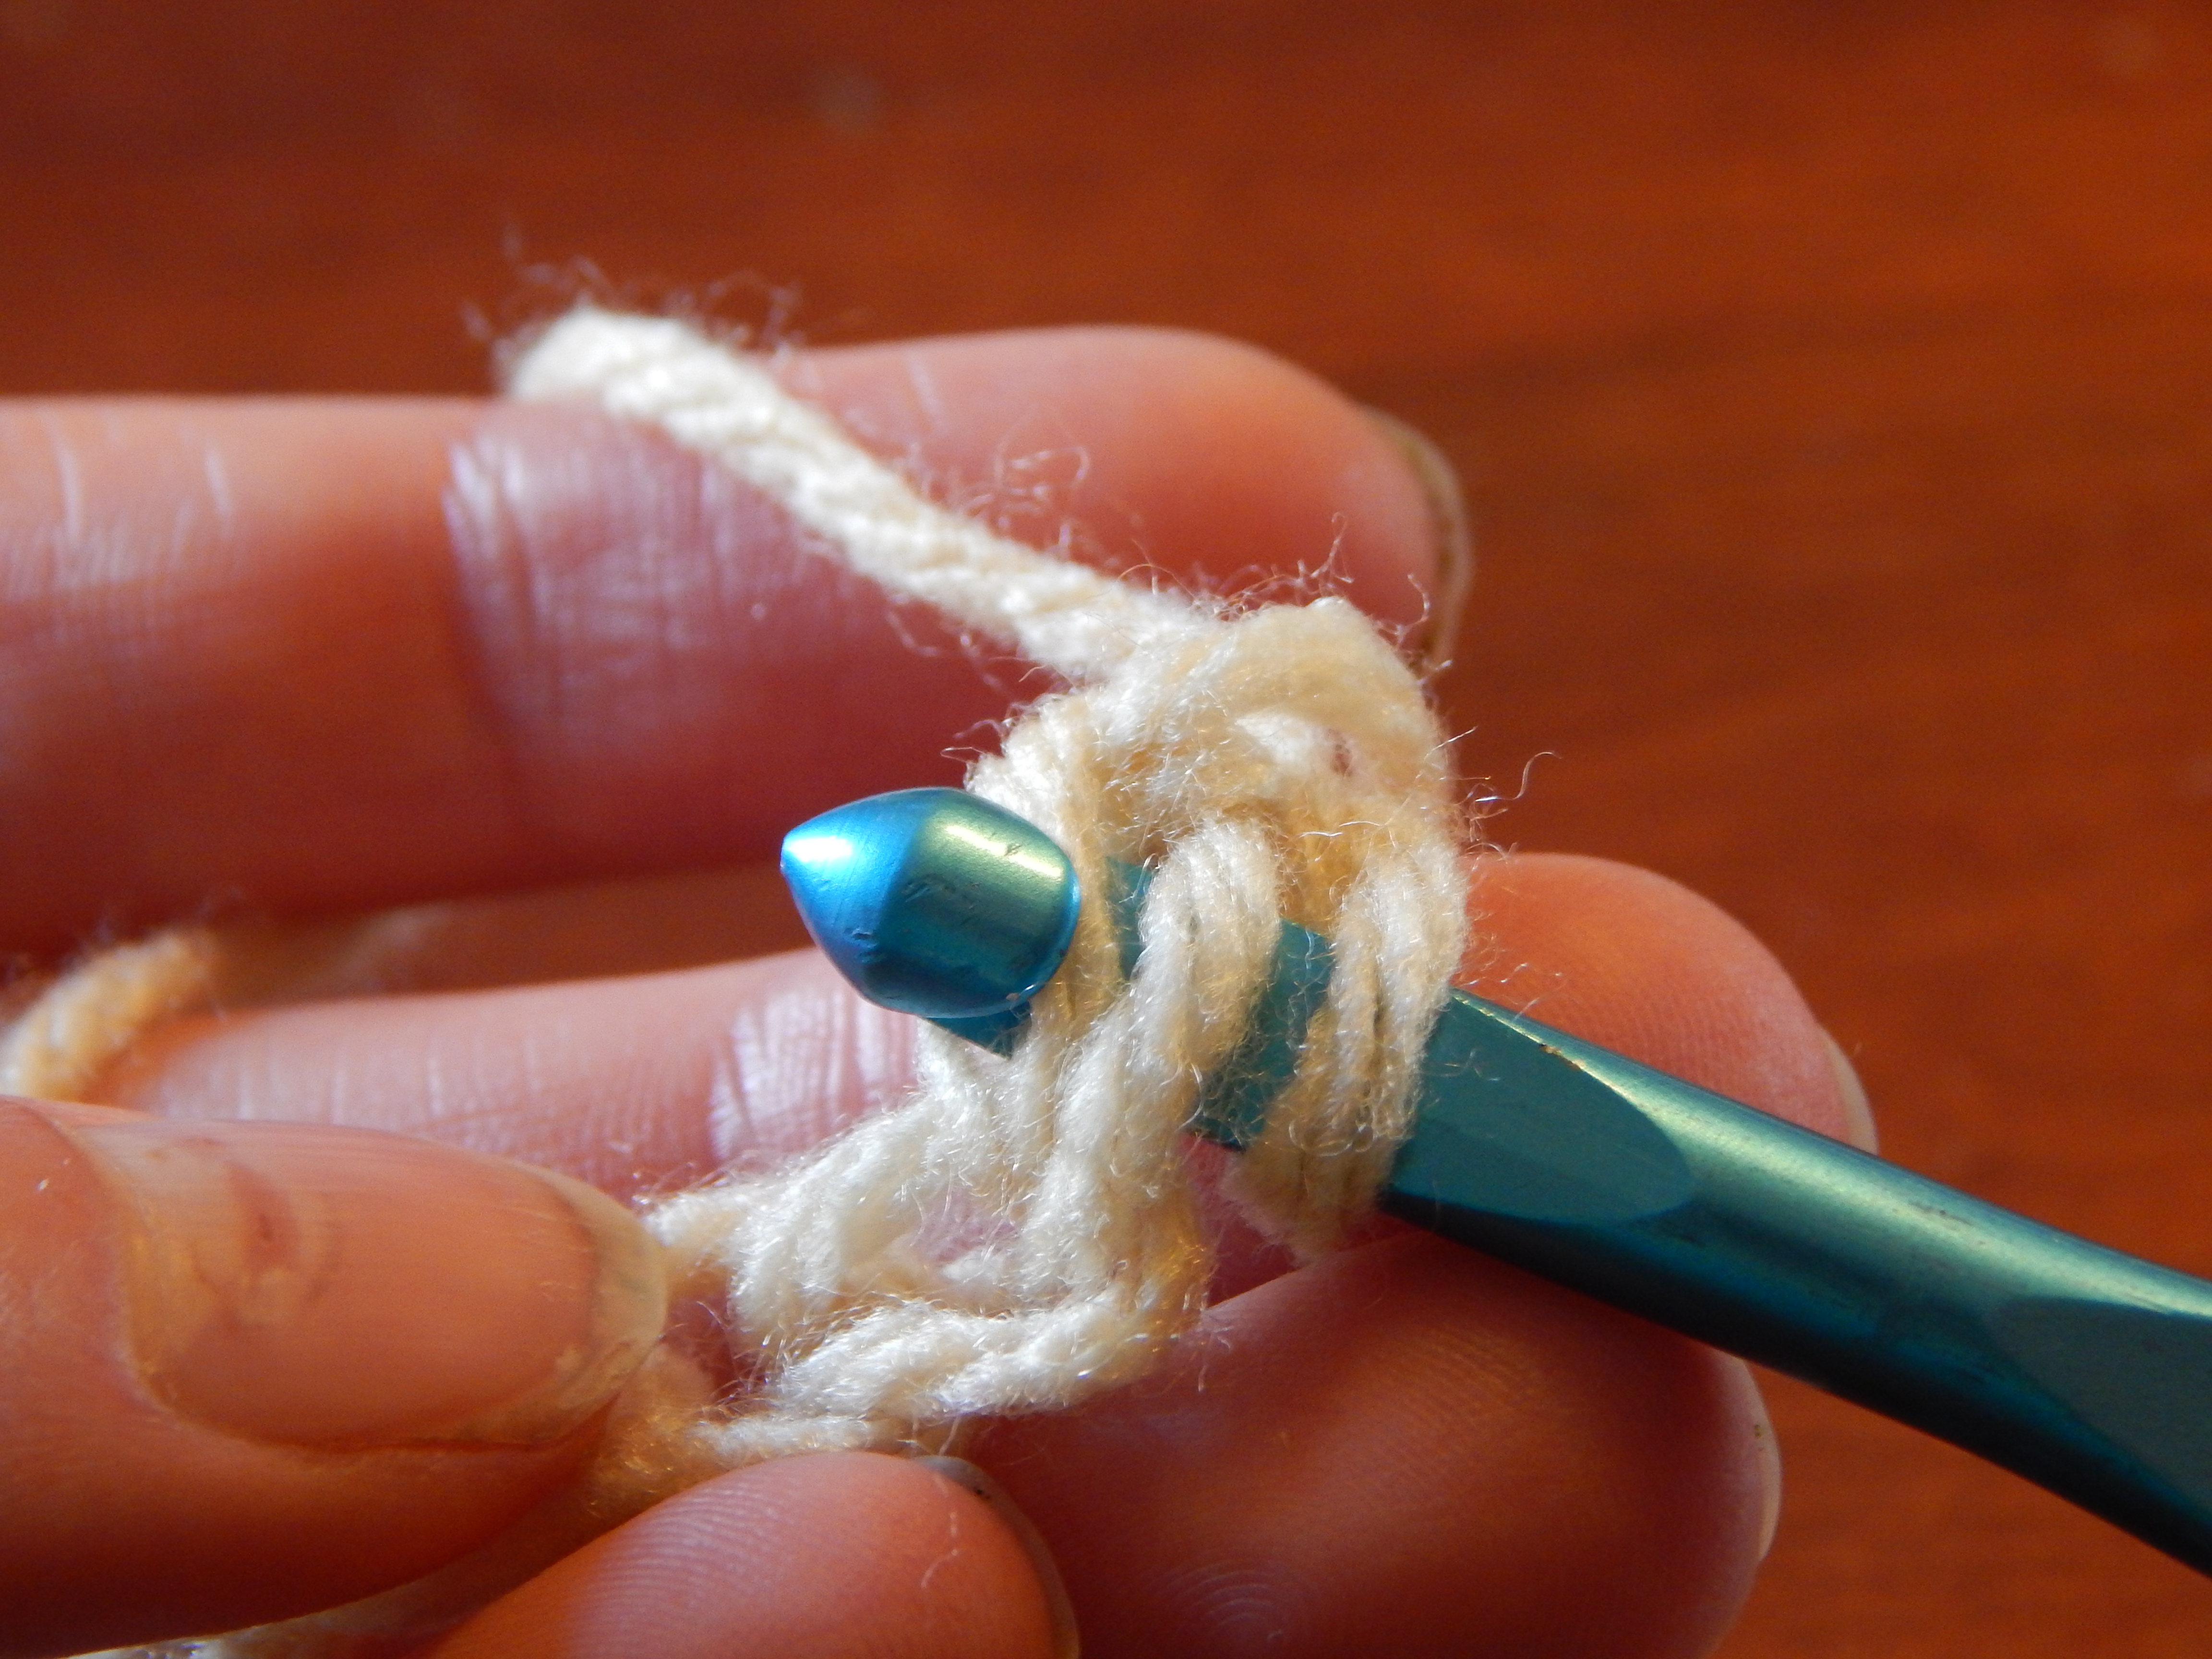
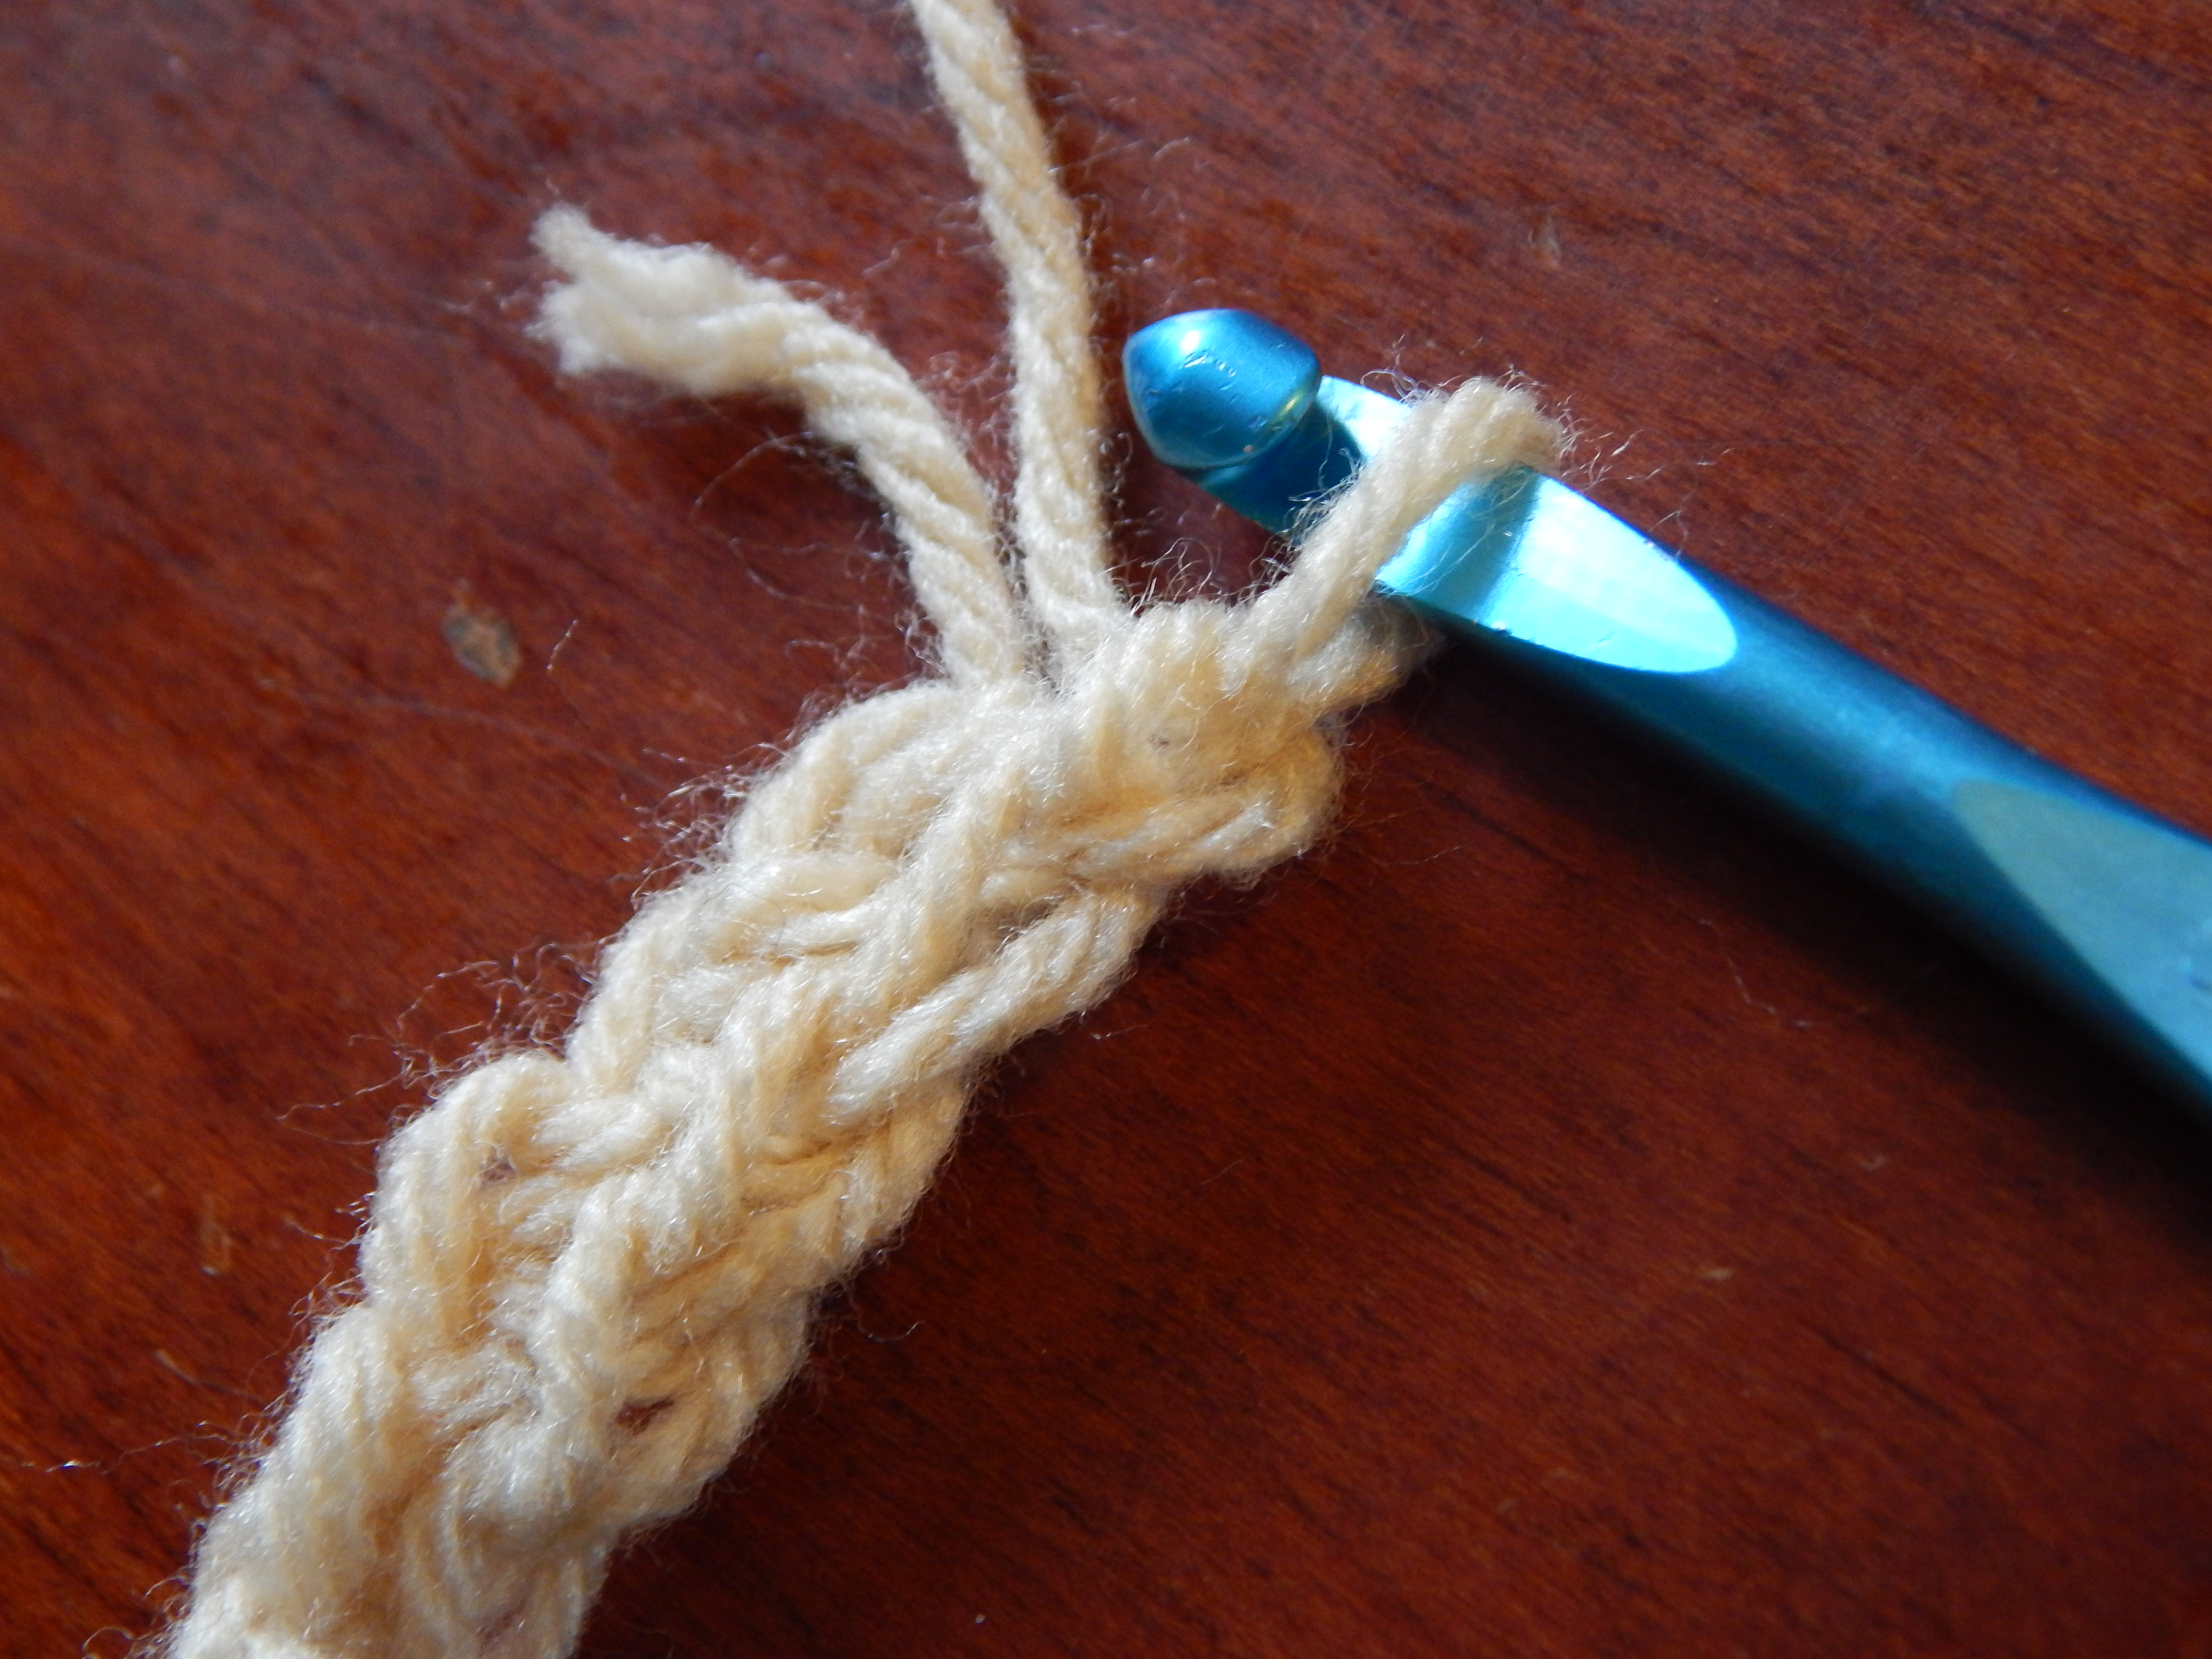
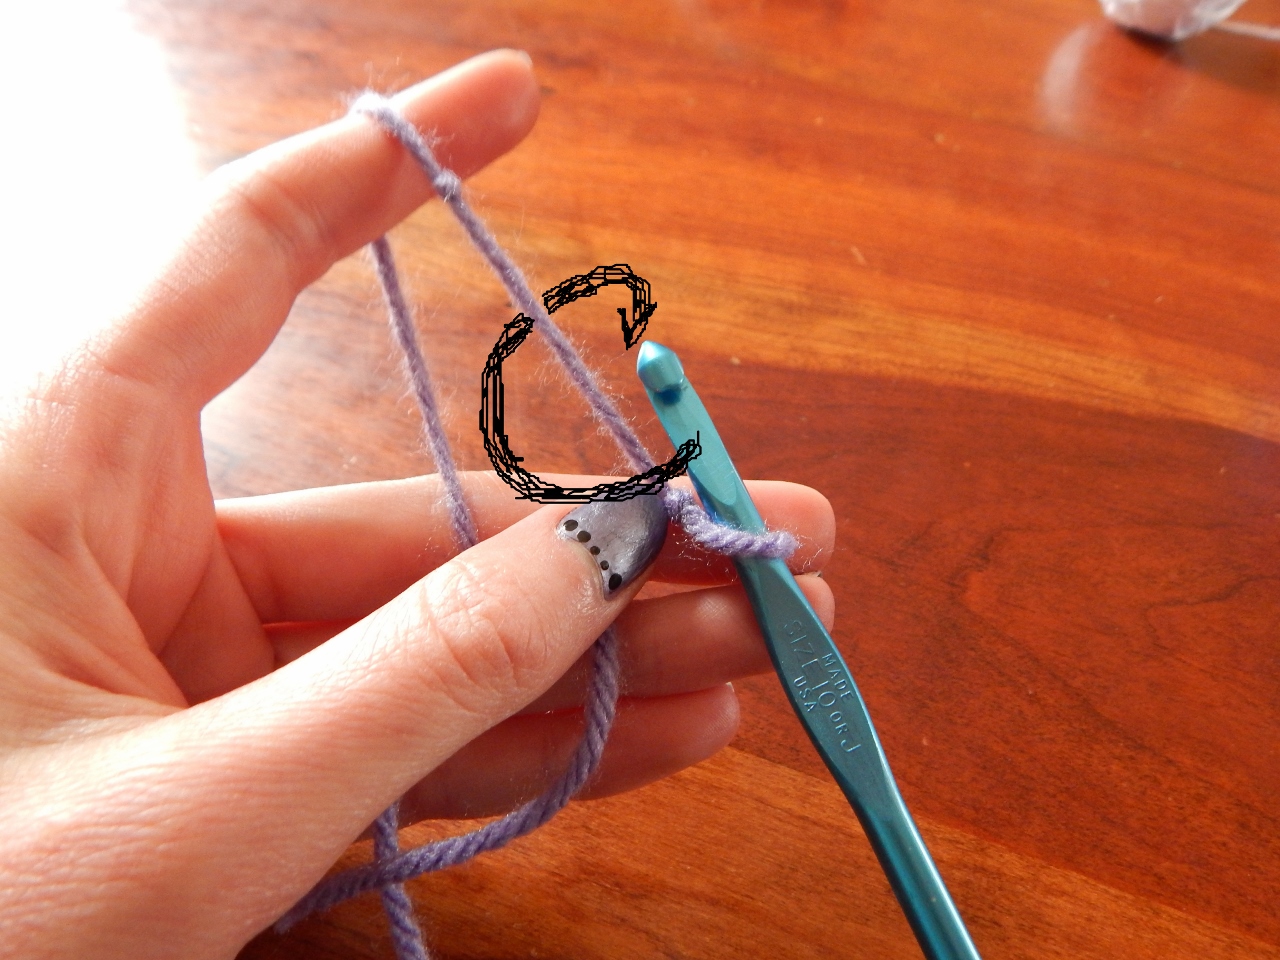
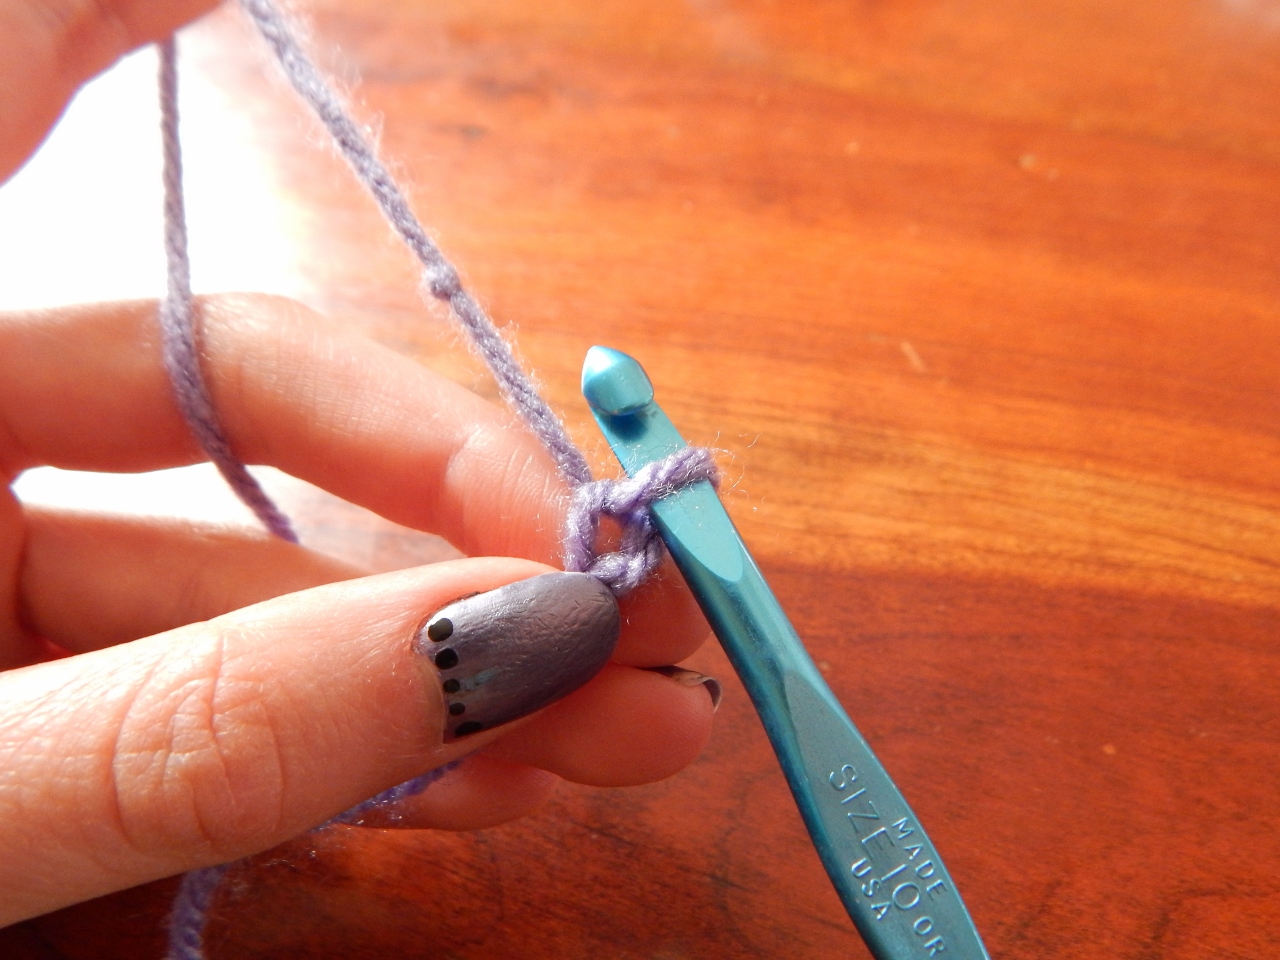
You are going to insert your needle not into the stitch that the loop on your needle is coming from, but the one behind it.  Push the hook under the first strand of the stitch, go over the next strand, and push under the last strand.  That’s probably confusing, so just look at the picture. =)  This is why you always have to make an extra stich at the end of rows – because that extra stitch helps you turn around without making the total stitch-length of your project less.

-Allison (crochet lesson 2) 042

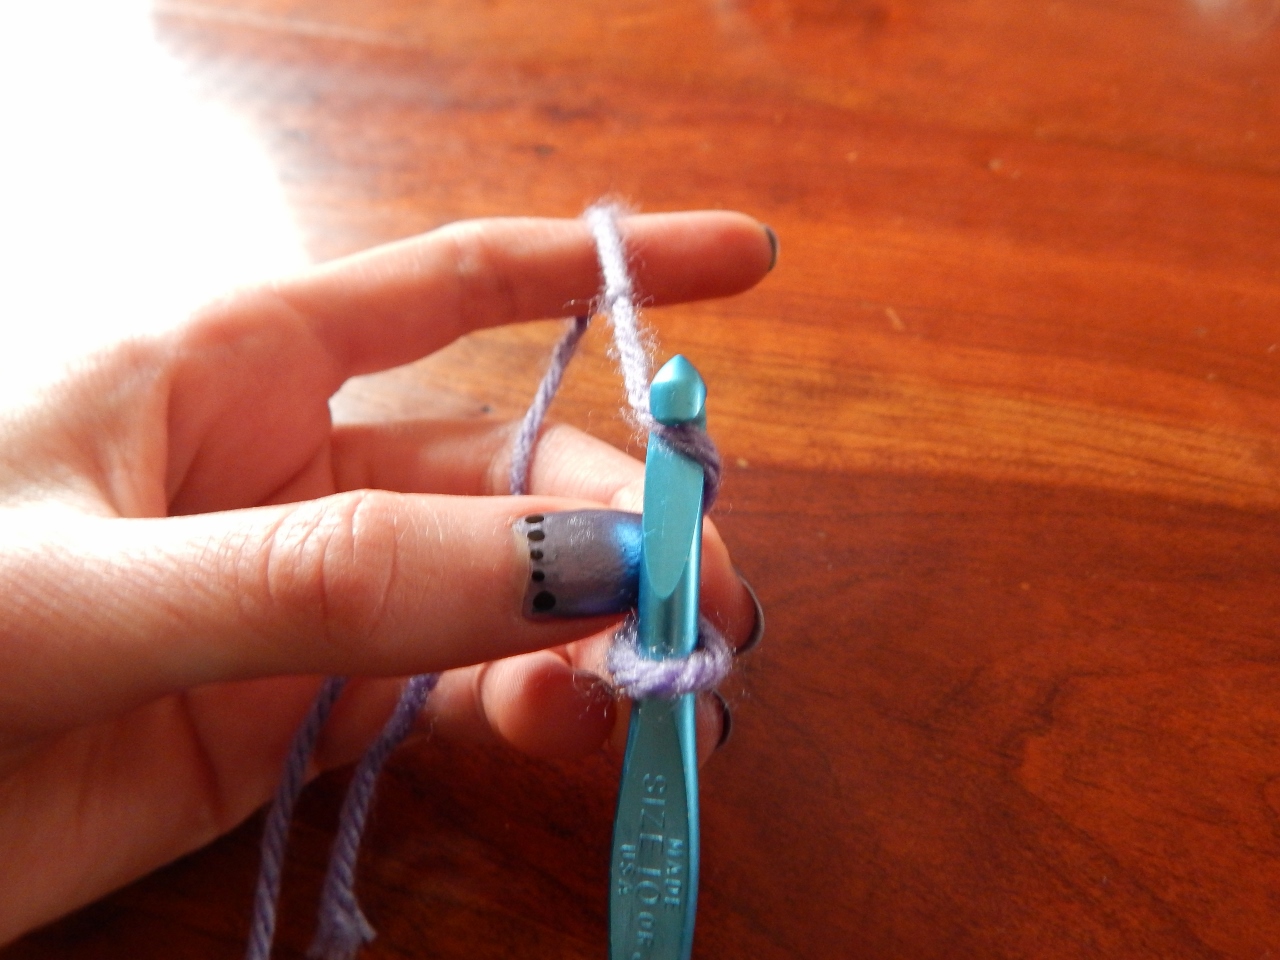
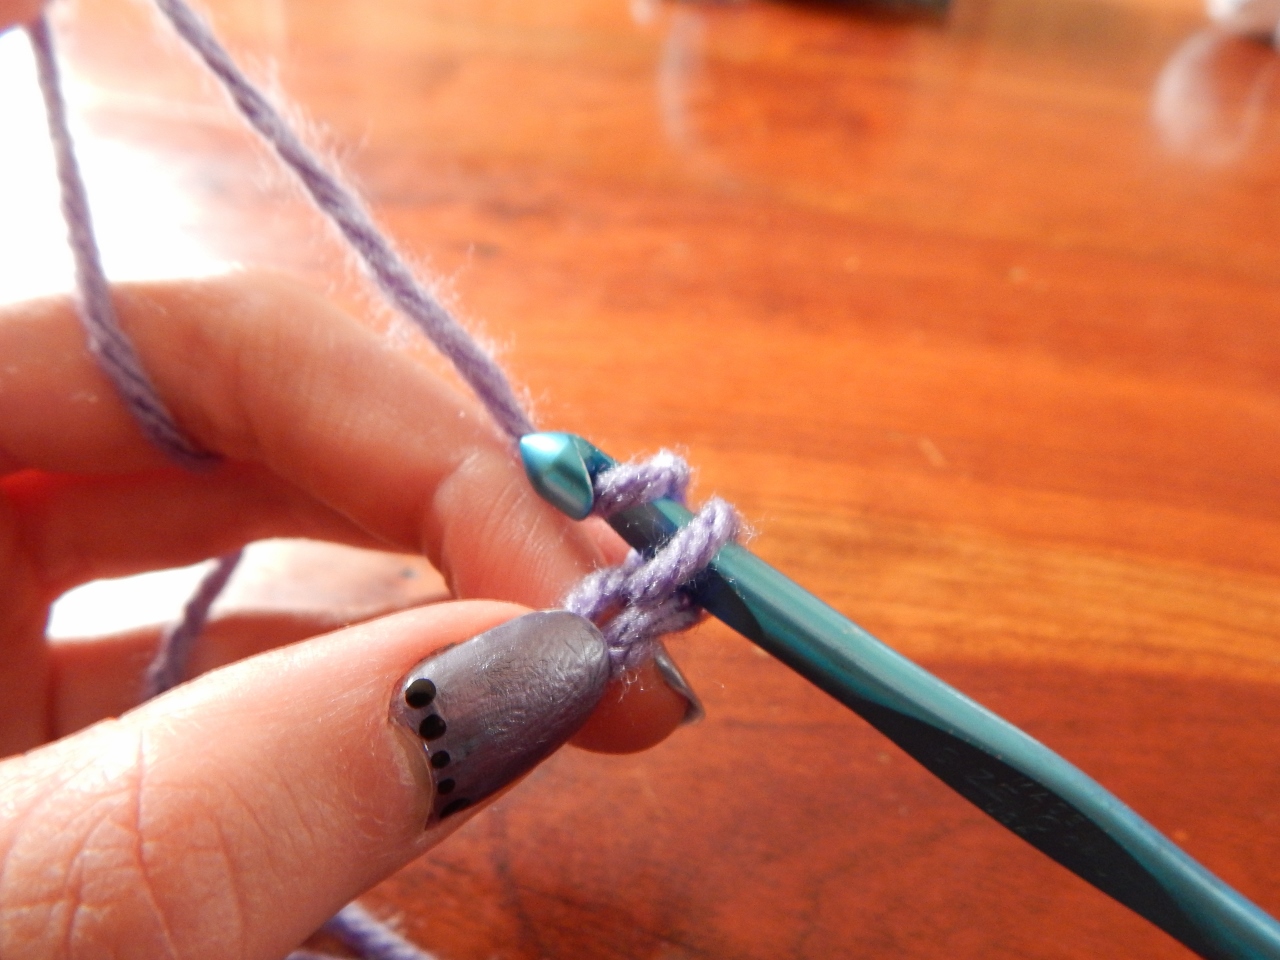
Now you have three loops on your crochet hook.

-Allison (crochet lesson 2) 043

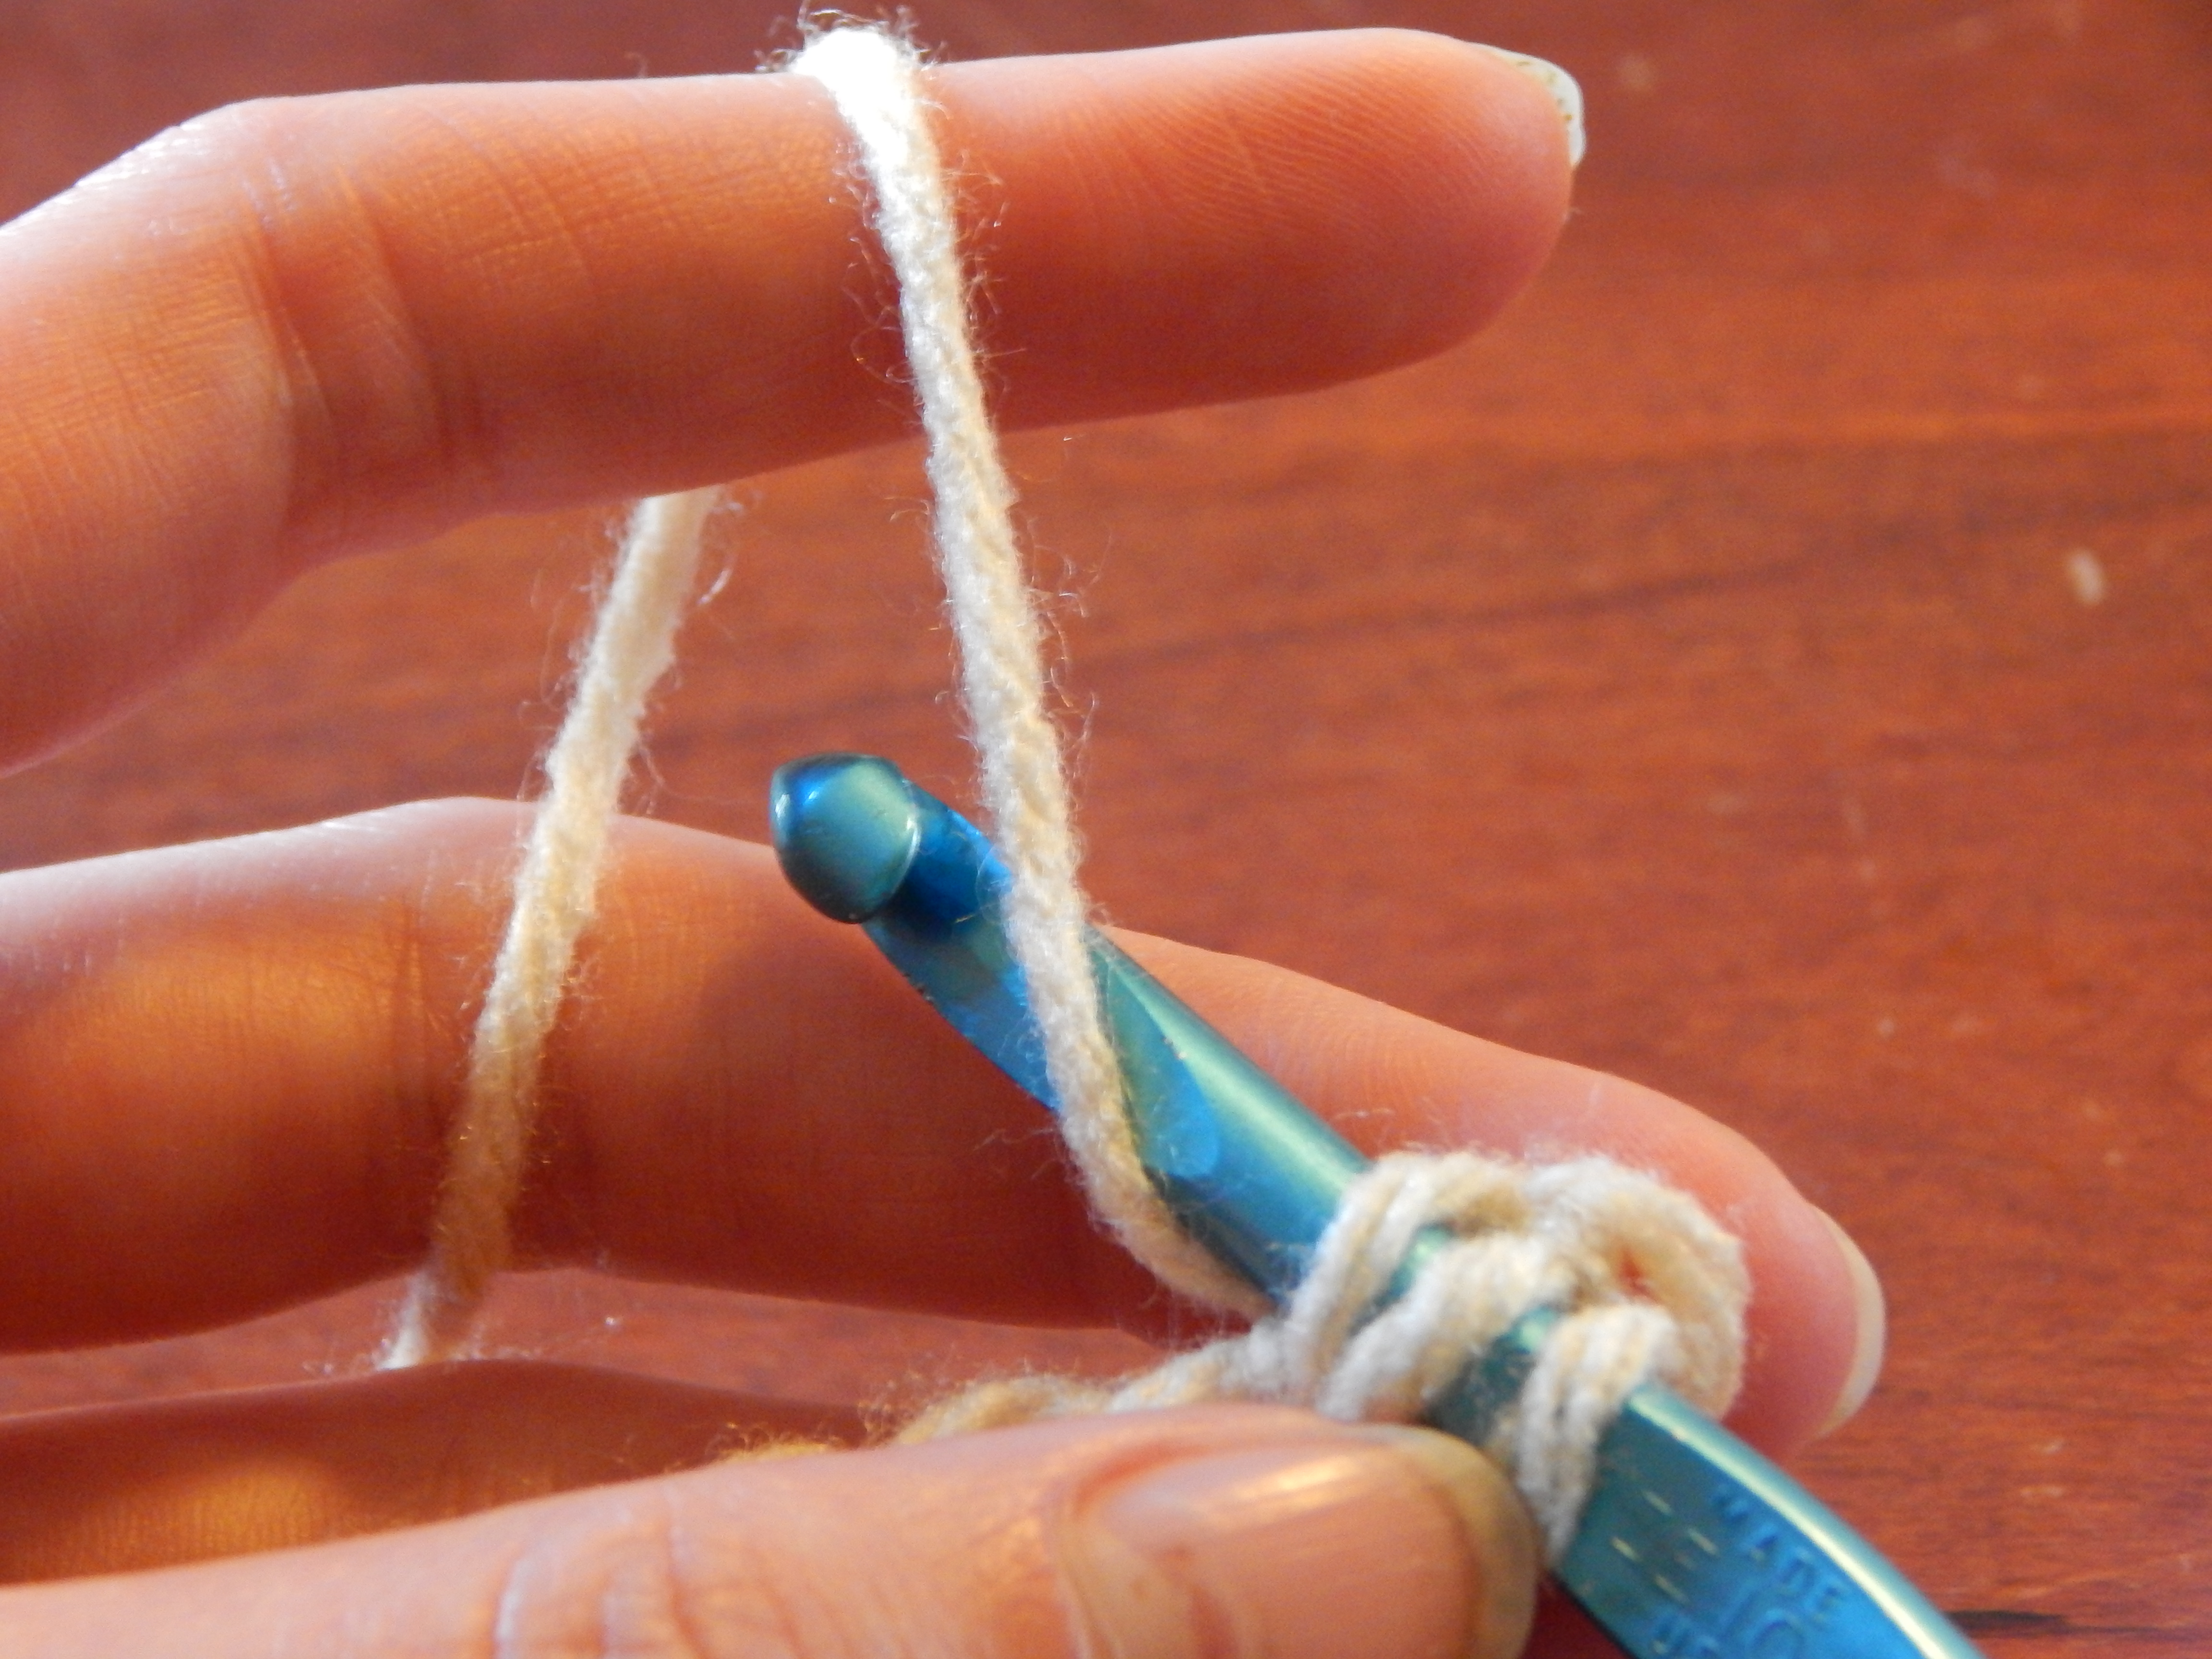
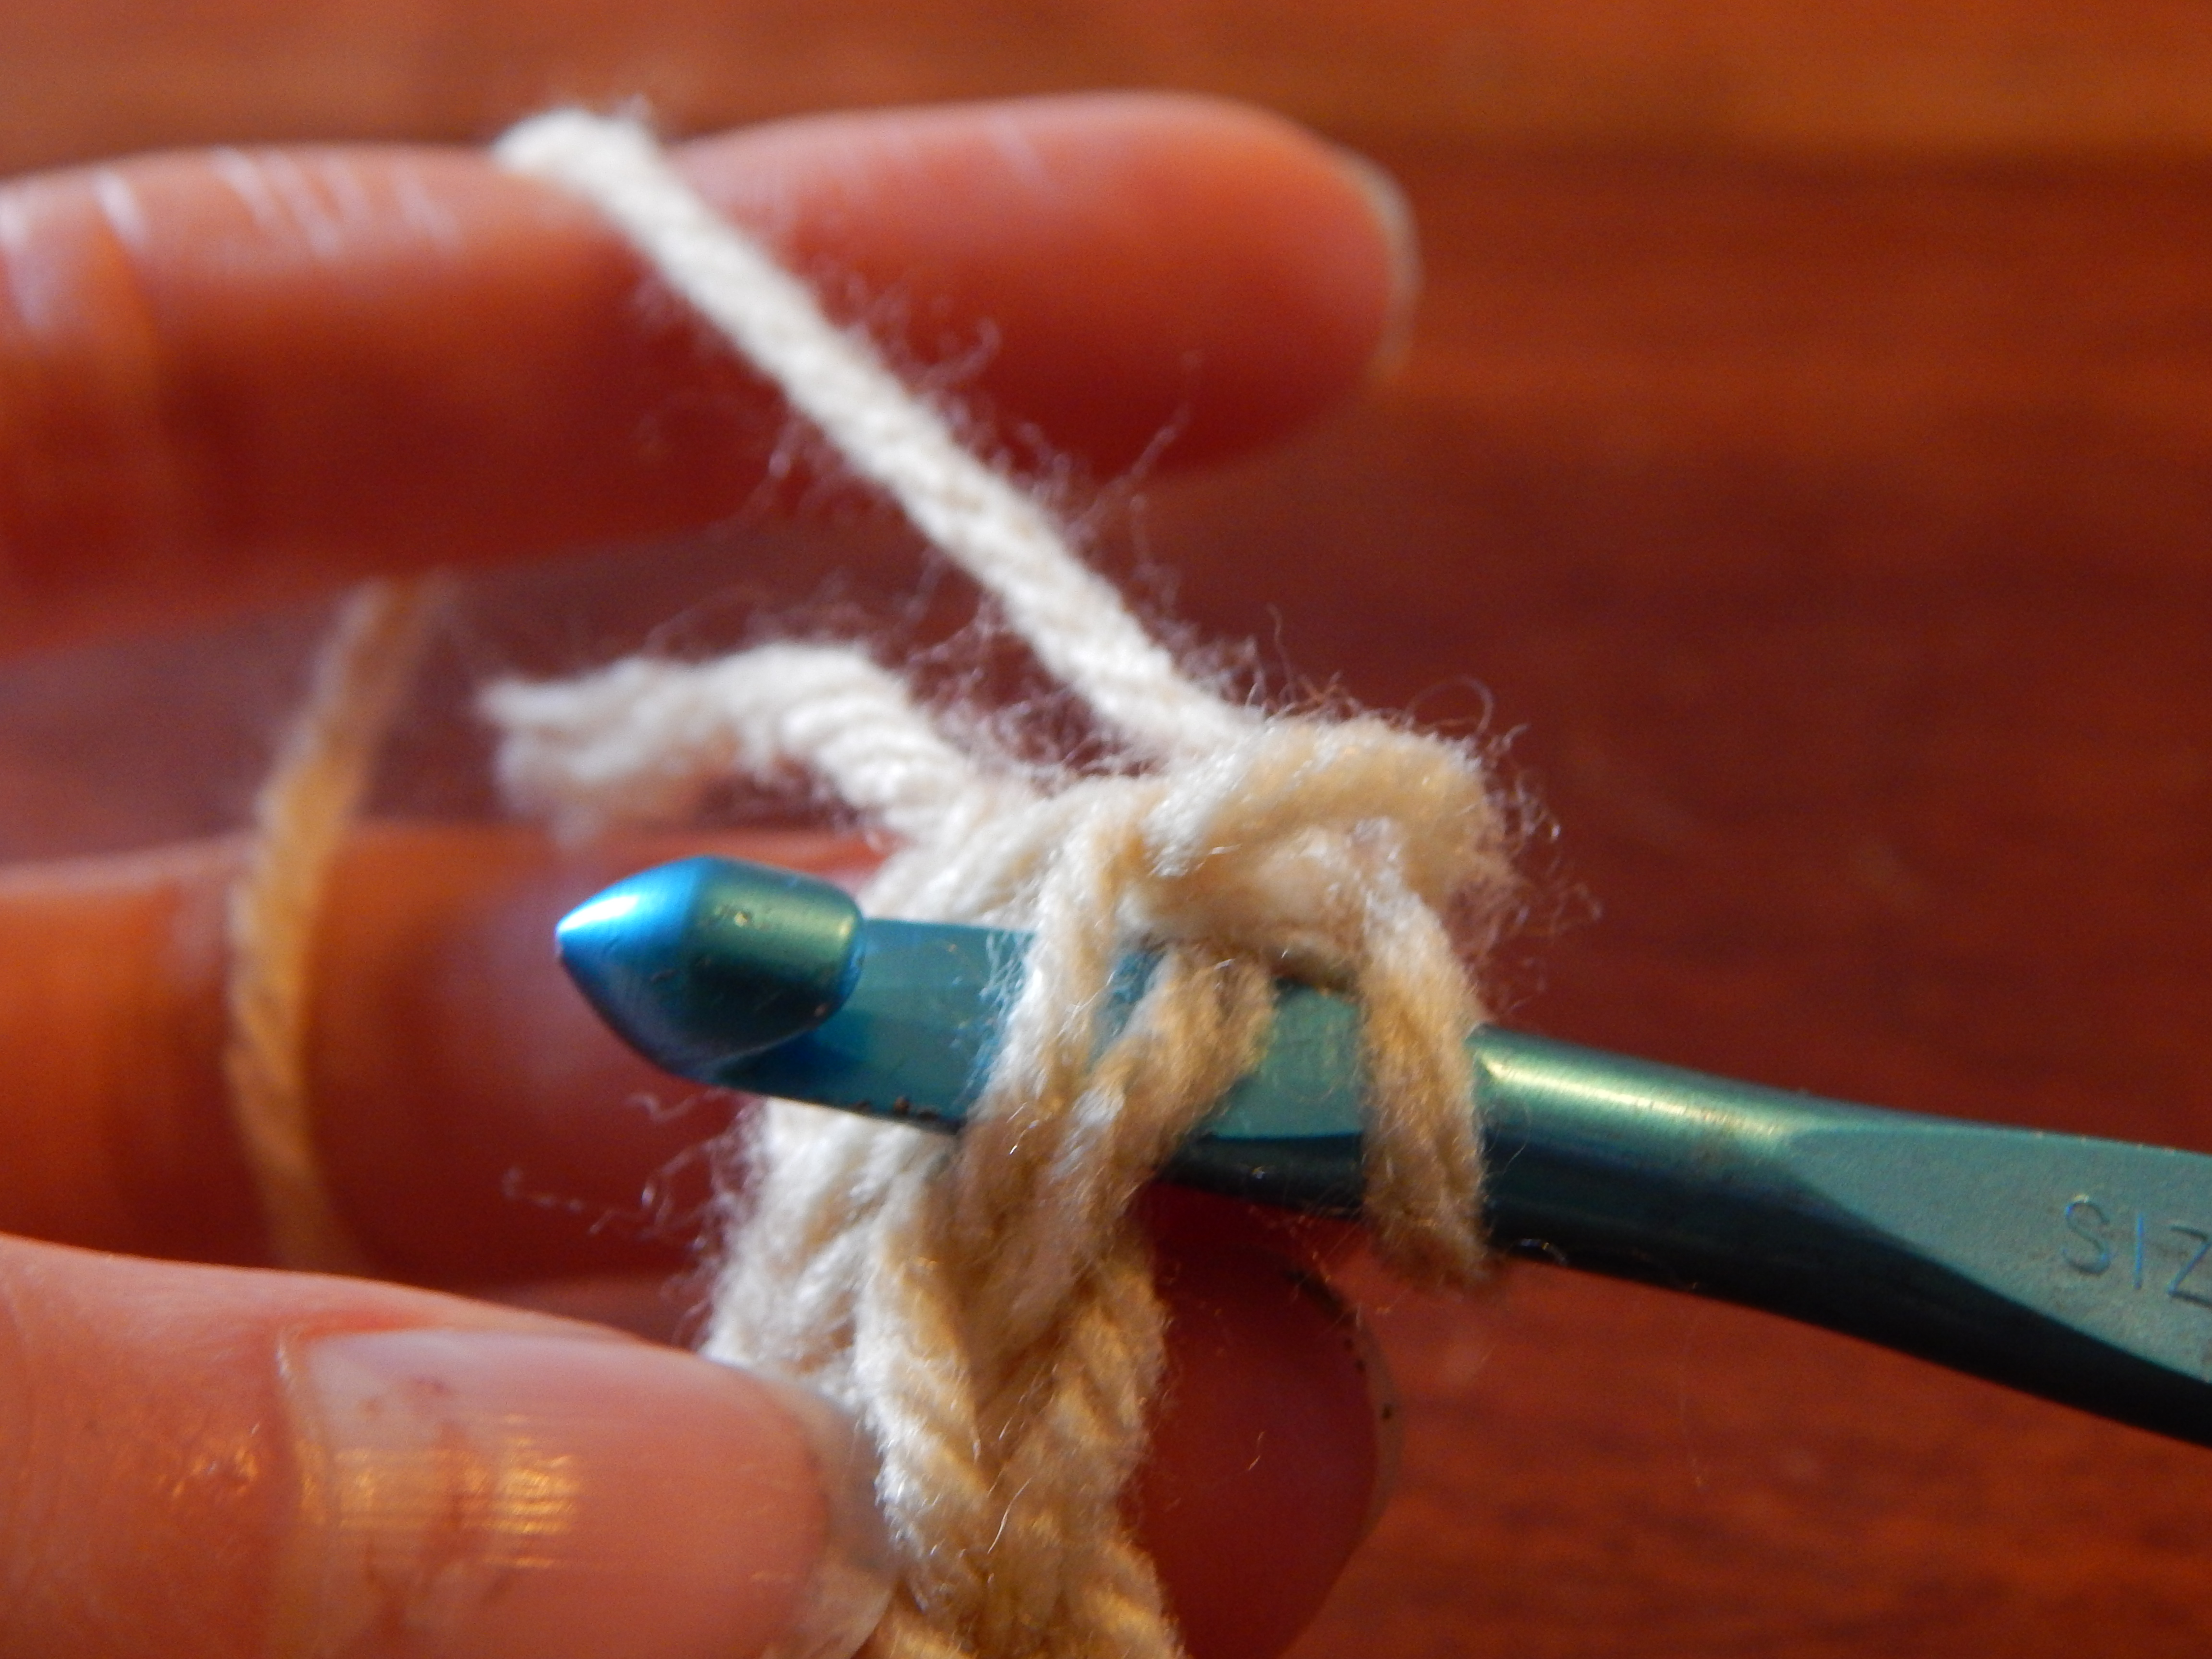
Wrap the yarn from the back of the hook to the front.

-Allison (crochet lesson 2) 044

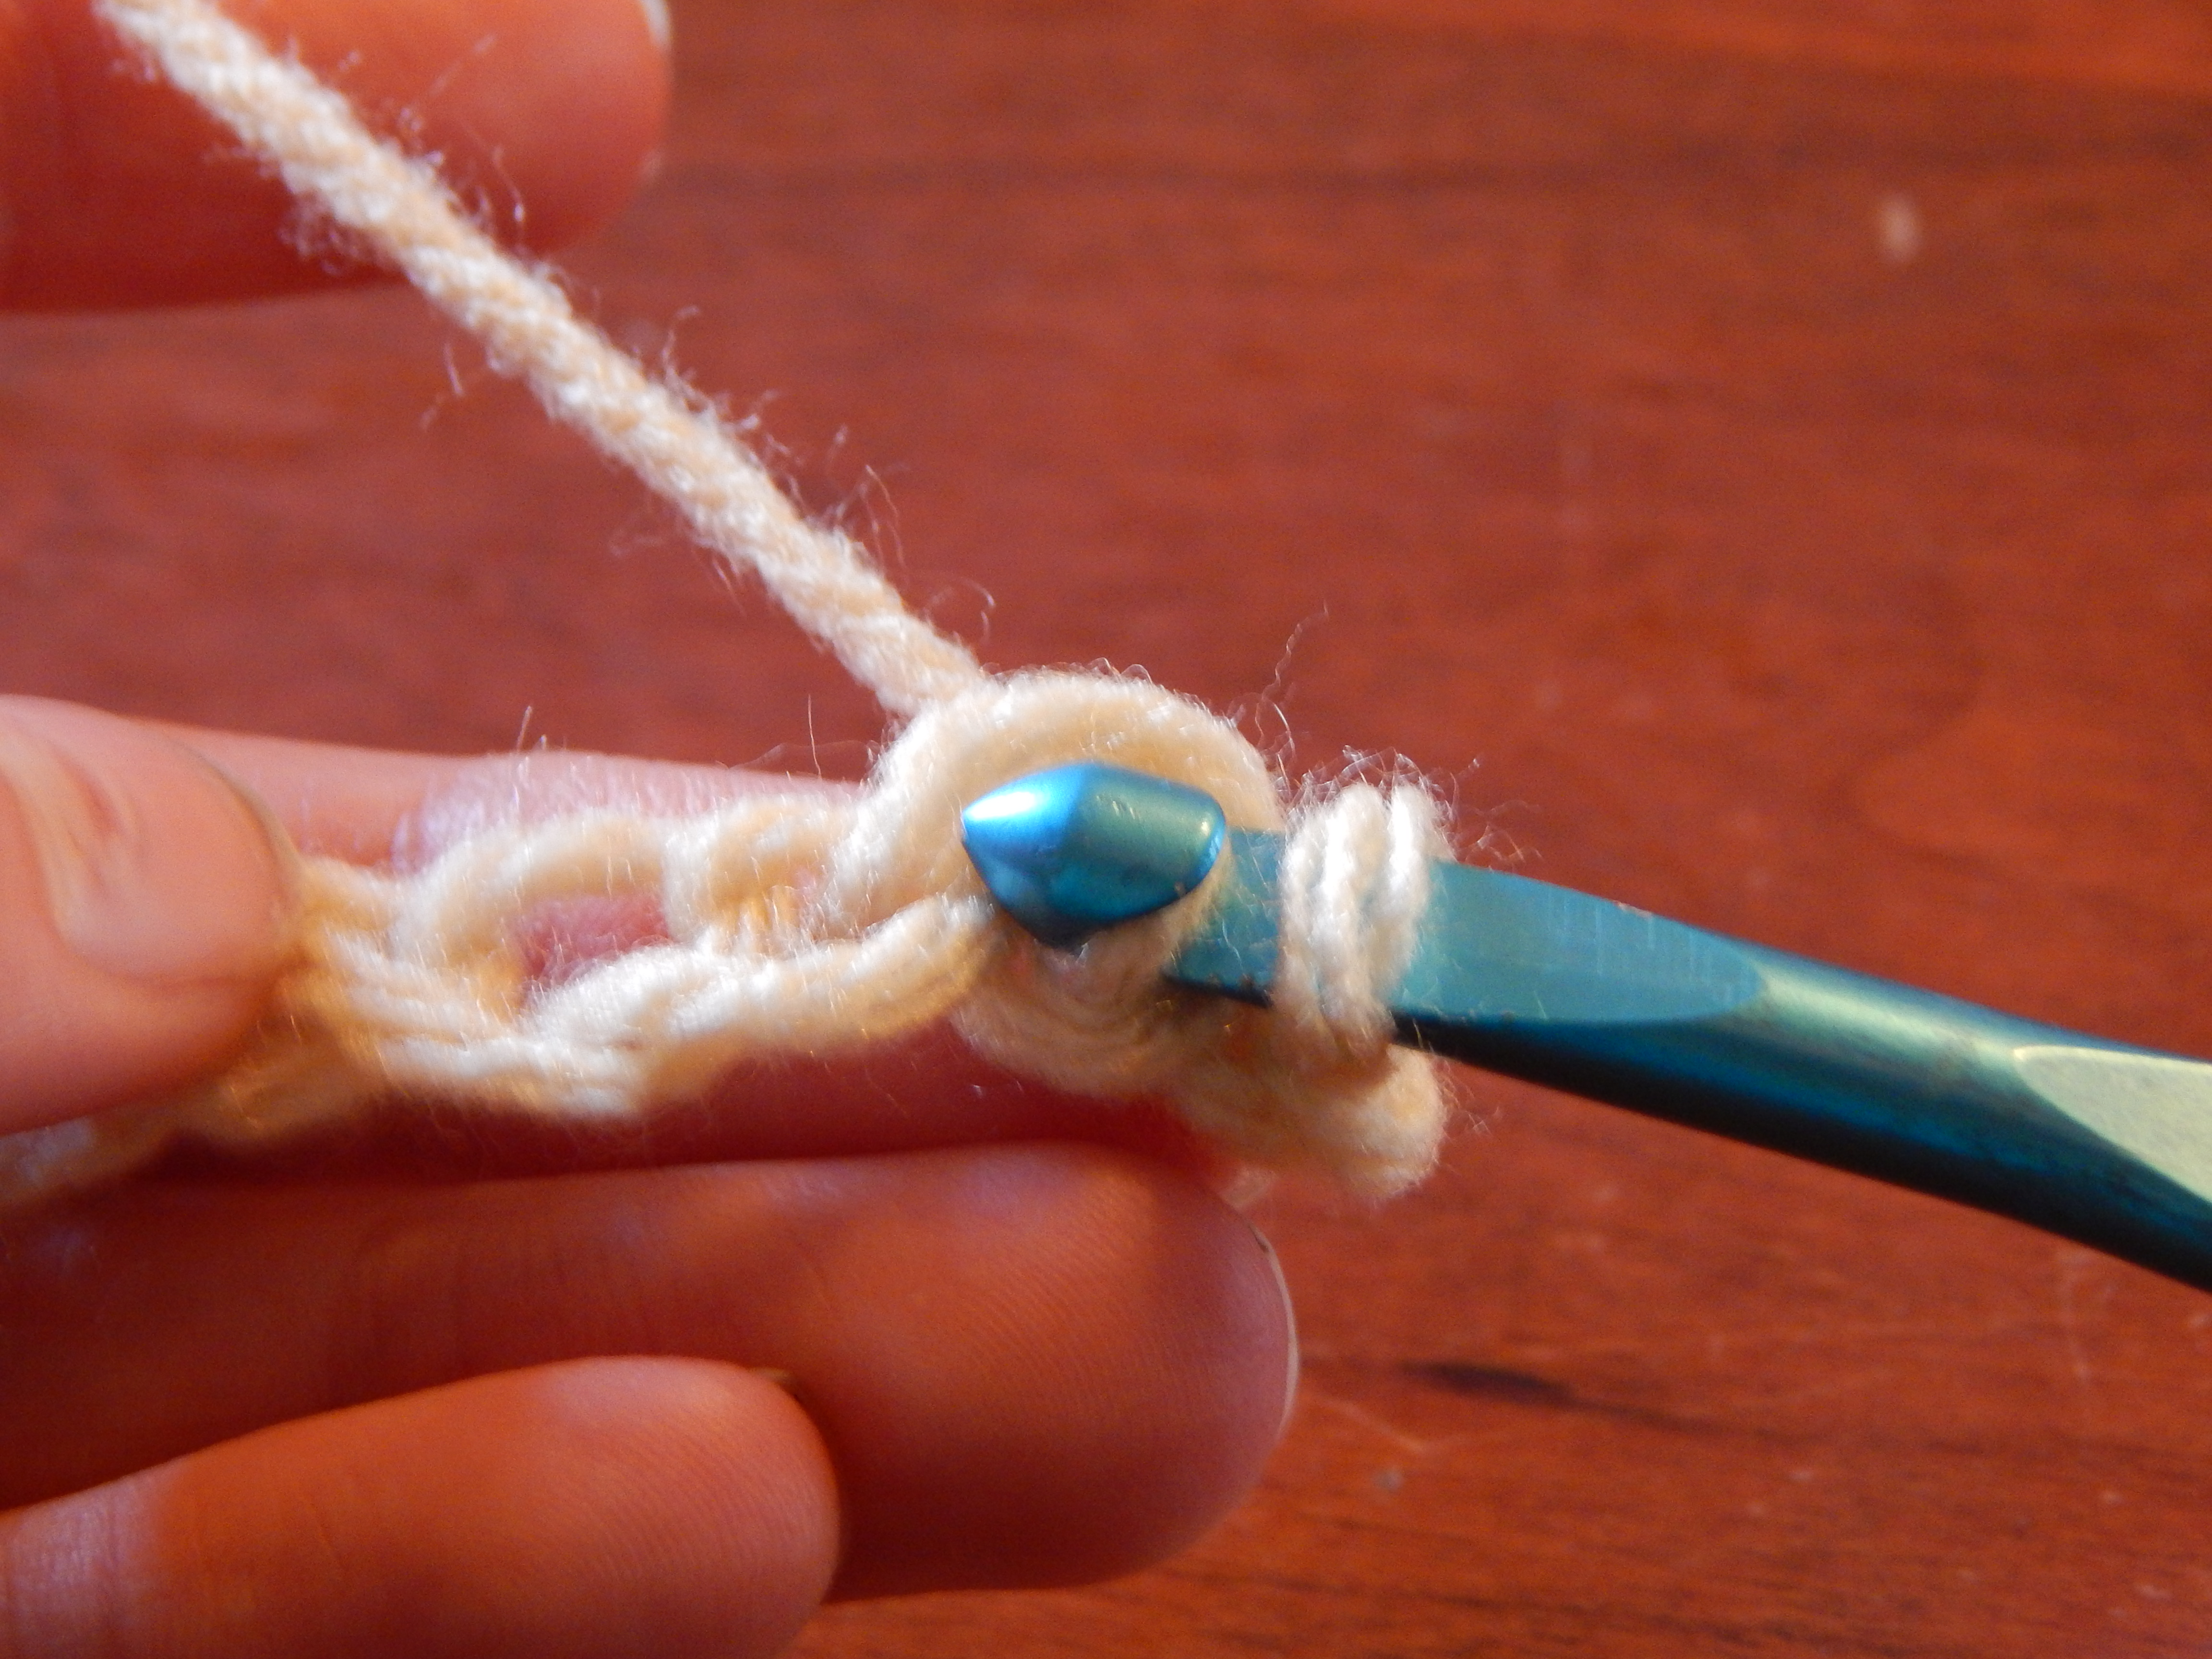
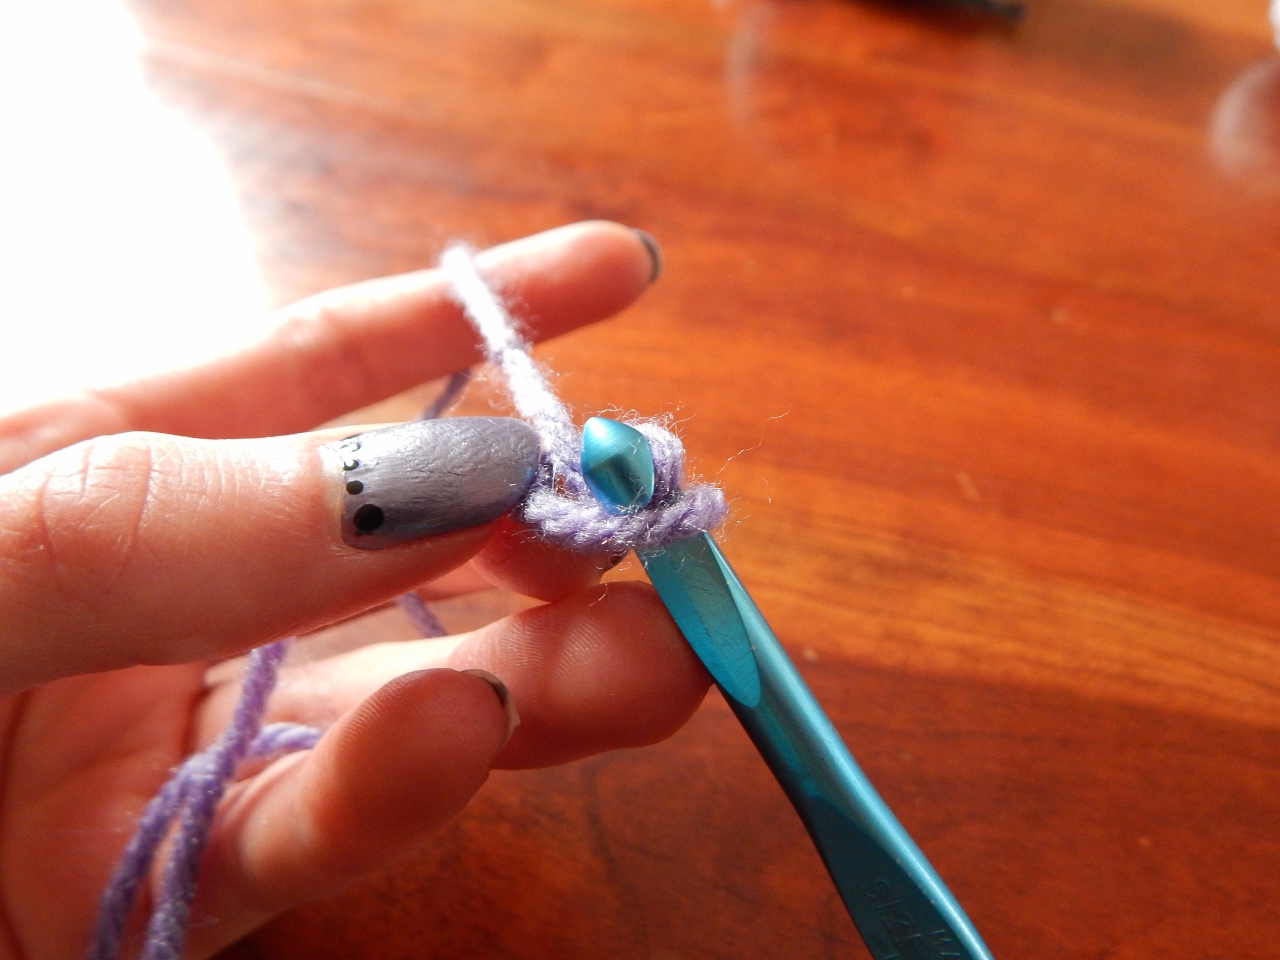
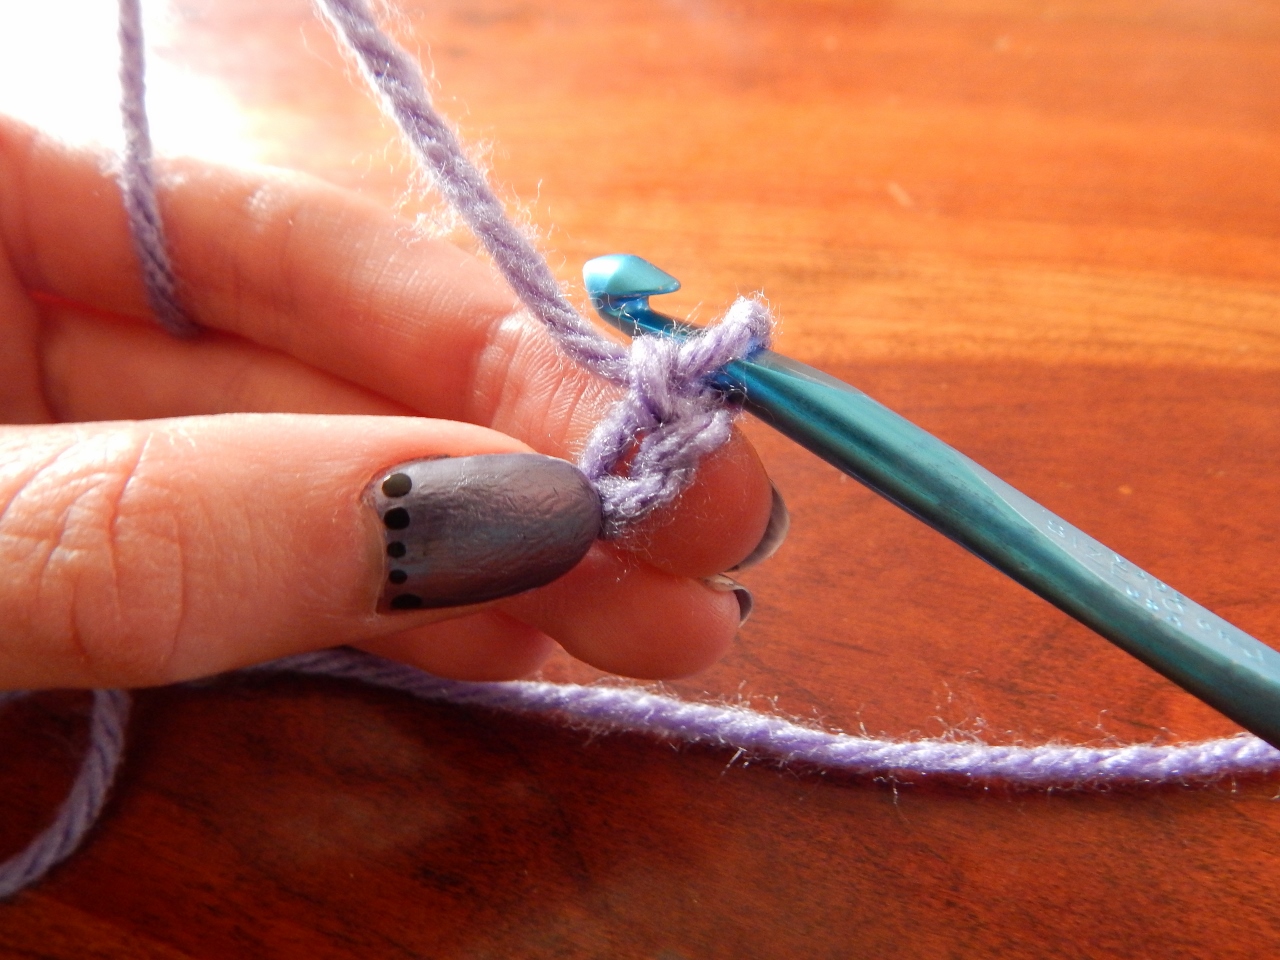
Pull the hook down, taking with it the strand of yarn that you just wrapped around the hook.  Pull that strand through the next two loops but don’t pull it through the last loop.  Now you have two loops on the hook.

-Allison (crochet lesson 2) 045

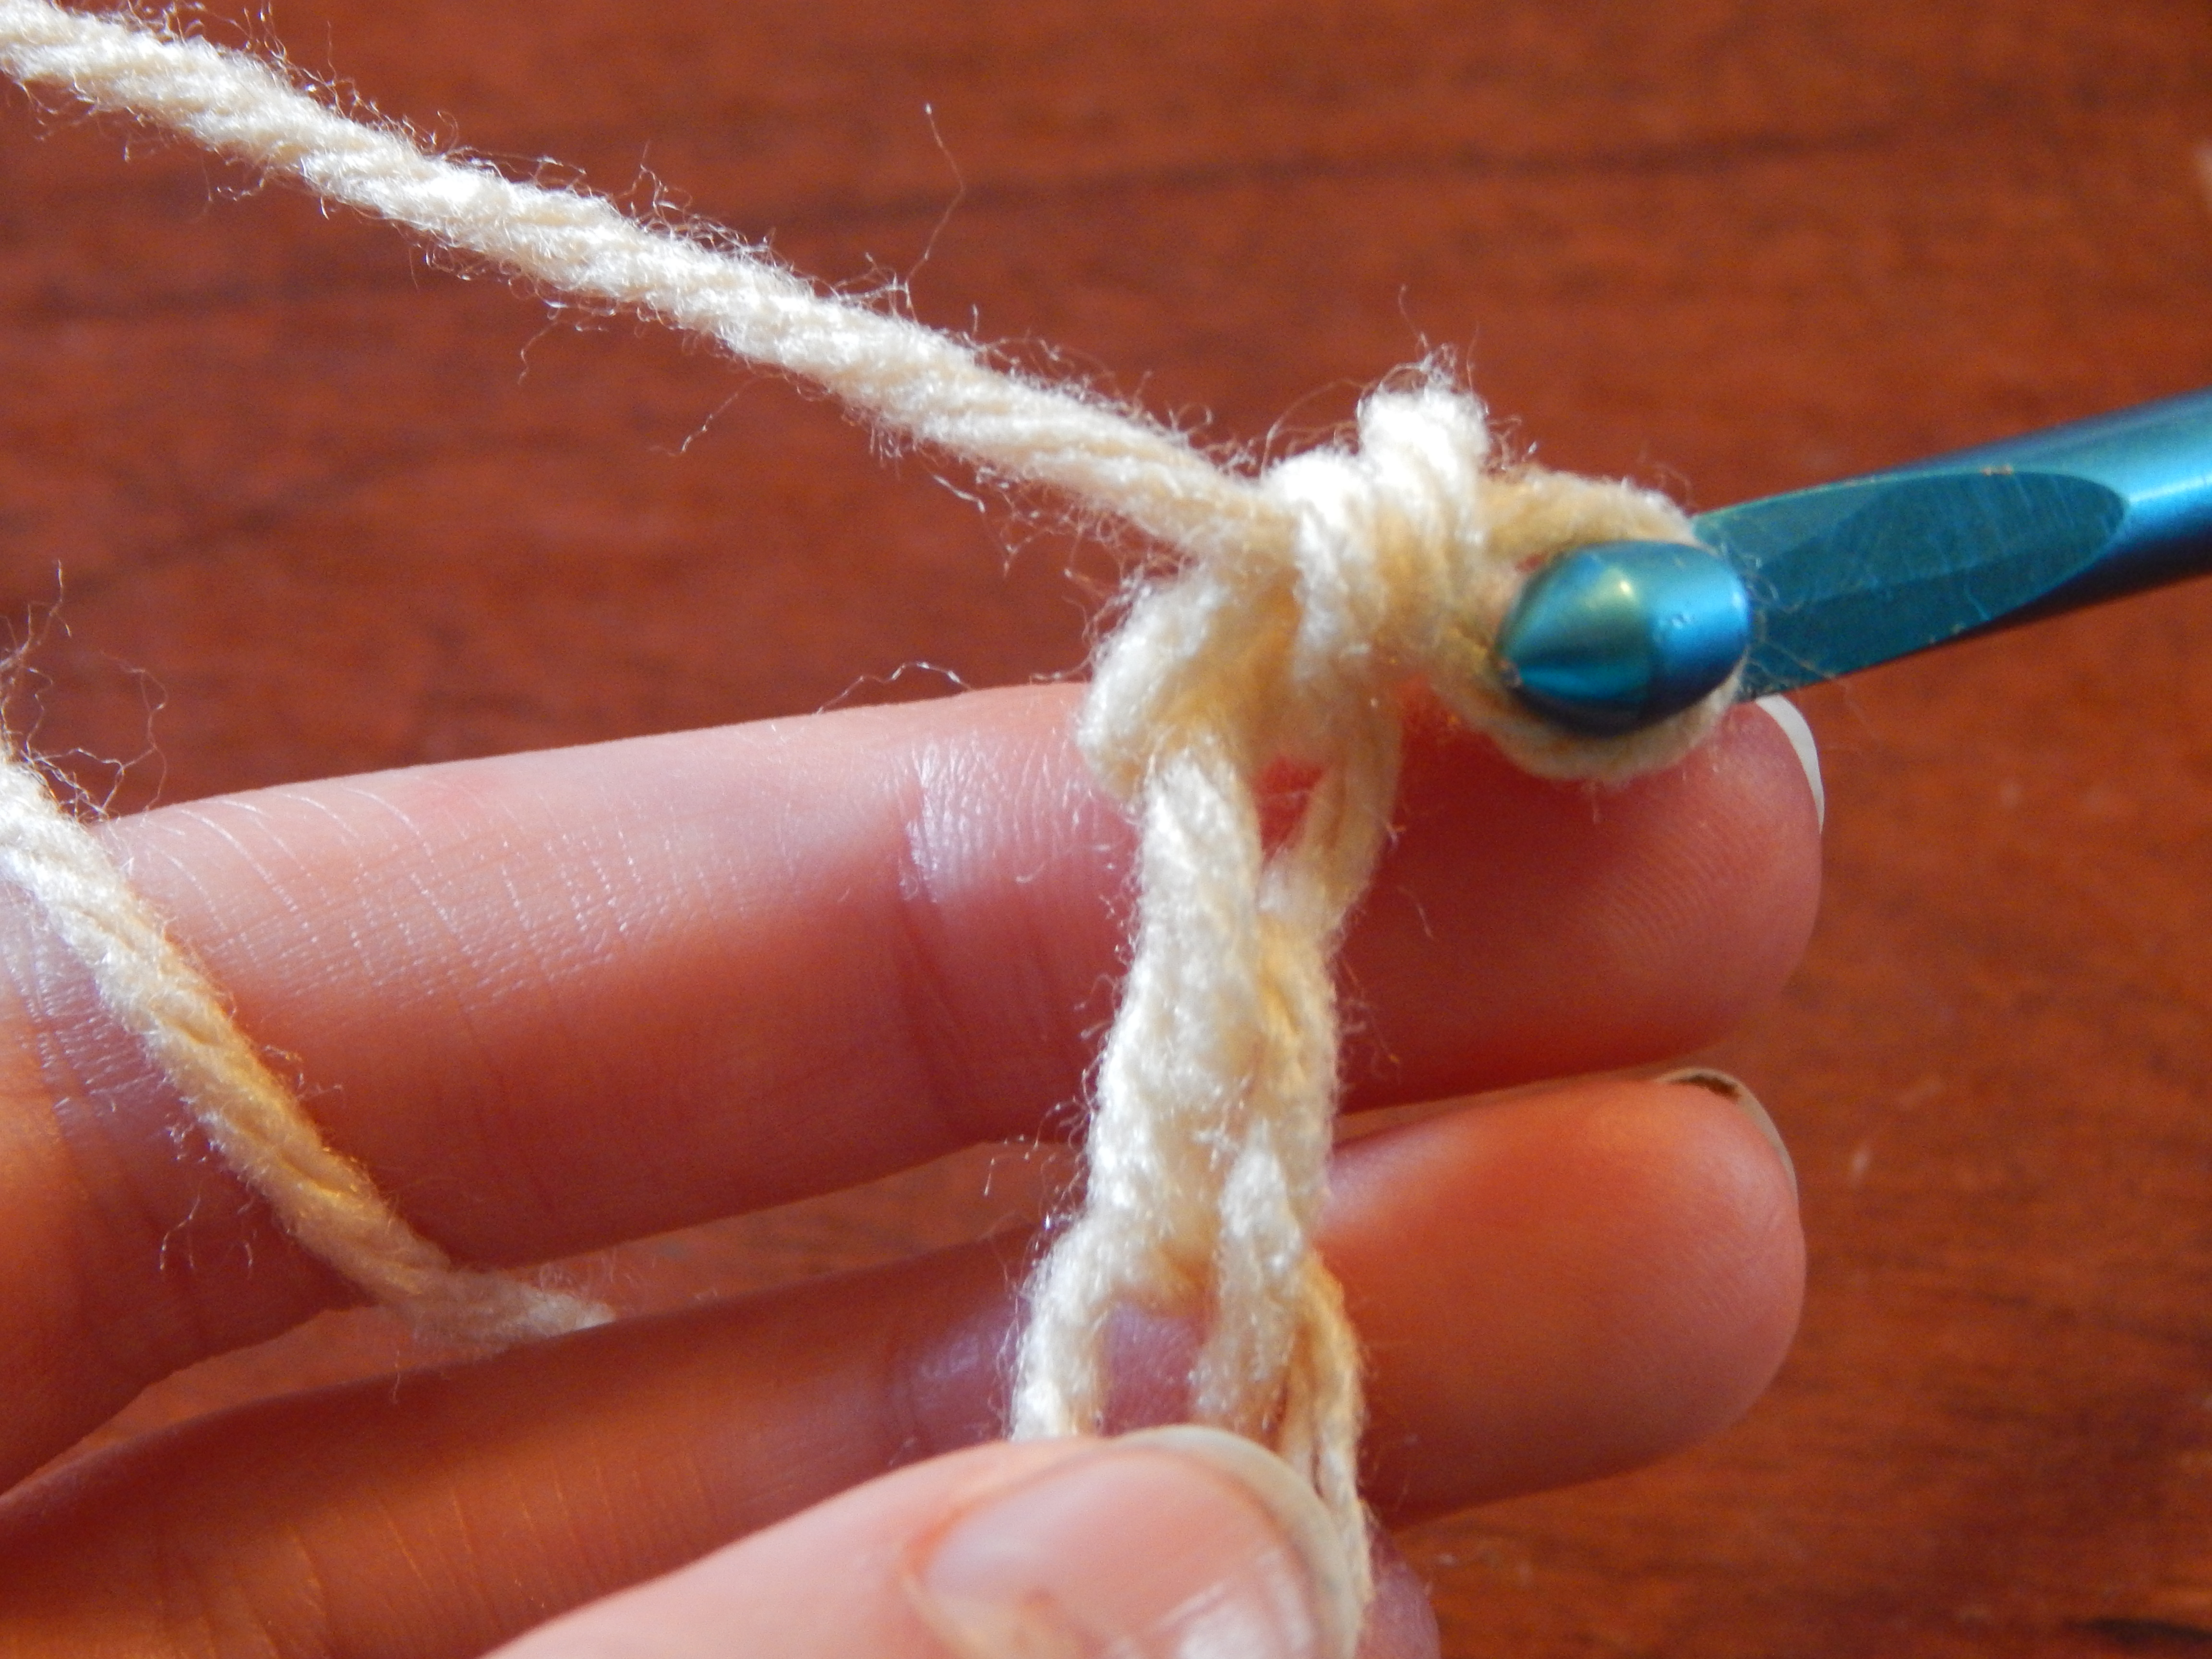
Wrap the yarn from back to front again…

-Allison (crochet lesson 2) 046

And again, pull through two loops.  This time, since there are only two loops instead of three on your hook, you will pull through all of the loops.  Now you have only one loop on your hook.

-Allison (crochet lesson 2) 049

Hooray for you!  You have just completed one single-crochet stitch!  That probably seemed very tedious and long, but believe me, after you practice a few more stitches it will only take a few seconds.  I just want to make sure you get this.

Ok, now repeat the process: insert your hook into the next stitch (three stitches on hook), wrap yarn from front to back, pull hook through two loops (two loops on hook), wrap yarn from front to back, pull through last two loops (one loop on hook.)  Keep going until you come to the end of the row and there are no more stitches.  (This row looks kind of weird because part of it is turned on its side and part of it is standing up.)

-Allison (crochet lesson 2) 050

Here is where you make that extra stitch so the edges look even.  Wrap yarn from front to back…

-Allison (crochet lesson 2) 051

And pull through the loop on your hook.  You should still only have one loop on your hook.

-Allison (crochet lesson 2) 053

Again, push your hook through the two sides of the “v”.  Don’t insert your hook in the stitch that the loop on your hook is directly connected to, because that is the turning stitch.  Insert your hook into what looks like the second “v” over from the loop on your hook.

-Allison (crochet lesson 2) 054

Now continue crocheting (wrap yarn around, pull through two loops, wrap yarn around, pull through last two loops, end of stitch, insert hook, wrap yarn around, pull through two loops, etc.)

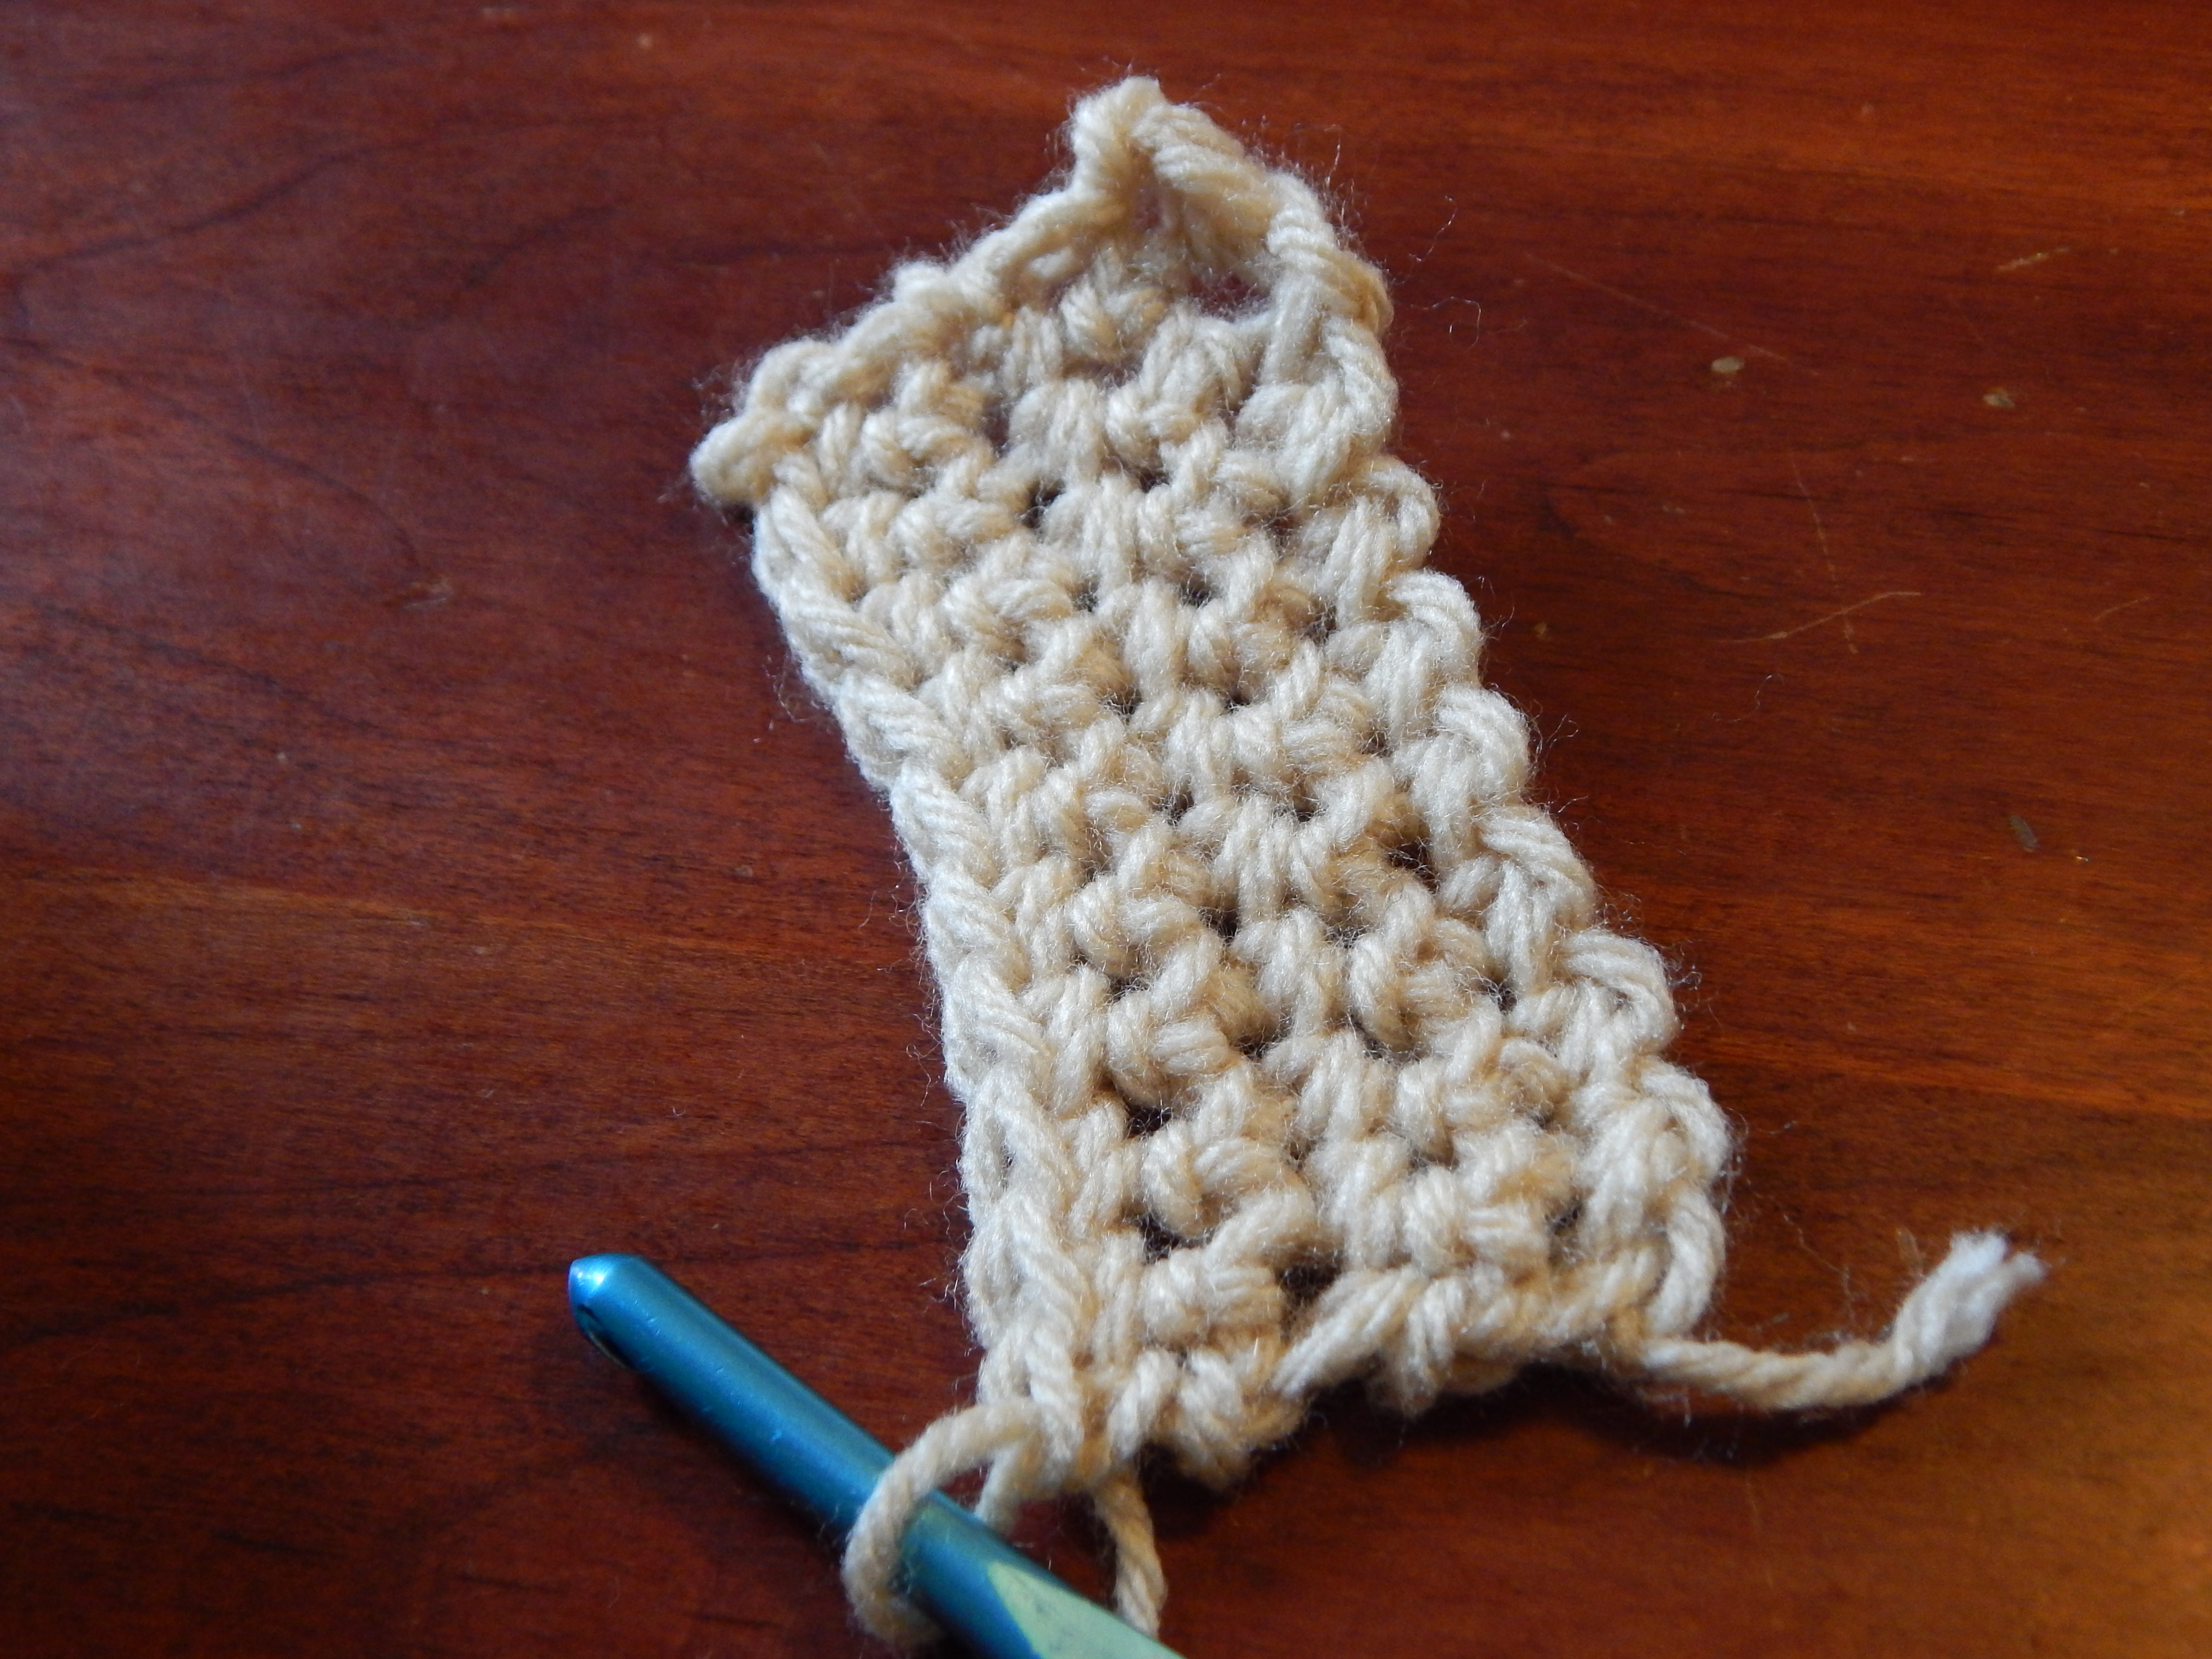
This is what it looks like when you’ve done a couple of rows.

-Allison (crochet lesson 2) 056

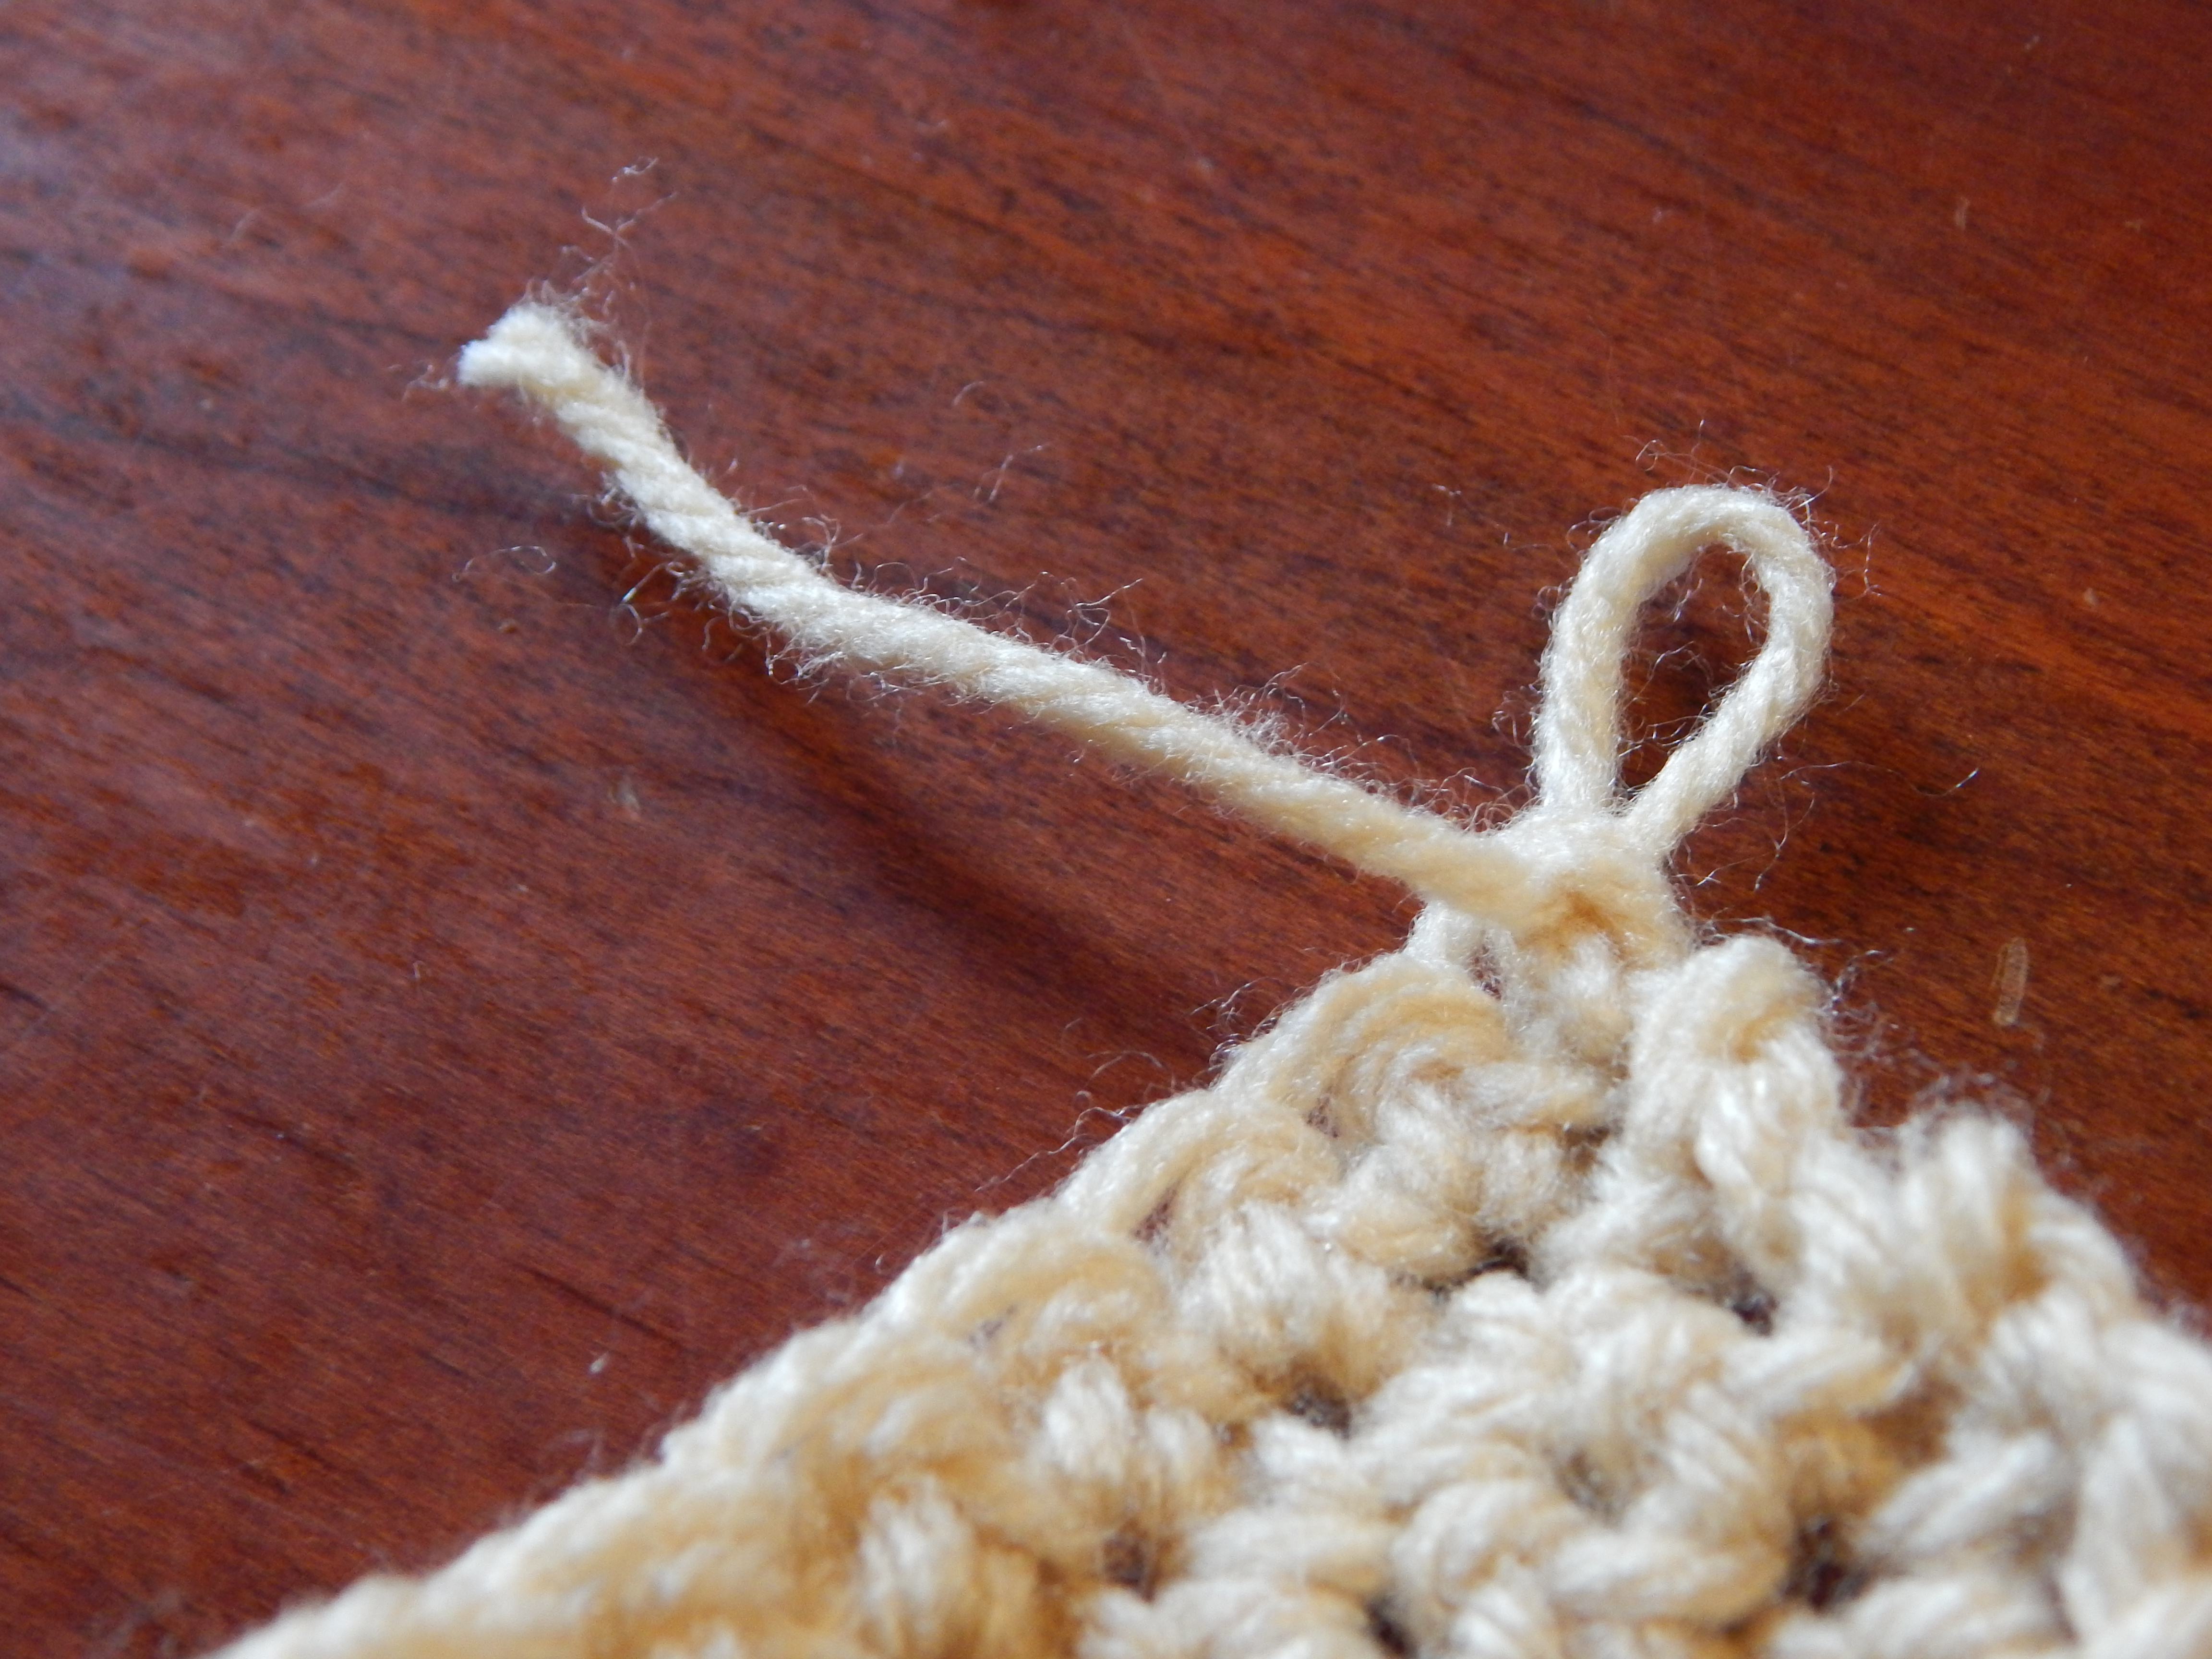
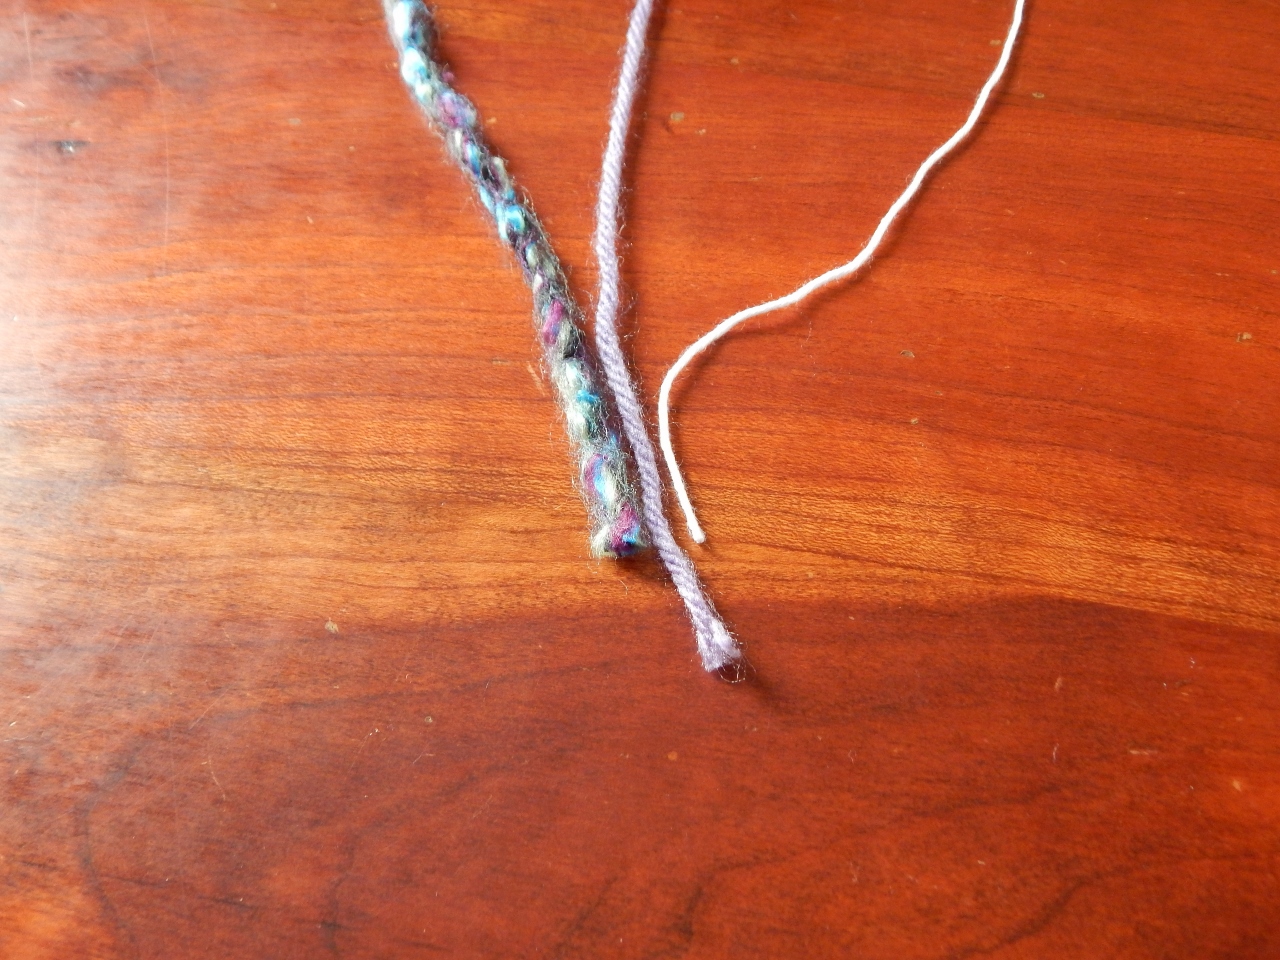
To finish a piece of crochet, take your hook out of the loop on it, and cut the yarn connecting the piece of crochet to the yarn ball.  Don’t cut the yarn too close – leave a tail.

-Allison (crochet lesson 2) 058

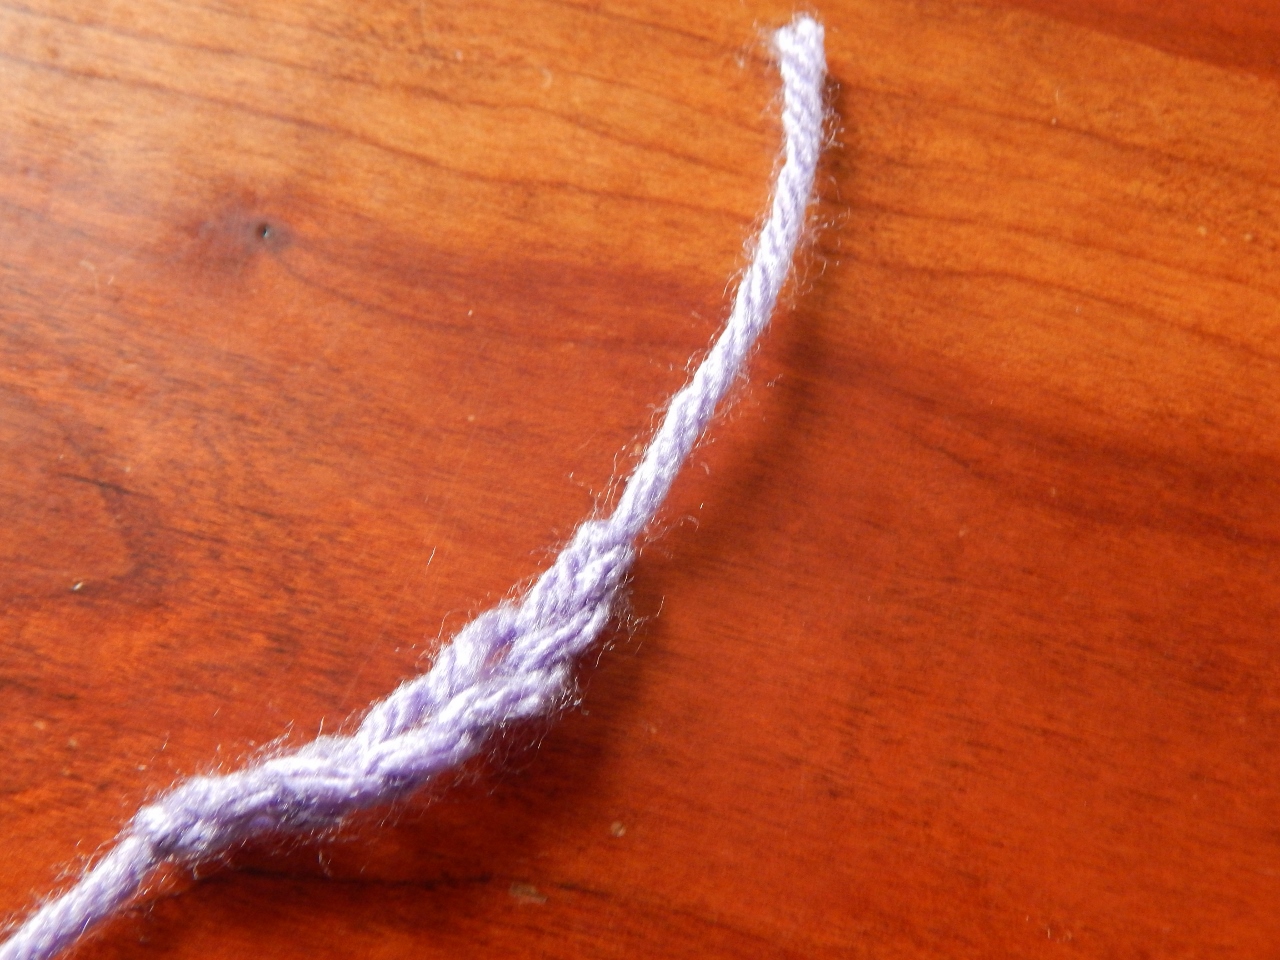
Pull the tail through the loop and keep pulling until it tightens into a knot.

-Allison (crochet lesson 2) 060

Thread a yarn needle with the tail and weave the tail into the crochet piece.

-Allison (crochet lesson 2) 061-Allison (crochet lesson 2) 062-Allison (crochet lesson 2) 064

And there you go!  You now know how to single crochet!

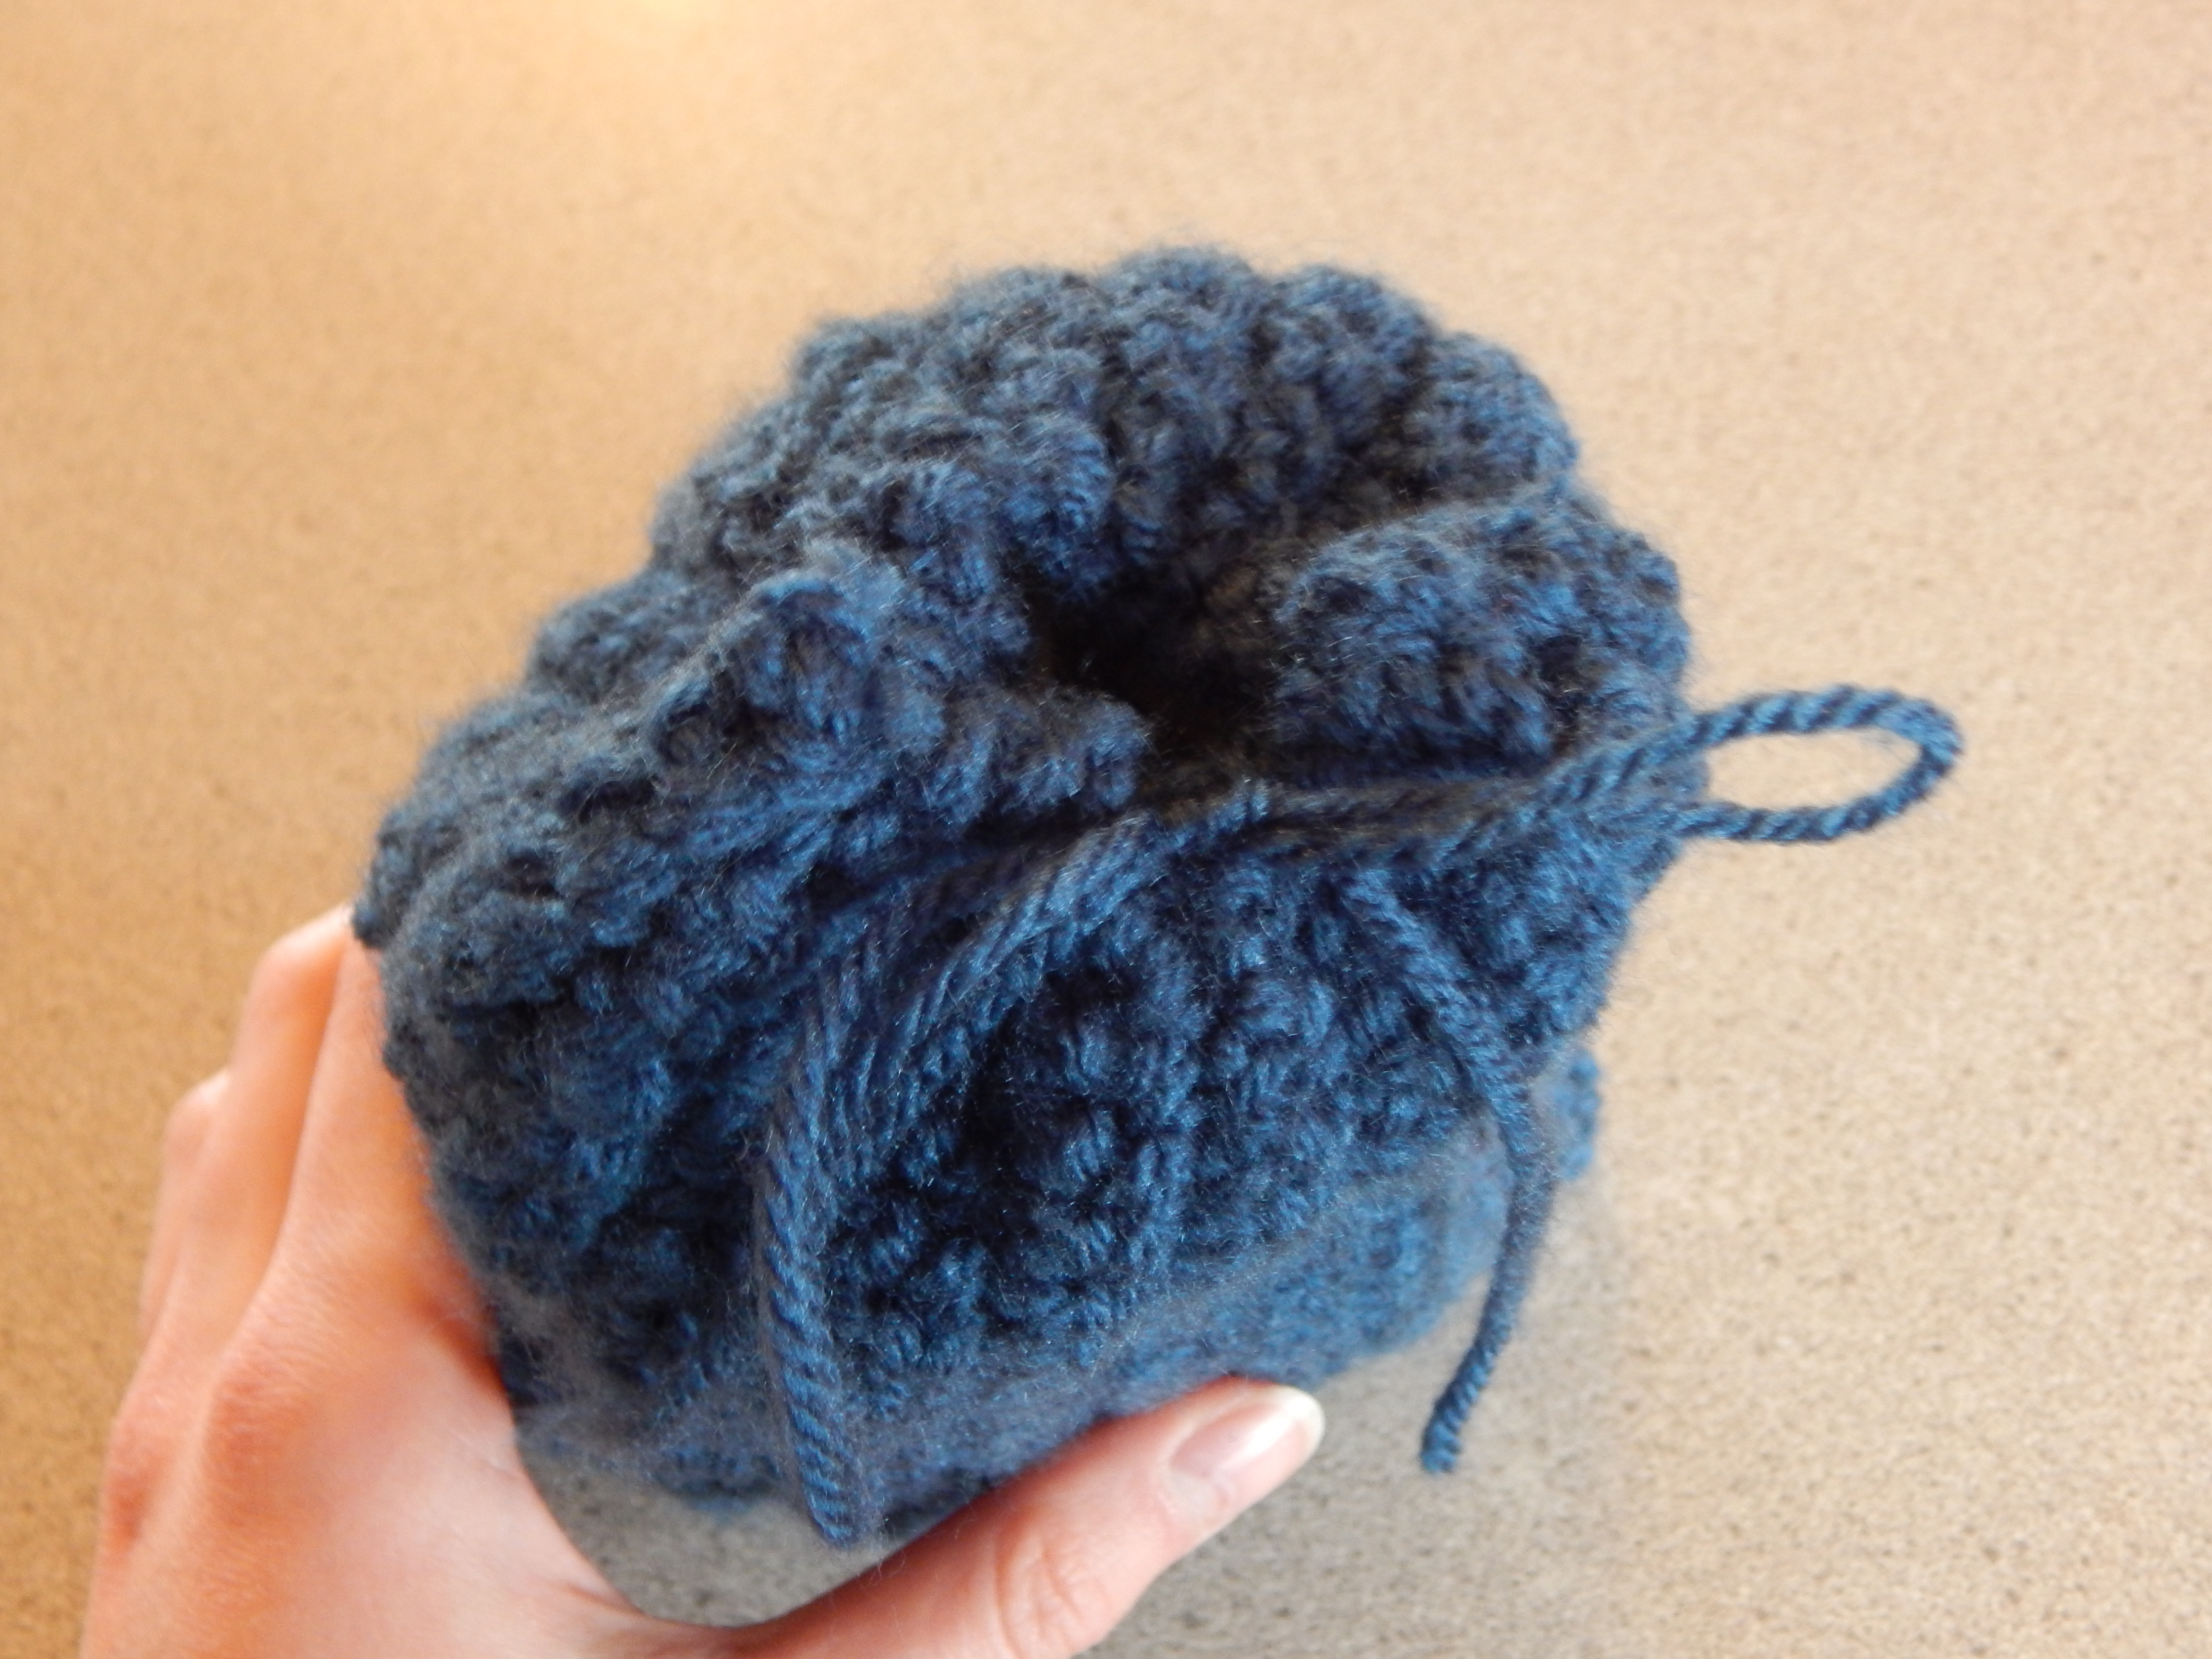
After you practice a while and get the hang of it, why not make something?  I decided to make a little bag to hold the tiles for Upwords (a really fun word game that we have), but you can use this bag for whatever you want.  It’s pretty simple to make if you’ve practiced single-crochet.

-Allison (crochet lesson 2) 013

1. Crochet a foundation chain of 51 stitches.  The actual width of the bag will be 50 stitches, but remember that you always have to crochet an extra stitch for your project to turn out even.

2. Single-crochet until you have a piece of cloth that, when you fold it in half from end to end, is the size you want your bag to be.

3. Fold the piece in half  and use a yarn needle to sew together the bottom edges and the side edges.  Leave the top edges unsewn.

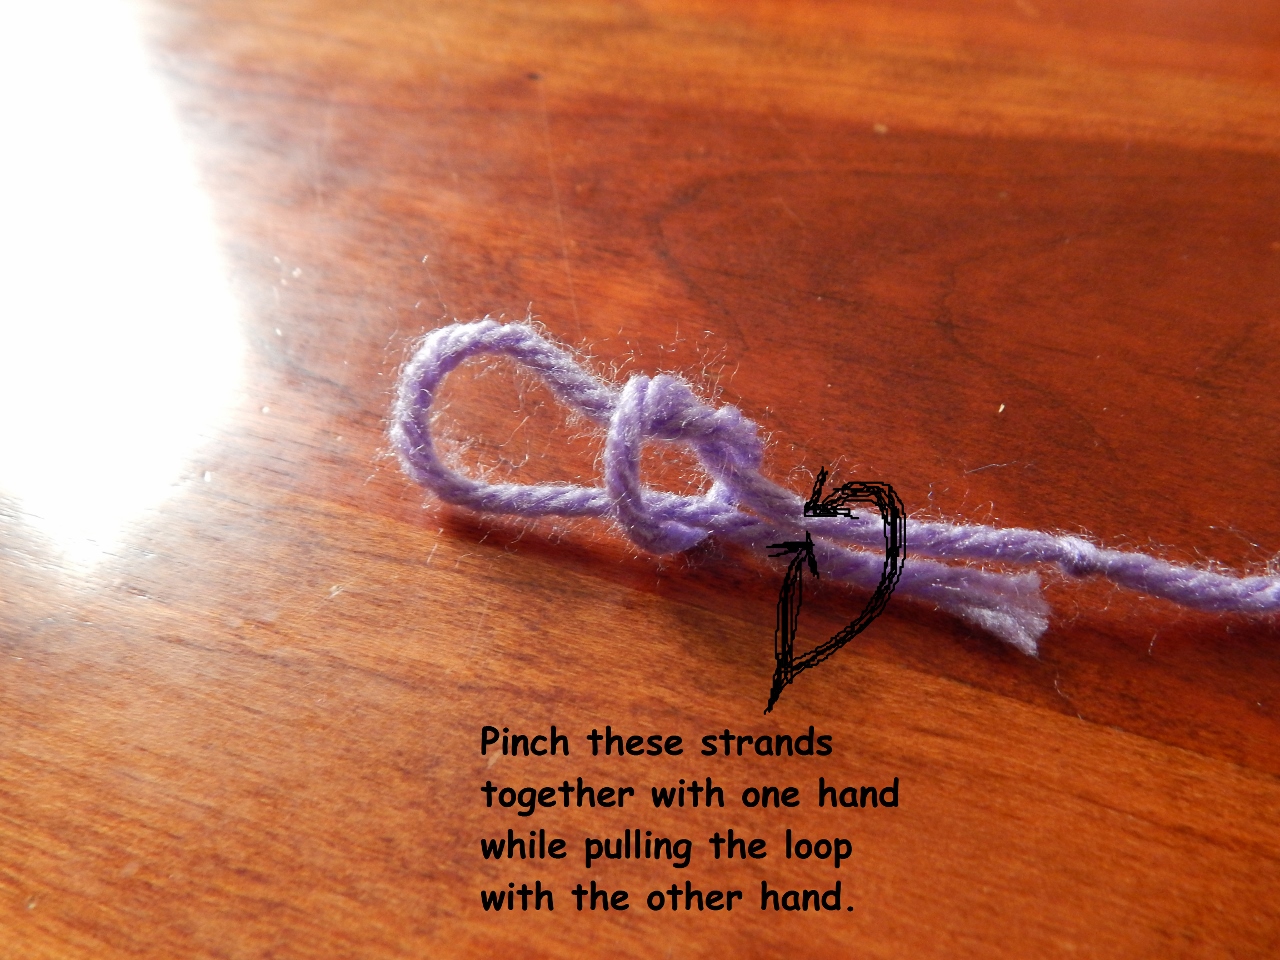
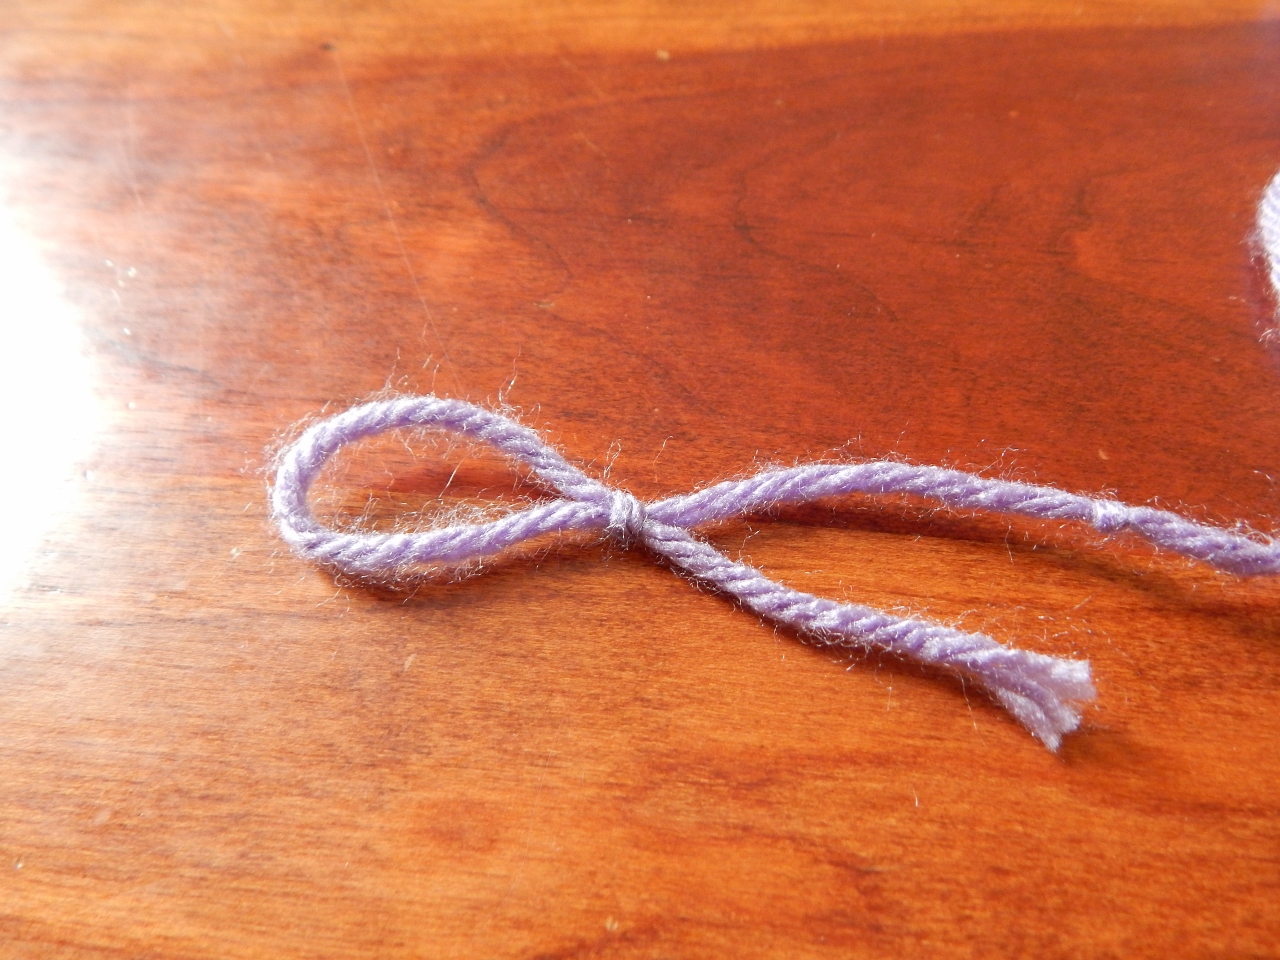
4.  If you want to make a draw-string bag, use your yarn needle to thread a piece of yarn all around the top of the bag.  Don’t pull the yarn all the way through the cloth – leave a tail sticking out.   Make sure not to sew the edges together!  When you come to where you inserted the needle at first, unthread the needle and tie the tails together in a bow.  Now when you pull both tails at the same time, the bag will close.

-Allison (crochet lesson 2) 017 -Allison (crochet lesson 2) 015

Happy crocheting!

***Allison***

Crochet Lesson #1: Crochet Basics and the Foundation Stitch

Hello, folks!  I have decided to do a series on how to crochet.  I like to crochet myself, and I hope you will have fun learning!  I am not a professional crocheter or anything, and I definitely still have a lot to learn, but hopefully I can teach you what I know.

So here’s how I am hoping to do this: in each lesson, I will show you one kind of stitch or skill, and then at the end of the post I will show you a project you can make to practice the skill you just learned.  Here we go!

******************************************************************************************************************************************

The great thing about crochet is you only need to manage one thing, unlike in knitting when you use two needles.  The only things you really need to crochet are a crochet hook and yarn.

-Allison(helium, crochet less. 1) 026 (1280x960)


-Allison(helium, crochet less. 1) 023 (1280x960)


There are several different sizes of yarn, as you can see.  There are also several different sizes of crochet hooks.  You need to have the crochet hook proportional to your yarn. (For instance, it doesn’t work very well to use a huge hook with really thin yarn.)  For starters it’s a good idea to use a medium size hook and medium size yarn.  On the crochet hook it says the size.

-Allison(helium, crochet less. 1) 024 (1280x960)


The crochet hook I’m going to use is size 10, or in letter-size, size J.

To start your foundation chain (basically the first row of your project), you need to make a slip knot.  If you already know how to make a slip-knot, you can skip ahead, otherwise, read on!

First, cross the end of the yarn over itself to form a loop.

-Allison(helium, crochet less. 1) 028 (1280x960)

Take the end of the yarn and put it under the loop.

-Allison(helium, crochet less. 1) 029 (1280x960)

Pull the part of the yarn that is under the loop up and out of the loop.

-Allison(helium, crochet less. 1) 030 (1280x960)


Keep pulling, but pinch the strands of yarn coming out of the loop or you will just make a normal knot.

-Allison(helium, crochet less. 1) 031 - Copy (1280x960)


Keep pinching those strands and pulling the loop until it is tight.

-Allison(helium, crochet less. 1) 032 (1280x960)


You have made a slip knot!  If you pull both ends of the slip knot at once, it will get smaller.  Be careful not to pull too hard or the slip knot will unravel!

-Allison(helium, crochet less. 1) 033 (1280x960)


Pull the ends until the loop is a little bit bigger than your crochet hook, then insert your hook into the loop.

-Allison(helium, crochet less. 1) 034 (1280x960)


Now, weave long end of the yarn through your fingers like this.  This helps to keep your yarn from getting too loose while you crochet.

-Allison(helium, crochet less. 1) 035 (1280x960)


I’m right-handed, so I weave the yarn through my left fingers and hold the crochet hook with my right hand.  If you’re left-handed, do it the opposite way.  Use your non-dominant hand to hold the base of where your crocheting.  (See in the picture below how I’m holding the base of the loop where I’ll start crocheting.)Now, hold the hook in your right hand (or left hand if your left-handed) and wrap the hook around the yarn so that the yarn is looped from right to left.

-Allison(helium, crochet less. 1) 036 (1280x960)


-Allison(helium, crochet less. 1) 036 - Copy (1280x960)


-Allison(helium, crochet less. 1) 037 (1280x960)


 Pull the hook down through the slip-knot loop further down the loop, making sure that you catch the yarn you just wrapped around the hook on the way down.  Once the hook is through the loop, pull it up again to its former position.

-Allison(helium, crochet less. 1) 038 (1280x960) -Allison(helium, crochet less. 1) 039 (1280x960)-Allison(helium, crochet less. 1) 040 (1280x960)

You have completed one stitch!  Now, to make another stitch, just do it again: wrap the hook around the yarn and pull it through the other loop on the hook.

-Allison(helium, crochet less. 1) 041 (1280x960)


-Allison(helium, crochet less. 1) 042 (1280x960)


-Allison(helium, crochet less. 1) 043 (1280x960)


Just keep repeating those steps until you have made all the stitches you need.

-Allison(helium, crochet less. 1) 045 (1280x960)


Do you see how the stiches kind of look like interlocking v’s?  You can count how many stitches by counting those v’s.

To end your chain, cut off the yarn strand that is connecting it to the yarn ball, and take your crochet hook out.

-Allison(helium, crochet less. 1) 047 (1280x960)


Pull the end of the yarn through the loop, and keep pulling it as hard as you can until it tightens into a knot.  You’re finished!

-Allison(helium, crochet less. 1) 048 (1280x960)-Allison(helium, crochet less. 1) 049 (1280x960)

****************************************************************************************************************************************

Phew!  I know that was a super long lesson, but I wanted to make sure that you got this.  Unfortunately, there isn’t really any project to do with just the foundation stitch, although you can use it instead of yarn to tie bows on gifts, etc.  The good news is that you can’t really crochet without knowing this stitch, so you didn’t learn this for nothing!

Have fun practicing!

***Allison***