Moving On {Part 2}

It has been way too long since my last “Moving On” post, and we’ve had quite a few adventures since Part 1! So, shall I catch you guys up on the news? Alrighty then. 🙂

Let’s see, where did I leave off? Oh yes, right before our cousins came to help us paint. Well… they actually didn’t paint much, but my aunt did. XD The kids played Dutch Blitz when we weren’t needed. We’ve all been playing Dutch Blitz a TON lately, and it’s so much fun! Have you played? Not many people have that I know, of but sadly it’s pretty hard to explain without showing you… :/ Trust me, though, it’s great. XD

moving 1

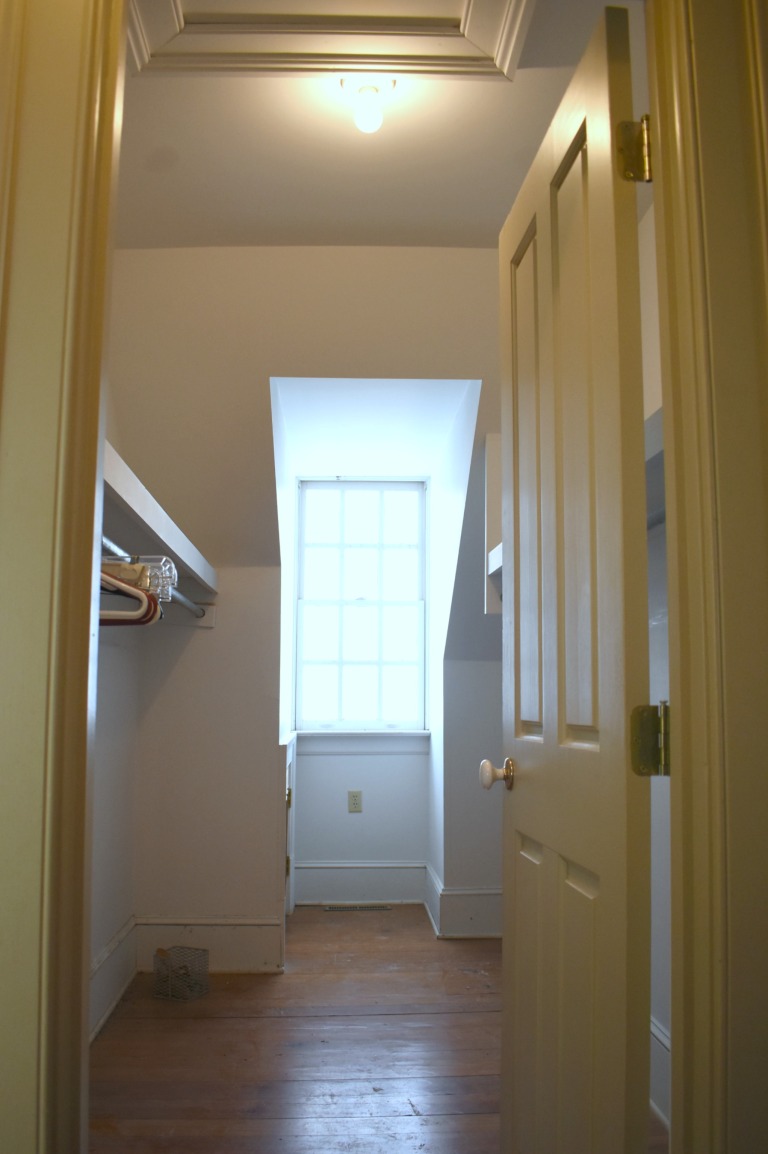
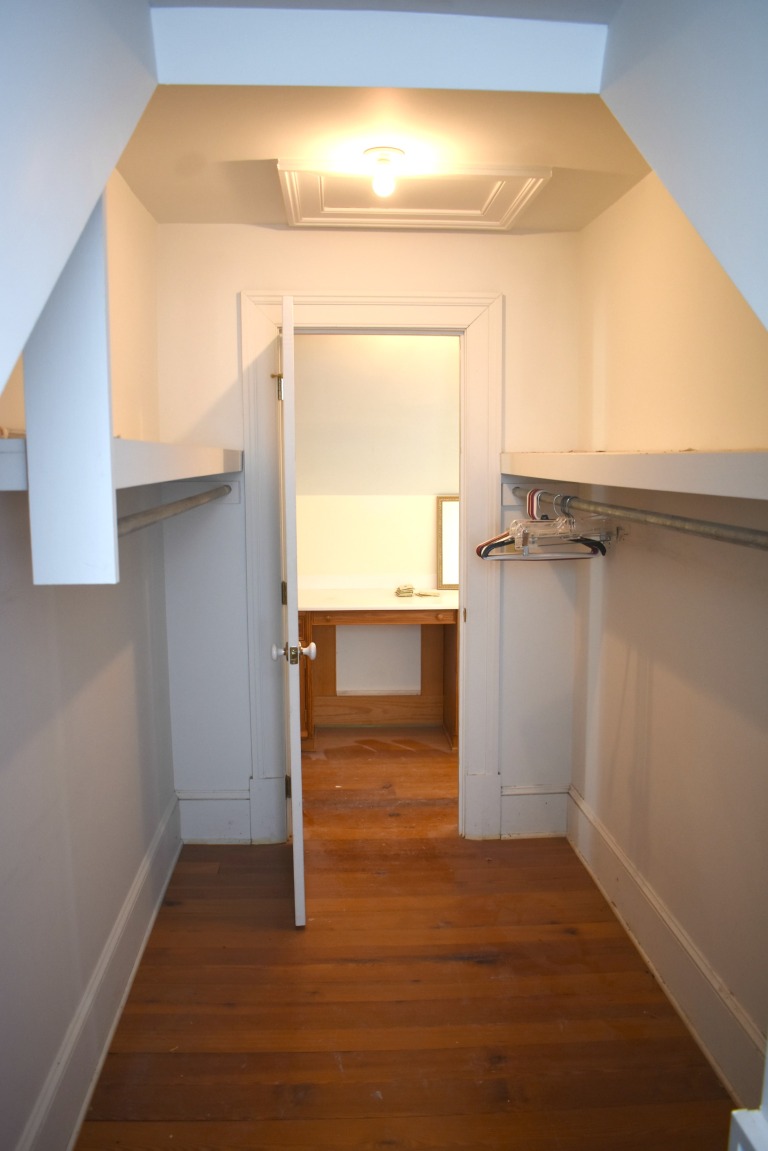
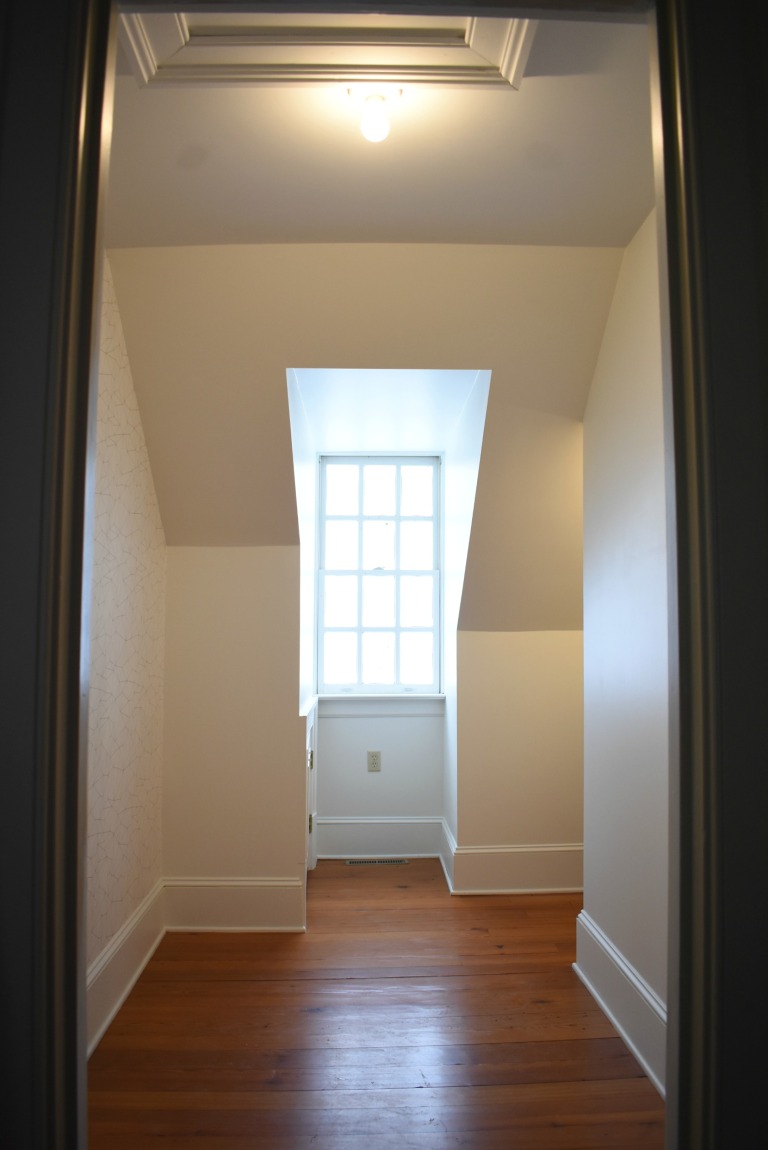
So now the Cedar House is all painted and furnished and it looks GREAT! We still have a few things to fix up before it debuts as an Airbnb, but it’s come a long way. (For instance, we replaced that carpet in the picture above after I took the photo.) Would you guys like to see a tour of the house once it’s finished?

Another thing we’ve been doing is learning to use the rebaling machinery. Part of what we do at the new farm is sell hay and straw, as well as make people’s large, unmanageable bales into smaller ones. Dad runs the machinery, the boys usually get the haybales prepared, and the girls usually stack them on a trailer. It’s hard work, lifting hundreds of 40-pound bales, but it’s good for us. 😉

The hay pictures are all in black and white because the light and surroundings usually weren’t the prettiest. XD I think they look really neat in B&W, though!

moving 4

moving 5

I guess Logan did help stack that time… maybe because I was taking pictures. XD

moving 3

moving 5

A few weeks ago we semi-officially moved down to our new place. We still have to go back to our old farm to pack up stuff and work once in a while, but we’re mainly down here now. 🙂

Since we’re mostly going to be down here, we brought all the live things we have to care for: namely, pets and plants. 😛 I really loved how the plants looked in the back of my car for some reason. XD Does it looks Pinterest-y to you?

moving (10)

moving (12)

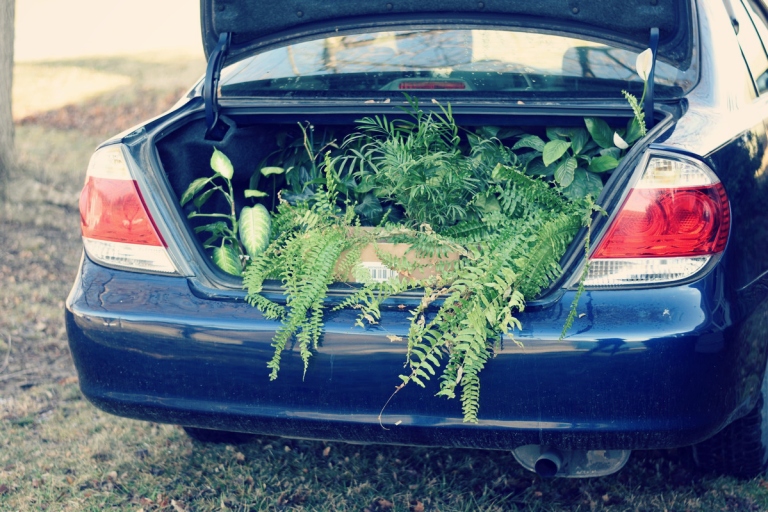
They looked so pretty against the cedar siding. 🙂

moving (4)

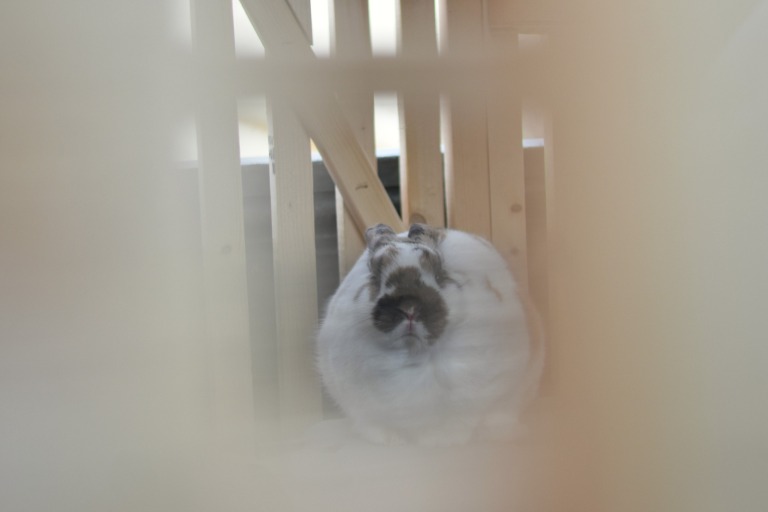
We also brought the bunnies up! Most of the bunnies stayed huddled together at the back of the truck, but Basil was hilarious – she hopped up on a cat crate (with no cat inside) we put there and stayed on top almost the whole time. What made it funny was it was really windy up there, and her fur got blown about every which way, like she was under one of those super strong hand dryers that ripple your skin. XD She didn’t seem to mind, though. Maybe she liked the fresh air.

moving 2

We also brought the cats down, but that was a little more… um, interesting. They were RATHER scared, and once Jinx decided he simply couldn’t wait to use the litter box till we arrived, so… yeah. He didn’t wait. IT WAS BAD. XD XD Ah well, we survived, and the cats are safely in the Cedar House now. 🙂 Maggie, our yellow lab, is quite enjoying the new space too, I think!

Dad had to stop to check on a vehicle at one point and I got some more lovely pictures of mountains at the overlook. ❤ You could see everything SO clearly!

moving 1

moving (2)

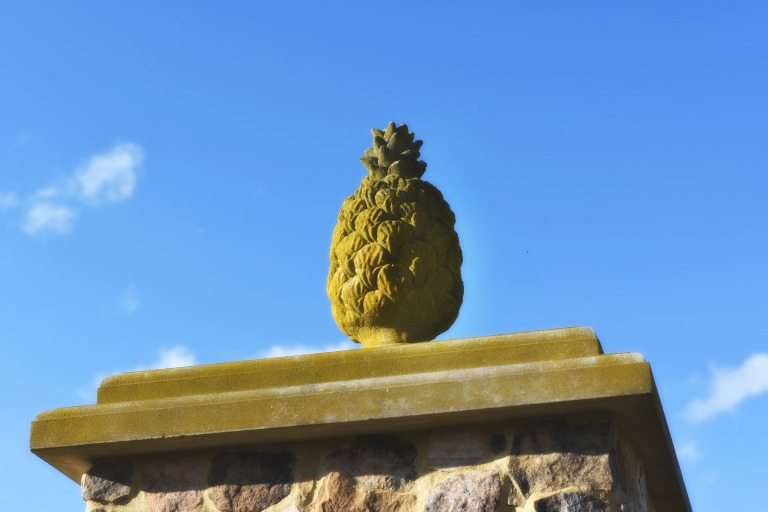
Finally we arrived at the pineapple gates. I don’t know why there are pineapples at the farm entrance, but it’s pretty funny. Especially because one of the pineapples is literally yellow and green with lichen, and in exactly the right places! XD

moving 8

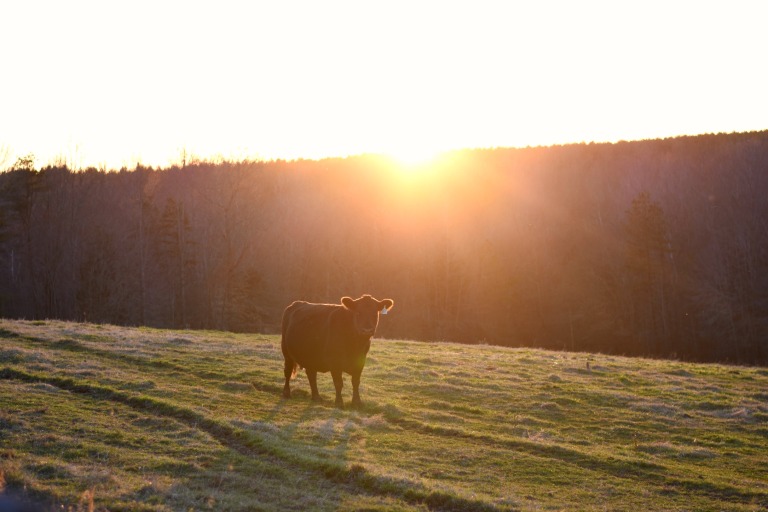
In case you’re wondering if we have animals at our new farm, we don’t. Except for pets, of course. 😉 We’ll probably get chickens later (just not 24,000 like we used to have!), but for now the only livestock are the cows in the leased pastures. They’re not ours, but they are pretty cute. 😉 They also look lovely in the golden hour! Then again, what doesn’t?

you found the secret message.jpg

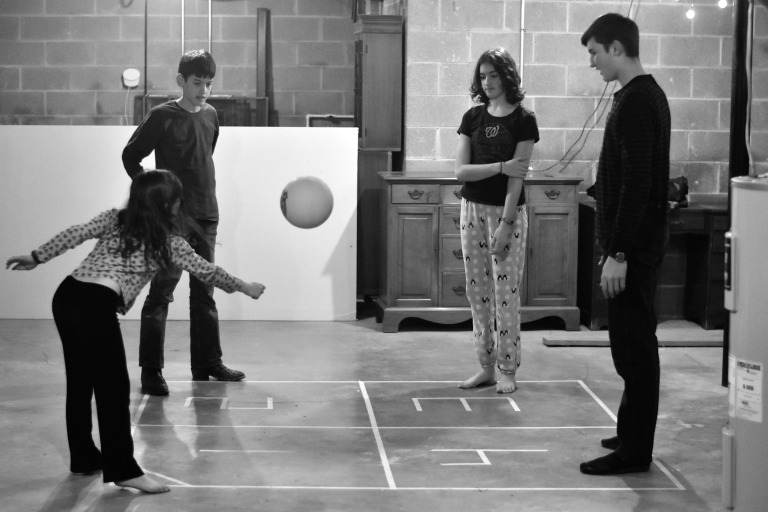
When we first started staying in the Cedar House we didn’t have many forms of entertainment, so Mom thought of Four Square! We laid out the pattern in masking tape on the basement floor, and we’ve been having a lot of fun playing it as a family. 🙂

moving 6

Another fun thing to do here is go fishing! We haven’t caught fish every time, but once we caught nearly a dozen in one day! That was fun. I’ll have more pictures from fishing in a later post.

moving (9)

Ooh, and one super fun surprise we found was a box of really old letters! Part of the big farmhouse was built in the 1850s, and I believe the farm itself is even older. We found some letters from the 1880s! Isn’t that amazing? This letter is one of my favorites, although it’s from 1922, so not quite as old. But LOOK AT THE HANDWRITING. (I blocked out part of the address.)

moving 4

Isn’t that amazing?! We haven’t read it yet because it’s in German, but we should really translate it sometime. 🙂

moving 3

Now I shall end this post with a sunset over the pond. ❤ I love sunsets in general, and reflected sunsets are twice the beauty!

moving (11)

Phew, that was a lot to cover in one post. I hope I didn’t leave anything important out… XD Oh well, I can always tuck it in later if need be. I hope you enjoyed the update and the pictures, and tell me…

Have you had interesting experiences traveling with pets? Have you played Dutch Blitz or Four Square? And would you be interested in a post with more about the Cedar House when it’s finished, or about more old letters and other interesting artifacts we’ve found?

Stay tuned for more posts like this in the future, because we still have the big house to finish fixing up. Man, it’s taking a while. There’s just soooo much to paint and work on. Ah well, it’s going to be incredible when it’s finished, and I can’t wait to move in!

Well, thanks for reading and I hope you have a lovely day, dears!

***Allison***

ART STUDIO {Part 1 + Photowall Review}

featured image 800X800

GUYS GUYS GUYS I AM SO INCREDIBLY EXCITED. Because, as you probably guessed, I’M GETTING AN ART STUDIO. 😀 I have wanted my own space for arts and crafts for practically forever, and I can’t believe I finally get to have one!

My new studio is actually in a closet. XD We definitely don’t need all four closets in our bedroom + bathroom at the new house, so Mom thought I could make the biggest walk-in closet into my studio!

It’s basically a small room, complete with a window and shelves for storage. It’s only about 60 square feet, but I think it will work great for just me. 🙂 However, it certainly wasn’t set up for a studio at first, and that’s what I’ll be showing you today: how I turned a closet into a space for a studio!

PLUS, Photowall contacted me and wondered if I wanted to do a review for them in exchange for a free product, and I was like, “OH YES PLEASE.” (I didn’t actually say that.) XD Are you as excited about this post as I am? I DOUBT IT. XD

Alright, let’s get started! First, this is how the closet looked to begin with:

1

2

3

Doesn’t exactly look like a studio yet, huh? Well the first step toward that goal was to get rid of the shelves and to take off the door for more space. I decided to keep the shelves in that little cubby above because really, it was too small and had too low of a ceiling to turn into anything else.

My brother Jeff helped me with the demo, and then Dad spackled (or plastered) over the marks where the shelves and hinges had been (and where Jeff had applied the crowbar a bit too vigorously, heh heh). After a few coats of plaster and some sanding, it was ready to be painted! I painted it in Valspar’s “Dove White” because I want the studio to look clean and bright, with pops of color.

5

I’ll get more into my color scheme and décor in a later post, but I’m thinking white, navy, purple, pink, and gold. ❤ Ahh, I can’t WAIT!

Anyway, here’s what it looked like after taking out the shelves and door, plastering, and painting. So much better already! Doesn’t it look a lot bigger?

7

Next, it was time to put up the wallpaper, and now it’s time for the review part of the post. As I said, I did get this product for free, but obviously I’m going to be honest about my likes and dislikes, because otherwise what use would a review be? 😉

Photowall is a Swedish design company that sells both canvases and wall murals/wallpaper. Also, one super neat part of their site is that you can upload your own image! So if you have a high-res picture, you can get wallpaper or a canvas with your own photo or art on it! I considered that, but decided to go with a more clean, modern look, like the White Grafo pattern I ended up choosing.

DSC_317921

I went with the premium wallpaper instead of the standard, because hey, why not? It was wonderfully thick and almost rubbery-feeling, like it would wipe off easily. The pattern was printed beautifully as well.

I ordered about 6.7 square meters, which cost $243. Preeetty expensive, especially considering you can get wallpaper at Home Depot for $0.79/sq. ft., compared to $3.67/sq. ft. at Photowall. :[] I also ordered the wallpaper kit, which you can get separately for $20.

However the shipping was free – and super fast! The customer service was also great, in my experience. Here are the boxes the products were shipped in:

DSC_3159

The wallpaper box included the following:

DSC_3174.JPG

  • wallpaper (duh)
  • wallpaper paste powder
  • instructions

And as for the kit box, I was surprised at how many different things were included! It seriously has EVERY SINGLE THING you need to put up wallpaper, except supplies pertaining to mixing up the paste (water, a bucket, and a stir stick).

DSC_3163

  • paste brush
  • wallpaper brush
  • trim guide
  • seam roller
  • spirit level
  • knife
  • pencil

And now for putting it up! It took a bit to mix up the paste and let it set, and it was definitely more work than using pre-pasted wallpaper (or so my mom tells me), but it seemed to work pretty well. Thanks to my mom for taking the next two pictures. 😉

108

One helpful feature of this wallpaper is that the panels are numbered. It’s not just one big sheet, it’s split into several sheets that you cut apart and then paste on. You do have to match up the seams, but it feels more manageable. 🙂 It still took about 2 ½ hours, though, with Mom and I putting it up together.

DSC_3178

It looked SO good once we got it all up, eep! But one thing that really scared me was these brown patches that appeared on the paper as it was drying:

19
Yikes, what a terrible picture. :[]
Thank goodness they don’t stay! It must just take a really long time to dry (more than three days, in fact), but that’s probably because it was cold in there and not super well ventilated. And now, this is how the studio looks thus far:

15
Thanks to my sister Megan for taking this picture. 🙂

14

1312

AHHH I LOVE IT. The wallpaper actually made the space feel bigger for some strange reason, and it definitely made it feel more like a room than a closet. I’m really happy with my pattern choice and with the product itself. 🙂

To recap…

PROS

  • Fast, free shipping
  • Excellent quality wallpaper
  • ENORMOUS selection of beautiful prints and patterns
  • Easy-to-use website and instructions
  • Great customer service

CONS

  • Very pricey
  • Doesn’t come pre-pasted
  • Fairly long application and drying times (at least for the premium paper)

Basically, I absolutely love everything but the price. I would highly recommend the product and company itself – the wallpaper is beautiful, high quality resolution, and scratch/tear-resistant – but I personally would go with a cheaper option if I did it again and not for free.

If the price doesn’t worry you, though, or if you just want one of their beautiful and unique murals you can’t get anywhere else, then Photowall is the company to buy from! Even if you don’t need any wallpaper at the moment, you should totally check out their website – remember they also have a huge selection of canvases, and I’ve heard they’re pretty great too! 🙂

I hope you enjoyed reading this rather lengthy post, and stay tuned for Part 2! In the next art studio post, I’m going to furnish the studio and put up at least some of the decorations. ❤ YAY!

Thanks for stopping by, dears, and have a lovely day!

***Allison***