
Hello friends!
I love receiving pretty printed Christmas cards in the mail, but it’s always extra special to receive a handmade Christmas card. Even if you don’t consider yourself an artist, here are a few simple card ideas you can create yourself! Send them to friends or attach them to Christmas gifts as gift tags.
Break out your pens and colored pencils and let’s make some festive artwork.
Note: This post contains affiliate links. If you buy something through the links, the price won’t change for you but I’ll get a small commission for advertising.
1. christmas tree
A cute and very customizable Christmas tree to brighten someone’s day.

SUPPLIES:
blank card | pencil | various colored pens, markers, etc. | yellow marker | black pen | brown & green colored pencils
INSTRUCTIONS:
- Sketch out a triangle in the middle of your page and add a short rectangle to the bottom.
- Fill the triangle with dots of different colors. I used metallic markers, a silver gel pen, and a yellow marker. Use a yellow marker to draw a simple star on the top of the tree.
- Color in the trunk and lightly erase the extra pencil lines.
- Top each ornament with a tiny square using your black pen.
- Fill in around the ornaments with short, slightly curved, vertical strokes using a green colored pencil.
- Add the final touches. I outlined the star and a few of the lighter ornaments with the brown colored pencil to help them show up better. Voila! Your card is complete.

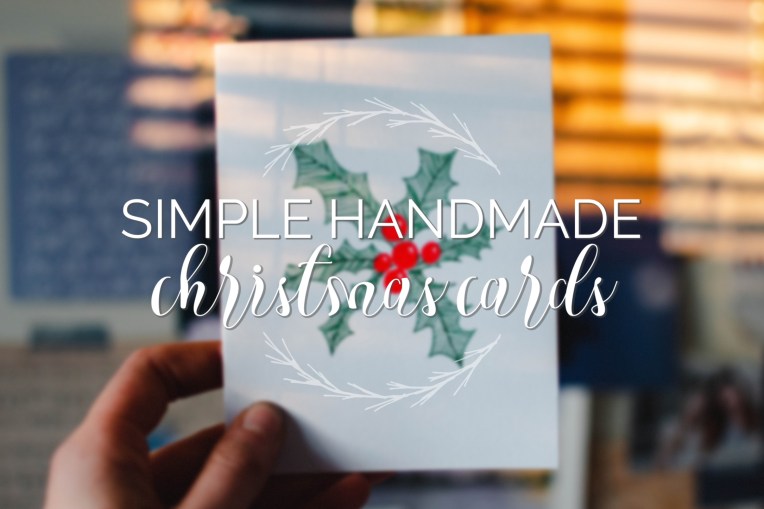
2. holly sprig
This might be my favorite design because it’s so simple but so striking. It almost looks vintage.

SUPPLIES:
blank card | pencil | green and red gel pens
INSTRUCTIONS:
- Sketch out the holly sprig. Start with some different-sized circles clustered together in the middle. Add some curved lines radiating outward like sunrays; make the lines varying lengths and unevenly spaced. Then draw some “waves” on both sides of each line to make the leaves.
- Outline the leaves with a green gel pen and the berries with a red one.
- Draw tiny triangles inside each berry for highlights. Shade in one side of each leaf with slanted lines. Notice that I shaded the right side of each leaf if you turn the page in a clockwise direction, slanting the lines the same way each time.
- Fill in the berries with red, excluding the highlights you drew. Shade the other halves of the leaves with lines slanting in the opposite direction, so it looks like a bunch of V’s stacked on top of each other and gives a feather effect. Voila! Your card is complete.

3. bethlehem star
This one requires a good bit of ruler work if you want to be exact, but of course you could always create a whimsical star freehand if you’re not the mathematical type.

SUPPLIES:
blank card | pencil | ruler | black pen | colored pencils in three shades of yellow
INSTRUCTIONS:
- Use a ruler to divide the page in half four ways. Think of it like drawing a big plus sign and then drawing a big X. Draw two triangles over the center vertical line.
- Draw two more triangles or angles on the center horizontal line to complete the main four-pointed star. Then draw four more angles using the slanted lines, and tuck four smaller ones in the extra spaces. Reference the picture above.
- Divide each of the triangles or points in half. Leave blank space between and around the halves.
- Outline the star with black pen.
- Color in the right side of each triangle half with a dark yellow or orange, going around in a clockwise direction.
- Color in the left side of each triangle half with a medium yellow, and fill in the blank space around that with the lightest yellow. Voila! Your card is complete.

4. snowlake
This could be a good greeting card for any winter month. I love the cute folk-art feel of this one.

SUPPLIES:
blank card | pencil | circle thing to trace around (like a mug) | dark and light blue pens or markers | light blue colored pencil
INSTRUCTIONS:
- Trace around the bottom of a mug or something similar to get a circle. Divide it into six pieces, using a ruler to draw the lines if you’d like.
- Draw a big V at the end of each line, touching the edge of the circle, and smaller V’s going down each line. Add a little hexagon in the middle by connecting the six lines.
- Thicken all the lines you just drew and add some triangles inside the hexagon.
- Outline the snowflake with a dark blue marker.
- Color it in with a light blue marker.
- Outline the circle with the dark blue marker, skipping over the snowflake. Add three dots to the tip of each “arm.” Color in the circle with light blue colored pencil. Voila! Your card is complete.

5. pinecone
This looks a bit more advanced but is actually still simple. The key to getting those vivid colors is to use good colored pencils (like Prismacolor) and pressing down hard.

SUPPLIES:
blank card | pencil | colored pencils in white, dark brown, medium brown, dark green, medium green, and red
INSTRUCTIONS:
- Sketch out the pinecone branch. Draw an oval for the pinecone and fill it in with scallops – long lines of U’s. Draw a thick curved line for the branch, and two sprays of lines for the needles.
- Color in the branch and the scallops with medium brown.
- Thicken the scallops and then color in the space between them with dark brown. Lighten the scallops with white if desired. Draw sprays of lines with the medium green and then the dark green.
- Draw and color in a circle behind the pinecone with red for Christmas or yellow for a sun or whatever color you’d like. Voila! Your card is complete.

_______________________________
I enjoyed making this post so much – I hope you guys enjoyed reading it and possibly creating versions of these cards yourselves. Have fun!
Which card design was your favorite?
Thanks so much for reading, my friends, and have a lovely day!
***Allison***


Very nice! I especially like the snowflake one, and as I’ve been making a lot of homemade cards lately, I’d like to try some of these out. I’d love more posts like this, as I’m always looking for inspiration for creating art. I think you were part of my inspiration for me to get into hand-lettering. 🙂
LikeLike
Well yay! I’m so happy you enjoyed the post, my friend! The cards were a lot of fun to create. Aww that’s great. Hand lettering is a lot of fun.
LikeLiked by 1 person
These are really beautiful, Allison! I love you show the progress as you create them. My favorites are the top one (the tree) and the bottom one!
LikeLike
Thank you so much! Yes I always appreciate progress steps on such tutorials. I love both of those too!
LikeLiked by 1 person
I loved first and last one the most.
LikeLike
I love those as well. ❤
LikeLiked by 1 person
These are great! And your steps make them look so easy.
LikeLike
Aww well thanks! That’s the idea. 🙂
LikeLike
I love handmade cards🤩! Just someone taking the time and effort to make one out of scratch is awesome✨. I just love the different frames leading up to the final card design and that pop of red on the holy sprig – lovely🌚. The detail on that pinecone and little green plants is crazy😮! Beautiful🍁. Definitely my favorite🌚. Hope Sully, your families and yourself are all doing well❤. Been a while since I’ve been on WordPress and I’ve missed your posts – always so wholesome🌚🌼!
LikeLike
Yes I know right?? I love the pop of red on the holly sprig too. And thank you – that one was fun to make a bit more realistic. We’re doing well, thanks! Sully was sick for a while which wasn’t fun, but he’s better now and we’re both so excited for Christmas. How have you been? It’s good to hear from you again!
LikeLike
Always a pleasure❤.
Oh thank God he’s feeling better🌼.
I’ve been great. Just swormed with school work over these last couple of weeks but I’m done with school for the year so lots of free time🎉
LikeLike
Wow, done with school for the year? What a lovely feeling. Hope you enjoy the remainder of 2022. ❤️
LikeLike
I enjoy looking at your art. This post was no exception! My favorite is the pinecone. 😁
LikeLike
Thanks for the sweet comment! The pinecone was a lot of fun. 🙂
LikeLike
I appreciate the work and love that goes into creating handmade cards, and you make it look so easy. It is not! Again, keep sharing your art talents with the world!
LikeLike
I appreciate that too – as well as your comment! Aw well actually these are pretty simple, at least most of them. XD Thanks for reading!
LikeLike
My favorite is the snowflake one, although I might combine some ideas from the other ones! Thanks so much for sharing.
LikeLike
Combining several designs sounds so neat! Thanks for reading. ❤️
LikeLiked by 1 person
These were so cool! This was a great post idea😃. I think my favorite was the holly sprig as well. I love how you filled in the leaves with slanted lines, it looks so good!
-Carmen
LikeLike
Why thank you! Sully helped me think of it. 🙂 Ah yes I love that one! Thanks so much.
LikeLike