Oh my goodness, spring is such a beautiful, wonderful thing. ♥ I have taken SO many pictures lately, like I always do in spring and fall; too many to fit in one post, even though you guys said you didn’t mind long posts. It would be a VERY long post. XD Heh heh.
Anyway, today I’m going to post some landscape photos of our farm. I hope you enjoy!
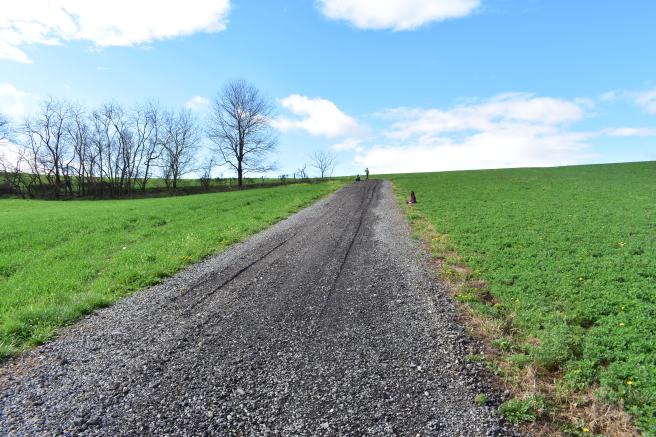
Sometimes we take a little walk/run up this hill before school to get some exercise. 🙂 It’s a beautiful spot!
Our house and surroundings. 🙂 Several of the trees are green(ish) by now.
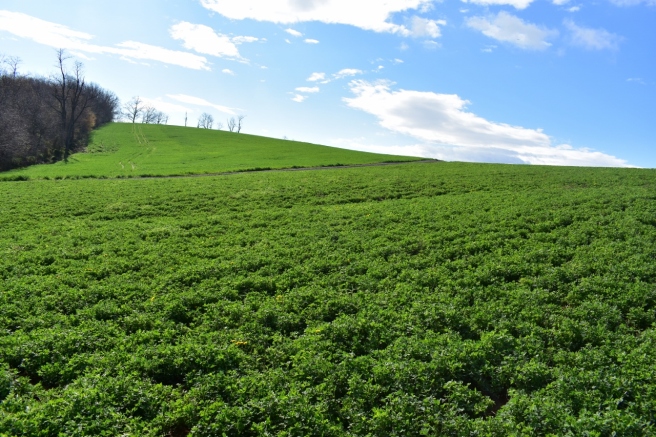
I love how fluffy and soft alfalfa looks.
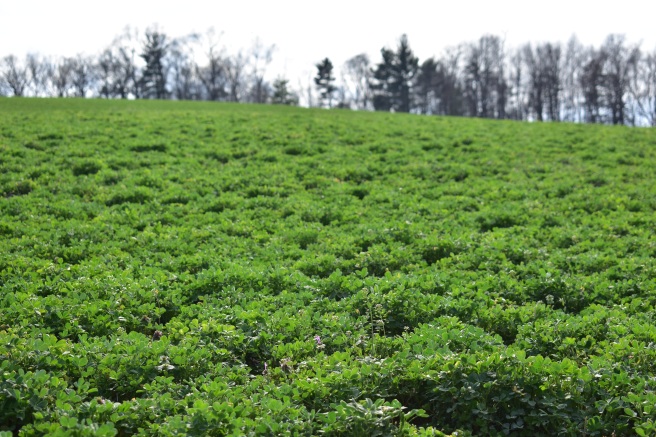
Triticale doesn’t look the same, but it’s still really pretty!
AHH I LOVE THESE PICTURES SO MUCH! I DIDN’T EDIT THEM! *Ahem* It’s just the lighting was absolutely perfect, and the scenery, and… ahh. It’s easy to take these views for granted when I see them every day, but sometimes it’s impossible to ignore their beauty. I’m so glad God gave me all this to enjoy! ♥
I kind of like the effect of the sun through dust. 🙂
Can you see why I love spring so much? AHH IT’S SO GORGEOUS! Do you love spring too? Do you have a favorite of these photos?
Halloo, my friends! I’ve been drawing a lot lately, so I decided to show you what I’ve been working on…
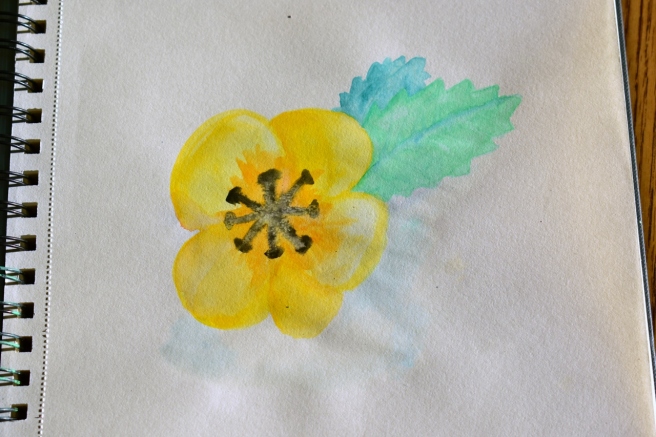
Like a random watercolor flower. XD
I’m kinda proud of this quote because it took me like ten tries to get the lettering right. XD Well actually it isn’t really a quote because I made it up, but you know… 😛
Hee hee! Isn’t this one funny? I made it for an Art Class assignment – art inspired by your favorite smell.
A not too interesting but pretty landscape…
Ugh, the sun was a bit harsh so there are way too many shadows on this picture, but oh well. This is a mixed media piece with tissues for the curtains and rug ( XD ), piano book pages for the sun rays, scrapbook paper for the bedcovers, and duct tape for the window. The rest is just drawing or watercolor.
Another art assignment. 🙂 (Actually a lot of these are art assignments.) We were supposed to do Pop Art, so I did a gummy bear because we were eating them in class anyway. XD
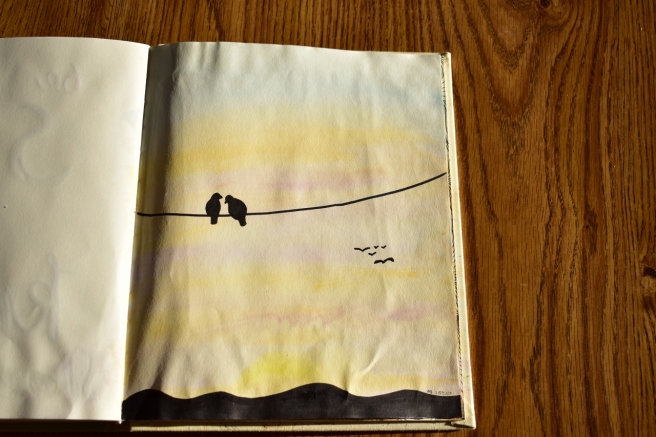
Random birds on a wire. 🙂
Ooh, this is one of my favorites! I really like how the pattern turned out 3-D-ish.
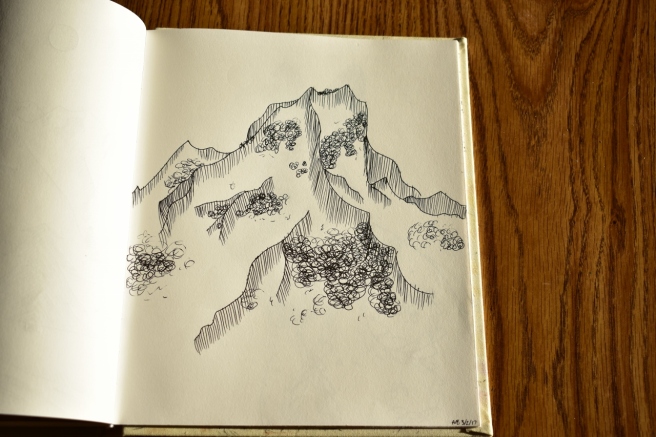
For some reason I felt like drawing mountains…
And more mountains…
I don’t really know why I drew this… XD
This was a “Forced Perspective” piece for art class.
Excuse my fingers. 😛
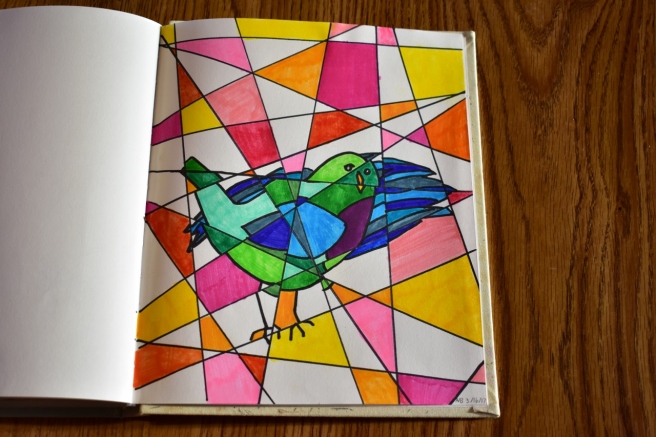
Weird cubism bird…
I decided to include this even though I already posted about here for Art Lab. 😉 I think this is one of my favorite pieces of art I’ve ever done!
Yikes, this is a terrible picture! Oh well, you get the point. I did a mixed media quote/hymn thingy. 🙂 I used tissue paper, book pages, buttons, paint, and even paper clips and corn kernels to make the flowers and leaves! XD
I felt like drawing a girl. Not much other explanation. XD
This is another of my very favorites! I really like the Zentangle/doodle type of art.
It’s kind of hard to take a picture of the whole thing, so here’s just the head so you can see it a bit better. 🙂
One reason why I like this so much is because it took FOREVER to make. XD Especially the mane – I made a herringbone pattern with a super fine-tip pen. It was fun, but quite time consuming. XD
Which do you see first, a face or two trees and a moon?
I got inspiration from Pinterest for this one (and for some of these other art pieces too). I like how it turned out!
That was fun. 🙂 As you can see, I rather like art! Do you? Which of those pictures was your favorite? What is your favorite art medium to use?
HA HA HA! How’s that for a title, hmm? Oh dear, it makes me smile. XD
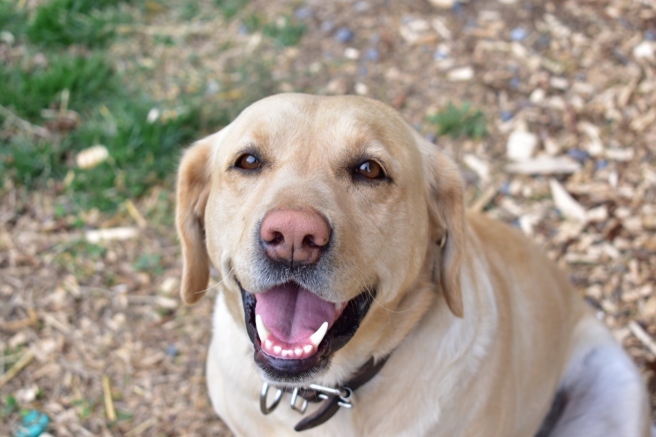
Anyway, as you can tell, I’m going to post some animal pictures today. I shall start with the happy pup, namely our lab, Maggie. 🙂 She’s always so happy and energetic – and cute!
And a B&W version, just for fun. 😉
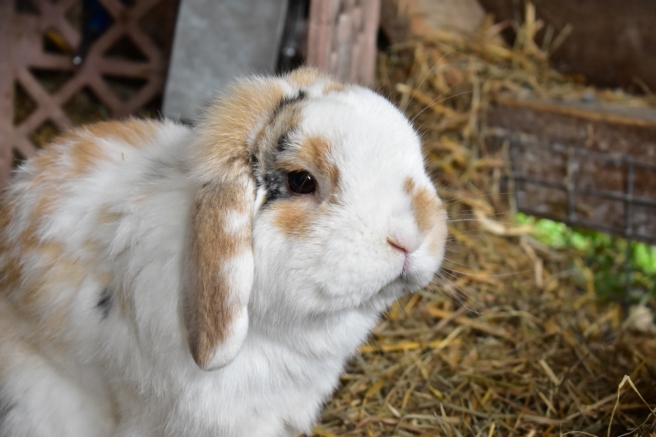
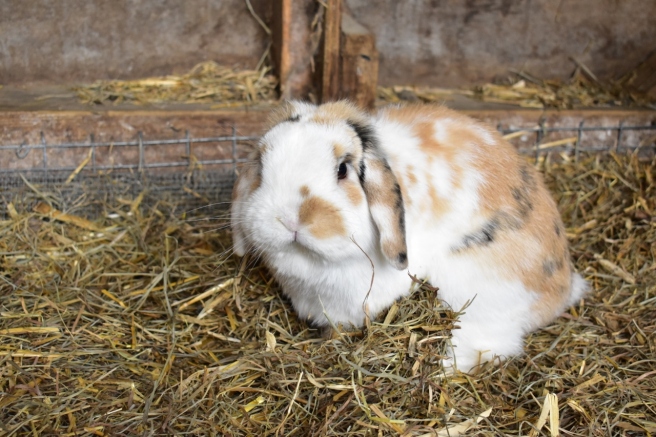
Now for some fuzzier subjects. Or in Willow’s case FLUFFIER subjects. AHH SHE’S MY FAVORITE FLUFFBALL I JUST WANT TO SQUISH HER! 😀
AWW SHE’S SO ADORABLE! 😀
Okay guys, now this next photo makes me laugh so hard. XD XD XD Is it not HILARIOUS?! She was stretching and yawning (did you know bunnies do that like cats?), and I quick snapped a picture. HA HA HA! She looks like a mixture between ferocious and super happy. XD Which do you think?
OH DOSE WITTLE TEETH!
Olaf and Diamond are best friends, I think. 🙂
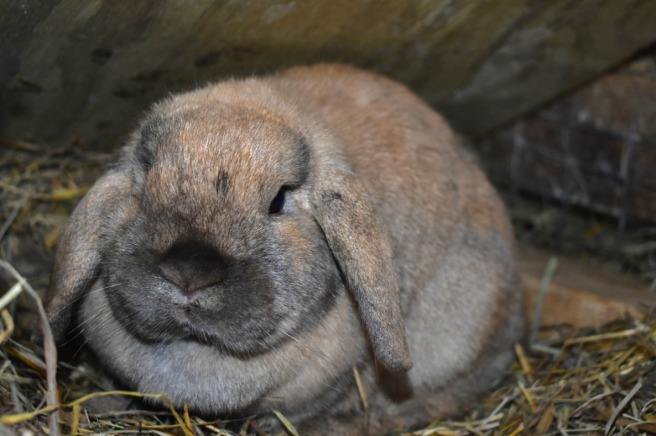
Oh my goodness, Snickers is also SO adorable and photogenic! Don’t you think?
HIS CHUBBY CHEEKS!
Clemmie, of course, had to run away and hide to make me use flash. 😡 XD Hee hee!
Oh my, this picture of Lily makes her look HUGE! That’s because she is.
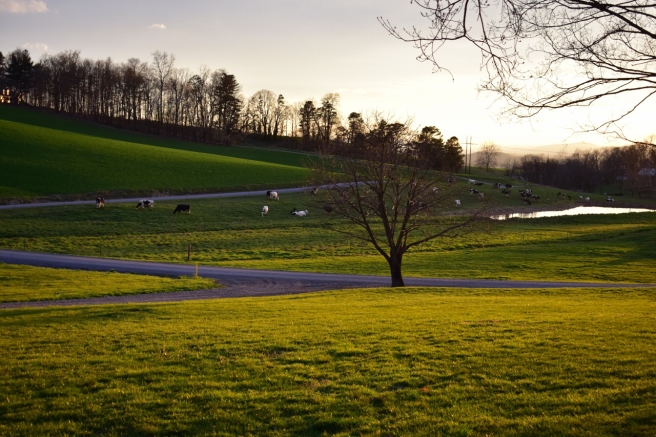
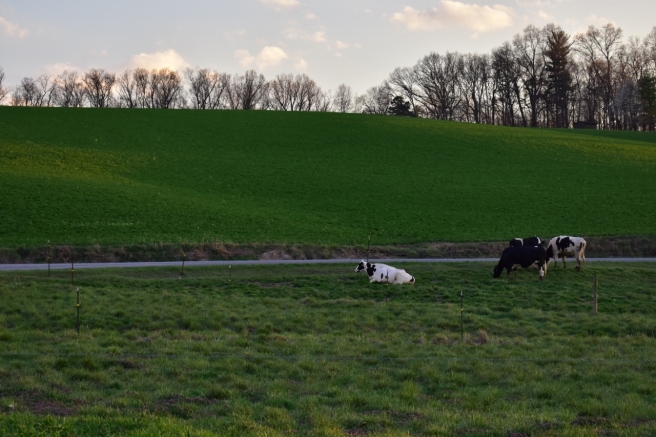
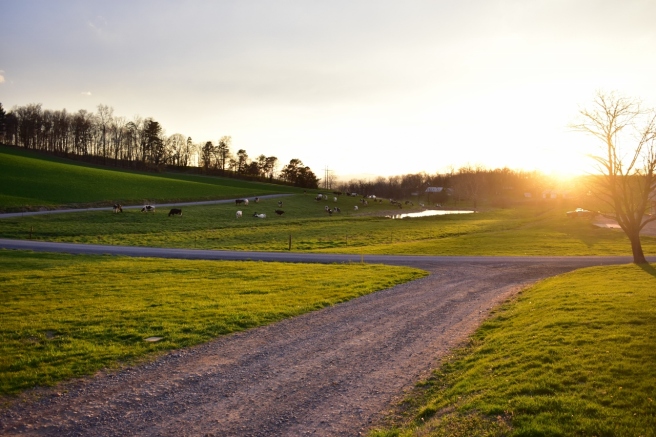
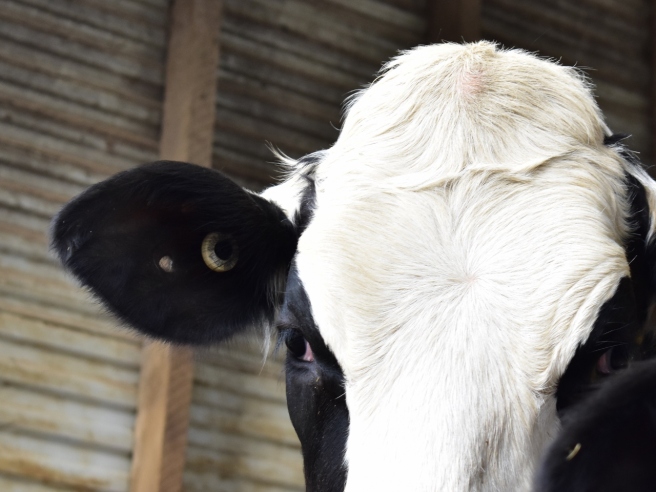
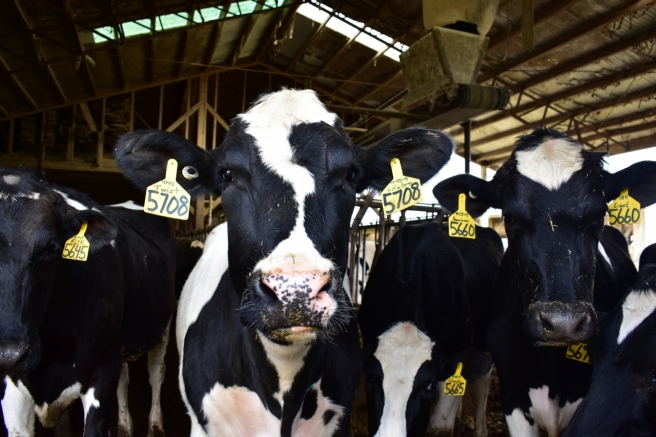
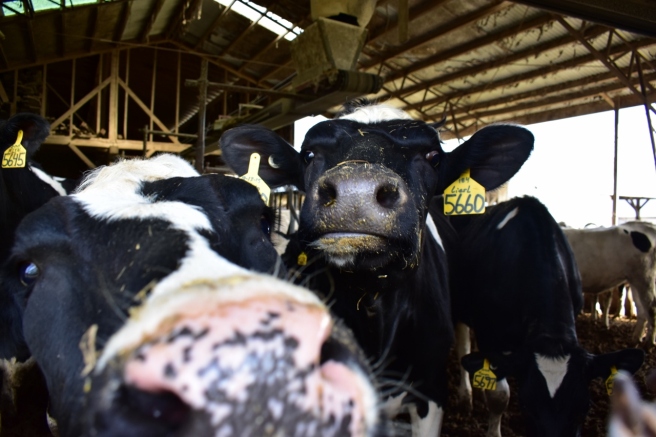
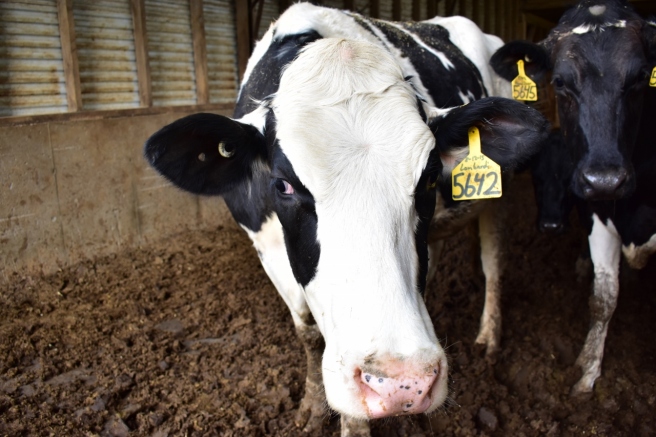
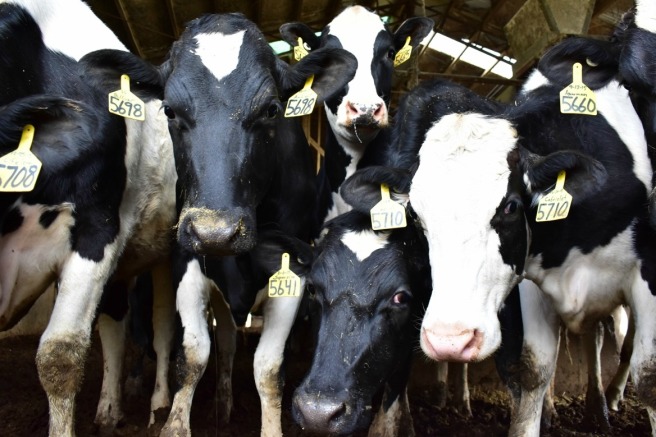
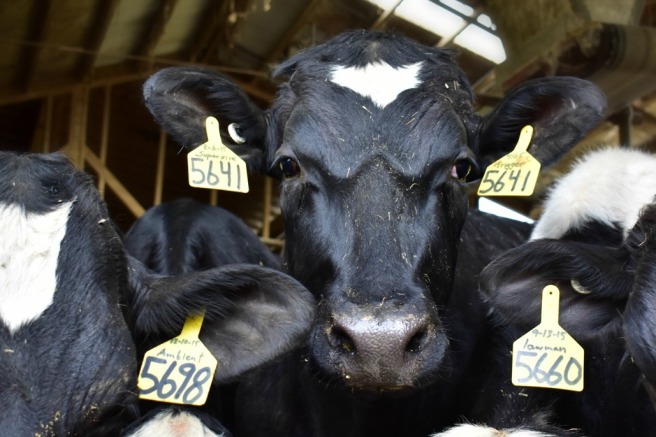
And lastly but not leastly, we have a bunch of rather puzzled cows. XD I remembered I hadn’t really taken many pictures of cows even though we live on a dairy farm (but Dad rents the dairy to someone else so we don’t actually have much to do with the cows). So I took some pictures. 😉
The ear tags tell you who the cow’s father and grandfather (or sire and grandsire) was. Sometimes the names are pretty funny! “Twist” isn’t too bad, though. 😉
It’s so funny how they have topknots. XD
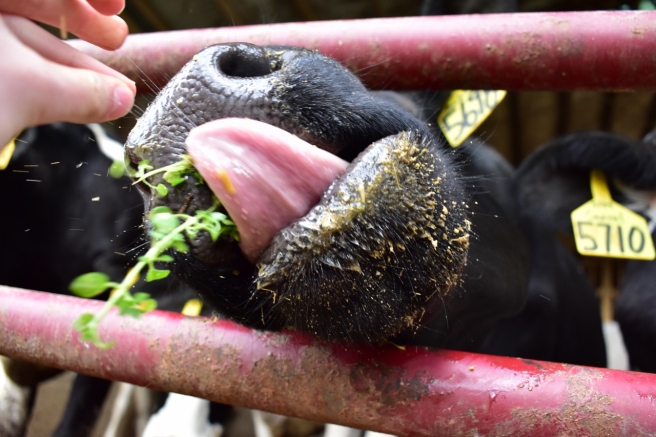
The cows are actually pretty shy, but very curious.
“Hey, look at this! There’s a girl human over here with a strange black clicking thing. What do you s’pose it is?”
“I dunno. Give it a sniff test, will you? It could be dangerous.”
“D-dangerous? Weeell, alright. *Sniff, sniff*”
“And?”
“Blech, it smells like human to me. AHH! IT CLICKED AT ME! IT’S GOING TO HURT ME ANY TIME NOW! RUN AWAAAAAYYY!”
*Shuffle, shuffle* *Nudge, nudge* “Hey, is it safe now?”
“I dunno. You go check.”
“No you go!”
“Uh… she looks pretty friendly to me. A few straws short of a haybale, maybe, but pretty friendly. As for that clicking thing, though…”
“What clicking thing? I want to see the clicking thing! MAKE WAY, MAKE WAY.”
“COMING THROUGH.” *Push*
“EXCUSE ME.” *Shove*
“Okay, let me in, guys. I’ll figure out what it is…”
“Hmm. Hmmmmmm. It looks like a… you know, that thing that clicks, it’s called…”
OH MY WORD ISN’T THIS PICTURE HILARIOUS?! XD XD XD
“*Sniff, sniff* AHA! It says NI-KON. What’s a NI-KON? Do you know, girls? AHH IT CLICKED AGAIN!”
“Wait. Wait, look!”
“Guys, she’s holding something. IT’S GREEN! Green is yummy. Mmm, I want some.”
“But what if it’s dangerous? Maybe it clicks too?”
“Well I, for one, am going to try some. You just watch me.”
“OH MY GOODNESS GUYS IT’S DELICIOUS! MORE, MORE! GIRL HUMAN, CAN I PLEASE HAVE SOME MORE?”
“Oh great. I knew it. It probably has some terrible powder in it to make you hungry for more or something. Sheesh. Humans.”
Hee hee! That was a fun post to write. 🙂 I hope it was fun to read too! Did you like the cow story thing? XD Which was your favorite photo from this post?
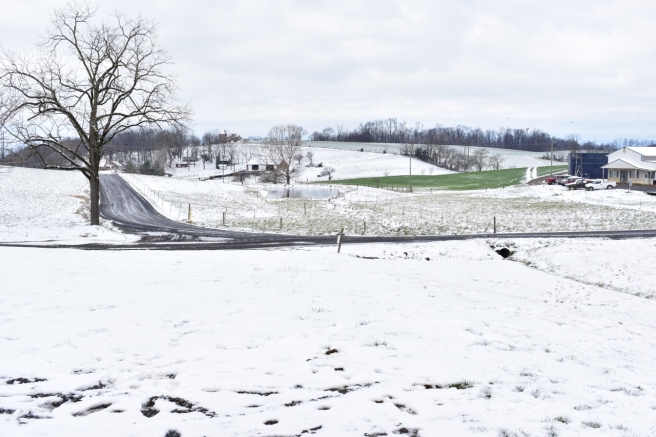
Guys, buckle up for a TON of pictures! This may be one of my longest posts to date. XD
It snowed last Monday/Tuesday, and I just went photo-wild. XD I got a few neat pictures of the snow, but most of the pictures were actually of icicles or ice. So anyway, have a seat and take a peek, won’t you?
Phew, I don’t know where to start! Let’s see. I guess I’ll start with some pretty, icy pictures.
Ice:
It looks like rain drops only… ice drops!
Love this one!The poor pussy willow buds got rather frozen. 😦
Next up…
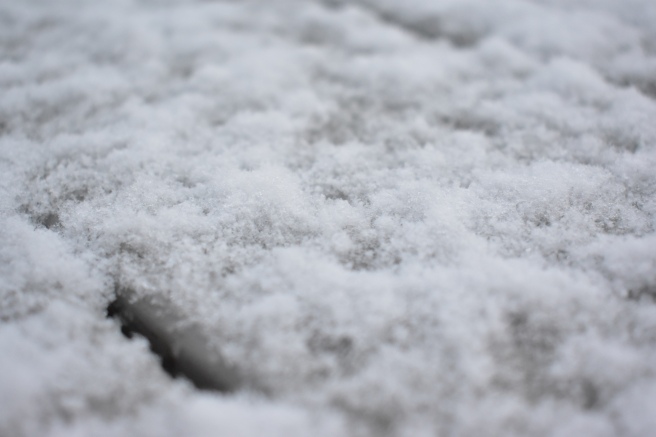
Snow:
It didn’t snow very much, but it still looked pretty!Maggie!Heh heh, I drew this horribly deformed smiley face in the snow with water.
My three youngest siblings made this hilarious but cute snowman. XD After I took these pictures, they made him a “Snow Cool” sign.
They used icicles for the mohawk, a carrot for the nose (obviously), sunglasses for the… uh, sunglasses ( XD ) and a smear of dirt for the mouth.
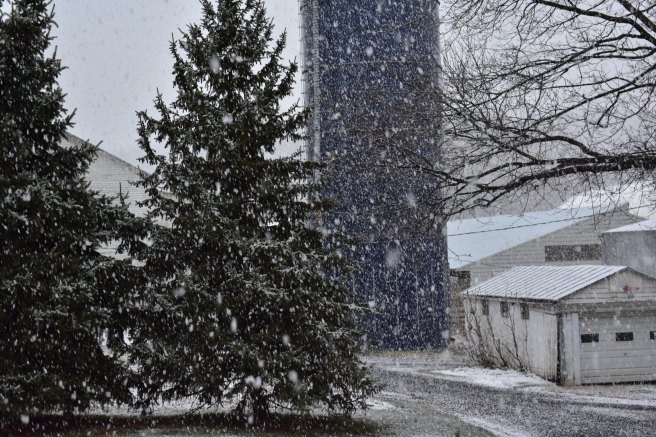
After most of that snow had melted, what do you know? It snowed AGAIN! (And then melted super quickly but oh well.) The most amazing thing about this snow was the snowflakes. I mean, they weren’t even snowflakes, they were more like snowballs! They were the biggest flakes I have ever seen – a whole bunch of snowflakes bunched into a clump, some of which were quarter-sized or bigger. I tried frantically to get a good picture that showed how big they were, but I didn’t really get any. 😦 I did get some pretty pictures, though!
We have a nice view of this silo from our deck. 😀There you can kind of see how hard it was snowing!Fluffy. 🙂
Ooh, yay! Now I get to show you the…
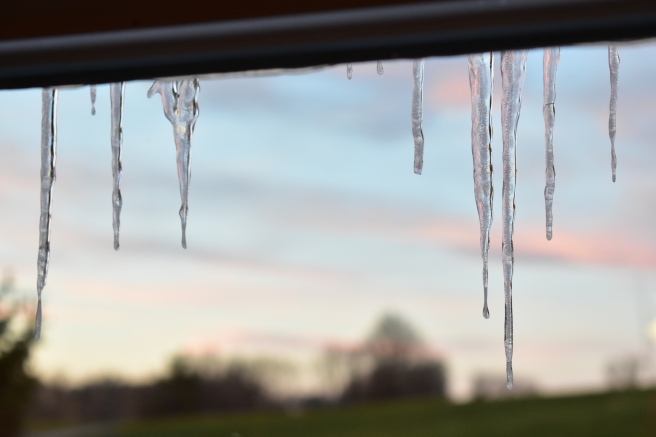
Icicles
After we finished gathering eggs, I ran back to the house to get my camera. I noticed the lovely icicles hanging from the chicken house roofs, and I just HAD to get some pictures. 😉 I’m so glad I did! It took quite a bit of patience and a high shutter speed setting to capture the drops falling, but I had SO much fun experimenting!
Woohoo, two at once!
These icicles are on our house, and I took this picture at sunset.
And that leads us to…
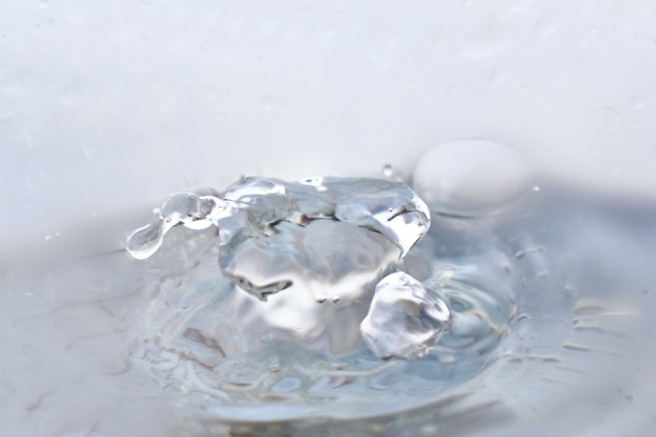
Water Drops
After I had taken quite a few icicle photos, I noticed that the drops sliding off of them were splashing into a puddle. I decided it would be fun to take pictures of that too! Instead of kneeling down in the wet snow, though, I got a (rather dirty) measuring pitcher from the chicken house, brought out something to sit on, and started taking pictures. This also took quite a bit of patience, like the icicles. I got a whole bunch of blurry or boring pictures for every good one. But again, it was so exciting when I DID get a good one! Hee hee!
(Note: I edited these pictures a good bit – they didn’t look like this straight from the camera. 😉 )
And now for my very favorite one. ♥ Ohhh my goodness I love it so much!
And last but not least, we have…
Everything Else
I took several not-so-snowy pictures that I wanted to include too.
Quite a few robins were hopping around this puddle, waiting for spring to come, I guess. 🙂
I love how you can see his reflection.This was a fun one! I made everything black and white except for the robin’s pop of color.
I was pretty tickled to get this next picture. I saw two robins fighting in the puddle all of a sudden and quick pressed the button – and it actually worked! I love it when that happens. 🙂
This is neat, don’t you think?I rather like this one too.
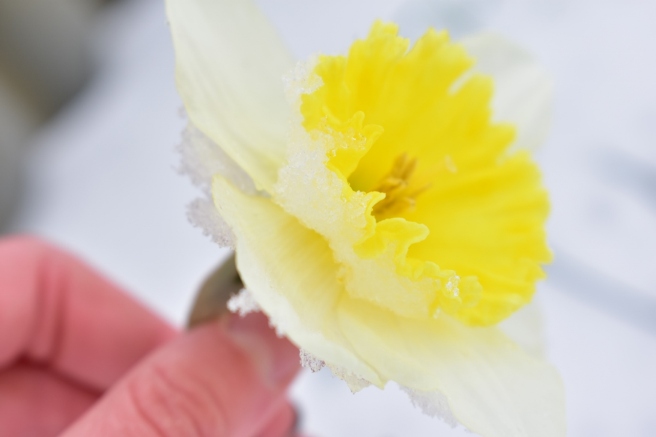
I shall end with this promise of spring. This poor little beauty was stuck face down in the snow when I rescued her, but she’s still so bright and cheery for all that! Daffodils are such incredibly hardy, resilient flowers that can spring back after even such cold trials as this snow. Sometimes it’s hard to be a daffodil, isn’t it? It is for me…
Aaaaannnd I’m finished! Maybe it wasn’t so wise to put all those pictures in one post, but I just wanted to try and see how it worked. XD What do you think? Was that way too much or did you heartily enjoy seeing all those photos at once? Or are you indifferent? XD
If you actually got through the whole thing, which category or picture was your favorite?
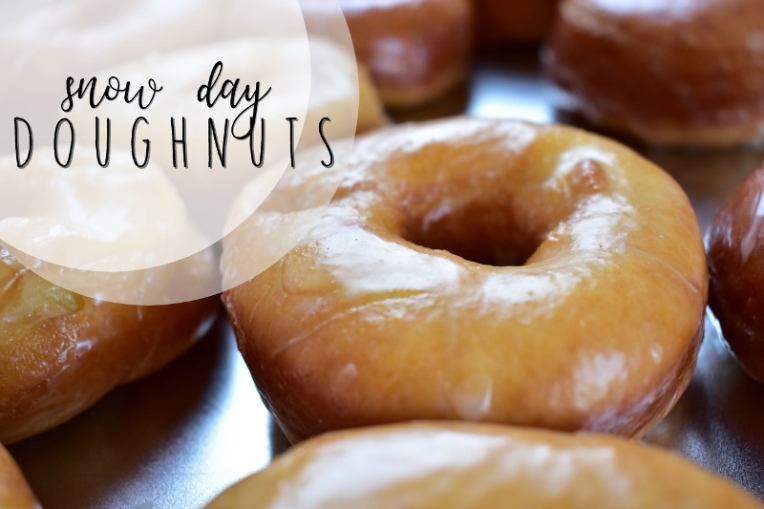
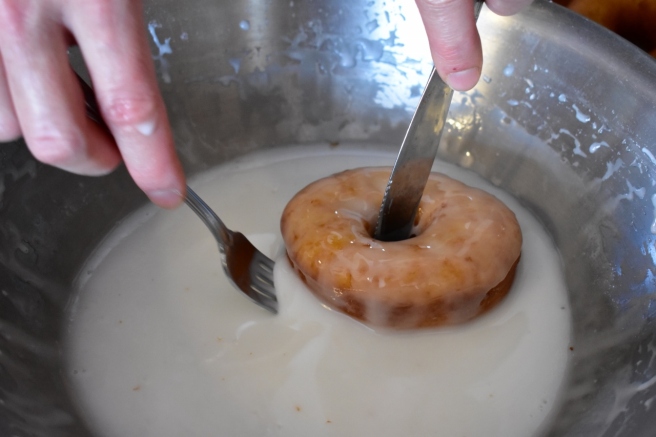
Yesterday it snowed (though a rather disappointing amount), and Mom decided to make snow day doughnuts with us! She and her sisters used to make them on snow days with their mom when they were girls.
It was a lot of fun to do, and it wasn’t actually that hard – just time consuming. Make sure you plan ahead before making doughnuts because it takes most of the day to let the dough rise the two or three times required.
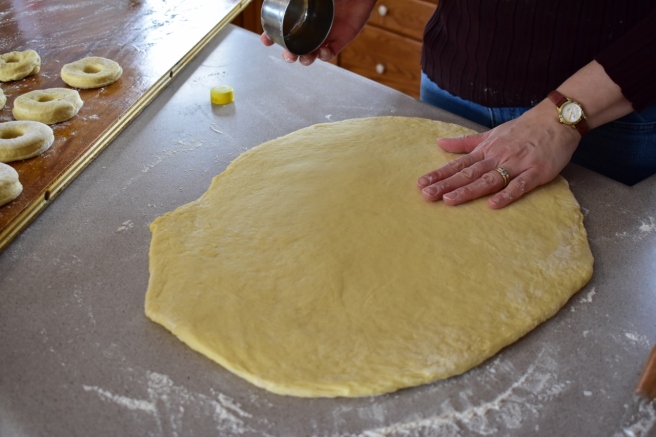
After mixing up the dough, Mom rolled it out fairly thick.
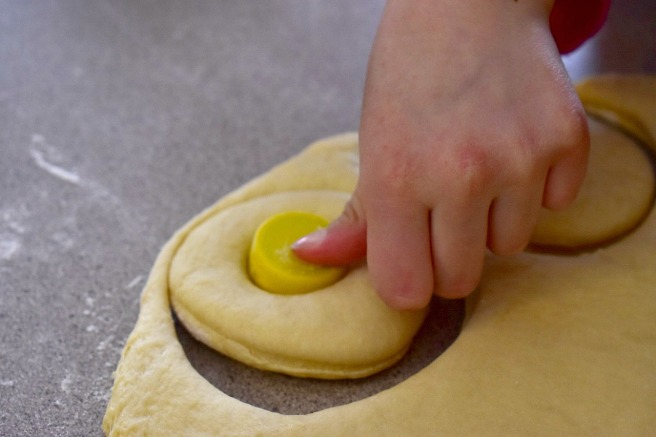
Since we, ahem, didn’t actually have a doughnut cutter (which my mom noticed a little too late XD ) we used a round measuring cup for cutting out the doughnut and a bottle cap for cutting out the hole. It actually worked quite well!
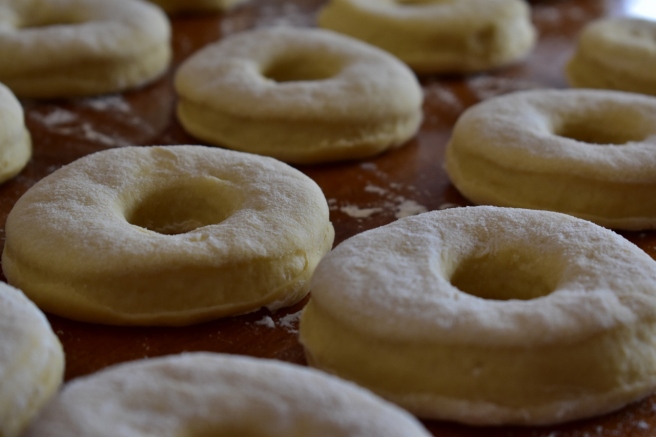
We put the cut out doughnuts on an extra table board which was big enough to hold them all but still portable.
Don’t worry, we made more than this. 😉
We didn’t forget the doughnut holes!
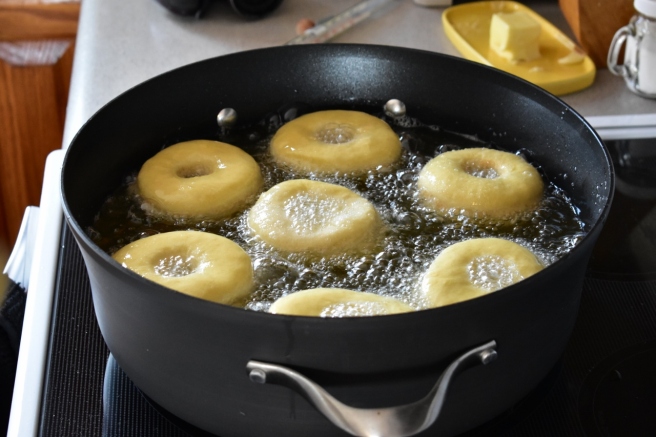
Next we needed to fry them – the fun part! Make sure to slip the doughnuts into the hot oil very, very carefully to avoid getting splattered: don’t plop them in! Watch the middles of the doughnuts and flip them over every so often to see if they’re getting browned. You have to be quick because once they’re done, they’re all done at once.
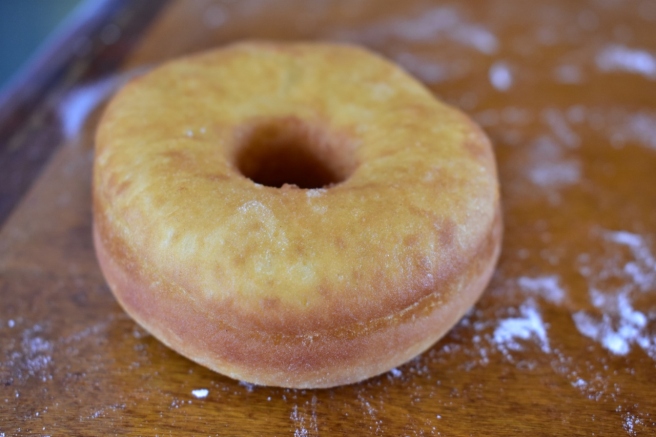
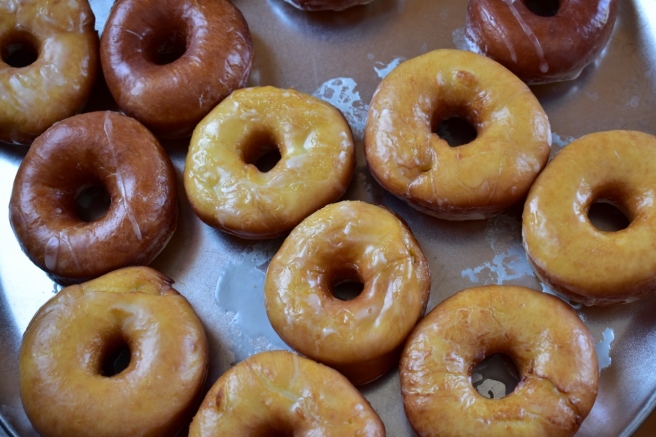
This is what an unglazed doughnut looks like. Pretty tempting, huh?
But take a look at these! YUMMY! Let the doughnuts cool and drain on some paper towels for just a bit, then take a knife and fork and coat them in a delicious glaze.
Yikes, this isn’t the best picture ever, but oh well. 😛
Never forget the poor yummy doughnut holes!
Let them dry on a metal rack, like we did, or hang them from a wooden dowel, and then DIG IN! Ohhh they taste so good! This recipe made about 50 doughnuts for us, so we froze the extras in Ziploc bags to have for Sunday morning breakfasts. Mmmmm!
Okay, are you ready for the recipe now? The doughnut recipe was handed down from my Grandma and the glaze recipe is from Mennonite Country-Style Recipes & Kitchen Secrets (but we always call it Esther Shank’s). Mom and Dad grew up Mennonite, so we use this cookbook a lot! It has a lot of great, classic recipes as well as some more unusual ones, and it also has plenty of tips and tricks for cooking your best. If you’d like to see the Amazon listing, click here.
(*Sigh* Since I’m not a food blogger, I therefore don’t have the fancy “Print this Recipe” button. 😦 XD )
Heat milk. Dissolve yeast in warm water and mix into warmed milk. Add 3 cups of flour to mixture and beat until smooth. Set back and let rise about 2 hours.
Cream butter, sugar, and salt, then add eggs. Add to yeast mixture. Stir in the rest of the flour and let rise until dough doubles in size.
Roll out the dough, cut, and let rise again. Fry in fat or oil at 375 degrees. Glaze (see below).
Glaze Recipe:
1 lb. powdered sugar (3 1/2 cups)
6-8 tbsp. boiling water
1 tsp. vanilla
Mix until smooth. Pour into small, deep bowl and dip the fried doughnuts with a fork and knife. They should be well covered with a thin coat of glaze.
(Update: Woops! Apparently I accidentally published this post before it was finished, but I’ve fixed it now. Heh heh. XD )
Oh my goodness, I took TONS of pictures the other day! Like, more than 100. XD Since I don’t think it would be the best idea to post all the pictures at once, I guess I’ll break them up into a few posts to save your poor scrolling fingers. XD
Oh, and hi, by the way. 😀
Annyway, we have this spot on our farm we call “The Sycamores,” because… well, it’s a row of sycamores. The trees are so big and old and beautiful! I love the white bark.
This seed pod or seed ball or whatever you call it is kind of deformed…
But this one’s better. 🙂I love how the seed balls look like ornaments hanging from the branches!
One tree is especially big and white at the top. ♥
Not all the bark is white, though, especially at the bottom. It’s only white where the bark like this flakes off.
Several cedar trees grow among the sycamores, and while they aren’t as pretty, they’re still neat up close.
Yikes, we found a scary looking thorn bush. O.o
Isn’t it amazing that this feather was stuck in the crack like that? Ha ha, okay, I’m kidding – I put it there so I could take the picture better. XD
Here’s one last tree, but I don’t know what kind this is. And it’s dead. But it still looked really neat against the blue sky, don’t you think?! Ahh, I want to go back and take some more pictures soon!
Alrighty, I guess that’s probably enough pictures for one post. 🙂 Tell me, which picture(s) was(were) your favorite(s)? (Wow, that was complicated. XD ) Stay tuned for the rest of the 100 pictures! 😀
I’m back with another edition of the photo editing series I’m doing! 😀 (Click here to see part one, and here to see part two.) Today I want to go over how to use PicMonkey to touch up a portrait of a person, as well as some clever tricks to use the touch-up tools in unexpected ways. I’ll also talk about how to use PicMonkey to create the perfect book character portrait for those of my blogging friends who love writing. 😉 I hope you find this helpful!
To begin with, let’s go over some common problems and how to fix them with the tools in PicMonkey’s “Touch Up” tab.
Blemishes: Well obviously you can use the “Blemish Fix” tool, but you can also use the “Clone” tool if that doesn’t work (because sometimes it doesn’t). If Blemish Fix doesn’t work and you don’t have Royale, you can fix small blemishes with the “Draw” tool from the Effects tab. Set the hardness to zero and use the dropper to select the skin color surrounding the blemish. Then paint over the blemish, like you’re using concealer.
Erasing Flyaways and Frizzy Hair: I learned this tip from the PicMonkey blog! Use the “Wrinkle Remover” tool to erase that annoying halo of frizz around your subject’s head. Wrinkle Remover softens whatever it’s painted on to, so it basically blurs the stray hairs (and wrinkle lines) into their surroundings. On a related note, you can shape eyebrows with wrinkle remover too – just don’t overdo it! XD
Brightening Eyes and Other Shiny Things: The “Eye Brighten” tool is one of my favorites in the touch up tab because it’s so versatile. Use it to, duh, brighten peoples’ eyes, but also to brighten the eyes of animals and pets. Cat’s eyes, especially benefit from a little brightening to make them pop. Eye Brighten is good for other shiny things too, like jewelry, cameras, and watches, that are shiny in real life but are dull in the picture. Oh, and one more thing! Paint Eye Brighten onto the eyelashes, eyebrows, and any other parts of the face you want to sharpen and darken.
“Ironing” Wrinkly Clothing: You can actually smooth out wrinkles in clothing with Wrinkle Remover too! Imagine that. 🙂
Whiten Eyeballs: You can brighten the whites of your subjects eyes with Teeth Whiten! You can also use Clone to erase blood vessels or other blemishes.
Now that you know a few tricks, let me show you some examples.
I have to say, I did use the Exposure tab first (mainly Highlights), since this photo was so dark to begin with. But after that, I used a little bit of blemish remover/clone; some eye brighten (for eyes, camera, and watch); wrinkle remover to tame Megan’s flyaways, blur the background, unwrinkle her shirt, and smooth her eyebrows;and I think some airbrush too. Looking good!
photo credit via abarefootgal.wordpress.com
Here I used wrinkle remover again to erase my flyaways and a few wrinkles in my shirt; and then eye brighten on my eyes, eyebrows, and Lily’s eye. 🙂
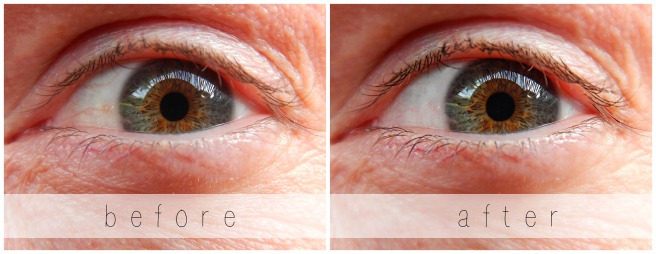
This is my Dad’s eye. 🙂 I chose not to erase the wrinkles completely, but I did smooth them just a tad. I also used Teeth Whiten and Clone to whiten the whites of his eyes, Mascara ( XD ) to darken his eyelashes, and Eye Brighten to brighten his eyes and darken his eyelashes as well.
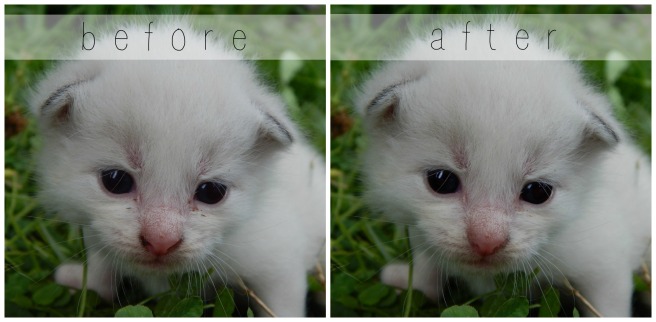
Here’s an example of using “Touch Up” to edit photos of your pets. This little kitten was so cute, but it’s face was kind of dirty. The only things I used here were Blemish Fix and Eye Brighten.
Now for the other part of the post…
How to Create the Perfect Book Character Portrait With PicMonkey
What happens when you know exactly what your character should look like, but you can’t find any pictures on Pinterest to match? That’s a terrible problem. 😛 But never fear – here’s how to fix it. Start with the best photo inspiration you have of your character, the photo that’s the closest thing to the picture in your mind. Try to find a picture where the structure of the face and hair is right, even if the colors are wrong. Then change the color of the character’s eyes, hair, lips, skin, etc. on PicMonkey!
Here’s an example I did. I’ve been trying to find the perfect picture for a character I have in mind, but I just couldn’t find it. This was a close one, but the eyes and eyebrows needed to be darker and the hair lighter. I touched this photo up on PicMonkey, and voila! (original photo via)
I used Highlights and Clone to lighten her hair, Eyebrow Pencil to darken her eyebrows, Spray Tan to turn her irises brown, and Mascara and Eye Brighten to darken her eyes and eyelashes. It’s a lot of fun to edit pictures like that because they turn out so different than the original!
Before we finish, here’s a few miscellaneous tips:
Don’t Overdo It! This is one of the most important things to remember when editing portraits. You might be tempted to make your subject’s skin look perfectly smooth and their eyes look super shiny, but that looks fake. Stick to realistic edits unless, like for book characters, you’re purposely making them look different.
Go Royale: Unfortunately, a lot of the Touch Up tab is Royale. If you take pictures of people a lot, you might want to consider upgrading to Royale to get these and many more features. I have Royale, and I love it! It is, however, 30 something dollars a year, so I would recommend thinking about how much you’ll use it before buying it.
Improvise: If you don’t have Royale, you can often concoct your own Touch Up tools from various free effects and features elsewhere in PicMonkey. (For instance, using “Draw” instead of Clone.) The more you use PicMonkey, the more you’ll be able to master it.
So that’s about it! Many of the tools I didn’t talk about are self explanatory, so have fun experimenting by yourself! 🙂 If you have any questions, I’d be happy to hear them I’ll try and help you the best I can.
I absolutely love Clara’s random photography posts, so I thought I would try to do a similar kind since I have plenty of random photos anyway. 🙂 I hope you enjoy!
Random Topic #1: Spring
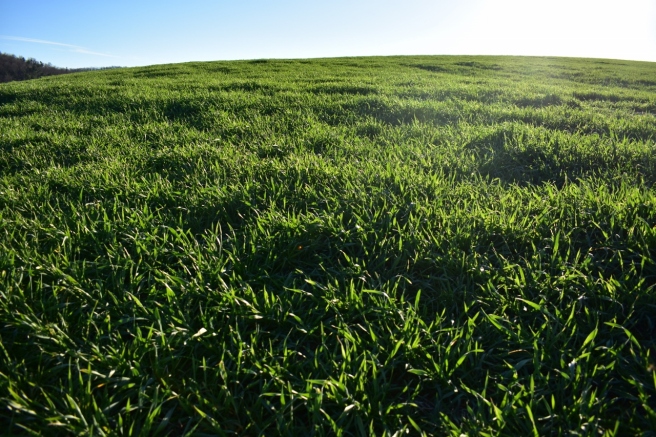
I was about to say that spring is on the way, but then again, it’s 29 degrees outside, so… XD But the daffodils are blooming and the grass is getting green, so you at least THINK spring is here until you go outside.
Ohhhh pictures like this make me happy with the golden sunshine on the green, green grass. So pretty!
Random Topic #2: Bonfire Days
I already wrote a post about a huge bonfire we had recently, but there were a few extra bonfire-related photos I didn’t show.
The fire was so hot that we couldn’t get close enough to roast hot dogs, so my grandaddy though of an ingenious solution! He hauled out some long, hollow metal poles and stuck the roasting sticks in the end. That way you could move them around from a safe distance. XD My uncle and brother, not to be outdone, just got up close to the fire and shielded themselves by putting their jackets over their heads. It was quite the hilarious scene, but it worked!
Oh, and we also cooked potatoes, but the photo of that was terrible, so I decided to leave it out. 😉 But that’s a really fun thing to do at a bonfire: wrap a few potatoes in aluminum foil, poke some holes in them with a fork, and bury them in hot coals from the fire. Apparently we left ours in a bit too long, because they had a nice thick shell of blackened potato around the edges ( XD XD ), but they were quite tasty in the middle! Hee hee!
Isn’t this picture so funny? XD
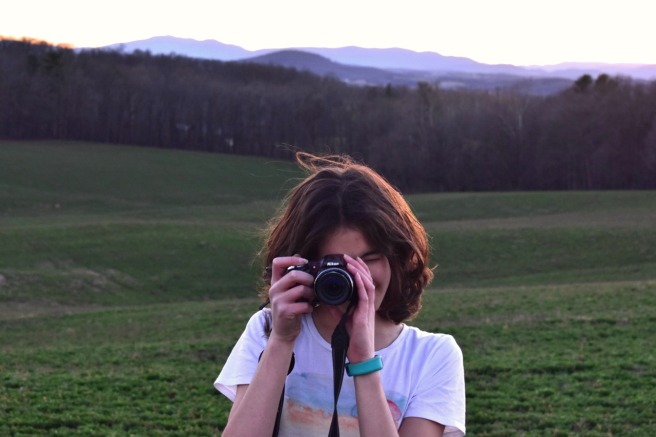
Megan and I took pictures of each other taking pictures of each other. That was confusing. XD
Aww, Maggie dear!
Another fun thing we did was play with glow sticks. We started by tossing them around out in the field, and discovered that if the person carrying the glow stick ran far enough into the darkness, the glow stick really looked like it was floating when they waved it around. It was so weird. After that, we cracked some of them open and drew on our hands. XD Probably NOT the wisest idea, because there is actually a tube of glass inside glow sticks that cracks too when you break it. So yeah, maybe not a good thing to “try at home”… but it was fun while it lasted! XD And it looked really weird – like you were glowing from the inside out.
Random Topic #3: Eyes
If you’ve followed my blog for a while, you might have noticed that I really like photographing and drawing eyes. I think they’re fascinating, and extra beautiful up close! I had fun editing these photos.
Ohhh my goodness I love this photo so much! This is my friend’s eye, which I edited to look bluer than it really is. (But it is still so beautiful in real life!)
Eh, the pictures of my eye aren’t nearly as pretty, but I like all the different rings of color. 🙂 My eyes are definitely brown from a distance, but colorful up close.
This is a fun angle! It makes my eyelashes look super long, hehe. O.o XD
Random Topic #4: A Beauteous Sunset
Even if you haven’t been following my blog for very long, you might know that I also have a weakness for sunsets. XD I love how they’re all different, but all glorious (well, most of them)! I took these pictures at my grandparent’s house. The sunset was quite unique that night – the clouds looked like a washboard or something!
I edited this one (as you can tell).
Random Topic #5: Yummy Lemon Pies
Mom found this delicious recipe in the latest edition of “The Magnolia Journal” magazine. I tried it out, and it was pretty yummy and VERY rich. 🙂 One thing that we noticed is it could use a little bit more lemon juice next time. I didn’t fill the 2/3 cups super full since I was squeezing real lemons and I wanted to have an extra lemon for garnish.
I am quite happy with how the editing turned out on these photos. They still aren’t anything extraordinary, but they sure are better than this: *shudder* I did lots of different things, but some of the main ones were cooling the temperature of the photo, boosting highlights, and using the fancy focus and miniature effects.
Ugh. 😦
Random Topic #6: Party Food
While we’re on the topic of food… XD
This has been a while – my little sister’s birthday was the middle of January, heh heh. XD But anyway, better late than never, right? My mom always makes us a custom cake, and my sister chose a fox. Mom saw this great idea for a coconut fox cake on Pinterest, and it turned out adorable! She also made fox cupcakes, but I didn’t get pictures of those.
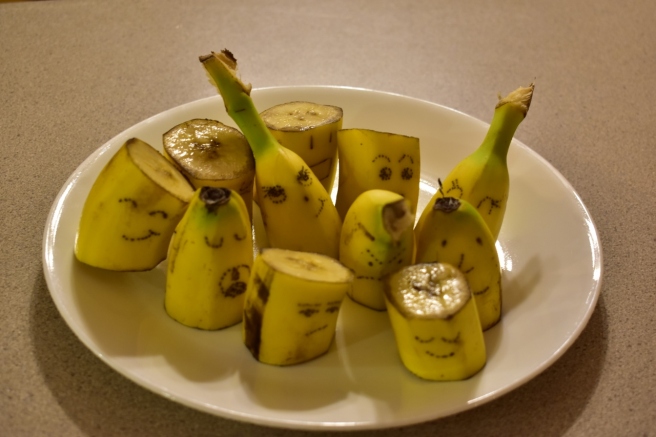
For my sister’s birthday supper she chose bananas as one of her sides. 😀 I had fun playing around with banana “tattoos” to make them more special 😛 It’s actually really simple: just poke holes in the peel with a toothpick, and soon the holes will darken by themselves. So fun!
Ugh, sorry about the bad lighting.
Random Topic #7: Uh… I’m Not Sure What to Call This…
Heh heh. I just had two lonely pictures leftover, which I took on the day of the rabbit photoshoot. So here they are!
Well that was rather anti-climatic. XD
Well, that’s about it, folks! So what do you think? Do you like this kind of post? What was your favorite random topic?