Can you believe it’s less than THREE WEEKS until Christmas?? I’ve been playing Christmas music and making fires in the fireplace and loving the Christmas decorations we put up (which I’ll hopefully post about soon!). Anyway, in honor of the season, today I’m going to show you guys a tutorial on how to make easy but beautiful Christmas-themed art.
Welcome back to another Art Lab post! Today I’m going to be showing you my drawings for Inktober 2018. Inktober is a challenge to draw one pen or ink drawing each day for the month of October. You’re supposed to follow the “official prompts” which I’ll show you in a bit, and then share your art with others.
I’ve never done this challenge before, although I’d heard of it, but one of my lovely readers asked if I was doing it, so I decided to try it! I’m glad I did. 😀 Even though I didn’t strictly follow the rules (it was close to the middle of October before I had time to start), I did use all the prompts and drew something every day when possible. 🙂 Continue reading →
WOOHOO Art Lab is back! I’m so excited to show you guys the post for today: 20 simple art prompts to help you erase artist’s block. 😀
Alright. So I’m going to give you the art prompts, explain each one a bit, and show you some of the art I’ve made using the prompts. Quite a few of these work especially well for ATCs, but you can use your sketchbook, a canvas, whatever! Ready?
Go.
Draw a colorful black and white animal. Because art is great for showing things you never see. Paint a colorful panda, zebra, penguin… skunk. Have fun. I made this ATC ages ago…
Draw your favorite music. Put on your playlist and draw what you hear. What color is the song? Blue, yellow, black, pink? Is it a soft, wavy line or an angry spiky one? Draw three or five of your favorite songs stacked on top of each other and frame it.
Paint a pretty background and write a word/quote on top. Super simple, super pretty. I like to use watercolor and black or white gel pen. Look up pretty fonts on Pinterest if you like.
Use a white gel pen to doodle on black paper. This is SO satisfying and fun! I did another (rather short) Art Lab post about it here.
Draw a huge picture of a tiny thing, and vice versa. A crumb, a bug, a part of your fingerprint… fill the whole page and draw in lots of detail. On the other hand, how small can you draw an elephant that still looks like an elephant? I know cats aren’t exactly huge, but I did draw them tiny.
Pick three markers without looking and only use those for a drawing. If you watch art videos on YouTube, you may know this as the Three Marker Challenge. 🙂 Somehow only having limited colors seems to kickstarts your creativity.
Draw a close-up of a tiny detail of something. The stitching on your jeans, your dog’s nose, the center of a flower… I’ll bet a collage of several close-ups would look really neat! Like those mystery pictures in the backs of magazines. It’s also fun to draw several close-up views of one object: your cat’s eye, paw, nose, ear, whiskers, and put them together.
Paint something by not painting. Negative space is fun to play with. I think watercolor is especially neat for this technique. It works well to paint the whole page with water except the silhouette of what you’re drawing, then swirl on some paint. What do you know, another cat.
Draw your dream house and decorate it. Or your dream bedroom, or craft studio, or kitchen. Who knows, this drawing might come in handy when you get a chance to build it!
Close your eyes and scribble. Turn it into a drawing. This is a super fun and simple prompt, which I also made a post about here.
Draw a silhouette with a galaxy behind it. Actually draw the galaxy first, but you know. And guess what? I ALSO made posts about how to draw galaxies! What do you know. There’s one here and one here. Once you’ve made the galaxy, draw a silhouette of a wolf, a person, a tree – the possibilities are endless (maybe)! Or you could draw a galaxy silhouette.
Draw on something unusual. A leaf, a crumpled brown paper bag, yesterday’s newspaper, an old book page, etc.
Use words instead of lines to draw. Draw yourself a story. Instead of drawing lines, write tiny words. Instead of coloring something in, color it in with different colors of words.
Draw a picture of what nothing would look like if it was something. I… don’t even know if this is possible. If you do it, I WANT TO SEE IT!
Draw what smiling and crying feels like. Don’t actually draw someone smiling or crying. Use colors and lines (and objects besides people or facial features) to convey the feeling.
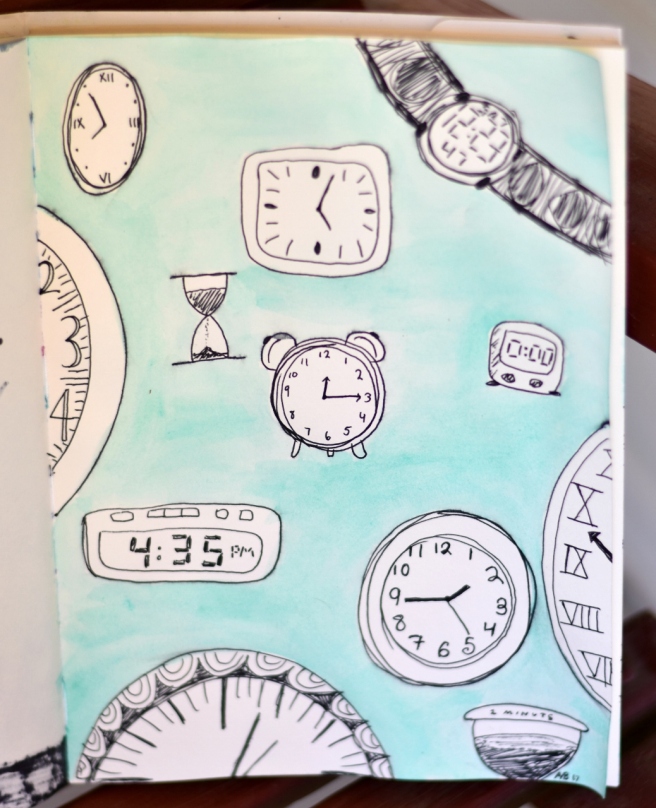
Fill up a page with different versions of the same thing. Draw a hedgehog twenty different ways. Draw ten different cats. Fifteen different trees. It’s fun.
Draw with a non-art supply. Try using coffee, makeup, dirt, nail polish, smashed berries, food coloring, or whatever else you can find.
Cover a page in lines, circles, or patterns, and watercolor on top. Another super simple but super pretty prompt! Just keep in mind that if you draw with a pen, you’ll need to let the ink dry before watercoloring over it.
Paint yourself without using lines – only colors that describe you. Go for sort of an impressionistic style here I guess. Use blotches of color instead of smooth lines, just for interesting.
Fill a page with watercolor swatches and doodle on top. SO FUN! I got this idea from Pinterest here. And this is mine:
That was fun! I hope these ideas inspired you, dears. Which one was your favorite? Would you like to see more art prompt posts like this?
If you drew something inspired by these prompts, I’d love to see it! Click here to see how to send in a picture of your art and help us fill our gallery over at the Art Lab blog.
Also, here’s an image especially made for pinning if you want to save this to Pinterest for future reference. 😉
Yay, I’m so excited to show you this art today, guys! According to your requests, here is a tutorial for the technique I used to create the last envelope art in this post. It’s a super fun technique and the inspiration behind it is absolutely beautiful too. So let’s get started, shall we?
First of all, the…
Art Prompt:
I found this really amazing spray paint artist who has a YouTube channel called “Skech Art.” He is SO good! When I think of spray paint art I picture graffiti, but he makes actual paintings on canvases. Here’s the video:
Okay, so I could do without the unicorn (I think it kinda distracts from the gorgeous scenery), but isn’t it AMAZING?! There’s another equally amazing video here that you should really watch too. 🙂
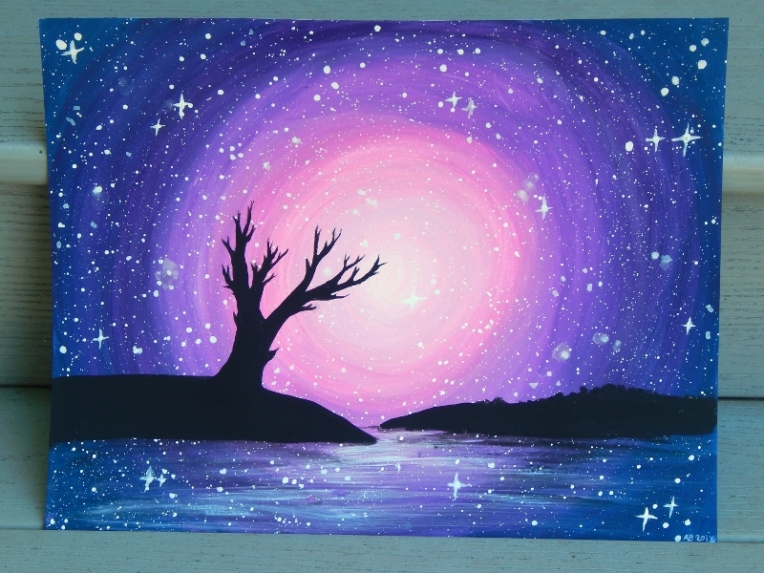
Alright, now for the tutorial. This technique is great for lots of things, like envelope art, ATCs, or just a painting on watercolor paper, but I think it would look especially nice on a canvas. (I used a piece of white cardboard, though, if you’re wondering.)
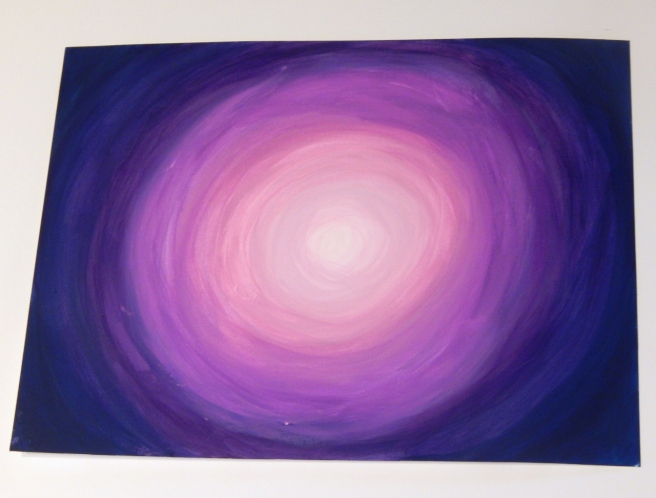
1. You’ll need a few different colors of acrylic paint that go together well, plus white and black. I used pink, a few different shades of purple, and a dark indigo.
Paint the outer ring with your darkest color. Don’t worry if it gets a little messy, like so. 😉
2. Blend a ring of the next darkest color (like dark purple) into the outer ring you just made, overlapping the paint colors so they blend.
3. Now just keep adding new rings of color, making a gradient from dark to light. Use white for the very center. Tip: Blending works a lot better if the paint is still wet, so try to do these rings all at once instead of letting them dry between circles.
Ahh, it’s looking so pretty, isn’t it?
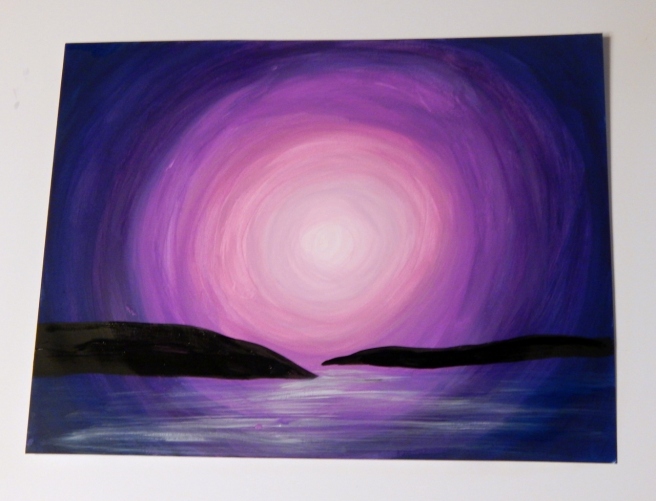
4. Add some long black blobs for islands to the bottom third of the picture, like so.
5. The islands kinda look like they’re floating, so we need to anchor them. Use your ugliest brush with coarse or frazzled bristles to paint some white streaks under the islands and create the illusion of water. Tip: Don’t use much paint and make sure your brush is nice and dry to create perfectly imperfect streaks.
6. The islands still need shadows to cement them into the picture. Paint some black streaks right under the islands to make their dark reflections. (Wow, that sounds scary. XD )
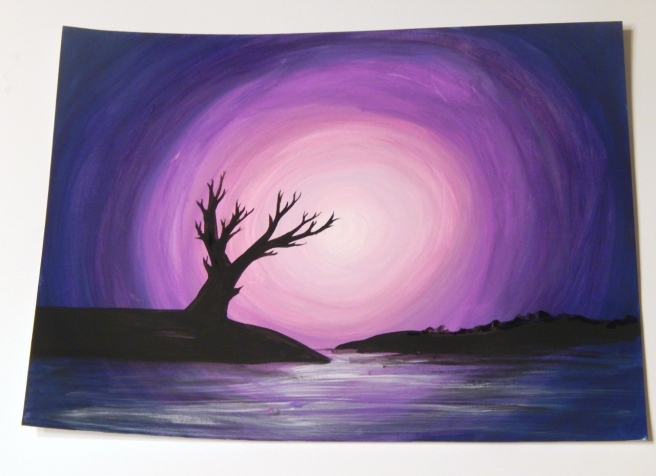
7. This is probably the hardest part: painting the tree. If you’re good at drawing trees, go right ahead and start painting, but if you’re not the best, like me, it might help to practice a few on a scrap piece of paper. My tree didn’t turn out quite as good as I had hoped, but you know what – that’s okay! You can always make a new and improved picture next time. 🙂 It also helps to look at some pictures of trees for inspiration.
Tip: I’ve found that it makes the branches look more realistic if they’re wider where they join the main branch and then taper to a point.
I also made a bumpy line for trees on the second island. 🙂
8. The stars are the finishing touch. Use your coarse paintbrush to splatter white paint all over your picture. Actually I should have done this part before I painted the islands, but I just painted over the black silhouettes and it turned out fine. 😉
Tip: It’s easier to splatter the white paint if you thin it with just a bit of water. Then tap the paintbrush handle on your finger to flick paint across the paper. If I do this again I think I’ll make slightly fewer stars because it can get overwhelming.
I also like to make a some twinkling stars by painting small crosses over a few of the dots.
Ta-daa! And there you have a beautiful galaxy-moonset-silhouette-ish picture. 😀
I hope you enjoyed this tutorial, my friends! Do you think you’ll give it a try? If you do, I’d love to see your artwork! Click here to see how to submit in your artwork to the Art Lab blog and help us fill our gallery.
Oh my, I think it’s past time for an Art Lab post, don’t you? Today I want to show you a beautiful piece of art and some art I made inspired by it. Here’s the prompt:
Ohhhh isn’t it gorgeous? I love it! And in case you don’t have mountains near you to look off of (you poor things XD ), I’ll give you a picture that I took of the real thing. (If you’re curious, it’s from this post.)
Photo Prompt:
I love this. ♥
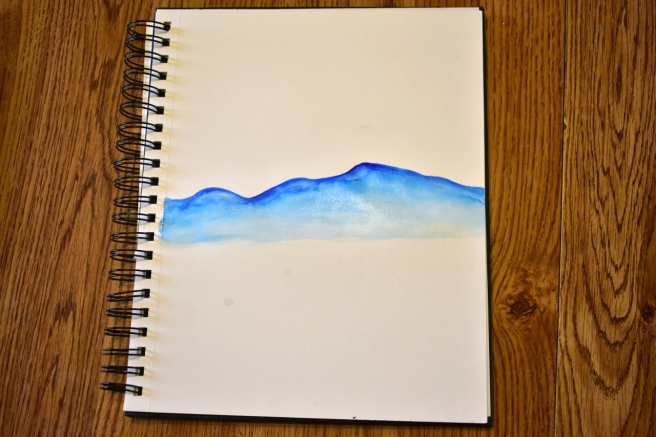
Now are you ready to break out the watercolors? Here’s how I made my mountainscape…
Step 1:
(The proper way would probably be to start with the background, but I started with the mountains because I didn’t know quite how far back they would go. 🙂 )
Use a really deep blue for the foreground mountains. Paint an irregular, medium-wet line of dark watercolor and draw it downwards, lightening it with more water as you go. (Okay that sounded really complicated, but basically just play around with it until you get dark at the top and light at the bottom. XD )
Step 2:
Use a different, lighter blue for the mountain ridge behind it, and do the same thing. Keep going until the mountains fade away to barely visible. I also decided to add a few more ridges in the foreground, like so:
Step 3:
Next you can work on the hills. Use a few different greens, and gradient your color from dark at the top to light at the bottom like you did with the mountains. Looking great!
Step 4:
Now for the sky. Again, start with a dark blue at the top and fade it downwards (are you starting to see a theme here? XD ). I dabbed off some of the paint with a paper towel to make puffy clouds.
And you’re done! So pretty! 🙂
I also made an ATC kind of like my painting but without the hills.
So, do you like this idea? Which was your favorite, the main painting or the ATC? Do you have mountains where you live?
To see more art inspiration like this, check out the official Art Lab blog right here. If you made a piece of art inspired by this post, we’d love to see it! Click here to see how to enter your artwork into our Art Lab gallery.
I’m so excited for today’s “art lesson” on how to draw galaxies! I learned this from the lovely video down below which was made by a teenage artist named Sydney Nielsen. She is super good at drawing!
Art Inspiration:
Ahh, so pretty. 🙂 I decided to use a slightly different technique but with the same idea for today’s art.
I started with a black paper, so it would blend in with the rest of the drawing better, but you could definitely use white if you want. I also wanted to try using oil pastels instead of colored pencils, and it turned out very well! So just a note: whenever I say “oil pastels” in this tutorial, you can also use colored pencils like she showed in the video.
Let’s get started!
You will need the following:
paper, blank envelope, or ATC
oil pastels (or colored pencils – the higher quality ones like Prismacolor work best for blending)
white acrylic paint
paintbrush
white gel pen (optional)
1. Like the video showed, I started with light colors and gradually blended in the darker shades. I used the pink and blue combination because 1.) it looked so pretty when Sydney used them and 2.) there were several shades of each in my oil pastel box. XD
Blech, what terrible picture quality. XD
2. Next I drew in the white sparkle stars. I think this is what makes the piece really special and space-y. 🙂
3. Almost done! Just need to finish the stars yet. Get out your white acrylic paint and start splattering. It works best to get your brush a little wet before splattering the paint, but you don’t have to. Do NOT do this step on your mom’s favorite fuzzy rug or in your best Sunday clothes. Trust me, that will not end well. XD
If you want, add a few more sparkle stars with a white gel pen. I like to do this because they stand out more than the pastel or colored pencil stars do. And you’re done!
Isn’t it pretty?
I hope you enjoyed this episode of Art Lab, dear readers. 😀 Have fun! And like always, if you make some art inspired by this post and would like to share it with us, we’d be delighted to see it! Get the details on how to send to us here, over at The Art Lab blog.
My pen-pal Grace and I made this mandala together. We took turns adding a section each time we sent our letters until it turned out like this! Isn’t it pretty? 😀
Mandalas don’t have many rules. The basic idea is to create a symmetrical, circular design by adding consecutive rings of doodles. It’s fun to play with the position of the mandala – you can have it in the center of the page, running off the page, or in the corner, which is what Grace and I did. This is how the mandala looked from start to finish:
Wow. I realized this post is really short. XD Heh heh, oh well! I hope you enjoyed it, short though it may be! If you made some art inspired by this post, we’d love to see it! Visit this page to see how to help fill our art gallery.
Do you like doodling mandalas? Do you have a pen-pal?
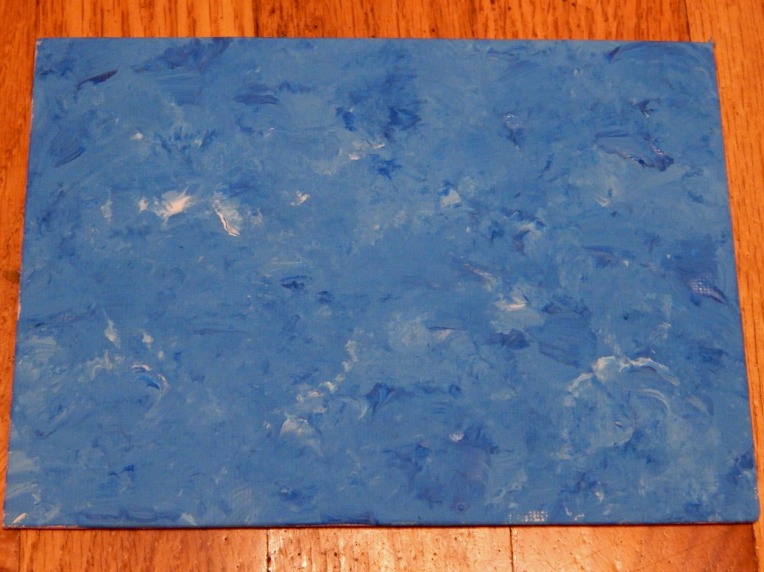
I’m going to use a canvas and acrylic paint for the first piece of art.
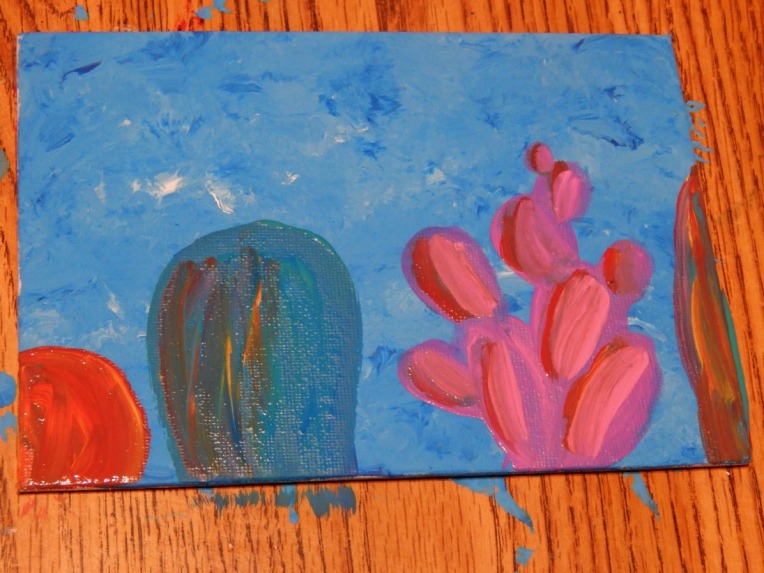
Begin by painting the background of your picture. I scooped up both white and blue paint on my brush to make a more textured background.
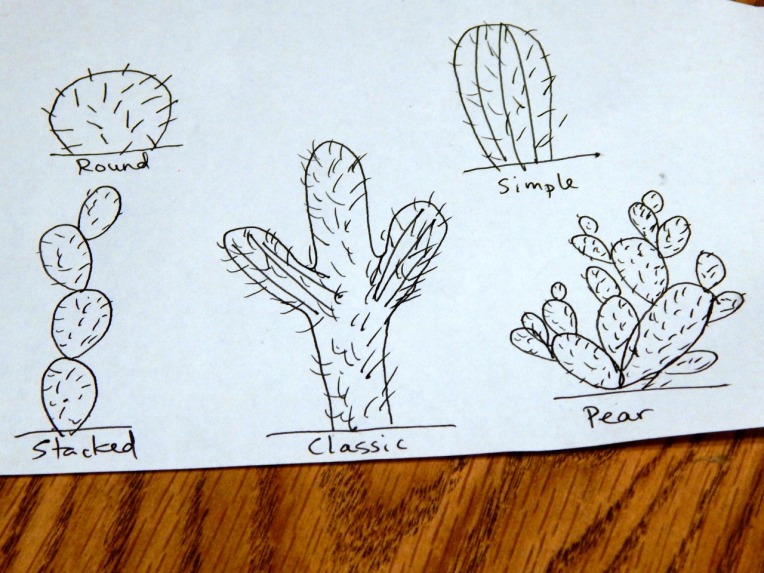
Now you need to populate your desert. Here are some ideas for cactus shapes: (And yes, I am aware that these cacti look rather sickly. Maybe their desert was extradry this year or something. XD
Paint your cacti the same way as the background – blending together different colors of wet paint onto the canvas.
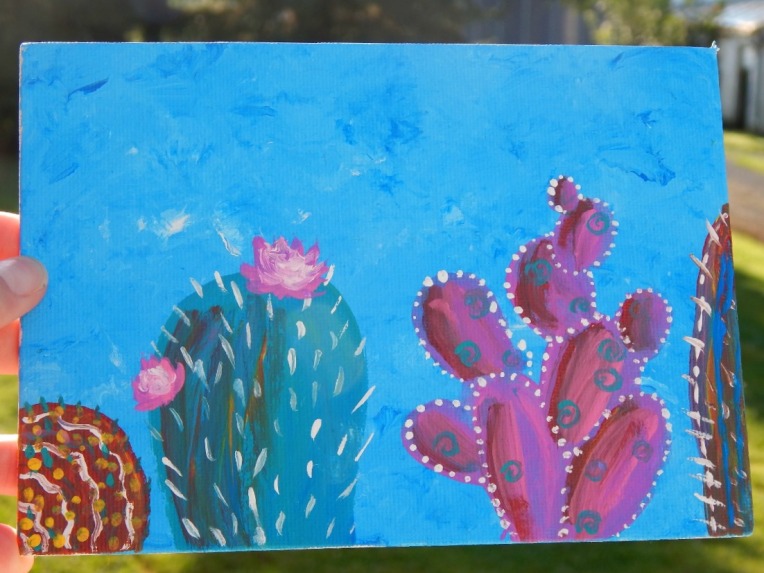
And finally, embellish your plants! Add dots, dashes, and beautiful blooms. Ta-daa!
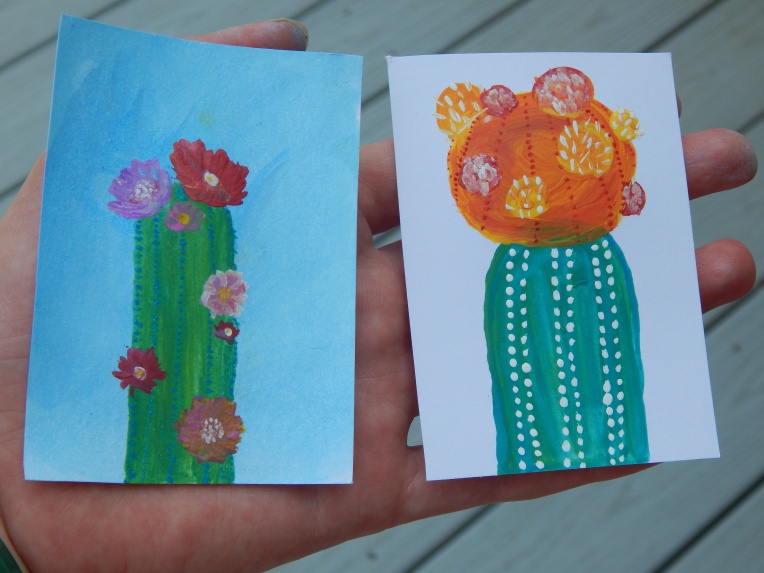
I also made these ATCs:
I had fun painting the flowers with the one on the left. So pretty! The one on the right was inspired by an actual cactus we have that looks kind of like that.
I hope you enjoyed today’s prompt. If you were inspired to make art from this post, we’d love to see it! Get the details on how to send in art on ourArt Gallerypage.
Hello, hello! 😀 Today I have a fun idea-generator drawing technique to show you. If you don’t know what to draw, this might help!
Technique: Scribble Art-Starters
Begin by closing your eyes and drawing a random squiggly pattern on your paper or ATC. Open your eyes and connect both ends of the line if they’re not already connected. You should have a very strange looking blob on your paper. Here’s my scribble:
Next you have to use your imagination to turn your random squiggle into a picture. (Hint: the simpler the squiggle, the easier the drawing. But you may want to do a complicated squiggle for a challenge, right?) Turn it upside down or look at it from a different angle if you’re stuck. Does it look like a bird? A flower? A person? What do you think my scribble looks like?
I thought mine looked like a fish, so I turned my squiggle into an underwater scene:
Do you see how it works? Here are a few more scribble doodles for inspiration:
Heh heh, it’s kind of addicting. 😀
So there you go – a really easy and fun way to bust “artist’s block” if that is even a thing. XD
Have you ever done this? Do you think you’ll try it?
***Allison***
P. S. I first posted about squiggle drawings in this post. (Wow, that was almost 2 years ago!)


 160 (800x600)")
 158 (800x600)")
 159 (800x600)")
 162 (800x600)")
 161 (800x600)")
 163 (800x600)")
 164 (800x600)")
 165 (800x600)")
 166 (800x600)")
 167 (800x600)")
 168 (800x600)")

