ART STUDIO {Part 2: Studio Tour}

Hello, dears!

AHHHH I am SO excited about this post! Finally, after many months of working on my studio, I am ready to unveil the (almost) finished product! 😀 I absolutely LOVE it, and I hope you guys do too! If you need a refresher on what the studio looked like before (hint: it was a closet), click here to see part one.

Now. Walk right this way, please… And here we are! Won’t you step inside? Continue reading

3,000 Followers GIVEAWAY!

(Despite what the title seems to proclaim, no, I am not giving away three thousand followers. Sorry about that.)

AHEM. I am very excited to announce a pretty…. um, exciting giveaway in honor of reaching over 3,000 followers! AHH I STILL CAN’T BELIEVE IT! You guys are even more amazing than the giveaway. 😀 ♥ I expounded your wonderfulness at greater length in my last post, along with some blogging tips, so be sure to check it out if you haven’t yet. 😉

Anyway, let’s proceed. Are you ready to see what I’m giving away?

OKAY.

What You’ll Win

This is mostly an arts/crafts type of giveaway because I love that sort of thing and I know a lot of you guys do too. Plus, I post about arts and crafts sometimes on my blog, so I thought that would make sense. 🙂 Here’s a breakdown of what you’ll receive if you win:

giveaway

  • one super fine-tip pen
  • a pack of six adorable little fox metal clips
  • three cute rolls of washi tape
  • a pack of six fun, wooden mechanical pencils
  • twenty blank ATCs
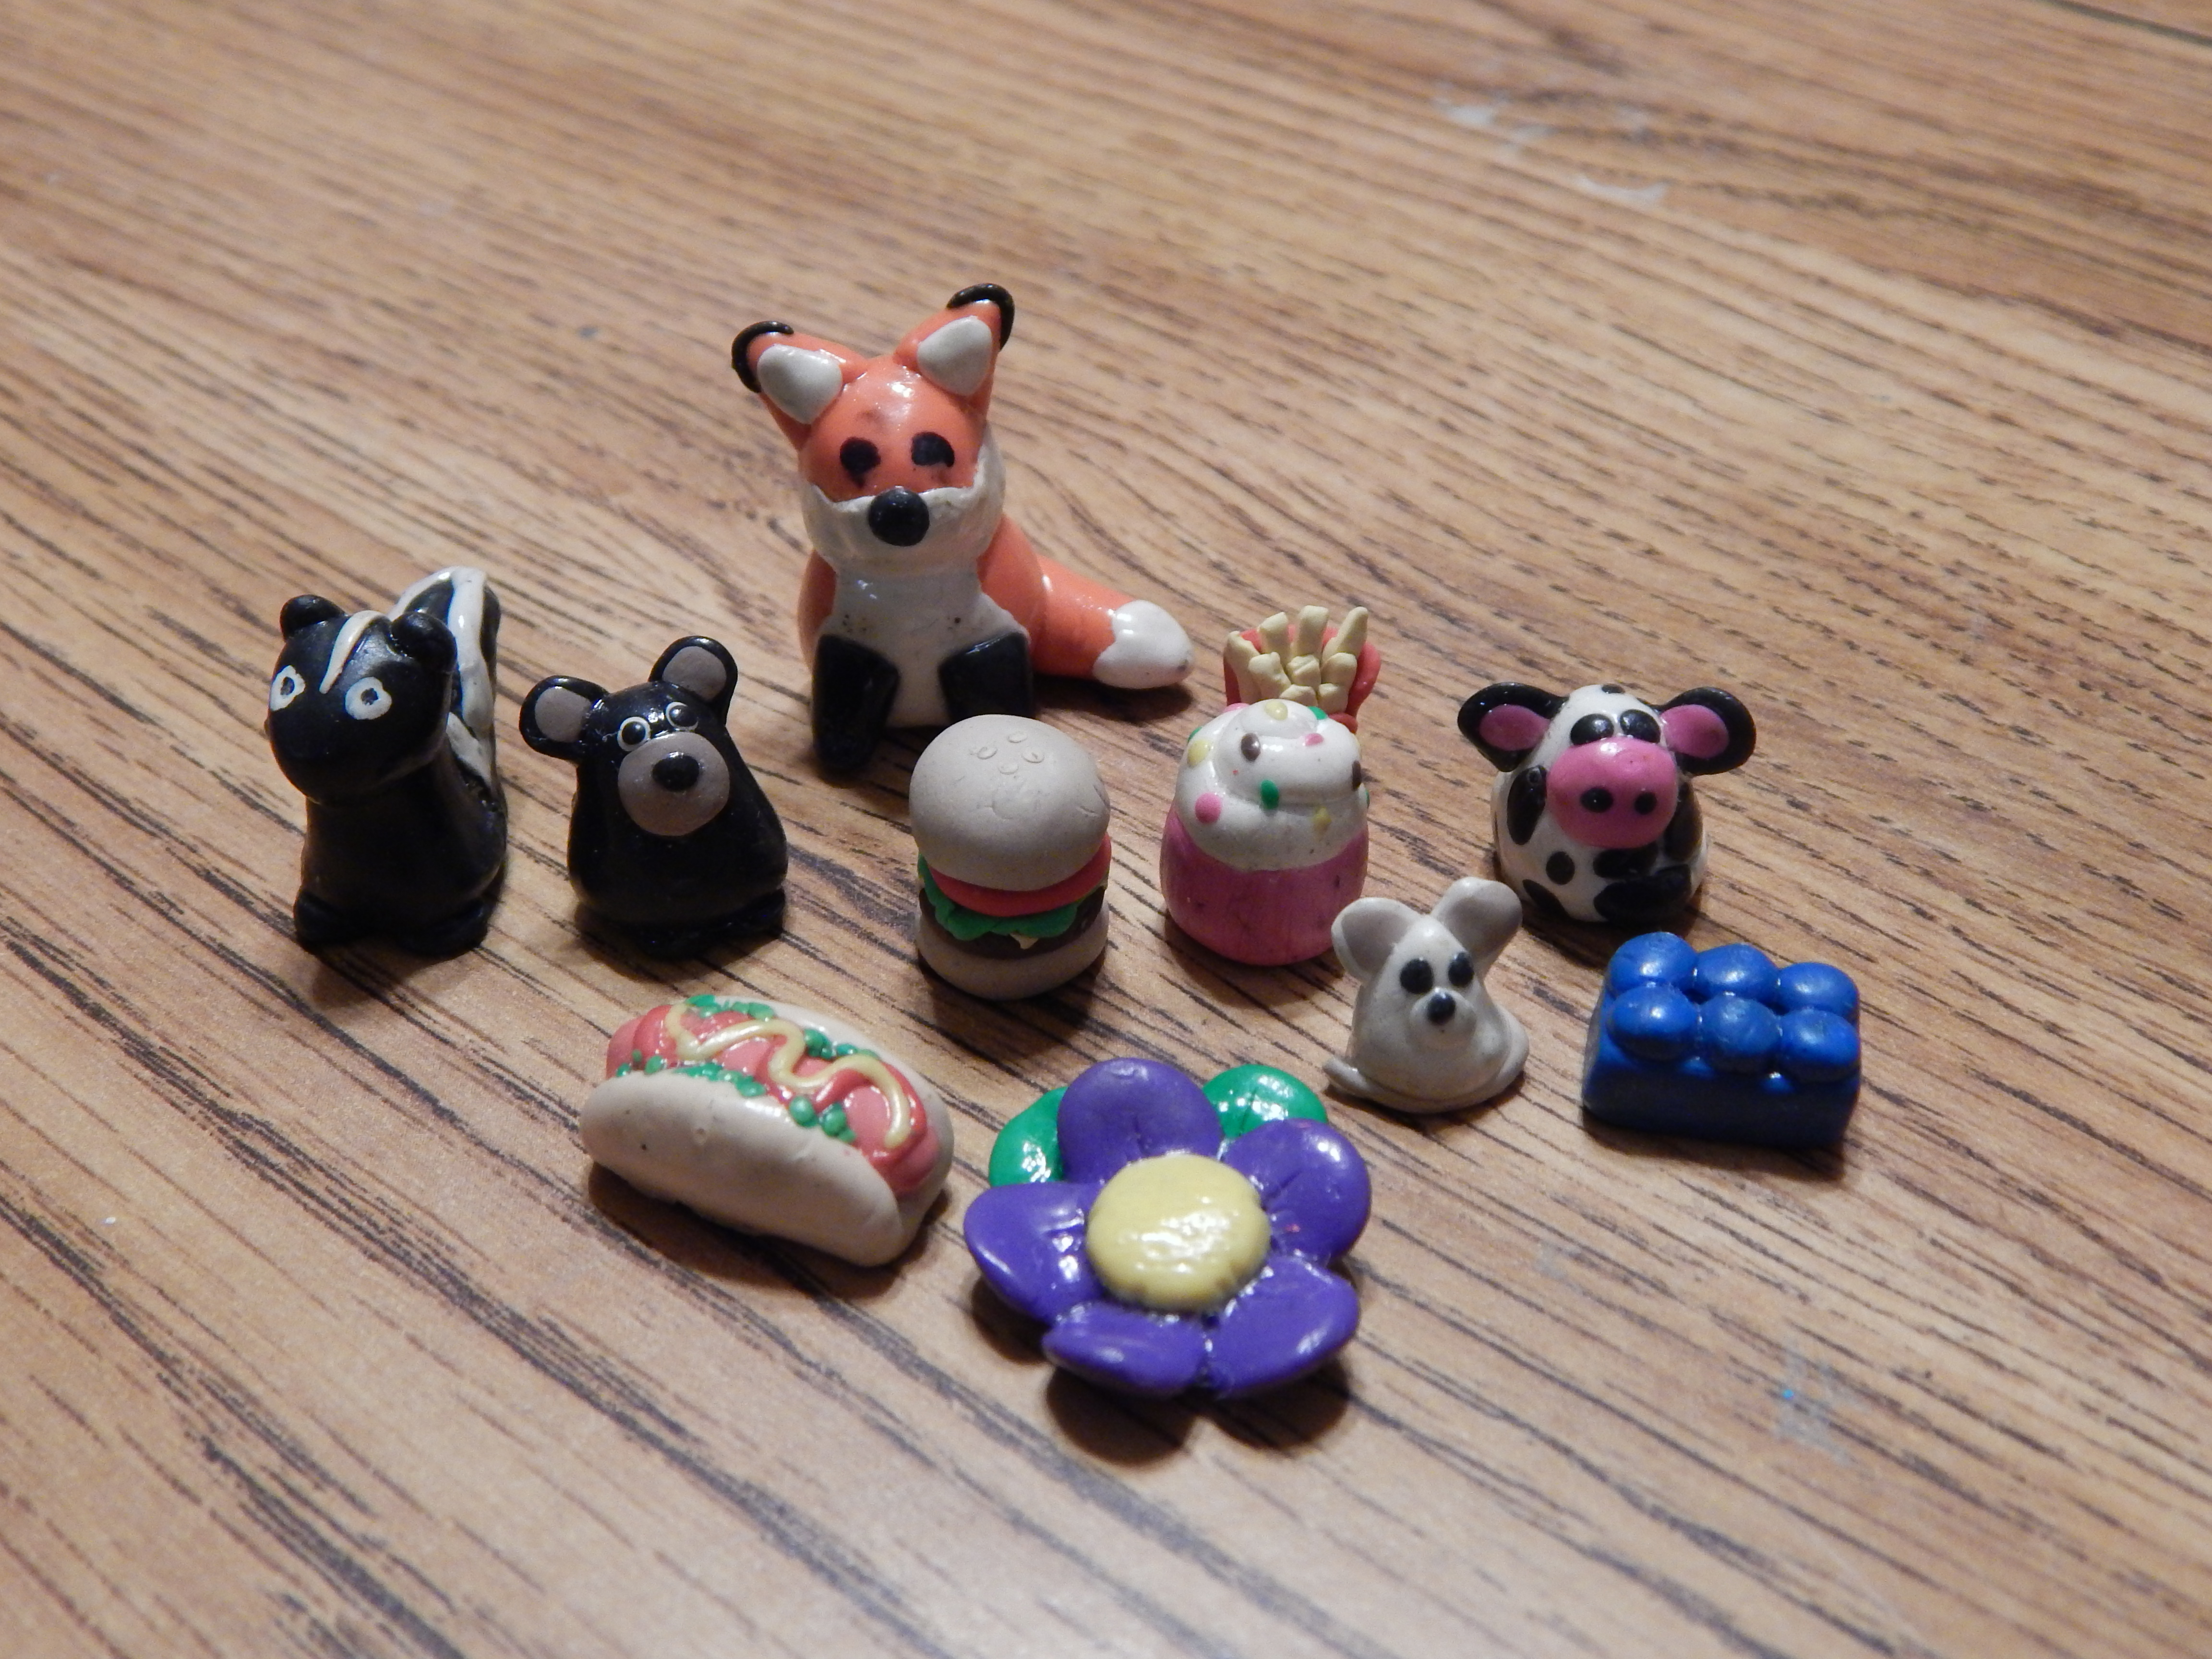
  • a miniature polymer clay snowy owl, made by me
  • a custom piece of art, to be drawn by me as well
  • a 20% off coupon for The Color Box Studio, my art Etsy shop
  • a paperback copy of the excellent book, Do Hard Things, by Alex and Brett Harris
  • and maybe a little surprise gift – who knows?

TEN DIFFERENT PRIZES FOR ONE WINNER. IS THAT NOT EXCITING? Goodness, I’m getting so excited and I’m not even entering (though I kinda wish I could). XD Okay, now that you saw an overview of each thing, let me tell you a little bit more about them.

giveaway 8 (1280x853)

This pen is AMAZING. I know because I have one just like it. It has an incredibly fine tip, perfect for intricate details. (I used this pen for my elephant drawing, a print of which you can buy here at my art Etsy shop.)

giveaway 5 (1280x853)

Are these not the CUTEST THINGS? I found them at Hobby Lobby and I love them! I believe they’re supposed to be paper clips, but I think they would also make great bookmarks. 🙂

giveaway 4 (1280x853)

What more can I say? It’s washi tape. You can never have too much washi tape, right? I love these colors and patterns together! ♥

giveaway 7 (1280x853)

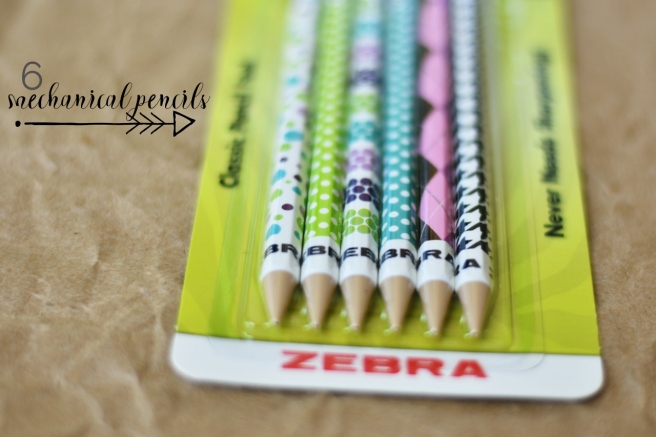
I have never used these particular pencils before but I really wanted to steal a couple out of the package and give you guys the rest. (Don’t worry, I didn’t.) The package says these mechanical pencils actually have a wood case instead of plastic? Also each pencil comes with three leads, so they should last you a while. 🙂 I also like the cute designs.

giveaway 3 (1280x853)

(If you don’t know what an artist trading card is, go here. They’re so much fun!) It’s much more enjoyable to make ATCs when they’re already cut for you, in my experience anyway. Perhaps you could use a few to test out some new art supplies? 😉

giveaway 2 (1280x922)

Aww, those eyes! ♥ I really like this little guy, but it’s time for him to go to a new home. *Sniff* I made this tiny owl from polymer clay. He comes with a “stone” nest, also made out of polymer clay. See his wistful expression? He wants to come live with you.

giveaway 9

The picture is kind of misleading, but I had to take a photo of something. XD The giveaway prizes include a free custom 8X10″ portrait of your pet, drawn by me, in Prismacolor colored pencil unless you specify otherwise. If you don’t have a pet or you’d rather me draw something else, I can certainly do that (though I reserve the right to refuse anything I think inappropriate, etc.)!

giveaway 10.jpg

And as a little bonus, you get a 20% coupon for The Color Box Studio! (You can also use it if you order a custom order.) It will be a code, like a promo code, that I’ll include either when I notify you of winning or else in the package.

giveaway 6 (1280x849)

And lastly but not leastly, we have this great book by Alex and Brett Harris called Do Hard Things. My brother and I got a copy of this for our birthdays and it was so good. It’s written to teenagers and is explicitly Christian, but the message is still relevant to everyone, whatever your age or religion. Basically the authors argue that our culture today has pitifully low expectations for teenagers and show how we can overcome the stereotype, so to speak, and use this time to “do hard things” that make a difference both in our lives and the lives of others. Not just randomly do hard things like try to mountain climb without a rope or something, but meaningful challenges that take us out of our comfort zone and into a whole new world. It was a super thought-provoking while still easy-to-read book and really impacted me, in a good way.

And that’s that! NOW. Are you ready to learn the rules for entering?

How To Enter

  • This giveaway is only open to people in the United States. I’m sooo sorry about that, guys, but otherwise the shipping cost gets pretty scary, you know?
  • You must be following my blog to enter. Ideally I’d like for this giveaway to be only for the followers I already have, but that would be too hard to monitor. I don’t want you guys to follow my blog solely so you can enter this giveaway, but I can’t think of a better way to do it and still have it only be for my followers, so… :/
  • As usual, if you’re under 18 years of age, get a parent’s permission before entering. But I’m sure you already knew that. 😉
  • To enter, comment on this post saying that you’d like to enter, and tell me which of these items you’d be most excited to win.

For Bonus Entries…

  • Take my survey for 2 bonus entries. NOTE: This is option is only for my current followers because it’s not going to work very well for you or for me if you fill out a survey for a blog you just found. 😉
  • Share on social media for 1 bonus entry. Choose Pinterest, Facebook, whatever. NOTE: You can only get one bonus entry for this, even if you share several times or on different social media platforms. Of course I’ll be quite happy if you want to share it more than once, but you’ll still earn just one extra entry. Otherwise things could get WAY too complicated. XD
  • Share on your blog for 1 bonus entry. You can add a link to my giveaway to your post or reblog this post – your choice.

Giveaway Deadline

The giveaway starts today, October 16th, 2017, and ends October 31st, 2017, the end of this month. That gives you just over two weeks to enter. I’ll post the winner on November 1st!

I’ll notify you by email and comment if you win, but if you don’t respond within a week, I will have to pick someone else. 😦

_____________________

OKAY, I think that’s it! Ahhhh yay, I’m finally done! That took forever to write. XD I hope you guys are as excited about the giveaway as I am! If you have any questions, just drop me a comment below.

Have a lovely day, and thanks for reading, dears. ♥

***Allison***

Making Easter Eggs

Hello hello!

Are you excited for Easter? I am! Easter is a wonderful time of year to meet with friends and family, enjoy good food, but most of all to remember what an amazing, astounding, and incredible thing our Lord and Savior has done for us by being crucified for our sake to take away our sins. ♥ I’m going to do another Easter post with more about that on Sunday, but for today I wanted to post about a much less important but fun aspect of Easter: dying Easter eggs.

Our family does this almost every year. Easter eggs make lovely colorful decorations for an Easter table, and they’re also super fun to make! I found this great post on Pinterest with tons of different ways to decorate Easter eggs. Some of them are absolutely gorgeous and creative! Click here to read the post.

A good set-up really helps the process to go smoother. Make sure to cover your working space with newspaper or an old tablecloth, and wear old clothes or aprons. We used this recipe to mix up our dye from scratch. It only takes food coloring, vinegar, and water, and makes a brilliant dye.

eggs 2 (1280x853)

I cut the tips off of an egg flat to serve as egg holders. Like so:

eggs 1 (1280x853)

Here’s a great tip I found from the egg decorating post I linked to above: put your egg inside a large whisk to make dipping easier and cleaner!

eggs 5 (1280x853)

We had so much fun experimenting with different techniques! These were some of our favorites:

  • Draw with white or colored crayon on a clean egg, then dip it into dye. The crayon will resist the dye and make a really neat design, especially with white crayon.
  • Dribble rubber cement over an egg and allow to dry. Dip egg, then peel off the rubber cement and you have a fun abstract design.
  • When your eggs are still warm, draw on them with crayons to make a neat melted effect.
  • Dye your egg a light blue or turquoise, then speckle it with gold paint.
  • Pretty much anything with gold paint and dye turns out neat. XD

If you want more detailed instructions for those techniques, again, you can click here. (Can you tell I love that post? XD )

eggs 3 (1280x853)eggs 4 (1234x1280)eggs 6 (1280x853)eggs 7 (1280x853)eggs 8 (1280x853)eggs 9 (1280x853)

Now that you’re done, how are you going to display your masterpieces? I shredded brown paper bags in a paper shredder, put some of in a round vase, and placed three or so eggs in the cute little “nest.” Ta-daa!

eggs 10 (1280x853)

Do you like making Easter eggs? What is your favorite technique?
Happy Good Friday and thanks for reading! 😀

***Allison***

P. S. You guys have GOT to read Madi’s amazing Good Friday/Easter post here. It’s so interesting and well written and… and GREAT! 😀

Tutorial: Cardboard Roll Organizer + BIBPC # 4

organizer 1 with watermark

Today I have a little crafty tutorial for you, my friends. Bring out your scrapbook paper and that huge stash of cardboard rolls you have tucked away in the closet, and… um, read this tutorial! XD

We are going to make this handy-dandy organizer. It’s perfect for organizing those stray but important knickknacks, or showing off a collection.

-Allisoncardboard_roll_shelf_Willow_024_1024x768-1

What you’ll need:

  • Toilet paper rolls or similar cardboard rolls
  • Pretty scrapbook paper
  • Cutting tools: an X-acto knife and scissors
  • Glue stick
  • Hot glue gun (with hot glue, of course 😉 ), or super glue might also work
  • Pencil
  1. Cut the cardboard rolls into even lengths. It is quite tiring to measure each tube, so I found a much easier and faster way! First, make a template. You will have to measure this one: make marks all the way around the tube using a pencil and ruler, then connect the dots. 😀 I made my template roll about 2 inches long. The longer the knickknacks, the longer the template should be. (As you can see, most of my knickknacks are small, so a shallow organizer worked perfectly.) Use an X-acto knife (and scissors if need be) to cut around the line. Trim the top rough edge with a scissors, and cut a slit all the way down one side, like so:-Allison(cardboard roll shelf, Willow) 002 (1024x768)Ta-daa! You have made a template. Now slip it on to the tubes you want to cut, and simply trace around the top with a pencil. No measuring needed! -Allison(cardboard roll shelf, Willow) 001 (1024x768)-Allison(cardboard roll shelf, Willow) 003 (1024x768)
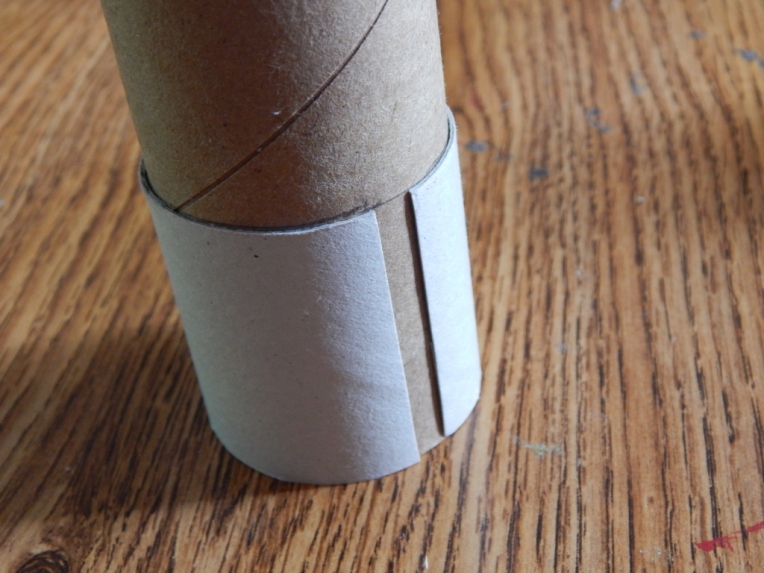
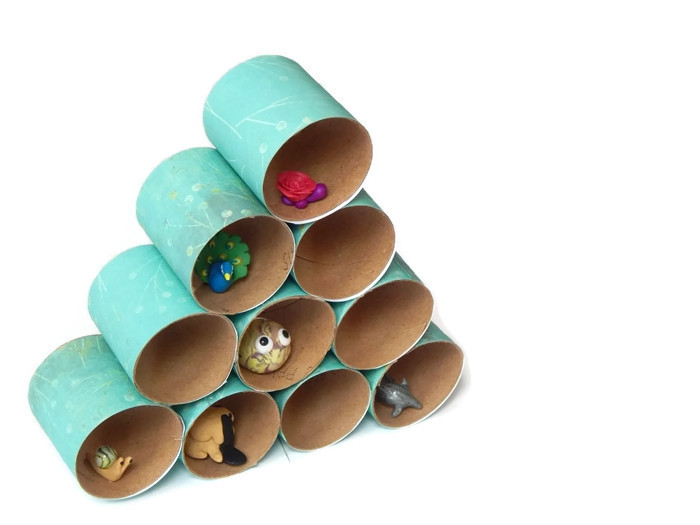
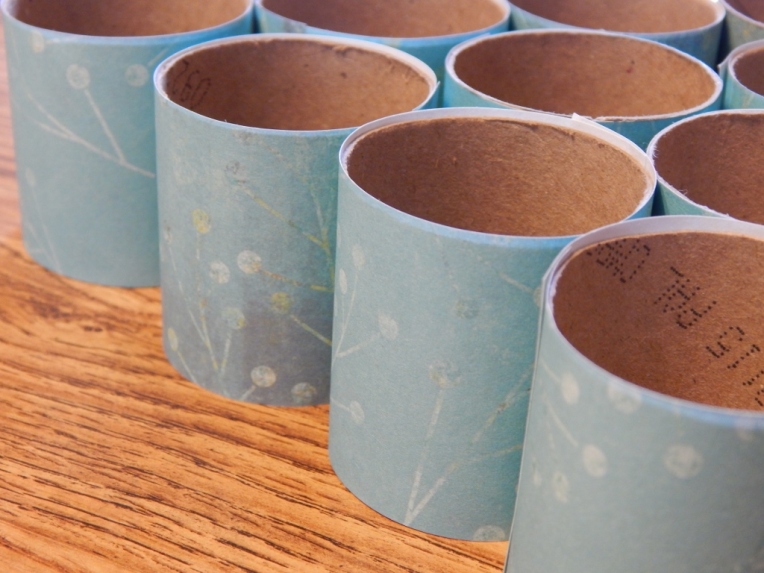
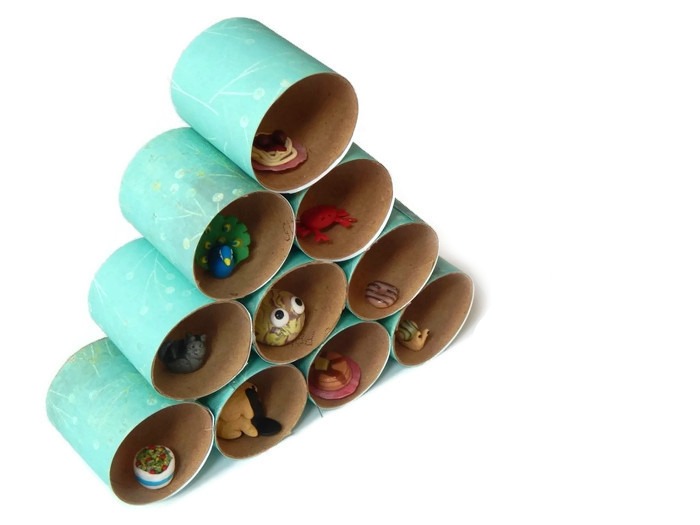
I cut 10 lengths for my organizer, which used about 5 tubes (not counting the template tube).-Allison(cardboard roll shelf, Willow) 005 (1024x768)
  2. Cut strips of paper to cover the rolls. Choose a pretty pattern or color of scrapbook paper to decorate your organizer. Cut the strips as wide as your tubes are – if your tube lengths are 2 inches, cut 2-inch wide paper strips. (Yes, you’ll have to measure this time. 😦 ) Glue a strip around each tube and neatly cut off the excess if your strip is too long.-Allison(cardboard roll shelf, Willow) 006 (1024x768)-Allison(cardboard roll shelf, Willow) 007 (1024x768)
  3. Hot glue your paper-covered tubes into a pyramid shape. Arrange the tubes so the paper seams don’t show on the outside, and hot glue them. I think it works best to glue one row at a time – glue the bottom row of four tubes together first, etc., then glue the rows to each other. Also, don’t glue them vertically on top of each other like it shows here. 😉 You can stand it up like this after you’re done.-Allison(cardboard roll shelf, Willow) 022 (1024x768)
  4. Use it! You are done! Give yourself a pat on the back, then go put the organizer to good use. Congratulations on a craft well done!-Allison(cardboard roll shelf, Willow) 026 (1024x768)-Allisoncardboard_roll_shelf_Willow_027_1024x768.jpg

By the way, the little critters and food in the organizer are polymer clay miniatures made by my sister Megan and me. I made all of the miniatures except some in the last picture, where Megan added some of hers to help fill it up. Which knickknack is your favorite? Of mine I might like the peacock best, and of Megan’s I think I like the cute little crab. 🙂

I hope you enjoyed crafting along with me!

Oh, oops! I almost forgot the BIBPC photo. BIBPC is fun photo contest that my sister Megan is doing. (Read about it here.)The prompt this time was “Funny.” Here’s my entry!

Allison(frost, bunnies, ATCs) 055.JPG

Story behind the picture: This is a hilarious photo of Diamond, my little sister’s rabbit. We sometimes bring our rabbits in the house for a bit, and here Diamond is just hangin’ out like a cool dude with sunglasses. XD You can see more funny bunny pictures in this post.

***Allison***

P. S. I made the white background of some of the photos with FotoFuze. It’s a really neat program! I made the poster with PicMonkey, which I also LOVE. 😀


DIY Paper Pennant Banner

I made this banner as a present for one of my cousins for her birthday. It was actually pretty easy, although it did take some time. It turned out to be a beautiful, approximately 6 foot long banner. You probably have most if not all the supplies need for this pretty lil’ garland –

  • Pretty scrapbook paper in 5 different patterns (I used two pinks and three neutral colors)
  • Cardstock paper or something stiff for triangle template
  • Jute twine or similar string for hanging
  • Single-hole puncher
  • Scissors
  • Pencil
  • Ruler
  1. First you need to make your template. Don’t get freaked out here but… it does involve a little bit of math. Just a tiny bit. And it’s really easy. This is what I did for my template: Mark a line 5 inches long. Make another mark in the middle of that line. (Here comes the math, guys: 2.5 is half of 5, so make a dot 2.5 inches from the end of the 5 inch line.) Now make a line 5 inches down from the middle-mark. Connect the dots from each end of the top horizontal line to the bottom of the vertical line. Like so:030
  2. Cut out the template.
  3. Using the template, trace three triangles on the back of each of the five sheets of scrapbook paper. Cut out the triangles.
  4. Use a hole punch to punch to holes in the two top corners of each triangle.031 It works well to do the first triangle, then put another triangle behind it, line it up, and punch through the holes you just made so all the holes will line up. Now you can arrange them in whatever pattern you like. 032
  5. Time to string them all up! You can string them two ways, so choose the one that looks best to you. Leave about 10 inches of string extra on the front and end of the banner for tying.034
  6. To tie the knots, bring the end of the string back through the nearest hole, making a loop.035 Turn the triangle over and just tie a knot around the loop to make this:036
  7. And you are done!

037 040 039 038Enjoy!

***Allison***

Spirograph Envelopes

I made these a long time ago but never posted about it, so here they are now! You know those Spirograph machines? You can’t do much with the finished spirographs except hang them on the refrigerator, right? Wrong. You can use them (or any other circular piece of paper, really) to make a beautiful envelope to hold, say, a gift card. They are very simple to make.

First, take a finished spirograph…-Allison (Nov. snow, hidden pictures) 007… and fold it in half.-Allison (Nov. snow, hidden pictures) 008Open it up and fold the two sides to meet the center crease. (I used scrap paper; that’s why there’s a random picture of a man on the inside of the envelope. I recommend using plain paper. ☻)

-Allison (Nov. snow, hidden pictures) 009

Now fold one end of the of the spirograph a little less than halfway up.

-Allison (Nov. snow, hidden pictures) 010

Fold the other end down so it overlaps the bottom of the envelope, tuck your card or gift card inside, and seal with a sticker.

-Allison (Nov. snow, hidden pictures) 013

-Allison (Nov. snow, hidden pictures) 014

Ta-daaa! Here are the backs of two finished envelopes.

-Allison (Nov. snow, hidden pictures) 016***Allison***

DIY Memo Board/Bulletin Board

One of the presents I made for my sister Megan’s birthday this year was a bulletin board set that included pretty clothespins and a little hedgehog drawing.  The board itself is made of foam board and scrapbook paper, and the clothespins have thumbtacks in the back so you can hang pictures without damaging them.

-Allison(Joy) 012

Today I will show you how to make the board, the clothespins, and I’ll include a link to show you the original drawing that I looked off of for the hedgehog picture. To start with…

You will need:

For the board:

  • a large piece of foam board
  • scrapbook paper
  • a glue stick
  • tape
  • scissors

For the clothespins:

  • wooden clothespins (Not the one-piece kind with a slit down the middle, but the kind you pinch to open.)
  • scrapbook paper
  • hot glue
  • glue stick
  • scissors
  • thumbtack (the kind with a flat top)

I used to have more step-by-step pictures, but unfortunately I accidentally clicked “delete all images” on my camera instead of deleting just a few images.  😦  Anyway, I took some pictures of the finished product that should help, even if they’re not step-by-step.

*********************************************************************************************************************************

  1. Cut your foam board into a square. It’s nice to arrange your scrapbook paper on the foam board before you cut it, so you will know how big to make the square.

2. Glue 4 squares of scrapbook paper in a checkered pattern on the board, leaving a little extra paper sticking out around the edge of the board.  Optional: cut a smaller square from a different patterned paper and rotate it to make a diamond for the middle.  Now the board should look something like this, except with paper sticking out around the edges.

DSCN7546

3. Turn the board over.  Fold down the extra paper from the sides and tape in place.

DSCN7548

4. Now for the clothespins.  They are really easy, but look amazing!  Place a clothespin upside-down on patterned paper, trace around it, and cut it out. Glue in place on top of the clothespin.

DSCN7550

5.  Hot glue a thumbtack to the back of the clothespin, about at its middle.  And you’re done!

DSCN7549

You can give this as a gift with something already pinned on, like a card or a picture.  Oh, and here is the link to that adorable hedgie art if you don’t want to draw your own: https://wanelo.com/p/5420153/fun-little-rainbow-hedgehog-art-print-drawing .

Until next time!

***Allison***


Make Your Own Game! Part 3: Game Pieces and Finishing Touches

Today I will finish up the Make Your Own Game Series with how to make game pieces and a box for your game to live in.  Let’s start with game pieces.

I think the most unique and customizable pieces can be made with polymer clay.  You can make them to go along with your theme, or just make an odd assortment of fun things, like I did.  I would recommend, though, that you make your game pieces more one size than I did, just so they look more uniform.

-Allison(game series 3) 001

There are lots of other options if you don’t want to use clay: use different colors of flat-bottomed clear pebbles, buttons with handles made from beads stacked together, small toys like toy cars or plastic animals, really you can use basically any small item that doesn’t roll off of the board.

It’s important to have a good box that keeps your game from getting bashed up when it’s on the game shelf, but also provides easy access to the game when you want to play it.  (In other words, don’t use a deep, barely big enough box or it will be hard to take your game in and out.)

I found the perfect box for one of my games: it is shallow, easy to open, and sturdy.  Unless the box has no writing or graphics on it, you will want to make a label to put on top.  You could just draw the logo on the label, or take a picture of the actual game and paste it on.  Make sure to draw the logo on all sides so you don’t see a blank side of the box from the shelf.

-Allison(game series 3) 004 -Allison(game series 3) 003

And there you go!  Have your friends and family test it out, and maybe someday you will even publish your game!

Until next time…

***Allison***

Make the Perfect Buggle House

What is a buggle?  Good question.  It is a very reclusive species of Glass marblus insectus, more commonly known as a buggle.  Never heard of it?  Well, don’t worry, you can make your own!  You just need flat-bottomed glass marbles, paper, and googly-eyes. (I actually made their eyes out of hole punches.  I glued two small black hole punches to two bigger, white ones.  For the baby buggle (which I made out of a smaller glass marble) I made two black dots on two of the smallest hole punches.)  Click here to see the buggle tutorial.

Great, you’ve made the buggles?  Now let us construct the perfect home.

1. Find a small box, like a soap box.

dscn9747

2.  Tape any open ends closed.

dscn9751

3.  Wrap it up nicely in cute wrapping paper.

dscn9754

4.  Use an Exacto knife to cut around three sides of the box to make a flap. (See picture.)

dscn9760

5.  Use pretty tape to cover rough edges.

dscn9764

6.  Draw a charming little entrance on the front of the box.

dscn9781

7.  The really fun part!  Give your buggles some nice furniture, some food and water bowls, and maybe a garland.  You can make stuff out of almost anything, but if you don’t have craft supplies, you can draw furniture too.  Now put your buggles in their new home.

dscn9788

I also made a way to keep the box closed (not shown) by putting a sticky dimensional foam square on the front, and gluing a ribbon to the top.  The ribbon sticks to the foam square and holds it closed.

dscn9798

Now you can play with your buggles!  You can keep them neatly in their box, or take them out.  With their convenient home, you can take them along in the car.

I made these with some kids I babysit, and they loved making the furniture.  They got very creative!  (I prepared the boxes first though, because they are a little tricky for younger kids, and then they filled it with furniture and made the buggles.)

Happy buggle-making!

***Allison***