Hey, guys! How’s life? Mine’s good, and currently smells like pizza baking in the oven. (It’s movie night with homemade pizza. 😉 ) Wait, that was the timer… HOLD ON.
Okay, we’re good. Ha, that was an interesting coincidence. ANYWAY, less food and more art now, eh?
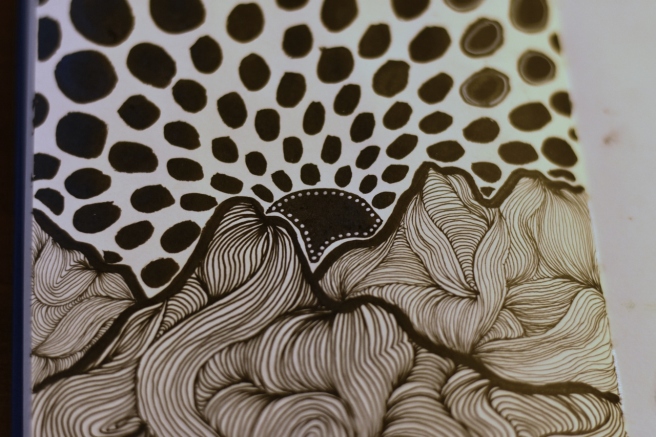
Oh wait, I forgot about the title. XD Maybe we’re not done with food yet… Today I want to show you how to draw “spaghetti mountains,” what I decided to call this certain doodling technique. 😛 I think it looks so neat in the end, and it’s quite fun and relaxing to draw.
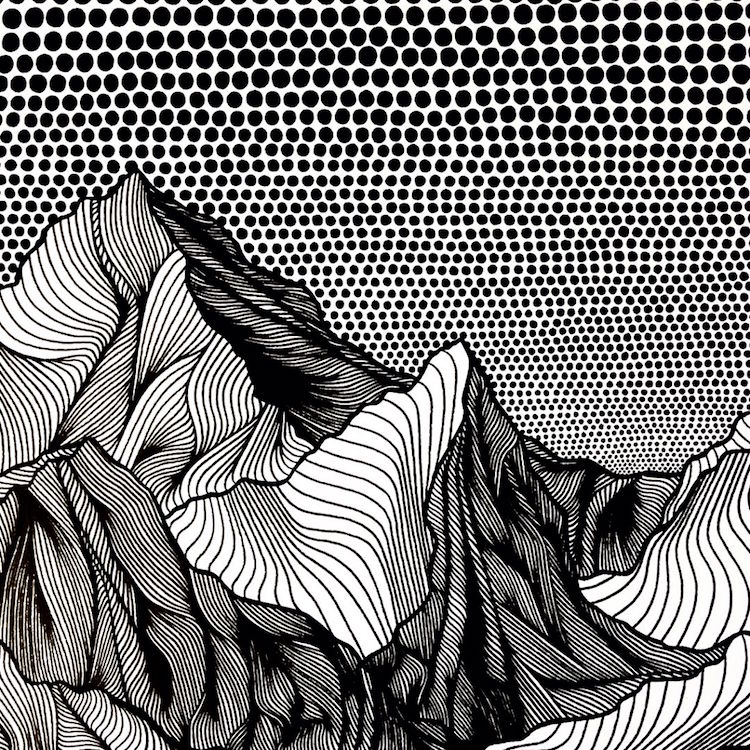
Isn’t this gorgeous? I love it! I made a similar piece using this as inspiration, and also made you guys a little tutorial if you’d like to try it yourself. 🙂
Materials Needed:
Paper, an ATC, canvas, etc.
Black pens or markers (I used varying sizes of Micron pens + a black brush pen)
A white gel pen (optional)
Some time
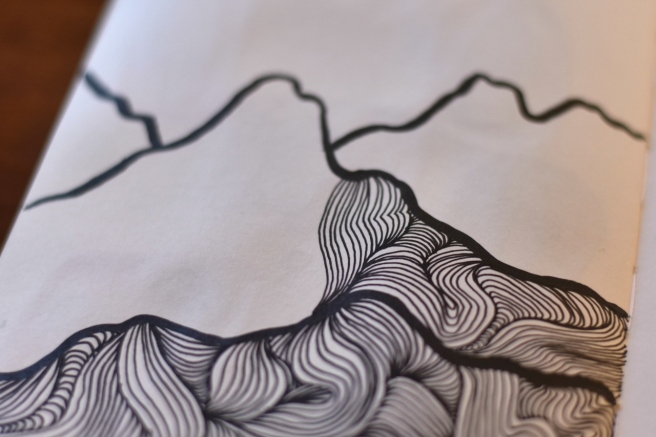
1. Draw some jagged lines for mountain ridges with your thickest pen (I made the lines thicker later). Make some ridges in the background and foreground.
2. Take your second thickest pen and start filling the first mountain with “spaghetti.” XD Draw some curvy lines that all start and end at the same point, and follow each other closely. Like so.
3. Add more spaghetti in a different direction, and connecting to the noodles you already drew.
4. Keep adding more spaghetti in all different directions until you fill the whole mountain ridge.
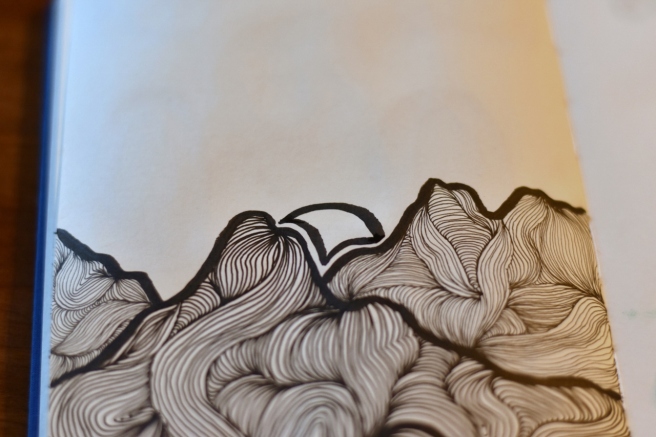
5. Now for the ridge behind it. Use a slightly thinner pen to show perspective, because things (like spaghetti) look smaller when farther away.
6. Keep it up! After you finish that ridge, move onto the one behind, using a thinner pen each time and making the lines close together. Doesn’t it look so neat thus far?
7. Add a sun behind the last ridge. I left a white space, but you wouldn’t have to. 😉
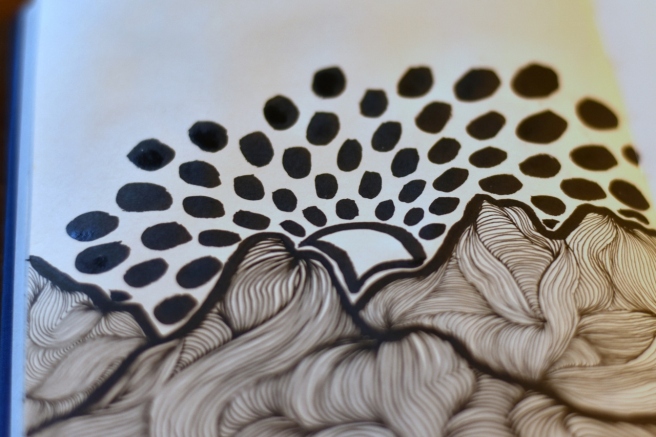
8. Next we’re going to make the “rays” of the sun. Using your thickest pen, fill in the space above the sun with rows of dots or ovals.
9. Make the dots in each new row bigger than the last…
10. Ta-daa! You’ve filled the whole page!
11. You can definitely leave it like that, but I added a bit more embellishment with a white gel pen. First I colored in the sun black, (weird, I’ve never seen a black sun before, have you? XD), and then rimmed it with dainty white dots.
12. And lastly, I added some white circles to the black dots, just to break things up a bit.
13. Ta-daa! You’re finished!
What do you think? I think… strange but neat. 🙂 I hope you get a chance to try this, because it’s quite fun and I love the end result.
Thanks for reading, dears! Now go make some art. 😉 Oh, and if you DO make art inspired by this post, we’d love to see it! Check out this page to see how you can help us fill our gallery.
Have a great day, guys! I hope I haven’t made you too hungry… XD
YAY, I am so excited to share some of my recent art with you guys! I’ve been drawing a lot lately, and I think I’ve really been improving, so that’s good. 😉
Also, before we start I wanted to mention this super good video (which I’ll show you in a moment) by Hullo Alice that talks about why it’s okay if not every piece of art turns out perfect. I thought it was such a good message!
Sometimes when people try to make art and it doesn’t end up looking like the idea in their head or they search the web and find soooo many better artists out there, they just give up, and think, “I’ll never be good at art, so what’s the use of trying?” The use of trying is that you WILL get good at art if you give yourself a chance. You might not ever get as good as the professional art you love looking at on Pinterest, but you’ll certainly be a terrible artist if you never try.
Listen, before you make some good art, you’re going to make (a lot of) bad art. That’s just how it works with anything – art, music, math, anything you try to learn. And that’s okay. Making bad art is part of the process of getting to be a good artist. If the piece you’re working on is terrible, just let it go, turn the page, and start again. You’ll get better if you keep trying over and over again, I can promise you that.
Okay, now that that little rant was over and you (hopefully) watched the video, I can show you my art. 🙂 I decided to include some of my “bad art” (although not my worst XD) in this post too.
Let’s get started!
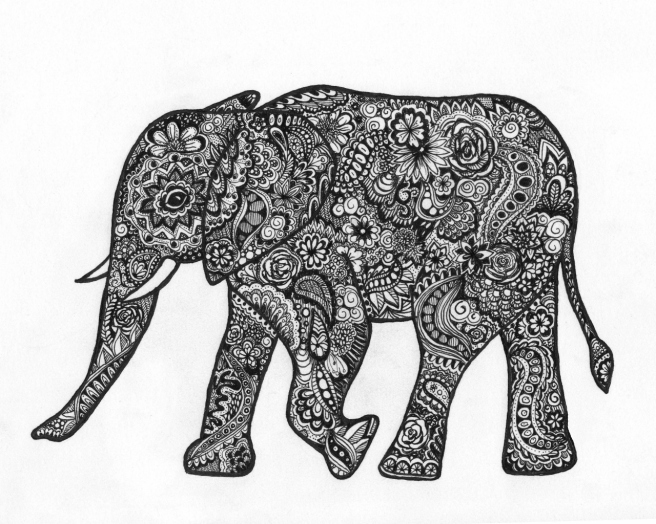
I shall start with some of my favorite art I’ve created – a zentangle elephant. 🙂 It took me FOREVER to draw this, as you can probably guess. XD I had just purchased a new fine-tip pen at Hobby Lobby, and it was great for detailed work like this!
I also made a mandala in a similar style. I think it turned out so pretty! It’s probably the best mandala I’ve done, because usually they get pretty skewed. XD
Another mandala.. YIKES sorry for the terrible picture. O.o
Next up we have a little design I made for Livy’s magazine here (which you should totally check out!)
I’m also submitting this for the next issue of her magazine. 🙂 I had a lot of fun with this one!
I’m not really sure what I think of the next piece… I guess it’s neat, but it didn’t really turn out like I was hoping. Oh well! Waterfalls are really hard to draw, aren’t they?
OOH! I love this drawing I did of the lovely Aria from purrfectlyinspired.com. It’s the best portrait I’ve done, I think!
Okay, here’s something I drew from you guys’ suggestions: a fairy. In the spirit of the post, I shall show you the two horrible renditions it took before I got it to turn out right. XD (I used them for testing pens and stuff, in case you were wondering. 😉 )
Actually the first sketch isn’t that bad… just, well, a sketch.
AHH SO CREEPY. Her face got smudged and made it look even more awful. XD
But finally that bad art enabled me to draw a good piece. Muuuuch better, yes? I hope you like the fairy, Sylvia!
So for this one I was trying to draw something interesting without using any reference photos. Well I sure paid for that with how her legs turned out. XD YUCK. I could NOT get the foreshortening and angle and all that stuff right, so I just called it good enough and finished the picture. 😛 I like the rest of it, though!
Some little water drop doodles from this amazing tutorial. You might think these are good until you see what I was looking off of. XD
Here’s a (pretty rough) concept sketch I did for a possible WordCrafters cover. What do you think? Do you like the idea of all the characters lined up like that? Also I need a better tagline. XD Tell me your ideas! I’ll also do a more in-depth post when I’m ready to start editing WordCrafters.
Heh heh, do you like my play on words? Unfortunately the ink ran all over the place, but it’s okay because it wasn’t my best picture or anything. (It looks like the horse is shooting ink out of her nostrils. XD)
Ooh, this one is funny! I made this birthday card for my sister Megan who loves donkeys.
Ha ha! Yeah, I had fun with that. Although it took quite a while to draw the donkeys inside the card. O.o
Next we have a page of doodles. I picked a couple of random colors from my watercolor brush pen set and drew this. WHY DO THINGS LIKE THIS ALWAYS TAKE SO LONG?!
Here’s some bad-ish art. It got kind of all blurred together.
BWAHAHA this did NOT turn out right. Poor, failed pineapple. XD
Lookee it’s a cute wittle hedgehog from Clara’s suggestions! 🙂
Random watercolor doodle…
Blech, some more bad art. I very much dislike the color scheme – or lack of one.
I’m really happy with this one, though! I thought it turned out pretty cute. 🙂 My watercolor brush pens are so fun for drawings like this.
A doodle/test page.
I haven’t finished this one and don’t know if I will or not, but this was drawn from a photograph of dew drops on a flower.
I really like how this turned out! My best horse picture so far, definitely. It’s a picture of my friend K. A.‘s horse, Gadget.
few more pages from my Bible journal… (would you like to see another whole post about it?)
And lastly, we have another rendition of the moonrise galaxy painting I did here.
And that’s about it! As for the bad art, some of you are probably rolling your eyes and saying, “Allison, seriously? You call that bad art?” Well I’ve done worse art – believe me. I just didn’t show it. XD Anyway, I know the feeling. I see “bad art” from other artists and I’m like “WHOA I wish I could draw that well!” And so you see, it depends on your perspective. Your bad art might be more beautiful than you think. ♥
I hope you enjoyed this post! Which pieces were you favorite? Do you have any suggestions for what I should draw next?
Hello, dear readers! How are you today? It snowed just a tiny bit here yesterday, but there’s not much left except freezing cold weather. 😦 Don’t worry, though, I DID get some snow pictures… but that’s for another post. XD
Today I wanted to show you some of the art I’ve been doing lately!
“Hello, I’m an odd but cute otter randomly holding a heart. Nice to meet you.”
Toucan holding a paintbrush… oookay? XDI really like this one! I didn’t mean to make her sad, but she kind of turned out that way. XD And yusss, I finally drew an goodish braid!You are priceless.Water drop sketches.One night before bed I wanted to draw something, so I though, “Hey, what about a seahorse?” So I drew a seahorse. Ta-daa. XDEh, it’s okay, but I like the other girl better. XD
*Sigh* Spring and bluebirds are both so lovely.A random Sharpie drawing of a sea turtle.I drew part of my boot for art class in co-op. 😀This was also for art class, but I might touch it up. We were supposed to put something we enjoy or love or whatever in the reflection, so I drew a camera, but it doesn’t quite look right… any tips?Another “Reflection” drawing for art class.And yet another “Reflection” sketch. 🙂
So that’s about it! Which drawing was your favorite? What do YOU like to draw most?
My pen-pal Grace and I made this mandala together. We took turns adding a section each time we sent our letters until it turned out like this! Isn’t it pretty? 😀
Mandalas don’t have many rules. The basic idea is to create a symmetrical, circular design by adding consecutive rings of doodles. It’s fun to play with the position of the mandala – you can have it in the center of the page, running off the page, or in the corner, which is what Grace and I did. This is how the mandala looked from start to finish:
Wow. I realized this post is really short. XD Heh heh, oh well! I hope you enjoyed it, short though it may be! If you made some art inspired by this post, we’d love to see it! Visit this page to see how to help fill our art gallery.
Do you like doodling mandalas? Do you have a pen-pal?
My friends and I got together and came up with the idea of an ATC party where you make and trade ATC’s, eat snacks, and have fun! (If you don’t know what ATC’s are, you can read more about them here, here, and here.)We put our plan into action and it was a great success! Here are some tips in case you would like to plan your own.
First, know how many people are coming. About 15 people came to our party, and mostly they were friends from church who make them.
Cut out blank ATC’s ahead of time, or have your guests each bring a few. We used on average from 5-10 cards per person. It kind of varied.
Set out a bunch of supplies. We also had a painting table and a drawing/gluing/etc. table. Here is a list of some supplies you can set out:
Sequins
Colored scrap paper
Glitter
Buttons
Magazine pages
Pretty tape
Stamps and stamp pads
Fabric scraps
And of course the basics:
Markers
Crayons
Colored pencils
Scissors
Glue/ fabric glue/ tape/ glue stick
So yeah, it was a lot of fun. (But it did take quite some cleaning afterwards! 🙂 ) It’s a good idea to put a scrap piece of paper down at each person’s place, and maybe a tablecloth on the table.
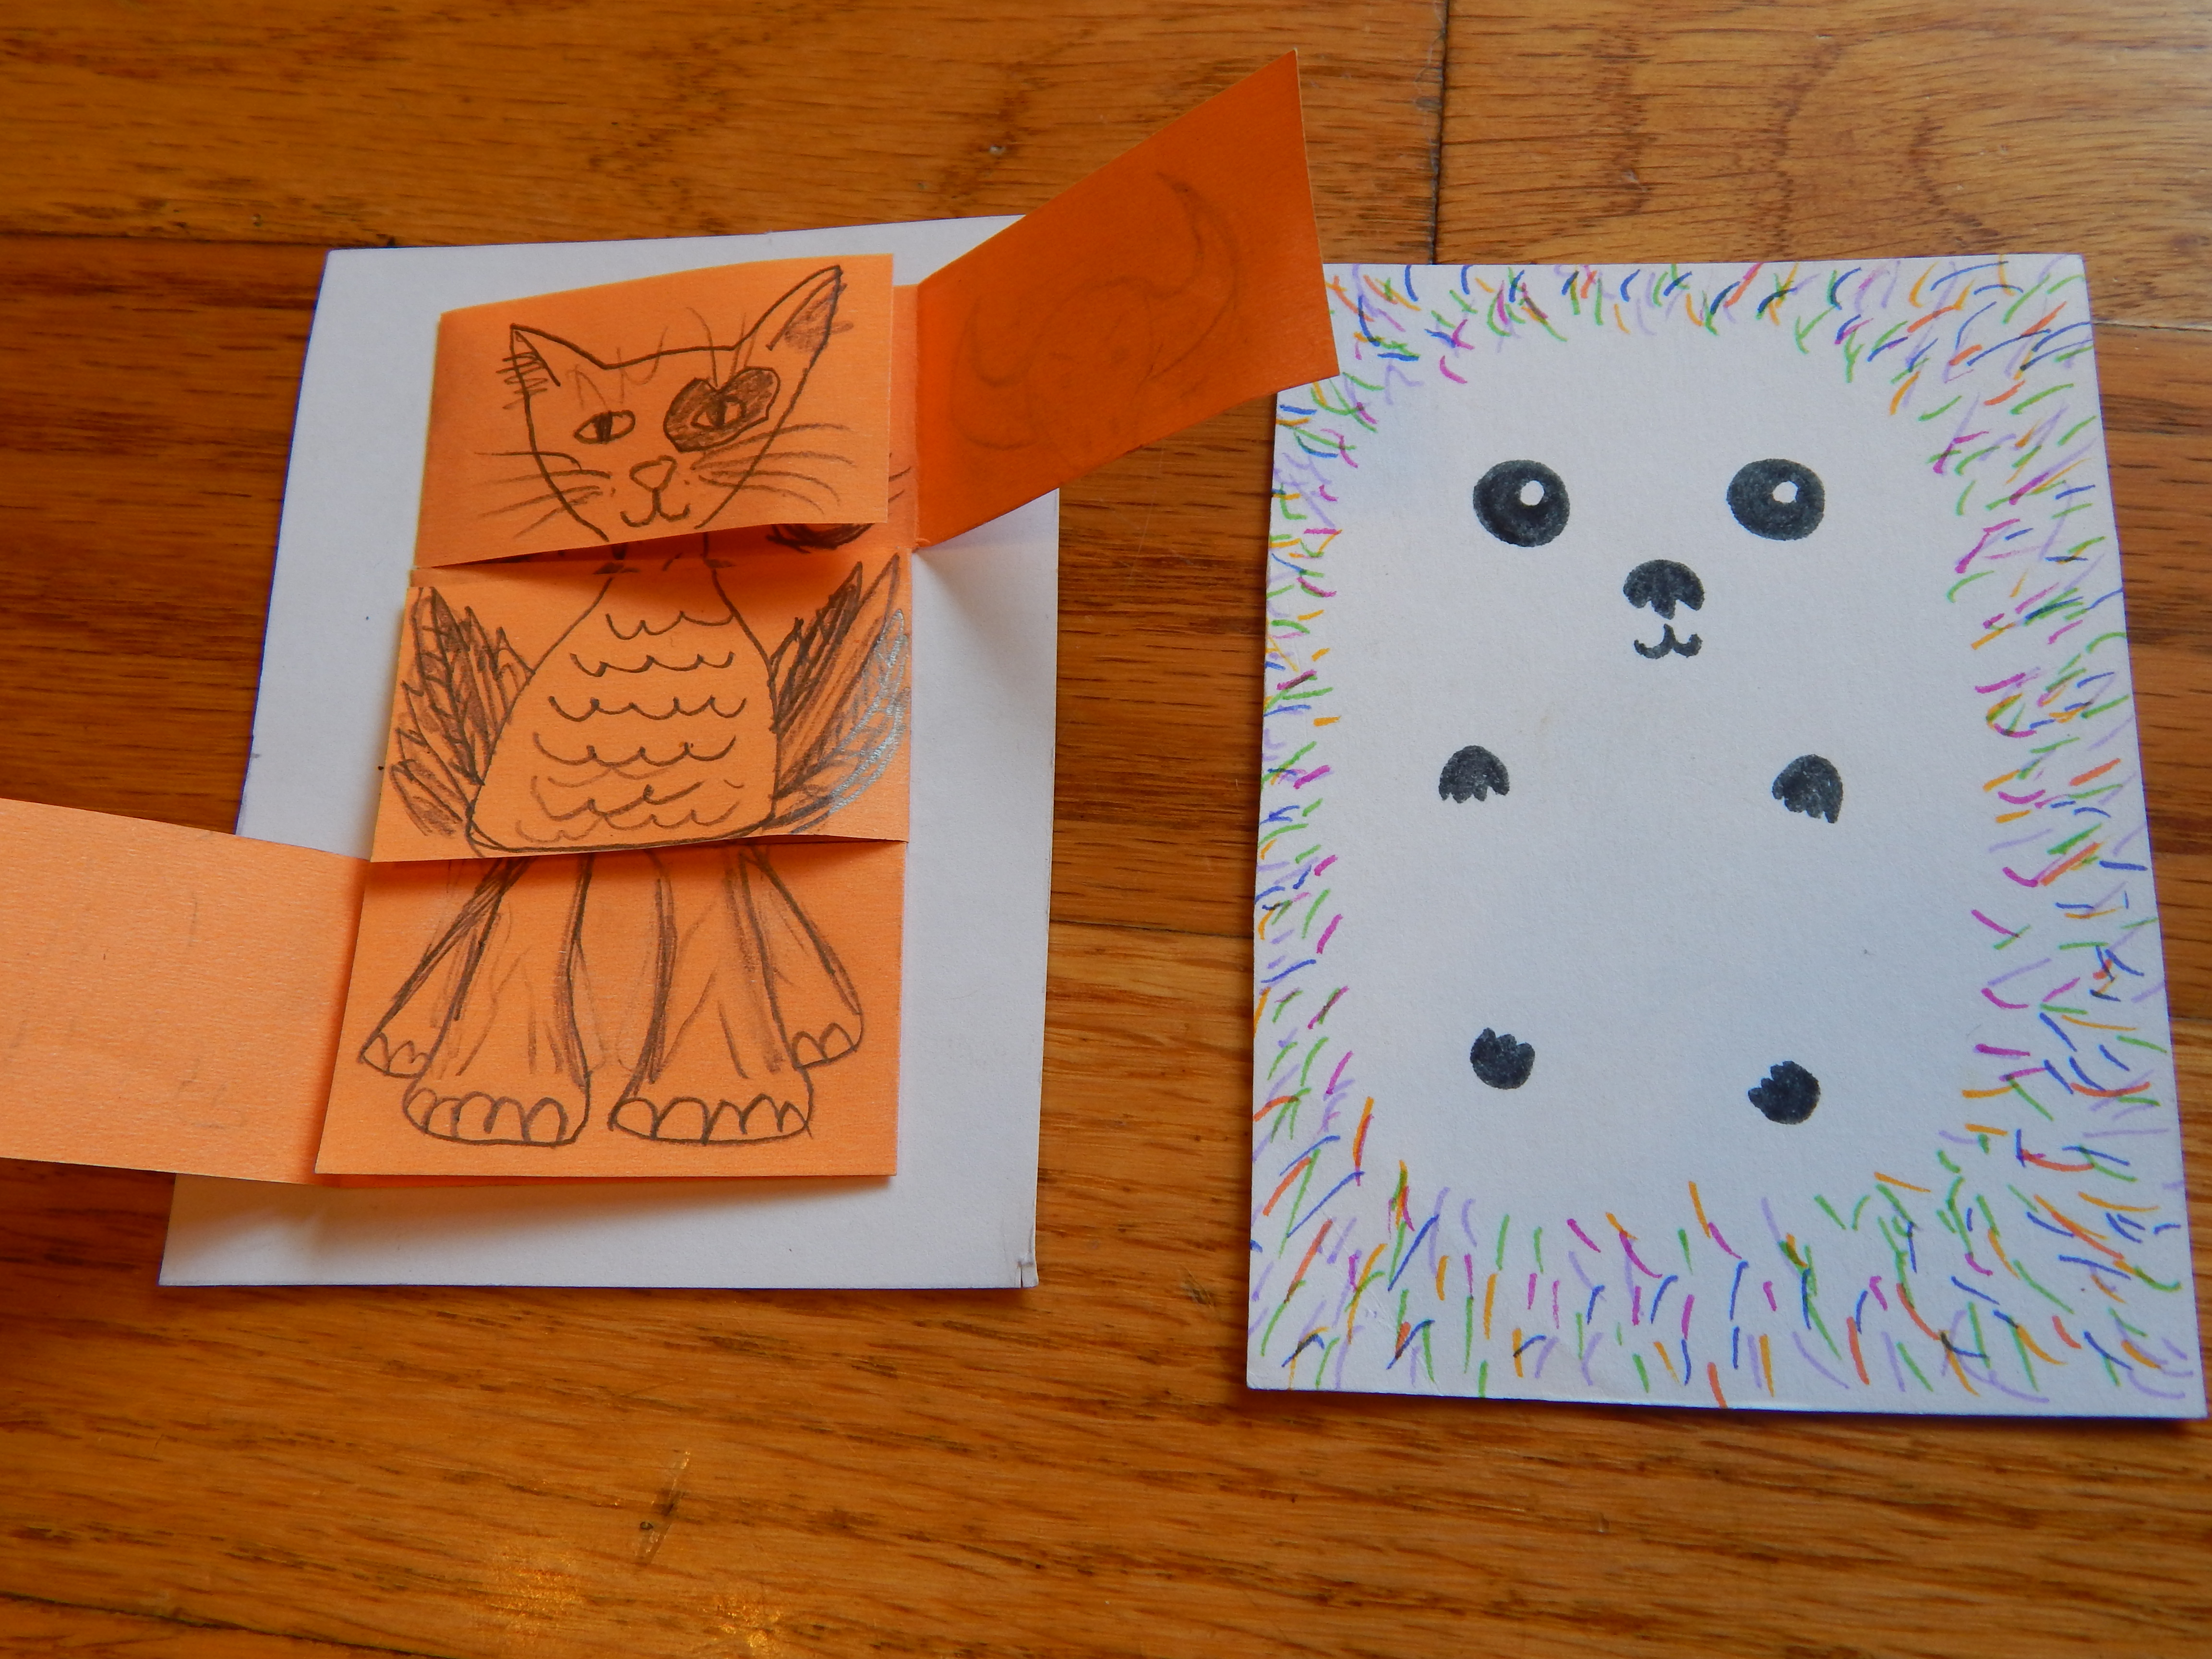
And now for my ATC’s. These are some of my favorites:
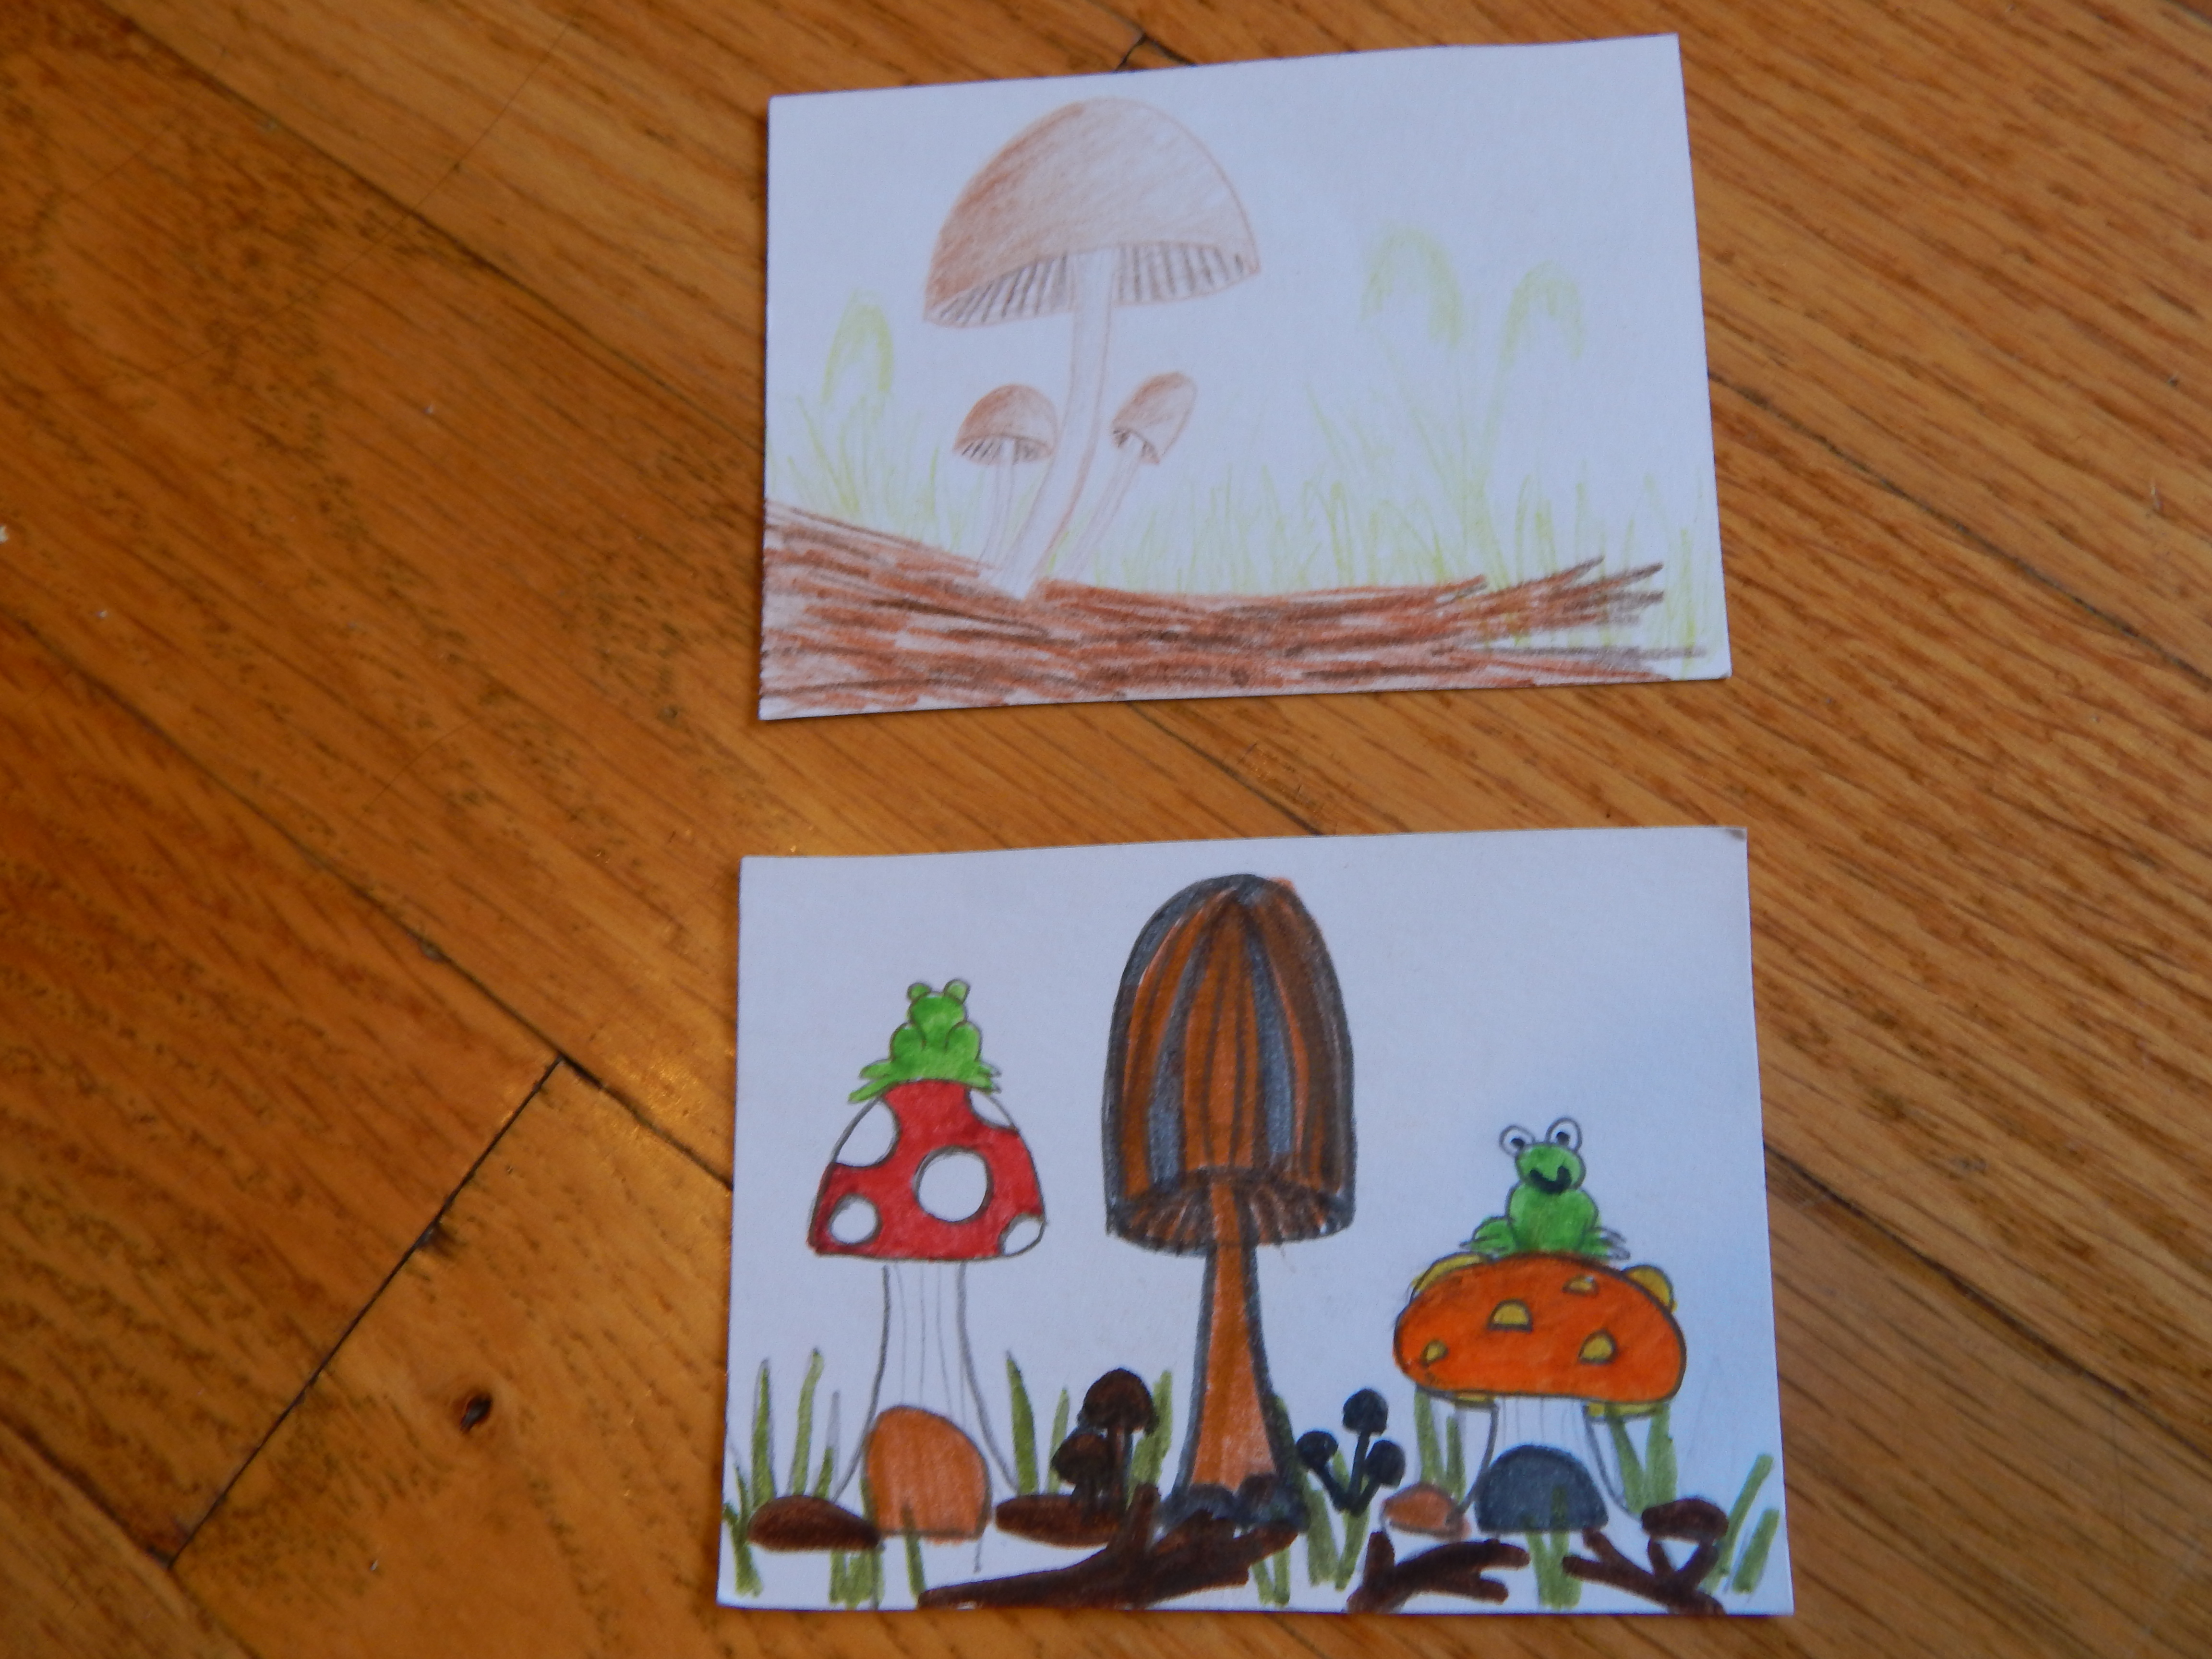
Top: Mushroomscape
Bottom: Toadstools. Get it? The toads are sitting on the mushrooms?
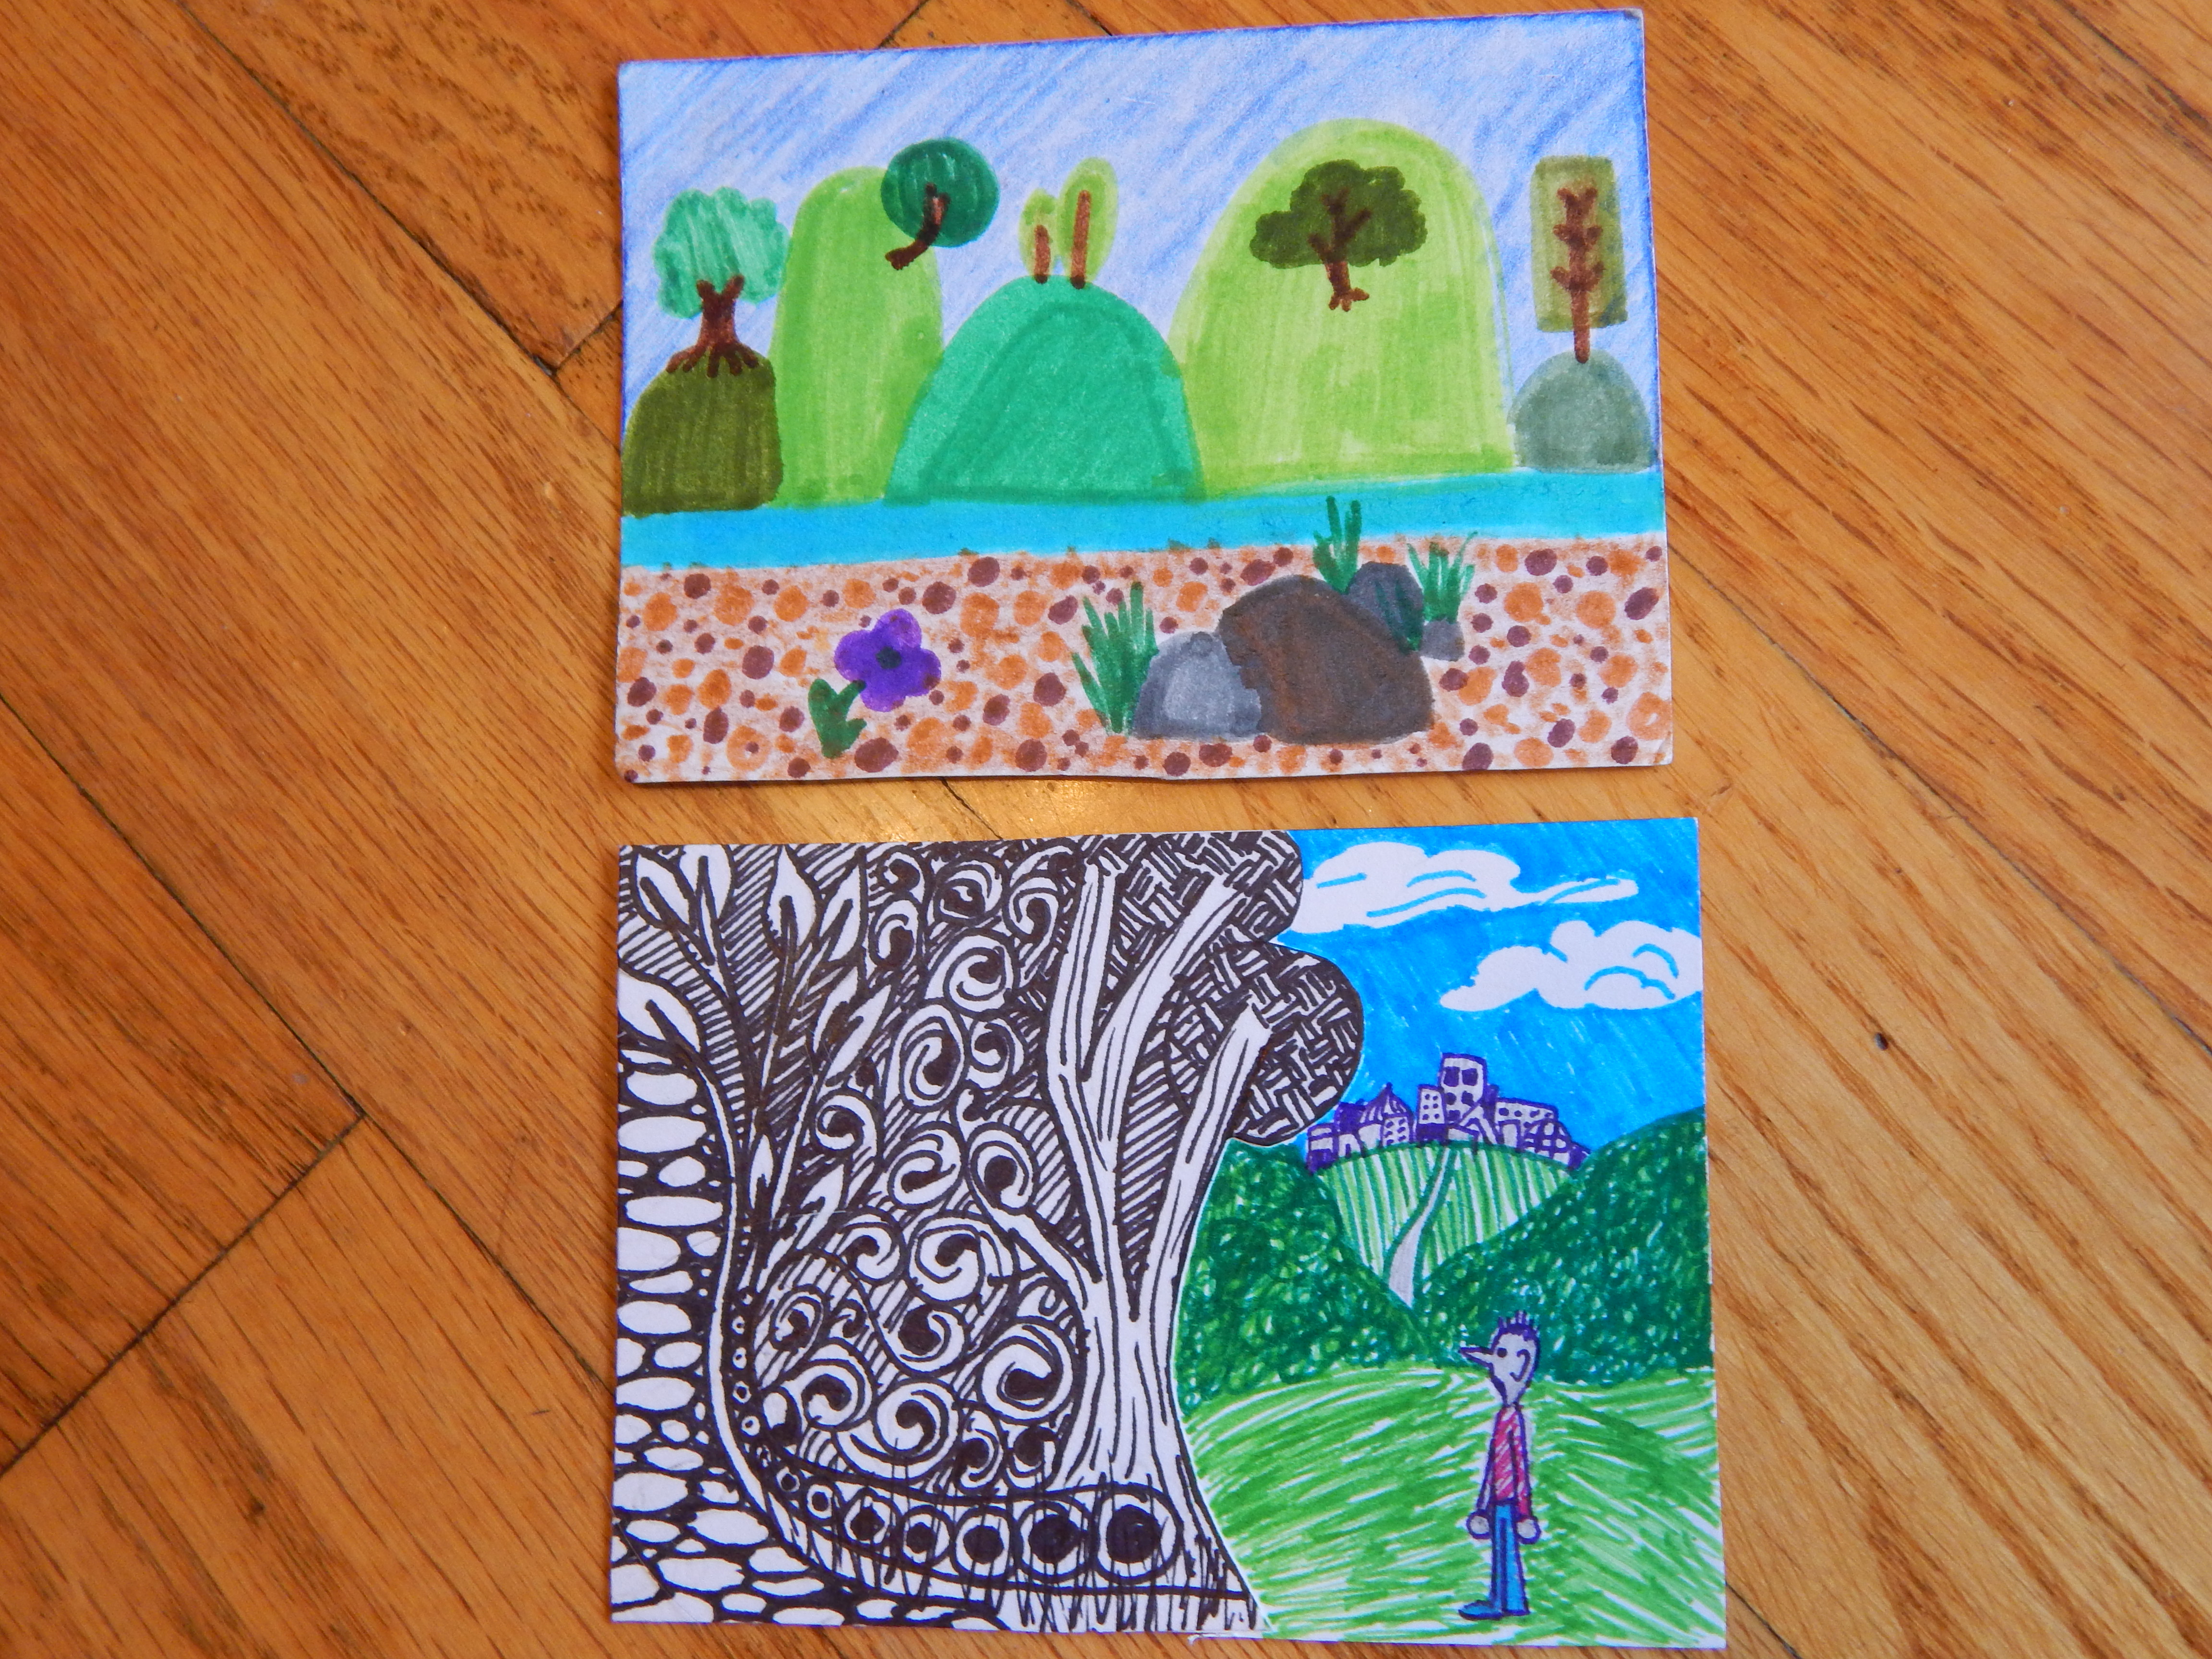
Top: Whimsical Landscape
Bottom: And…
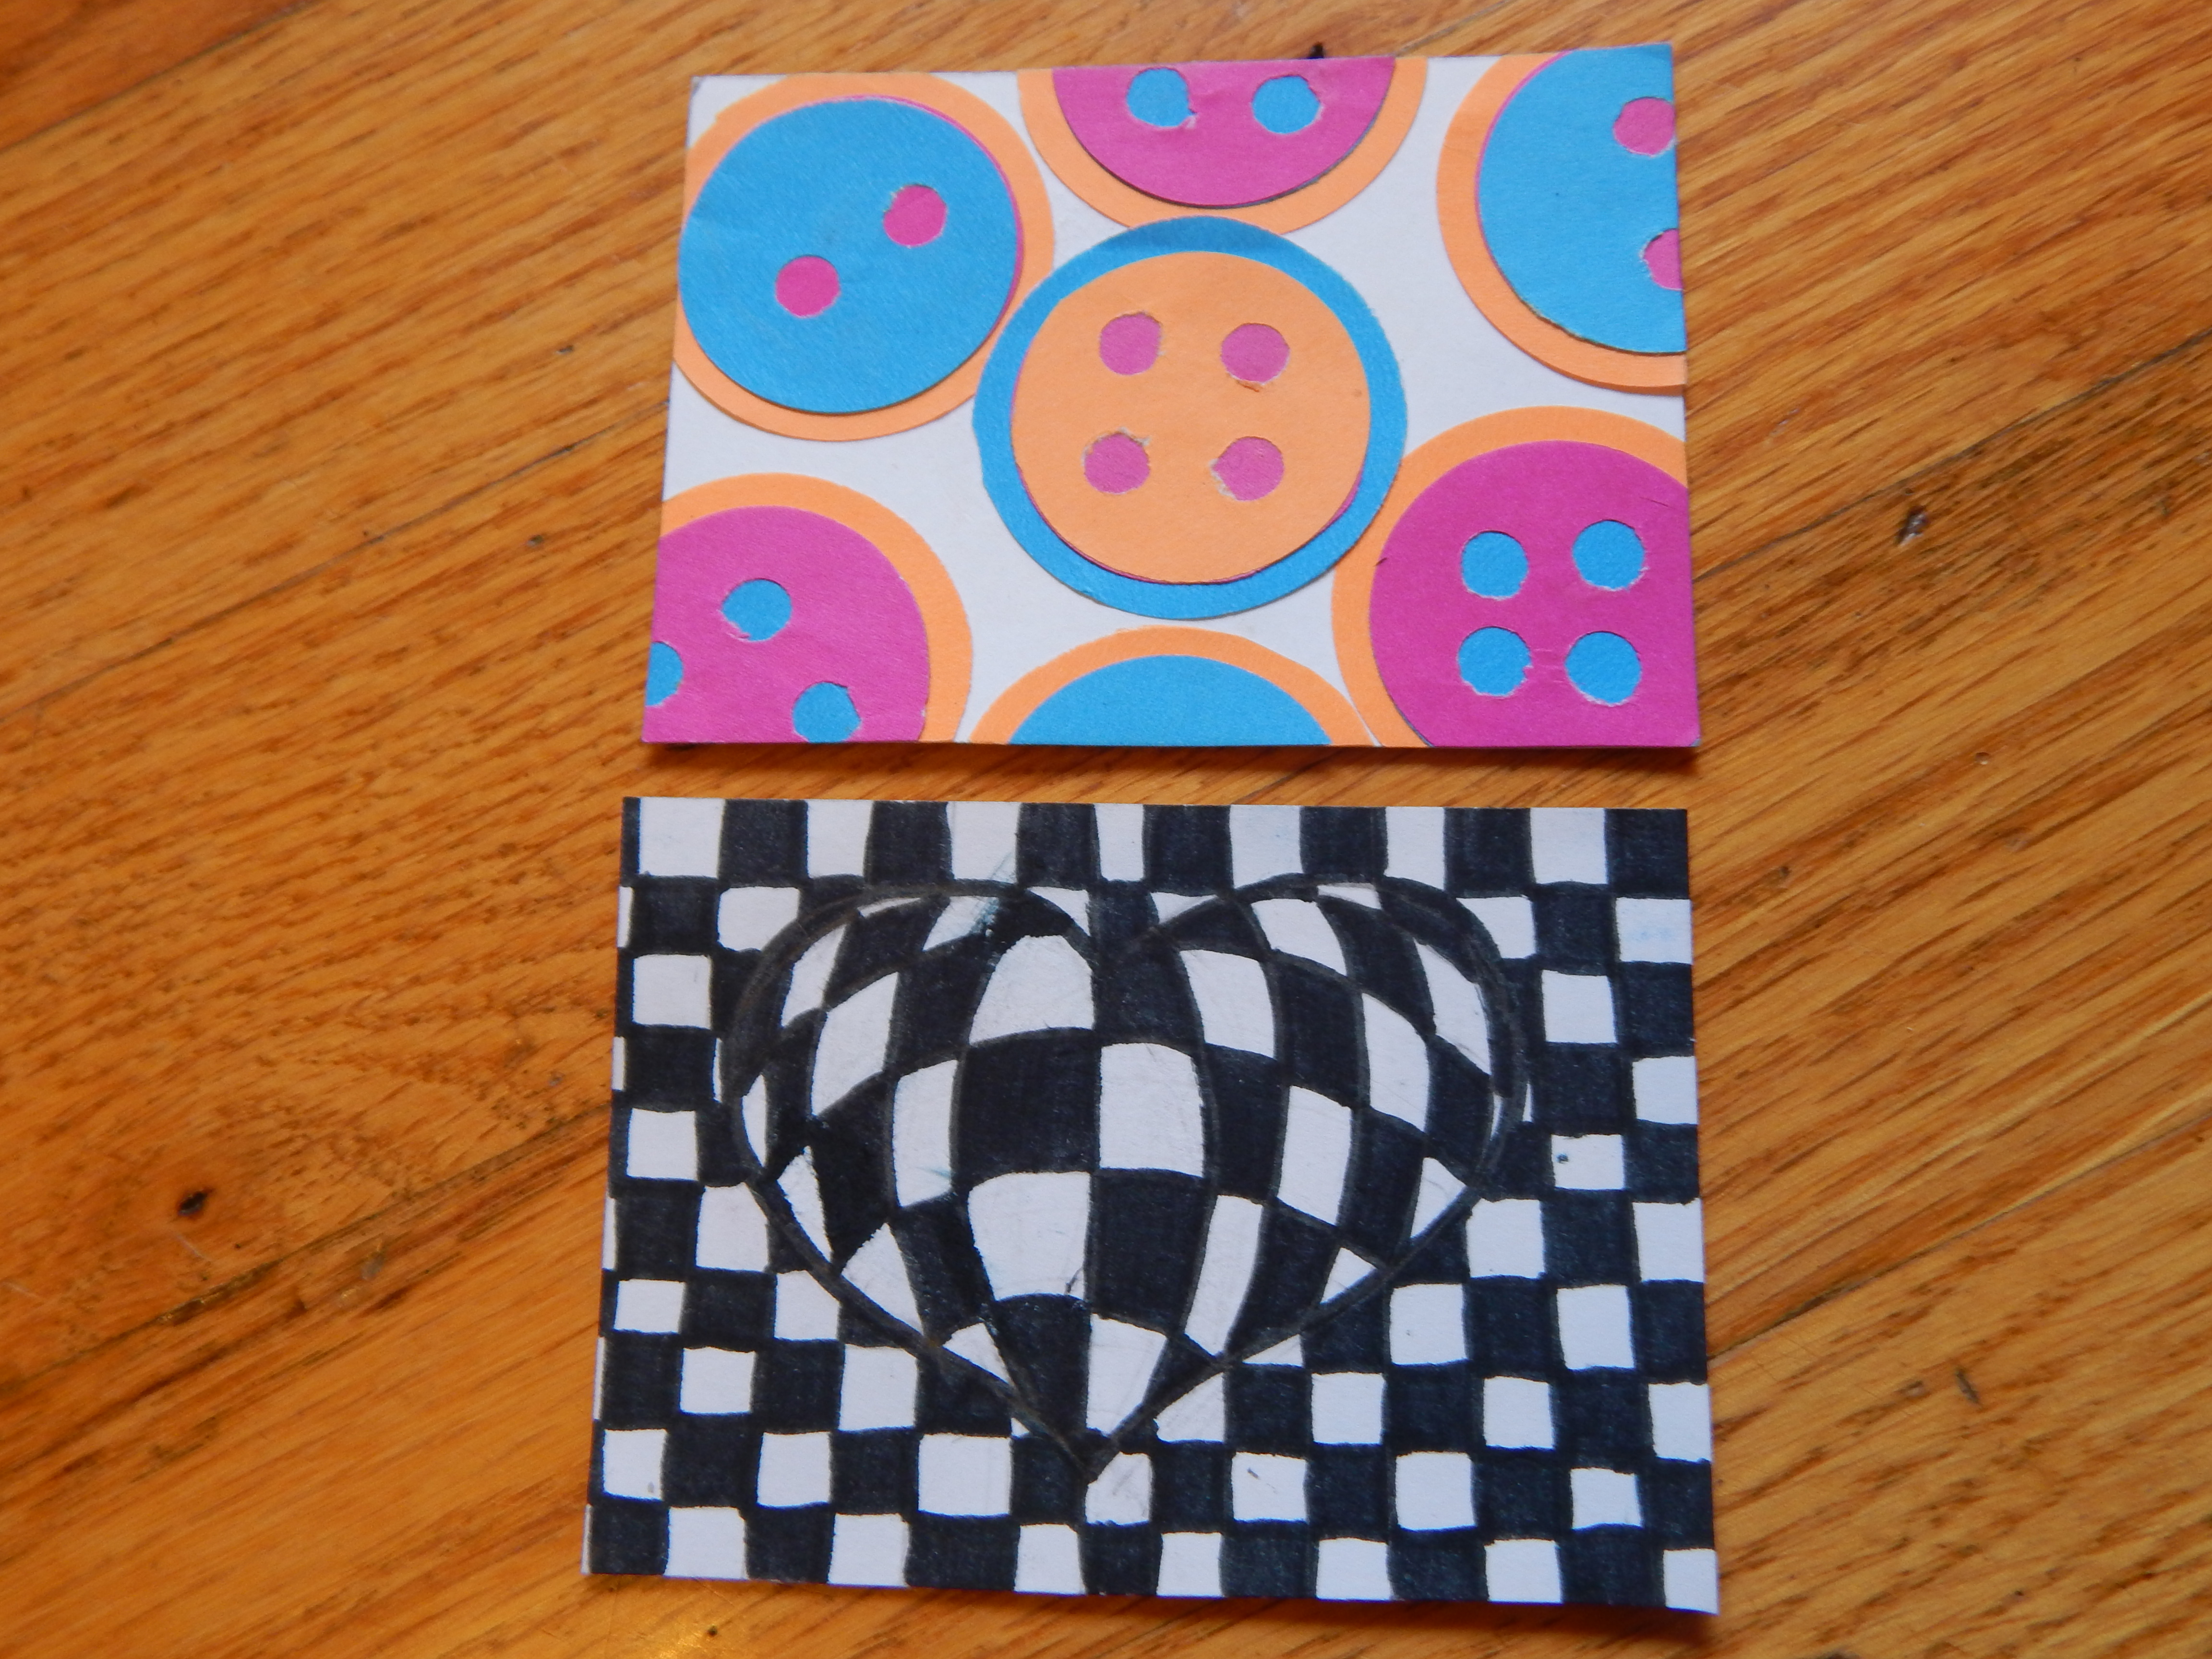
Top: Cute as a Button
Bottom: A Full Heart
Top: Transformation (I kind of forget the title, actually. 🙂 ) I made this one by folding a paper in thirds, gluing the middle fold to the ATC, and cutting the two edge folds into three sections.
Bottom: Rainbow Hedgie I got the idea for this from Pinterest
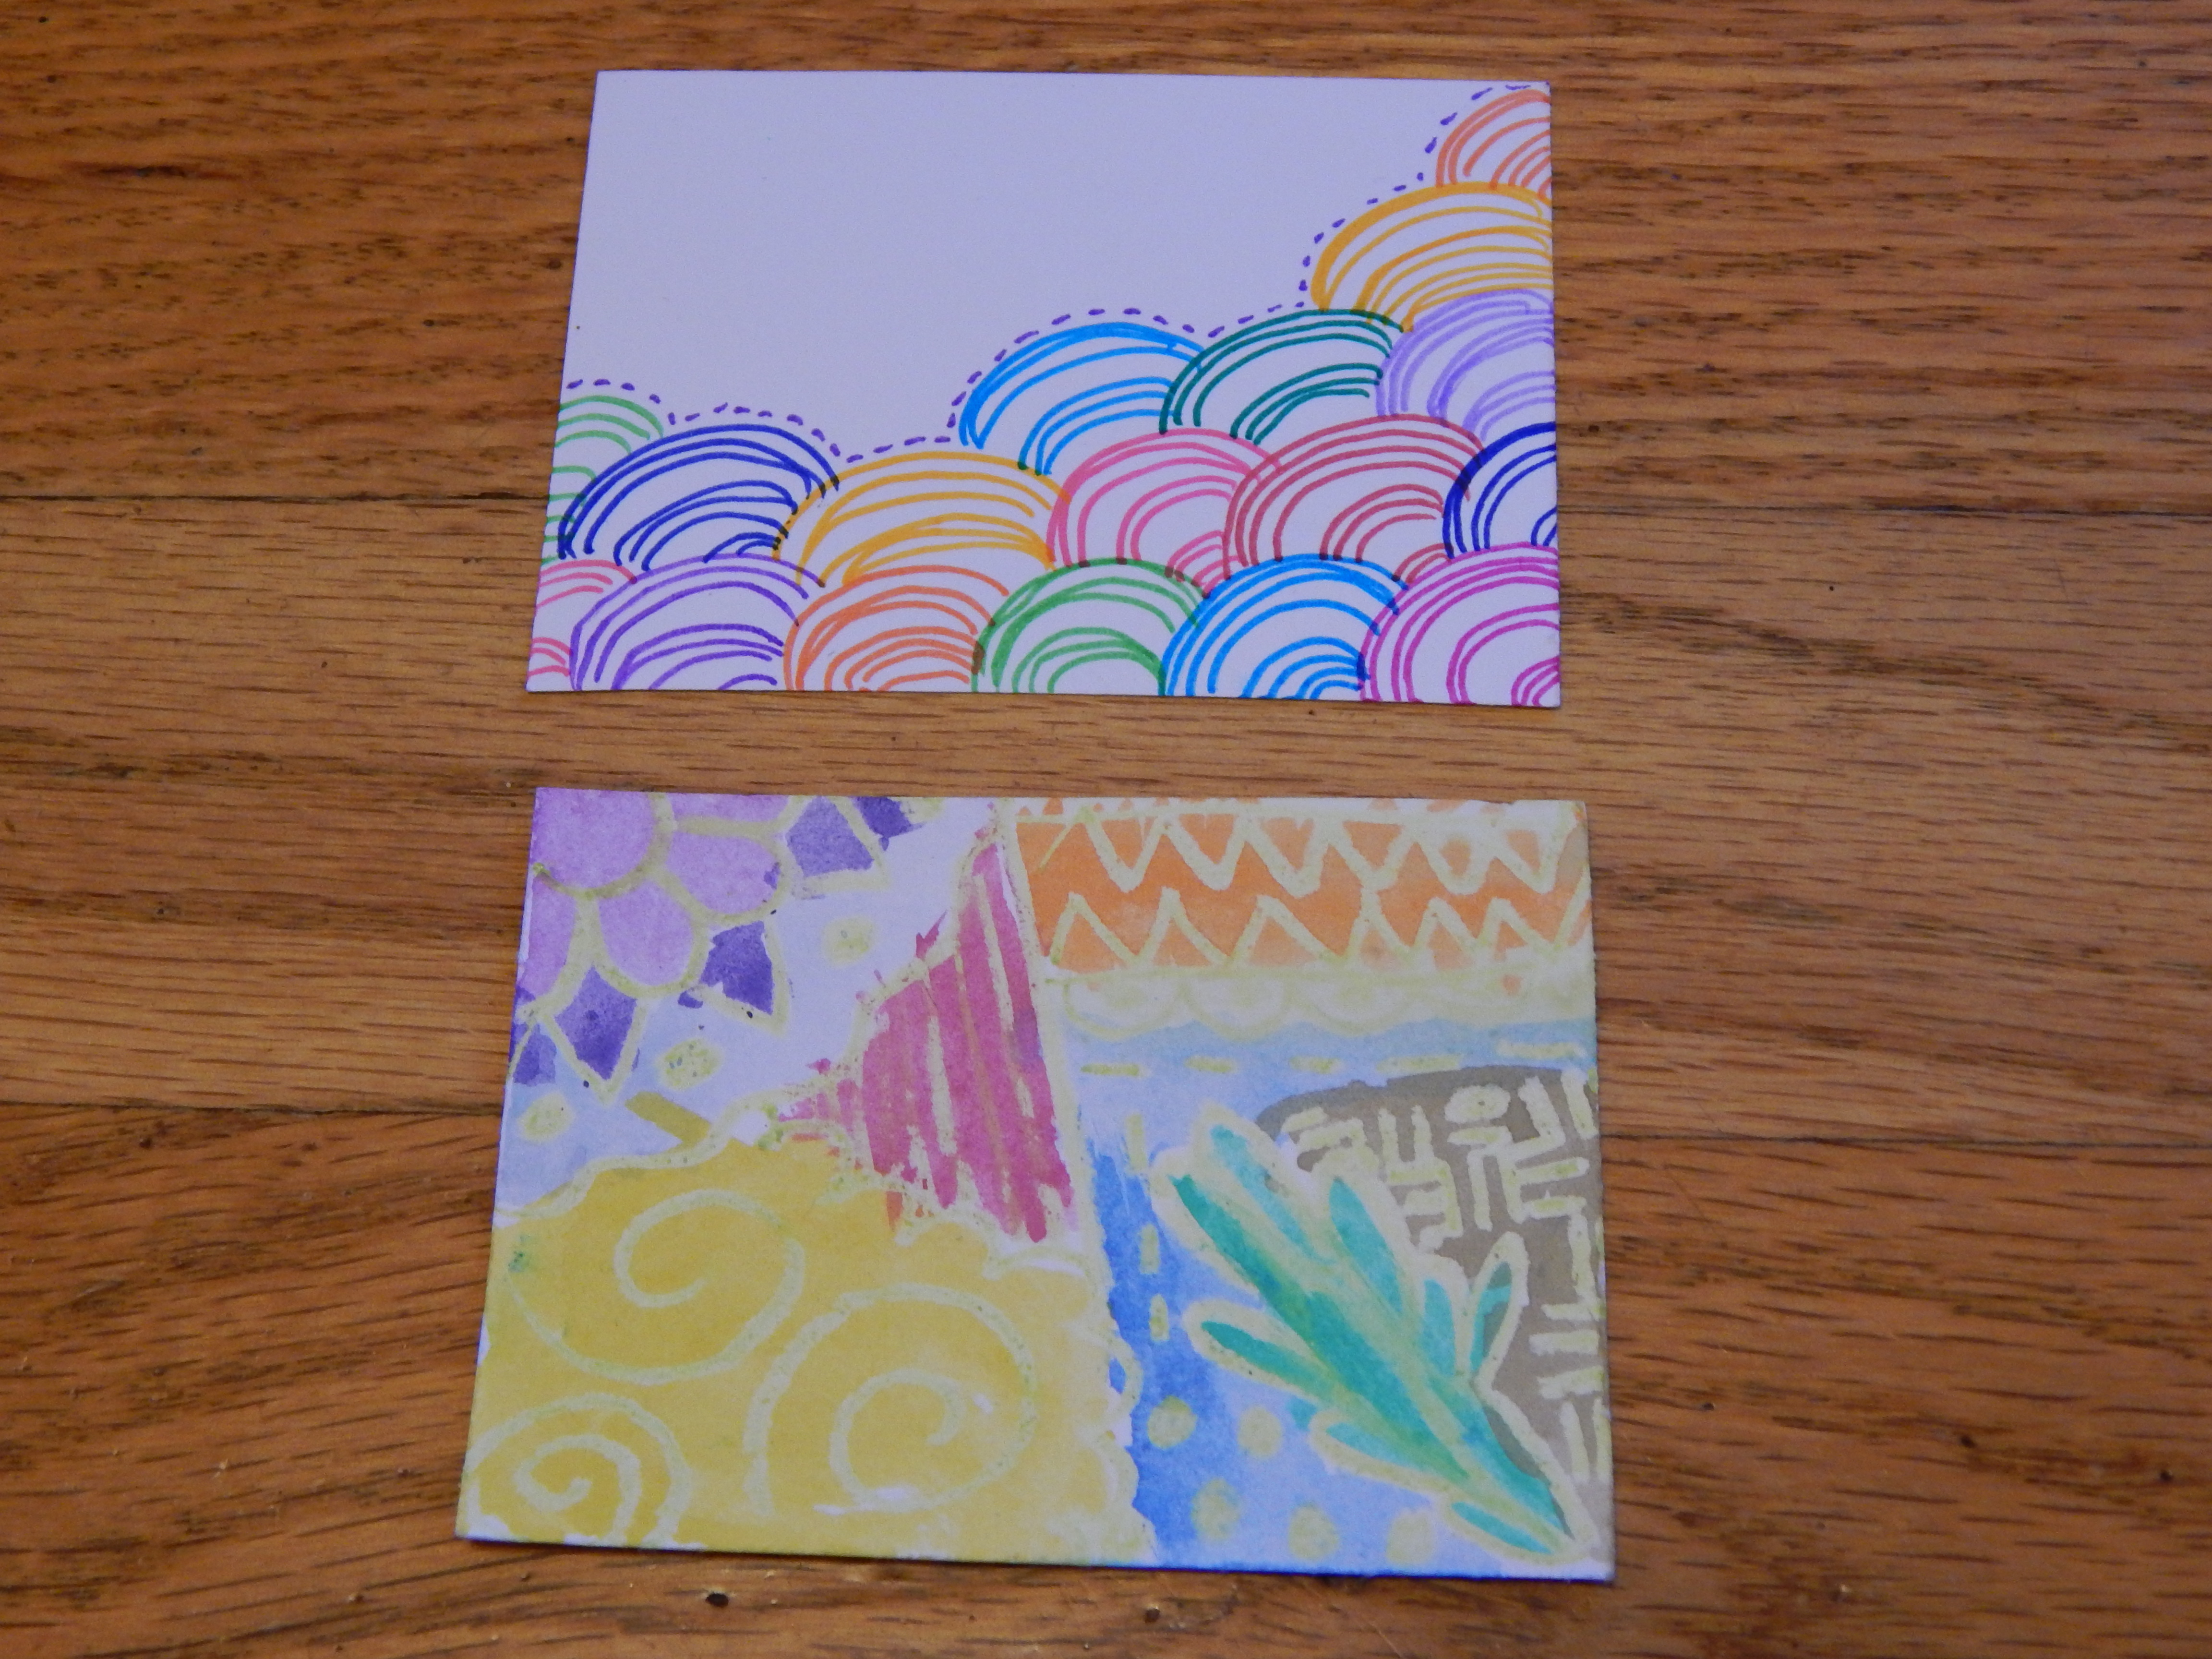
Top: Scallops
Bottom: Crayon Resist This one I made by drawing with crayon first, then painting with watercolor over top. The paint doesn’t stick to the crayon lines, but it does stick to the paper.
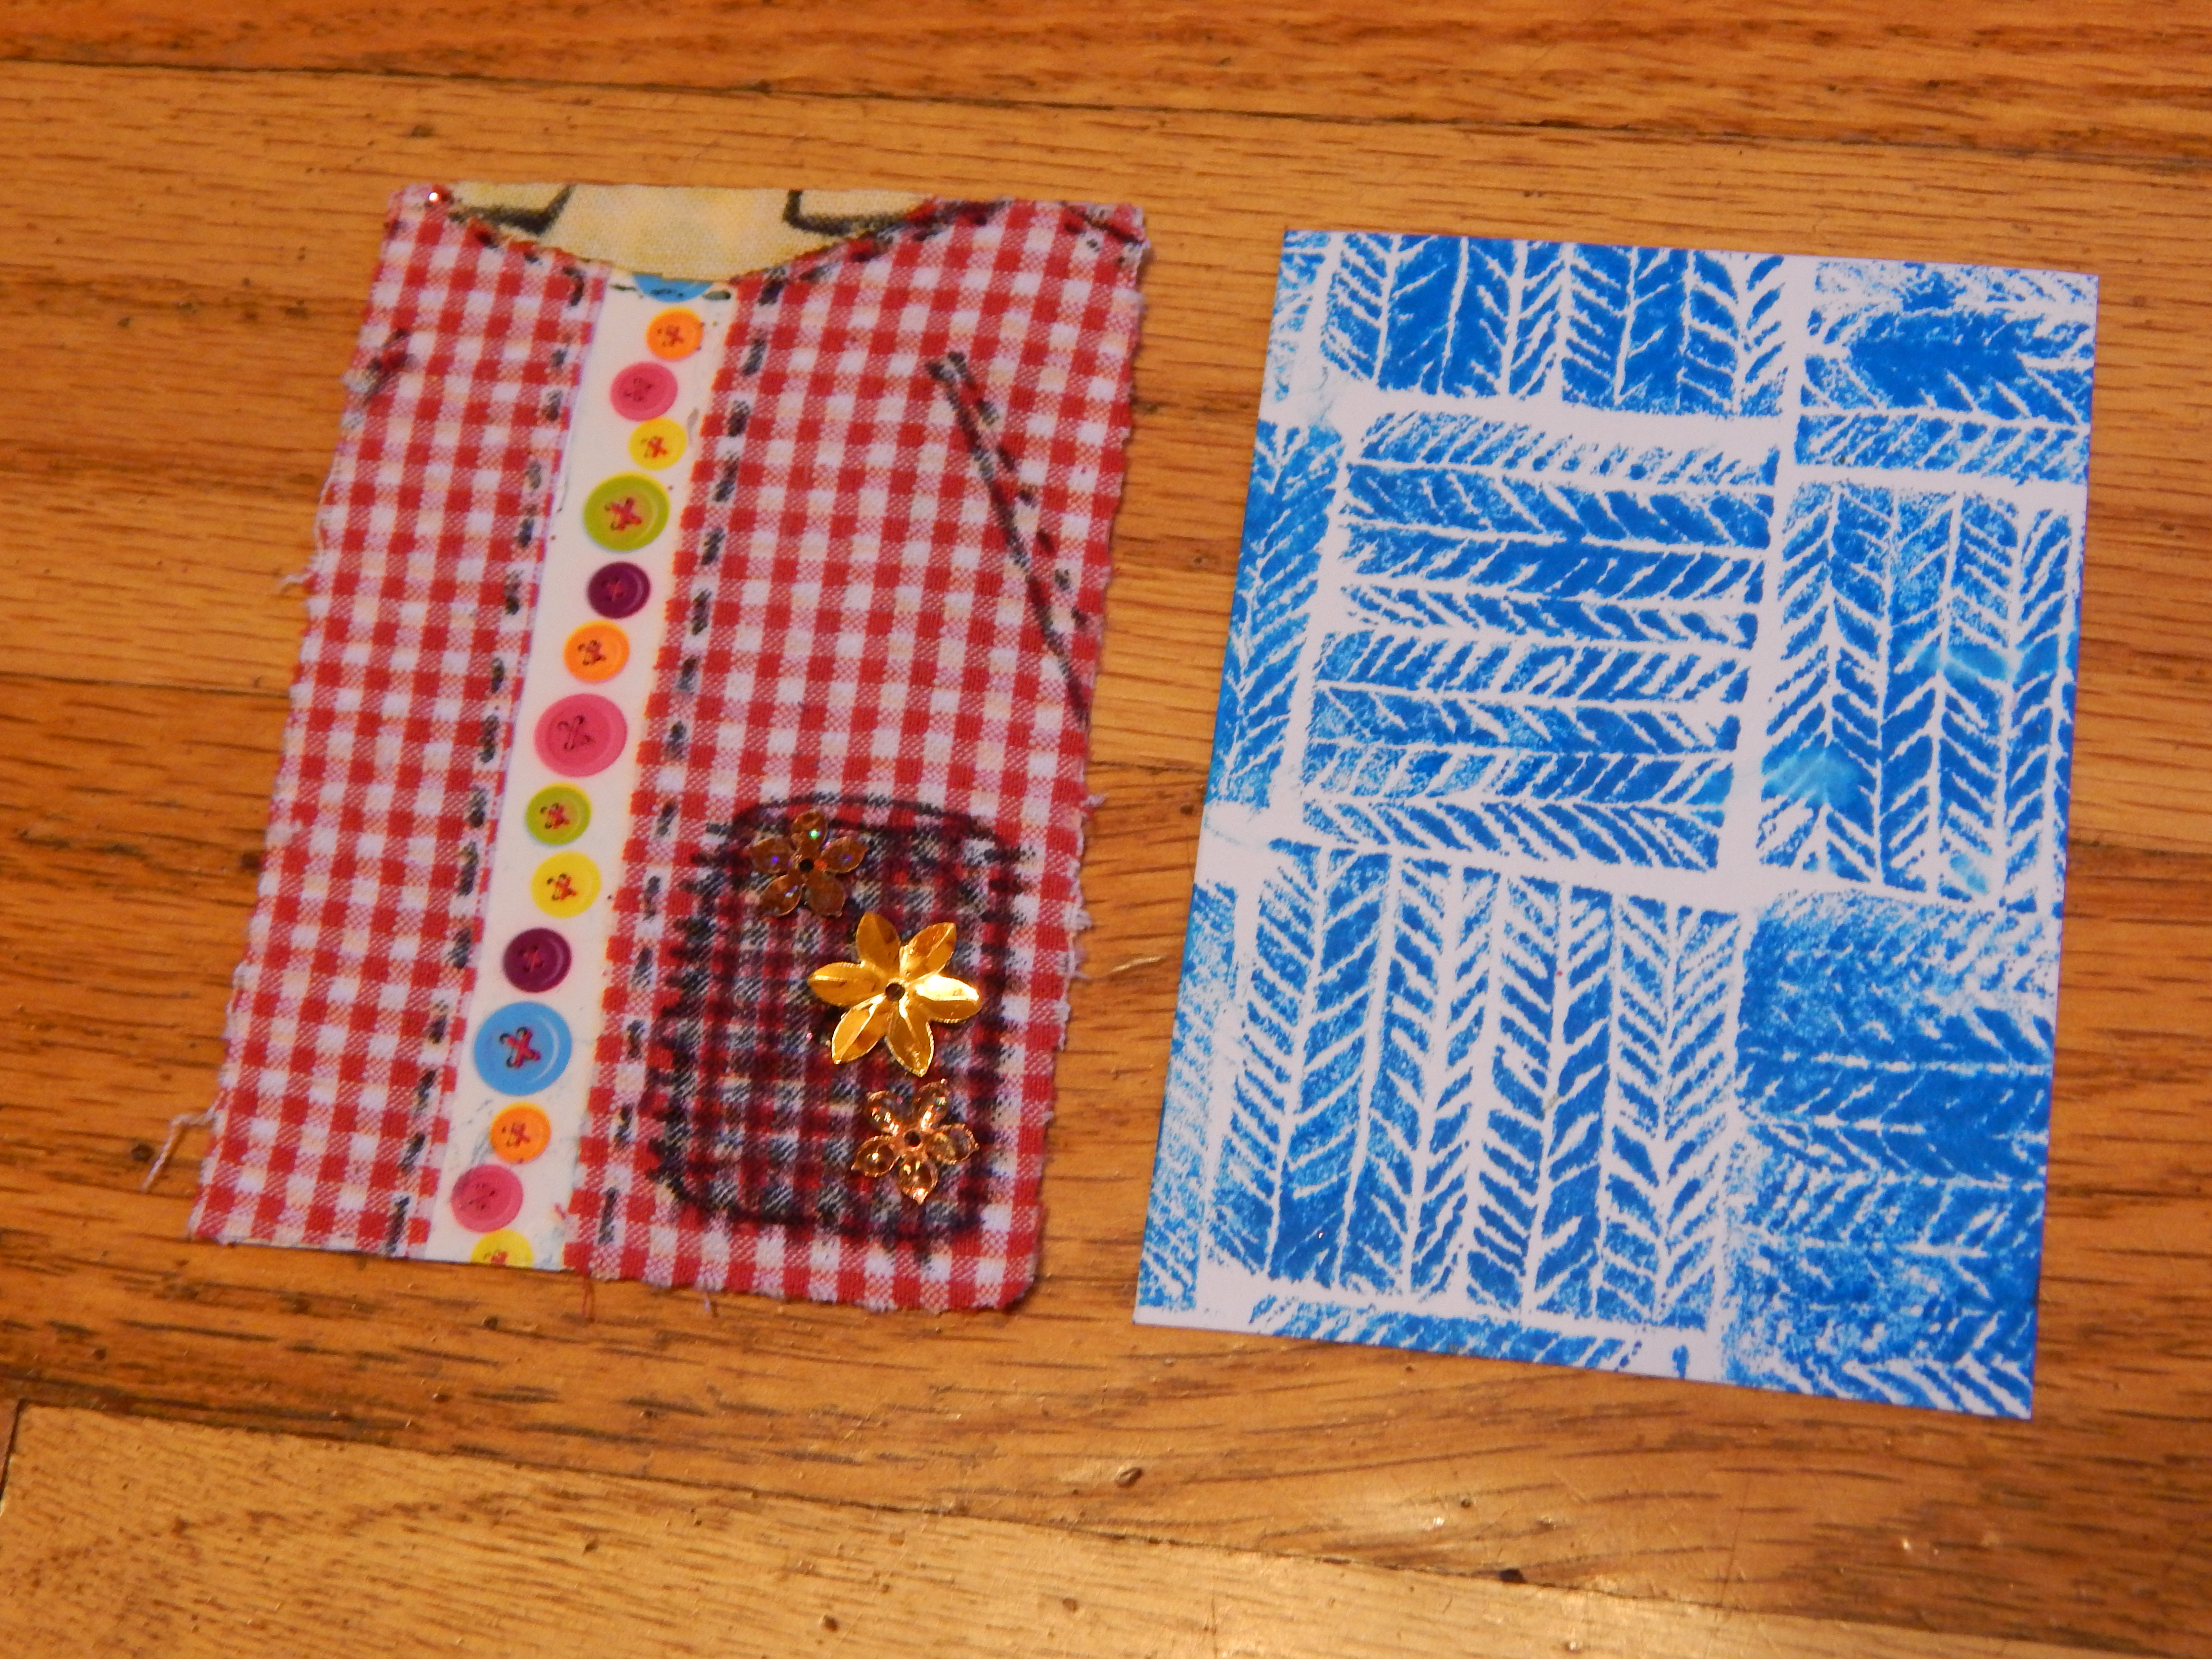
Top: Coat Pocket Made out of fabric, marker, button tape, and sequins
Bottom: Herringbone I made the prints from scratching the pattern in Styrofoam, and using it like a stamp with a stamp pad.
Top: Oodles of Doodles
Bottom: Connect-the-Dots This one was a lot of fun to do. I just drew lines through the white dots on the paper to make a picture.
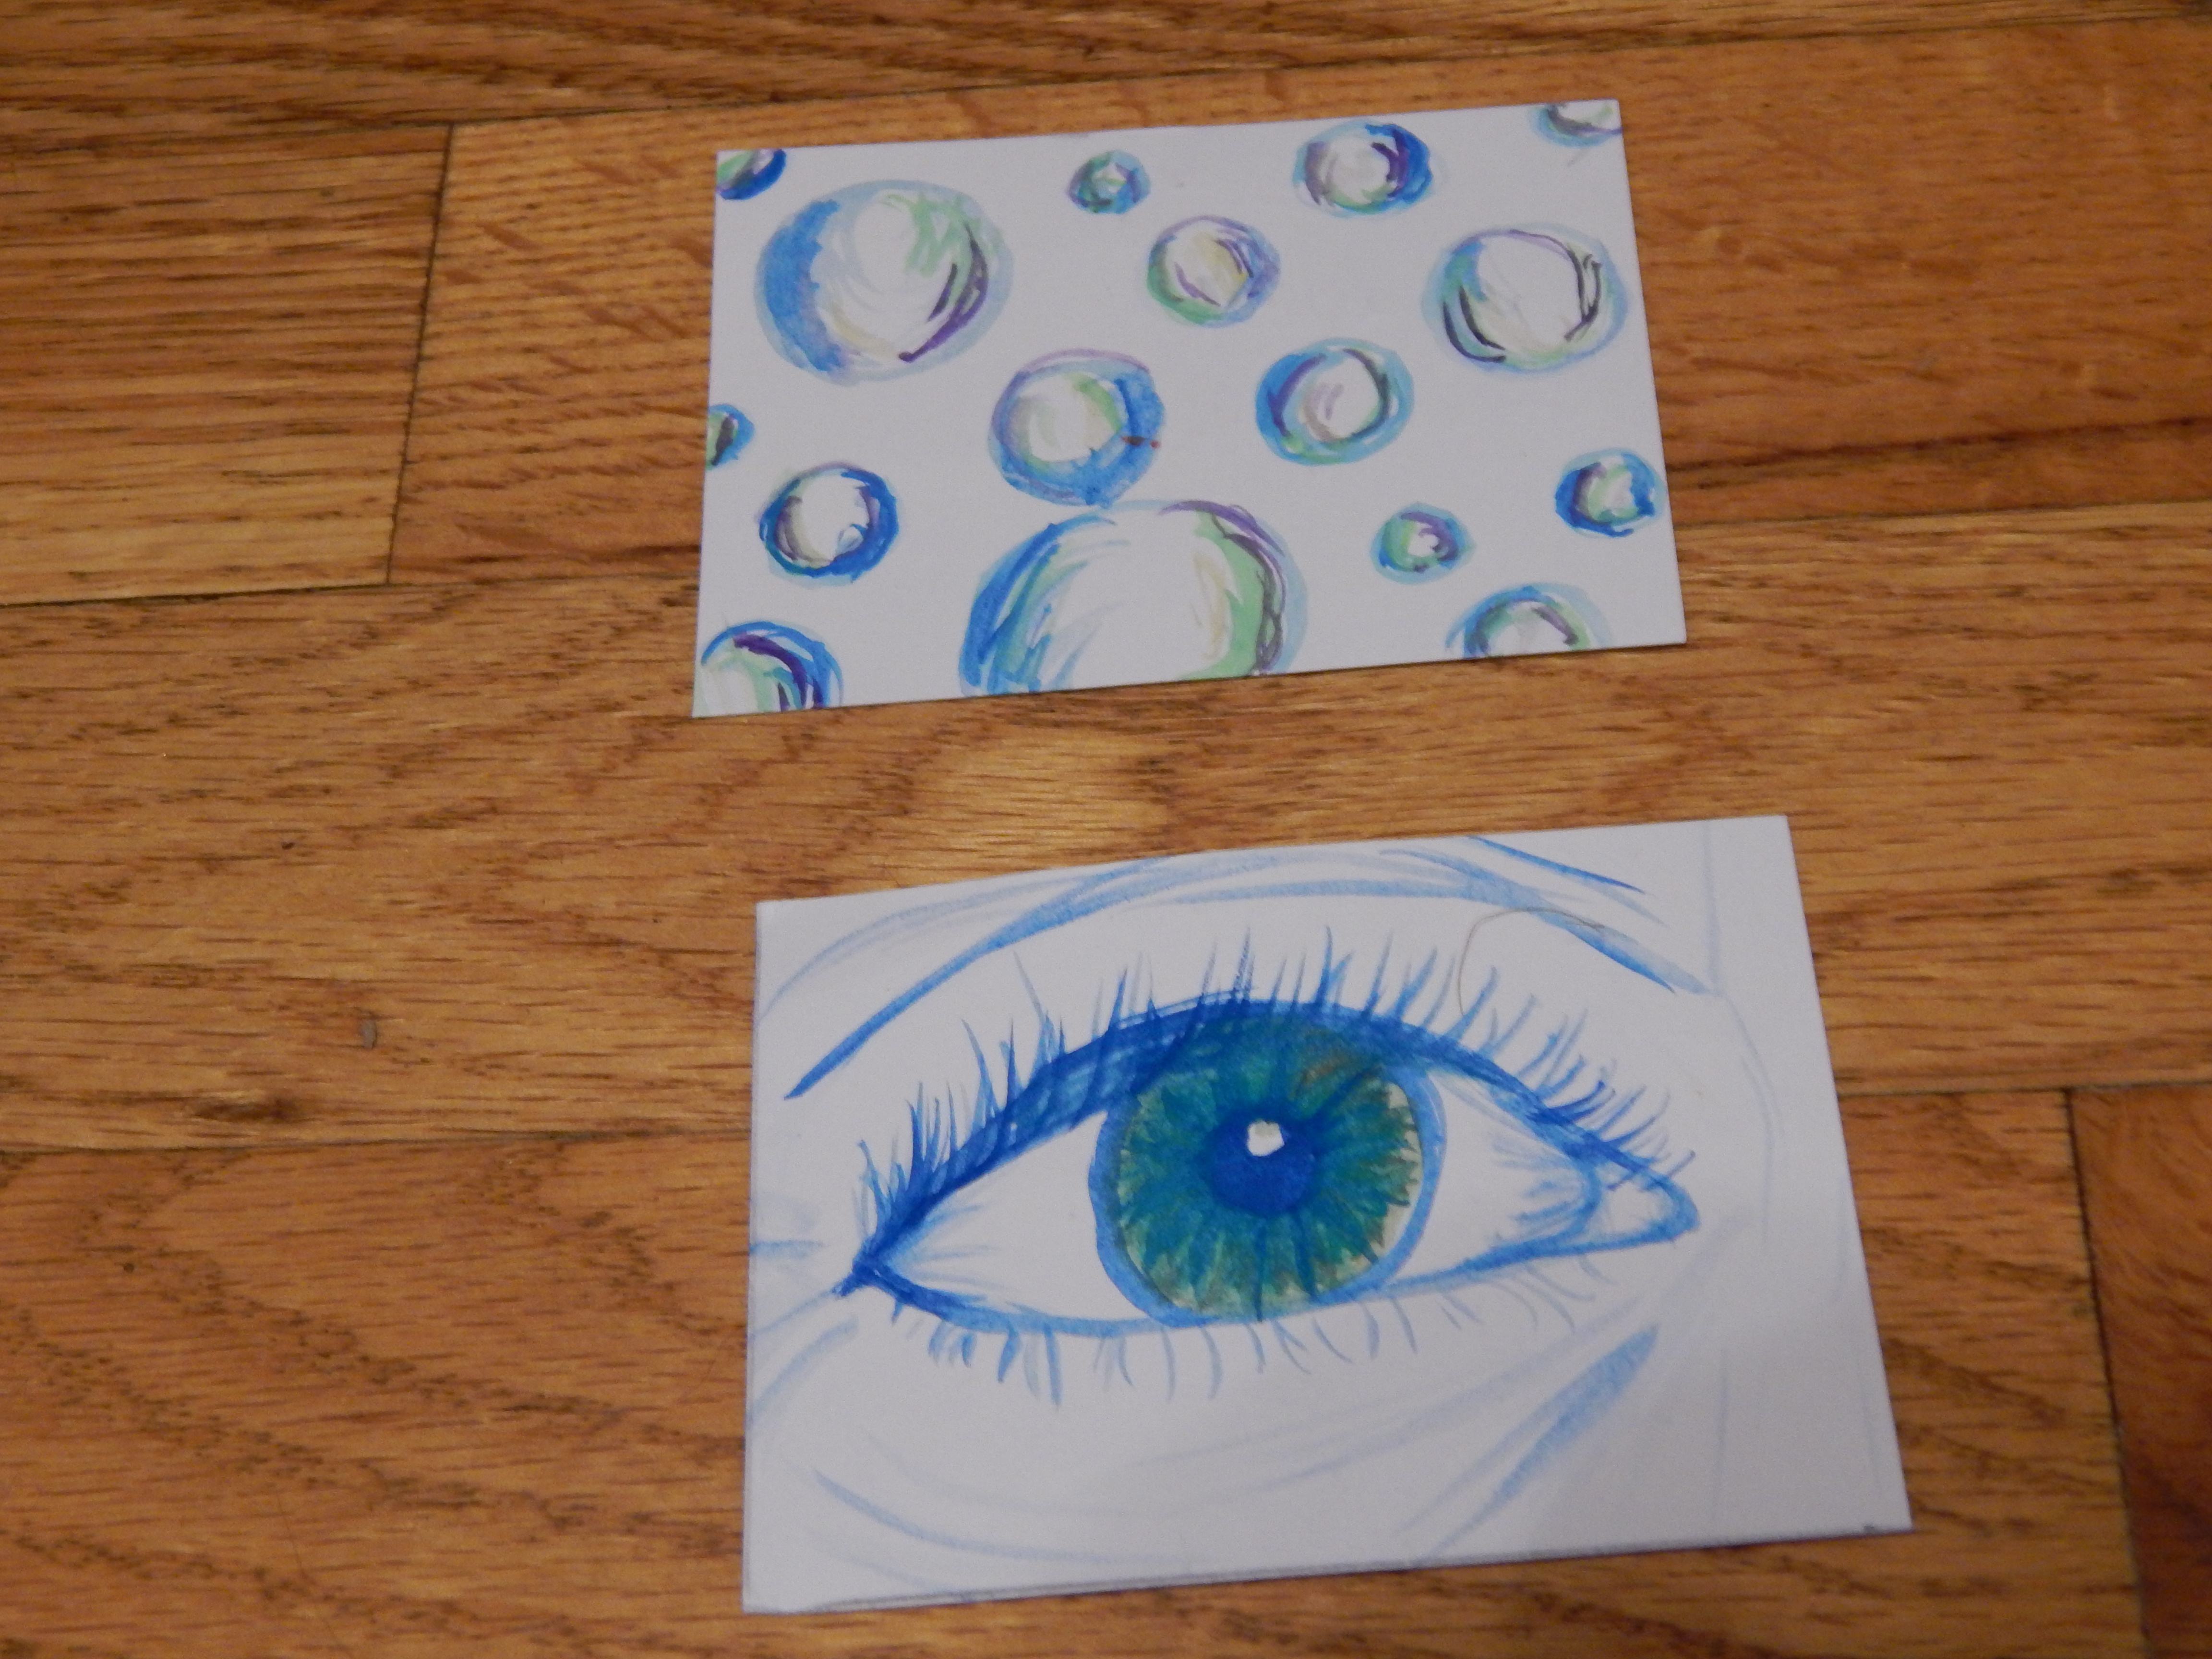
Top: Bubbles
Bottom: I’ve Got My Eye on You
Uh… Top and Bottom: Fall Collage
Whew, that was a lot of “favorites!” Do you like making ATC’s? It would be fun to see your ATC’s too!
This is a random post of pictures of lots of little things that aren’t hardly big enough for their own post, but are not small enough to be left out. They are gathered here today for your viewing pleasure.
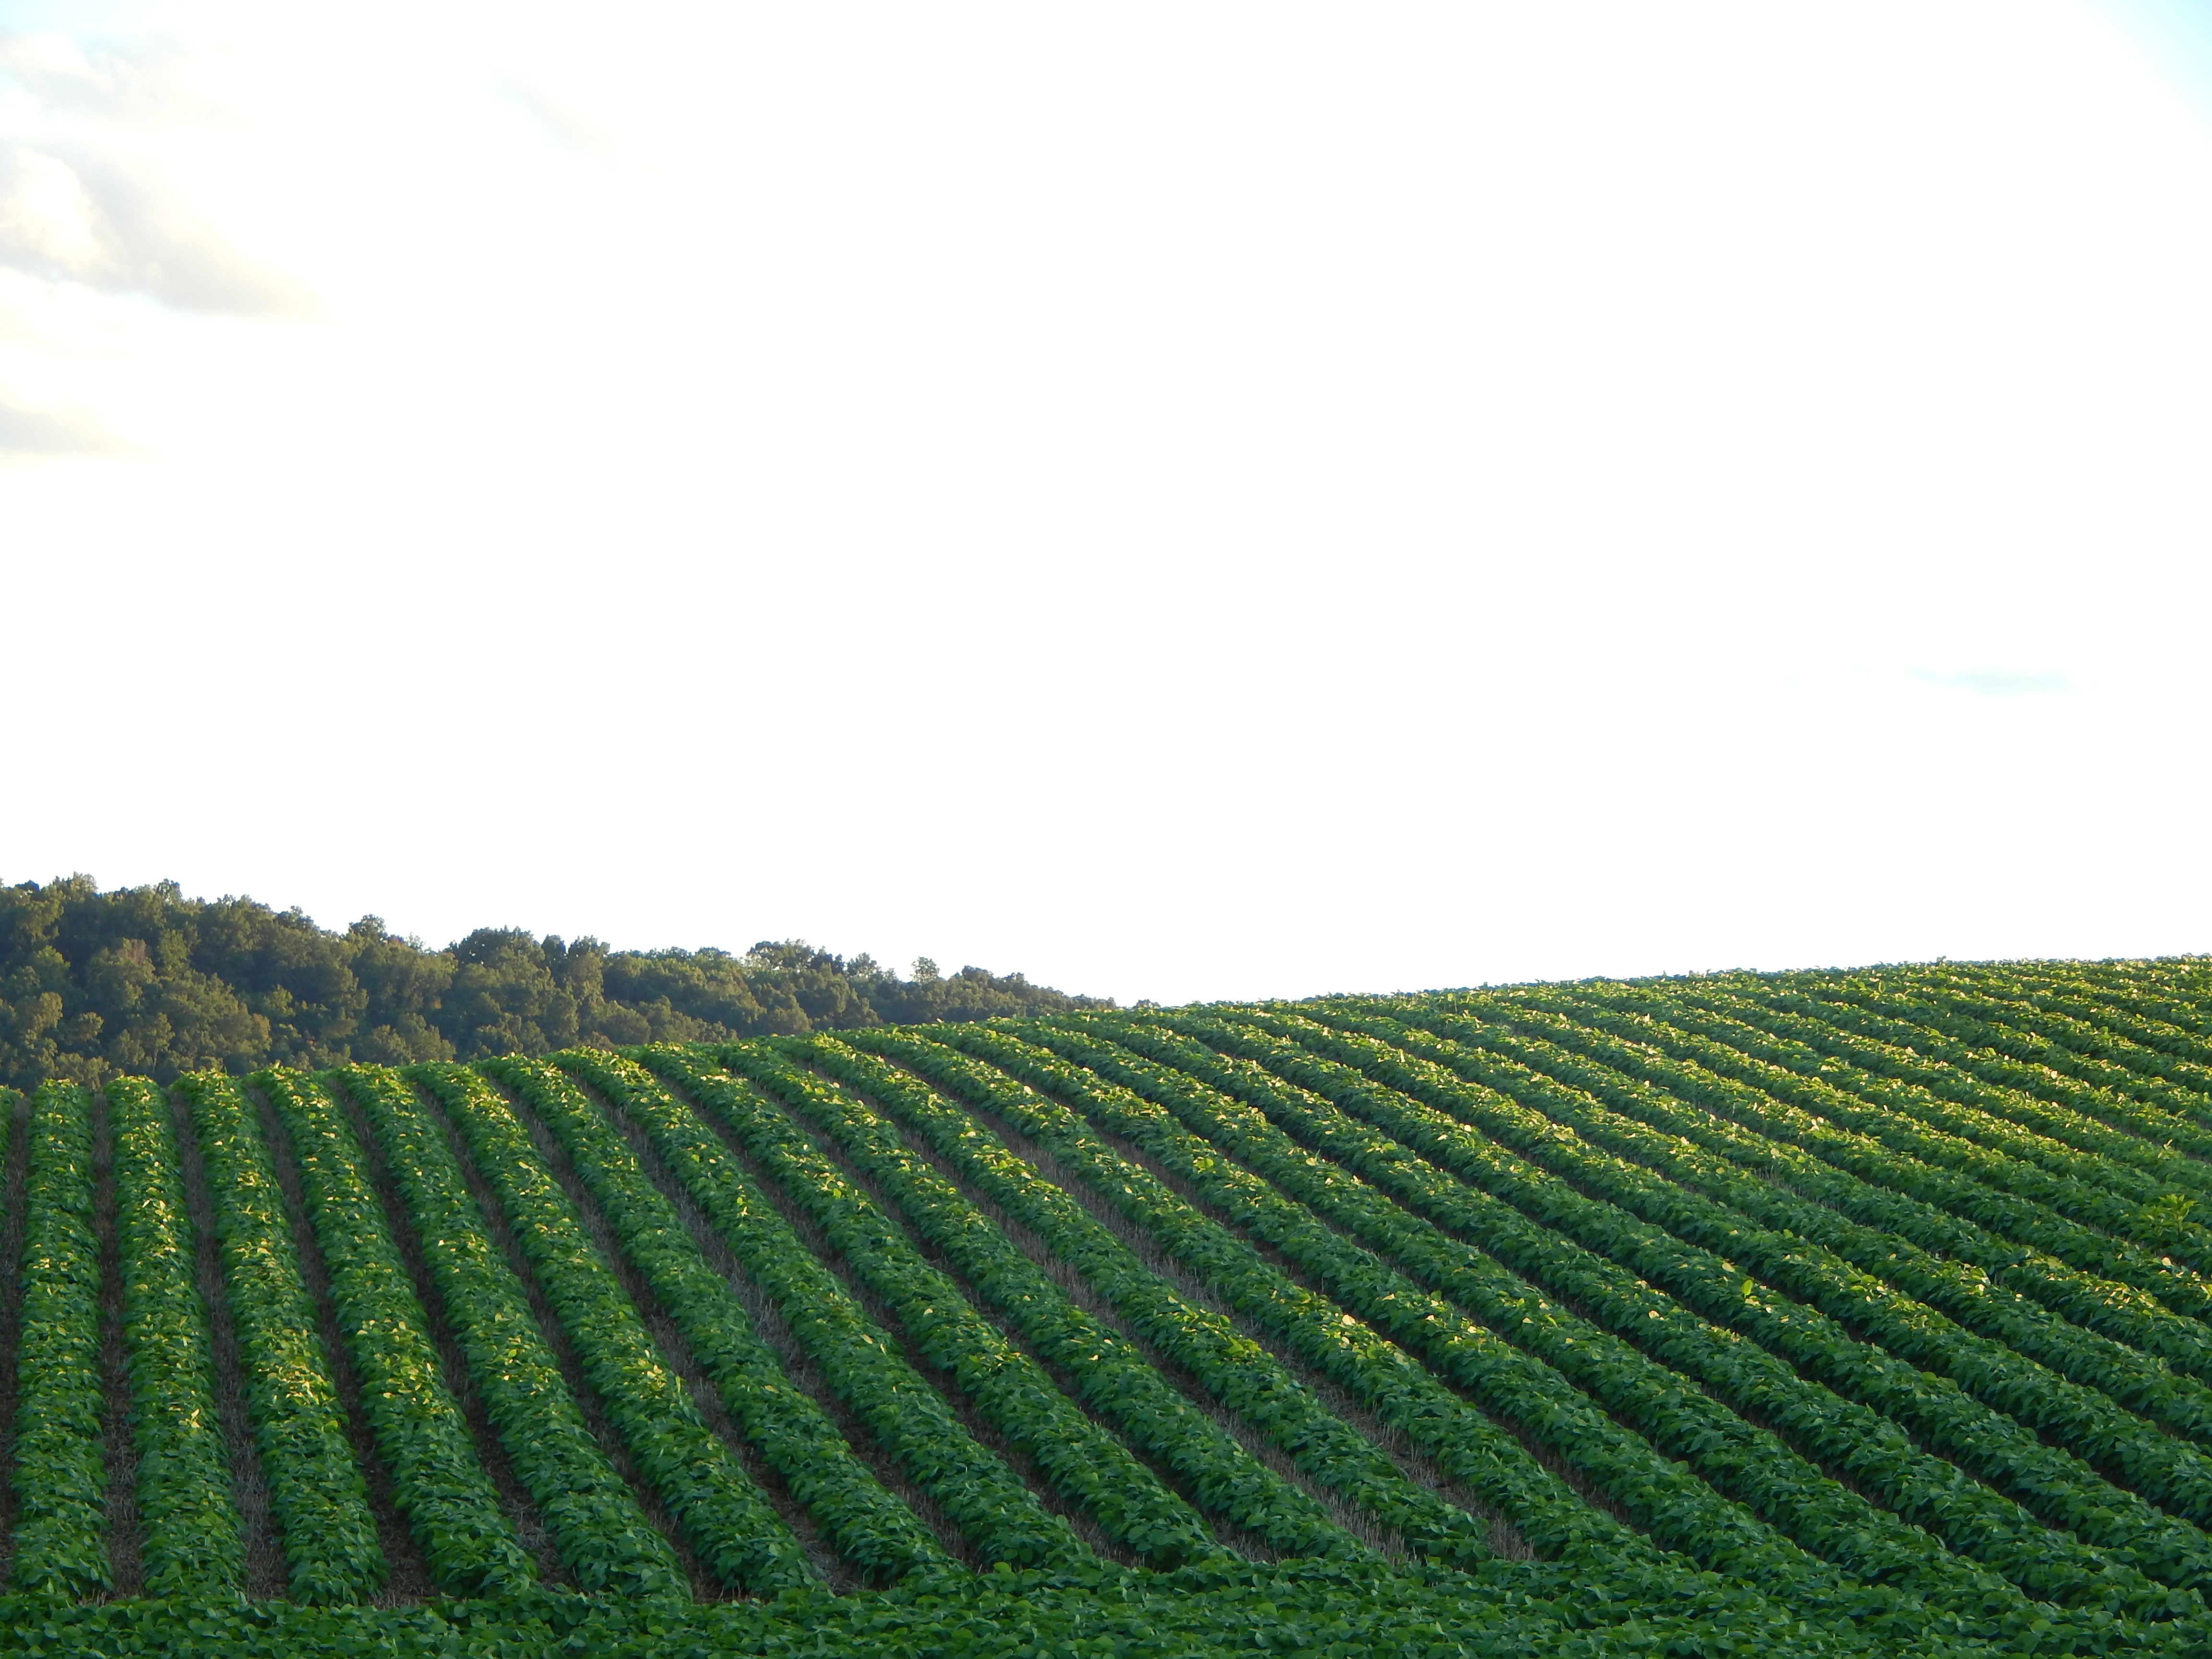
This is a picture I took awhile ago of the beautifully straight rows of soybeans in one of our fields. I’m sure it looks quite different now!
Here is a fun little rock that looks like it has a “b” on it.
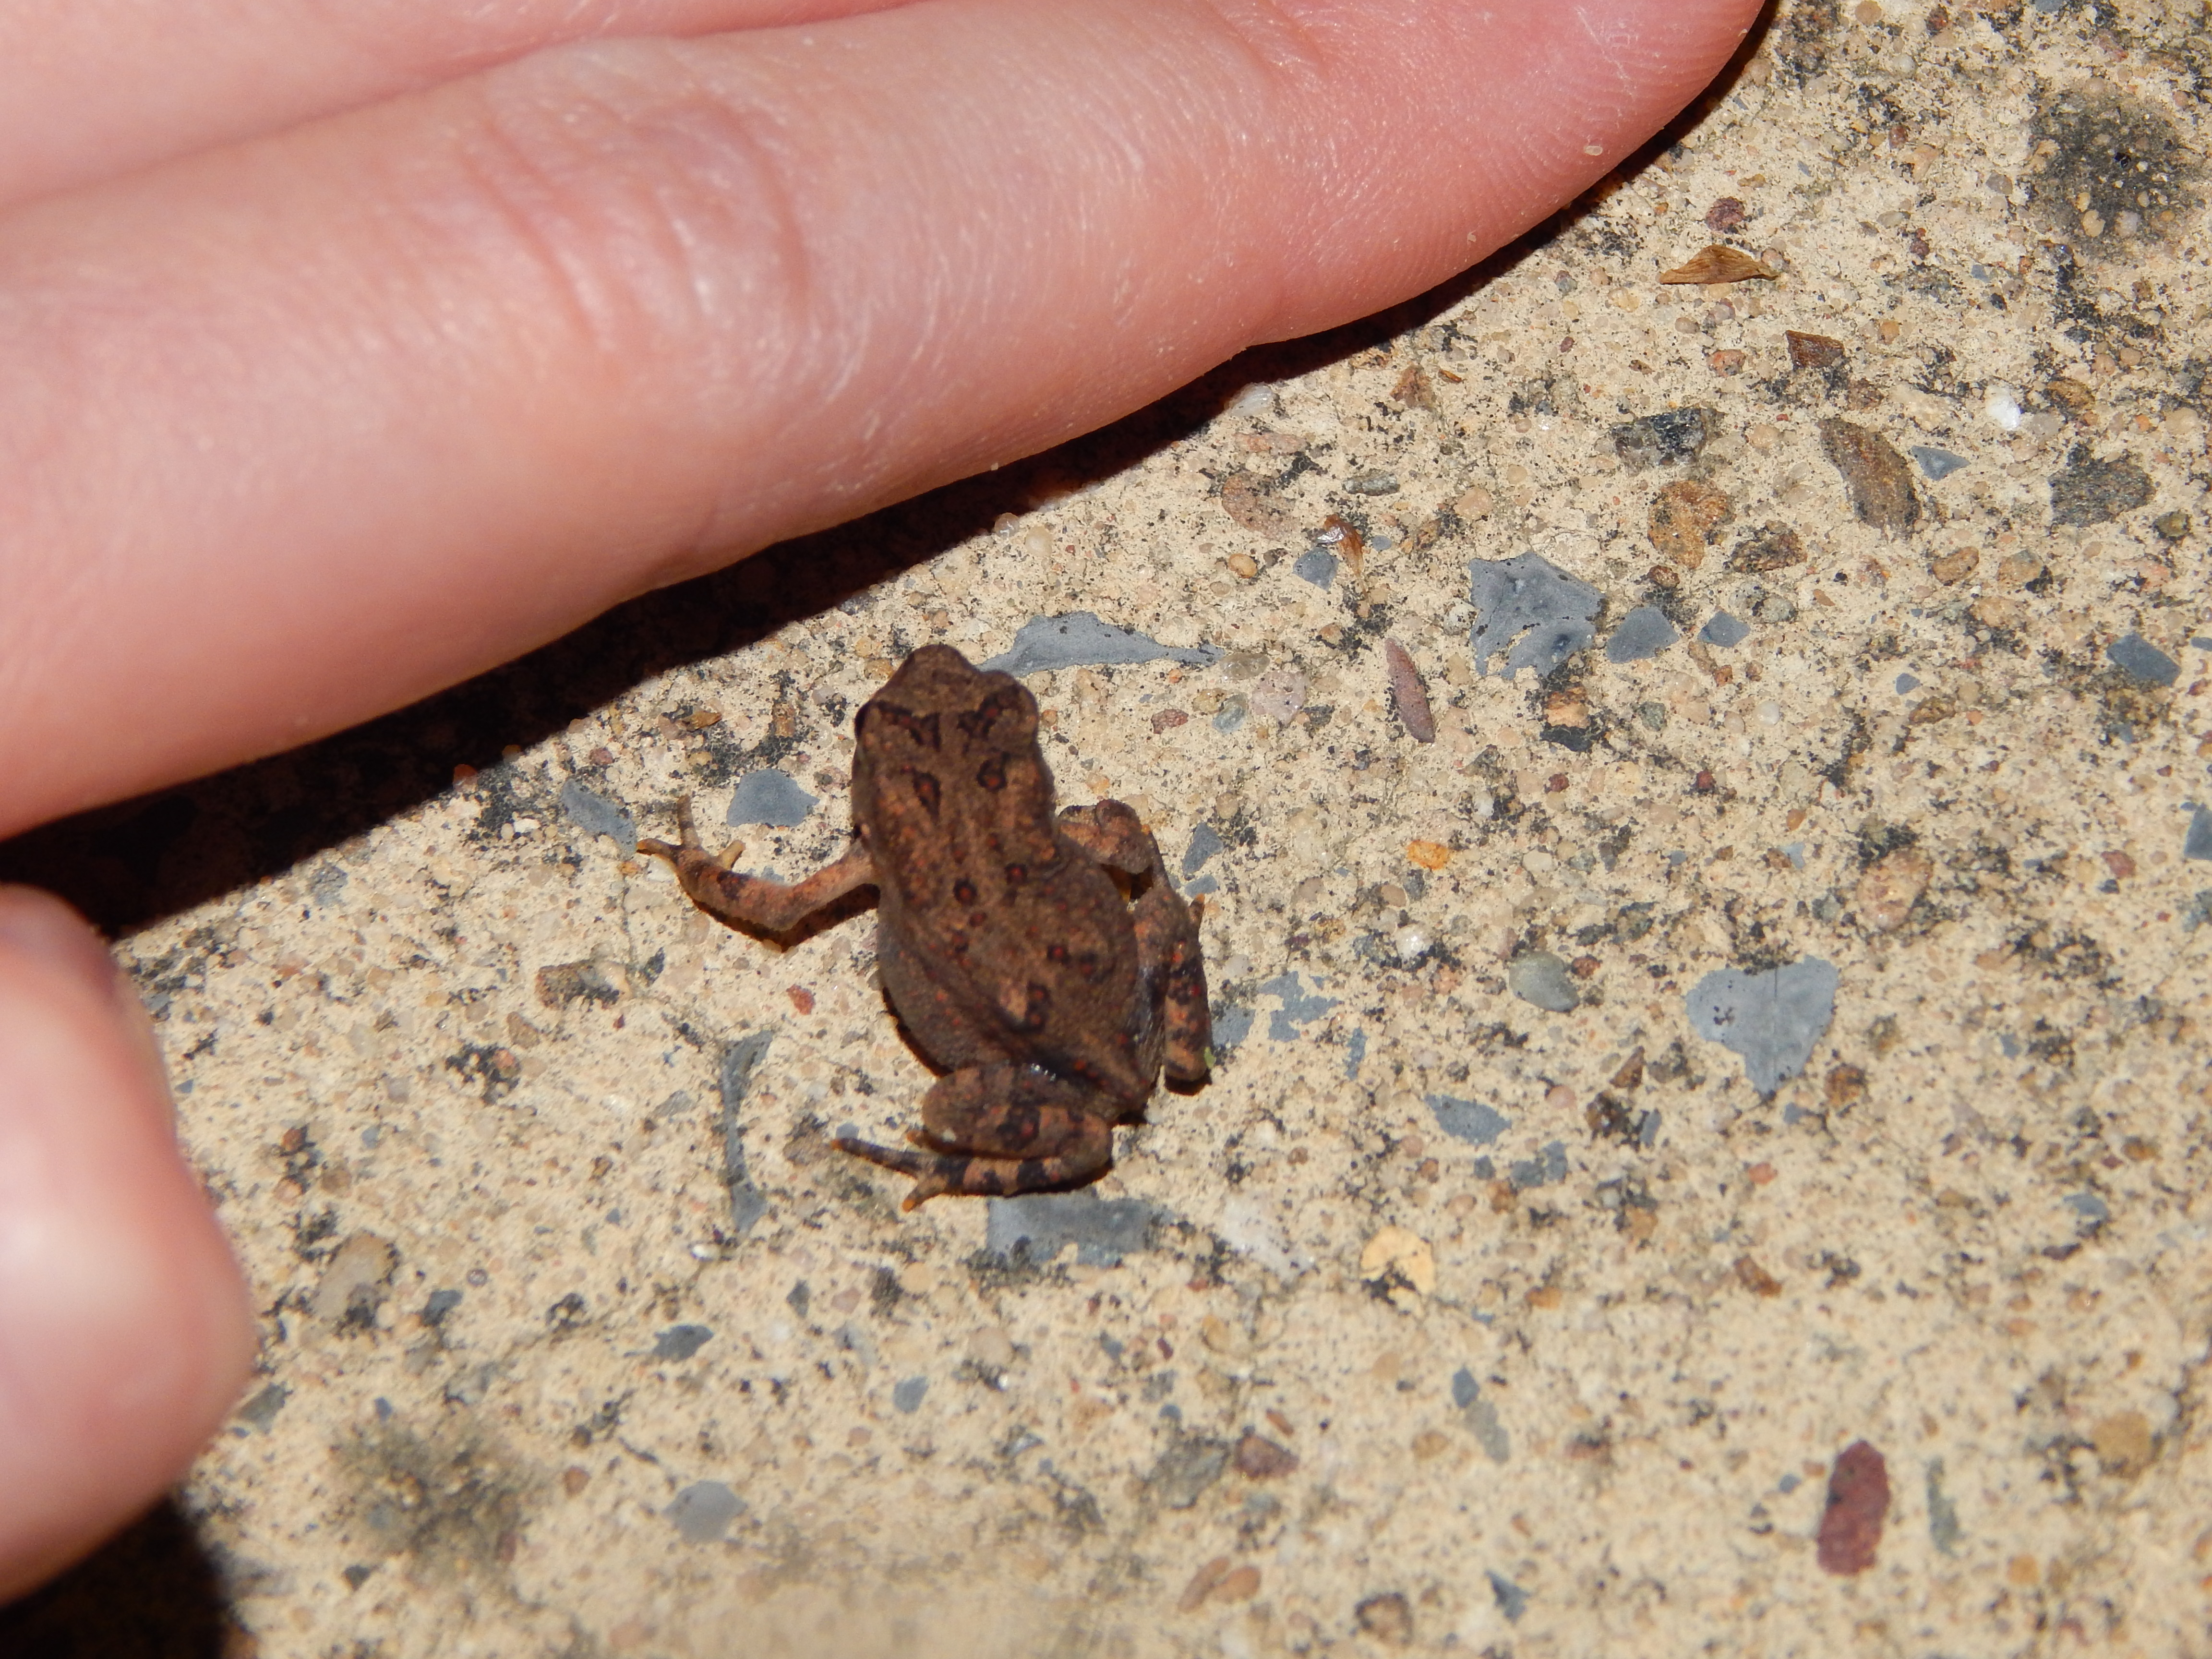
A cute tiny froggie:
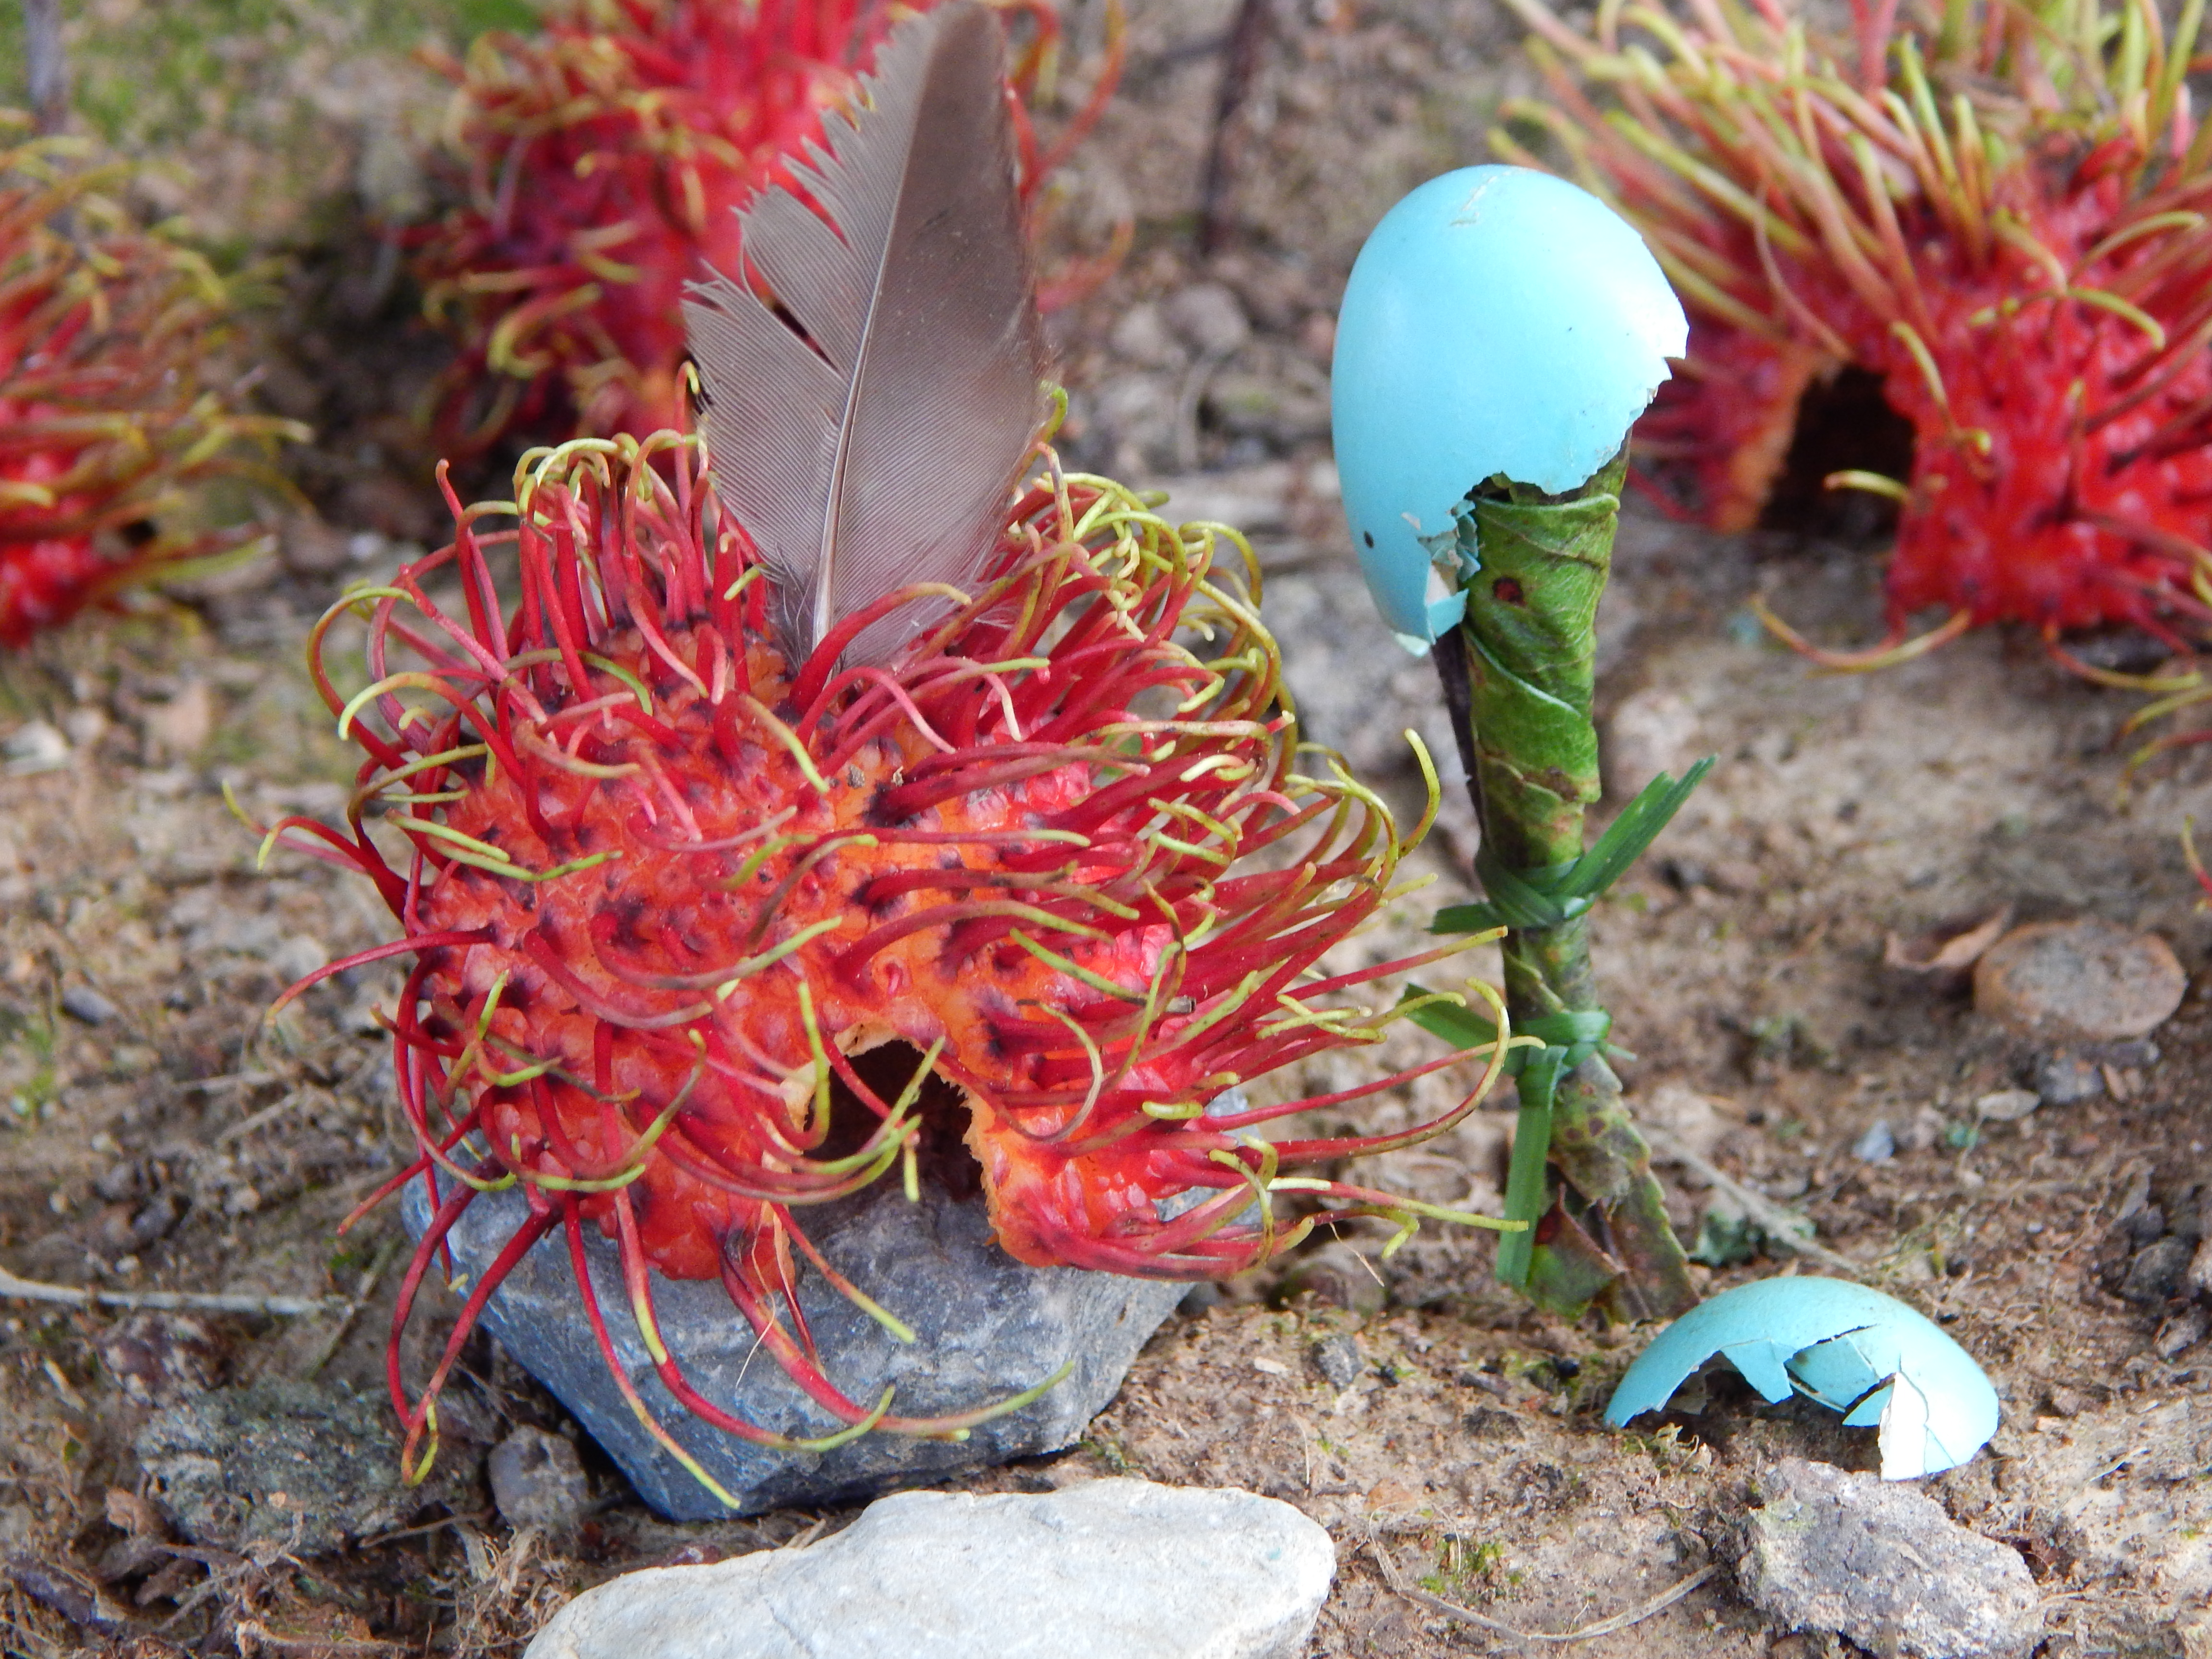
A little village made from rambutan shells – rambutans are a fruit that our friends introduced us too, with soft but spiky-looking shells and a soft sweet fruit in the middle.
The chief’s house:
We picked a bunch of apples today to make applesauce with (YUM!) and they all looked so pretty laid out on the ground. I like this smaller photo because it shows the interesting texture better.
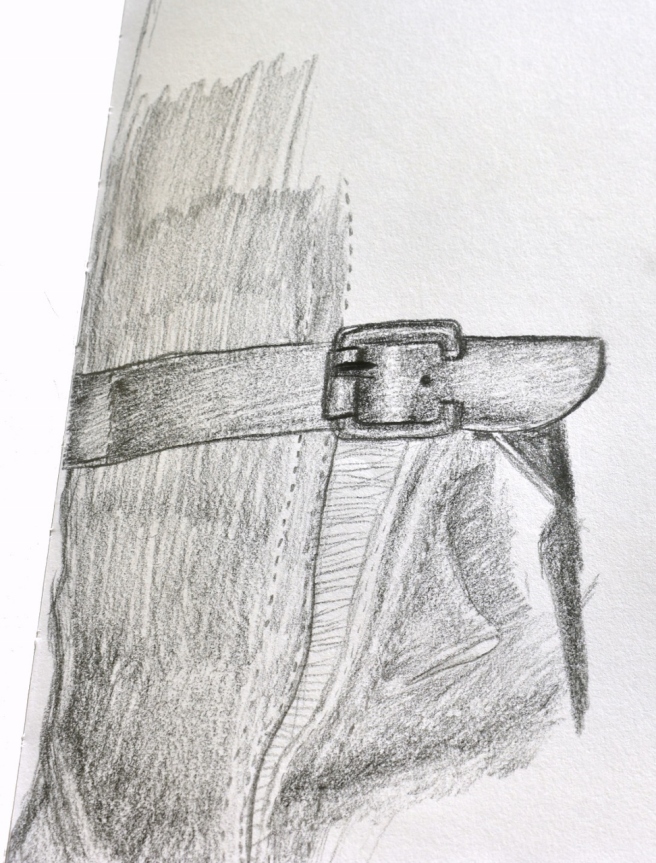
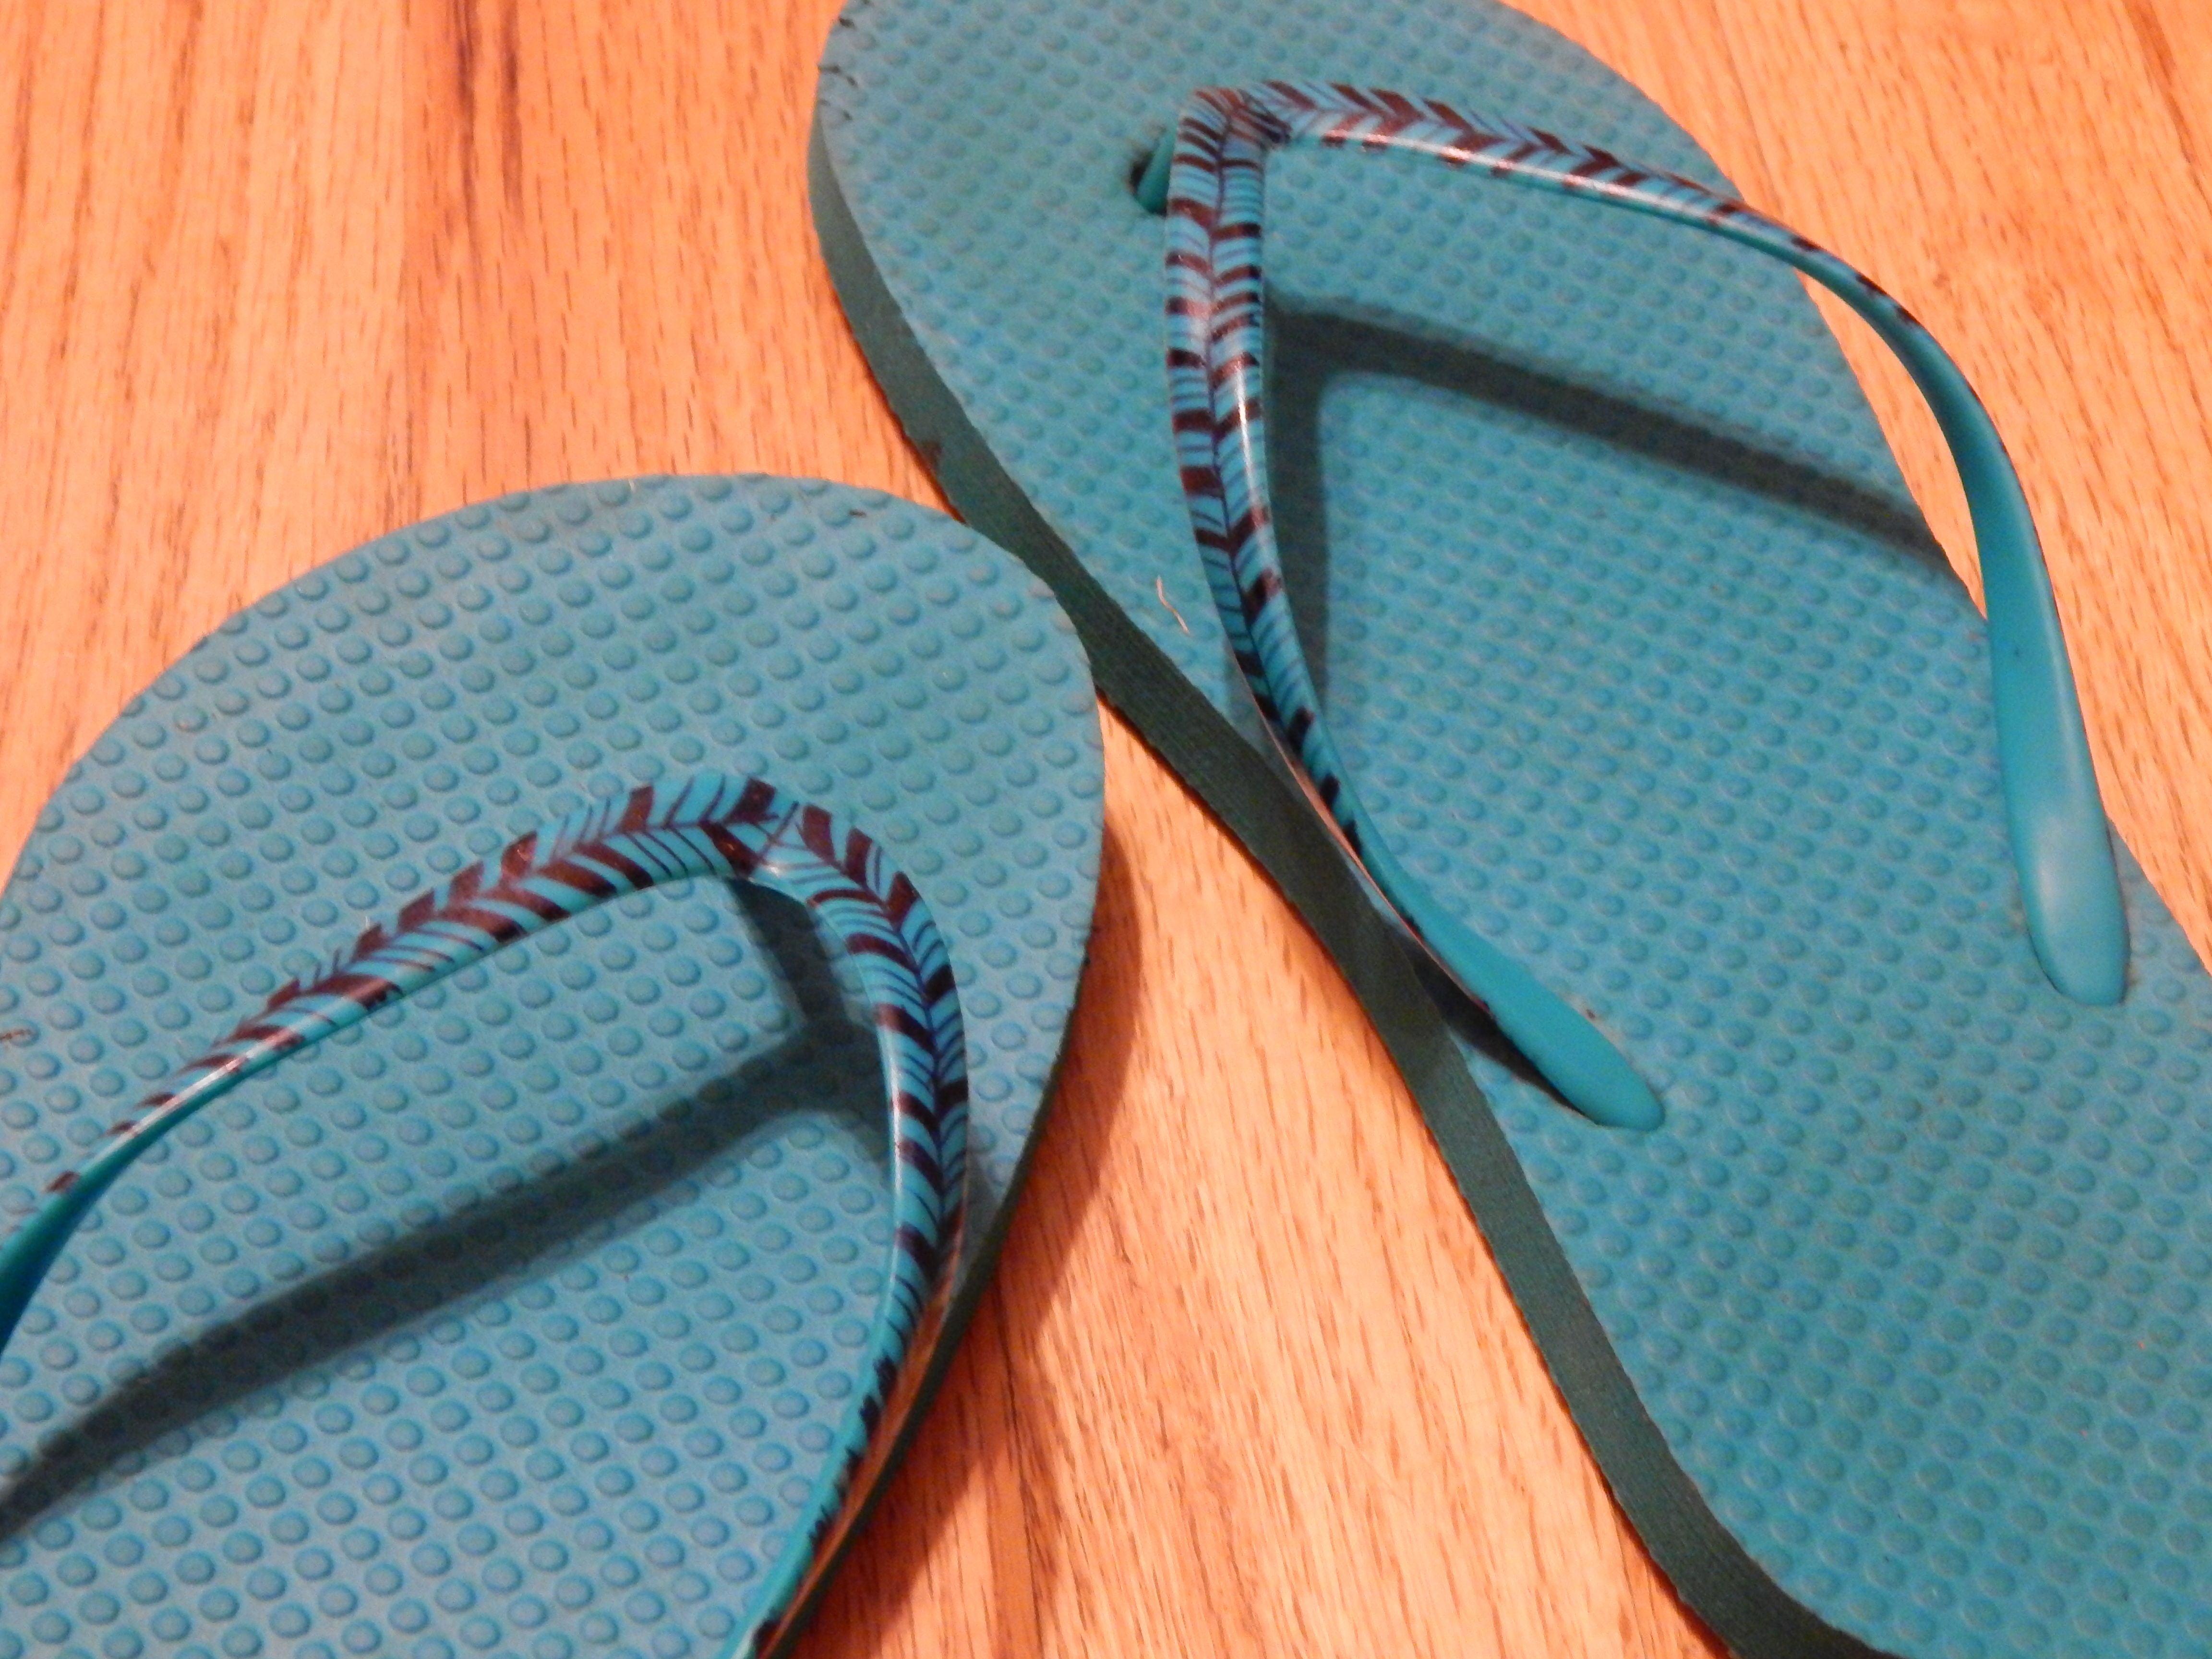
And here is a flip-flop makeover – I drew a pretty design on the straps with Sharpie. Simple, effective, but it took a long time!
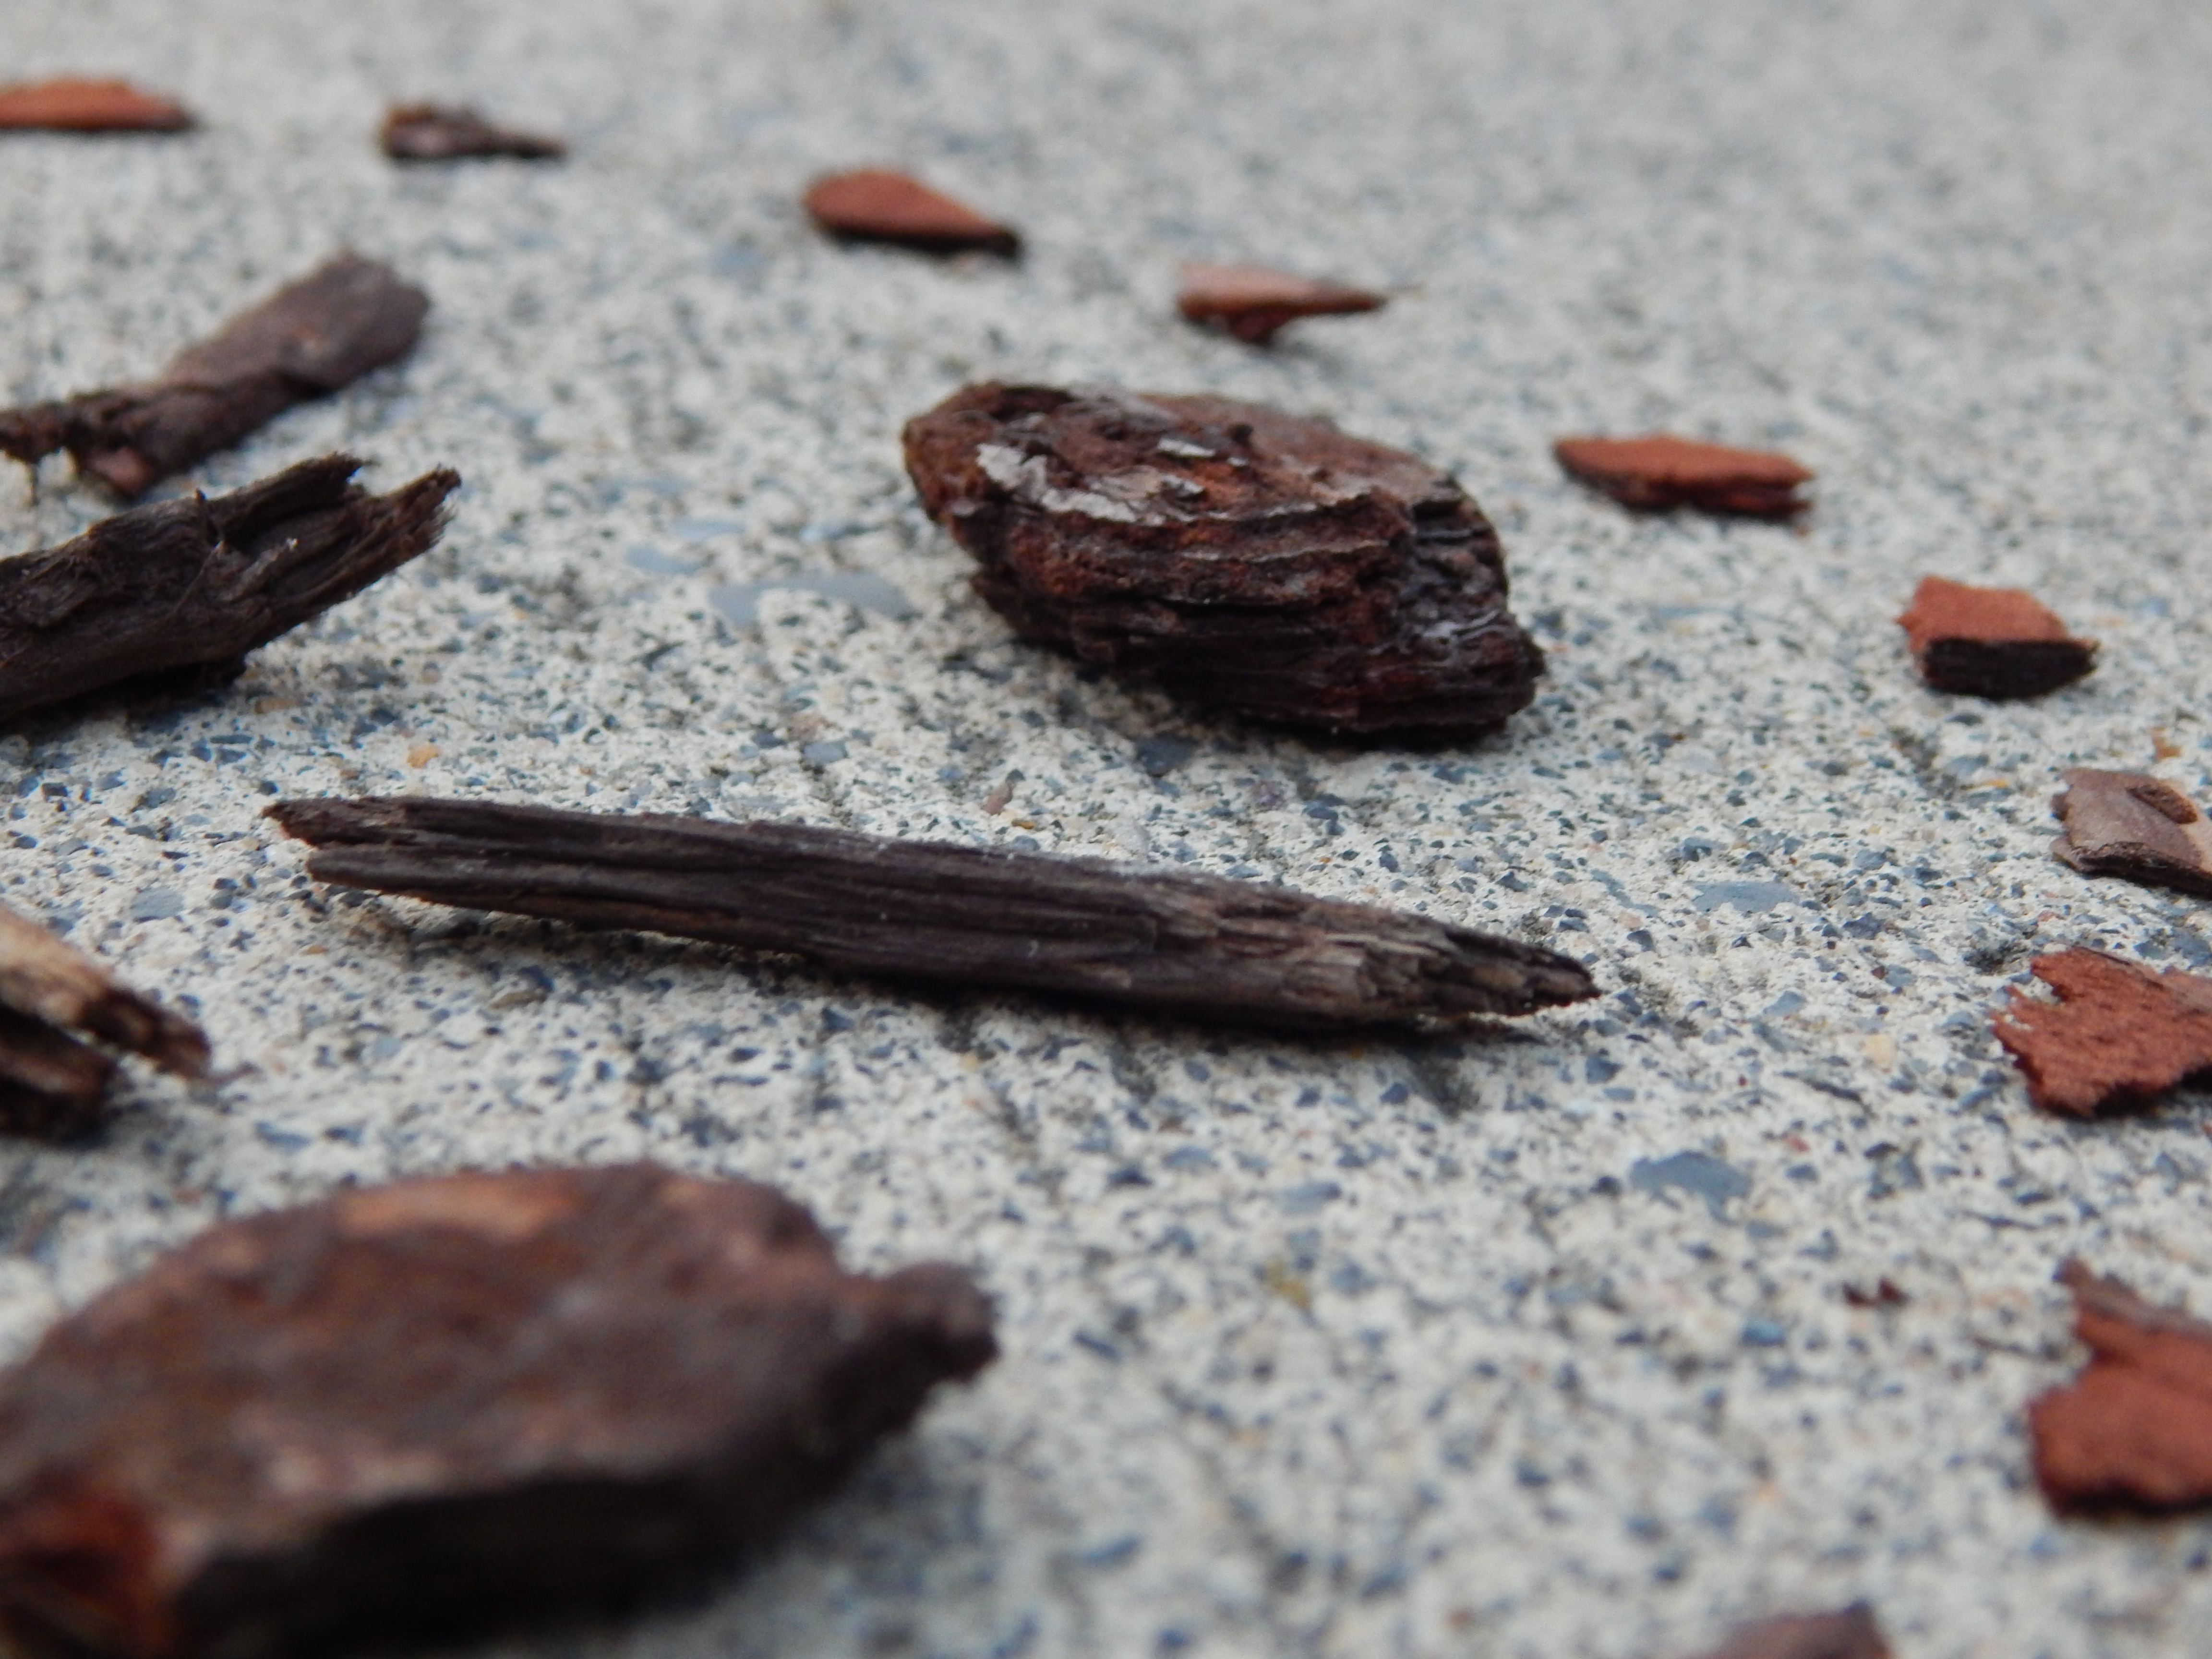
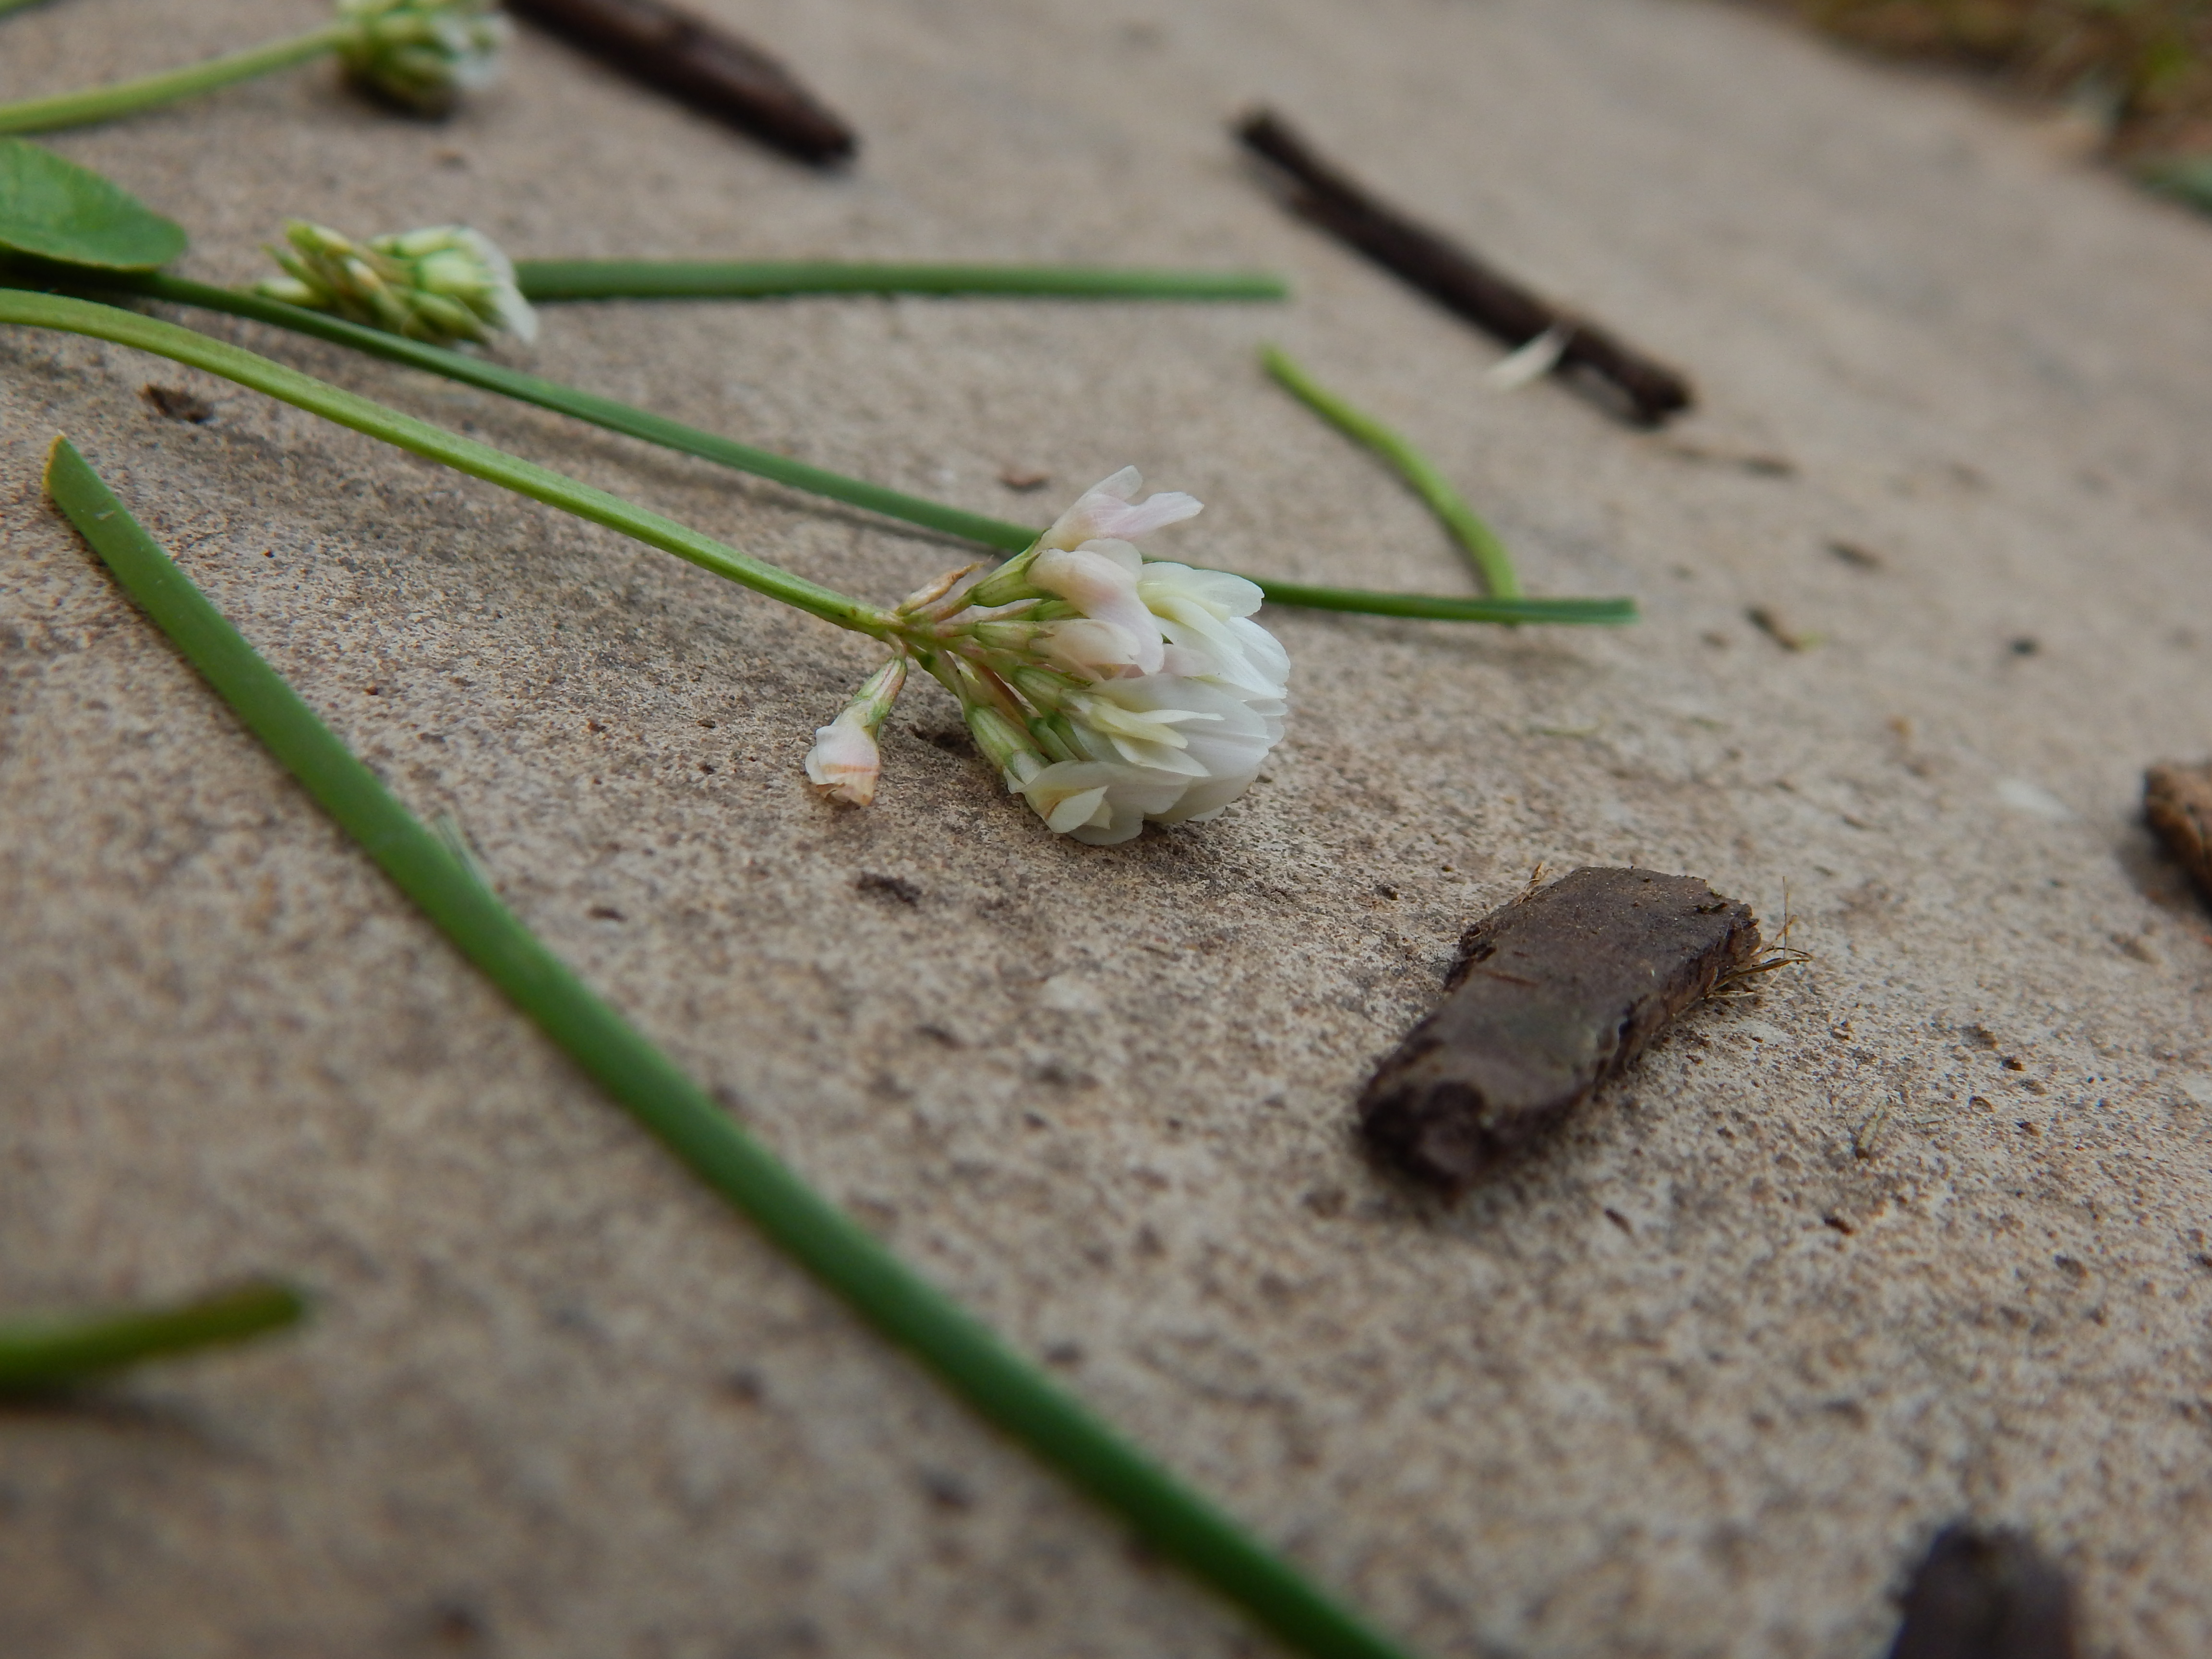
Let me introduce you to some little mandalas I made. They are very similar to the mandalas Michele made right here, but without the game part. It’s a fun challenge to make a mandala with only one material. You can just sit down somewhere and make one using whatever you have around you – grass, bark, leaves, stones, whatever!
The one below is made only with pieces of wood and mulch.
And for this one I just sat down on the sidewalk and used whatever I could reach. You could also collect things from a nature walk and make these.
So how about giving it a go? If you make any, I’d love to see pictures of them!
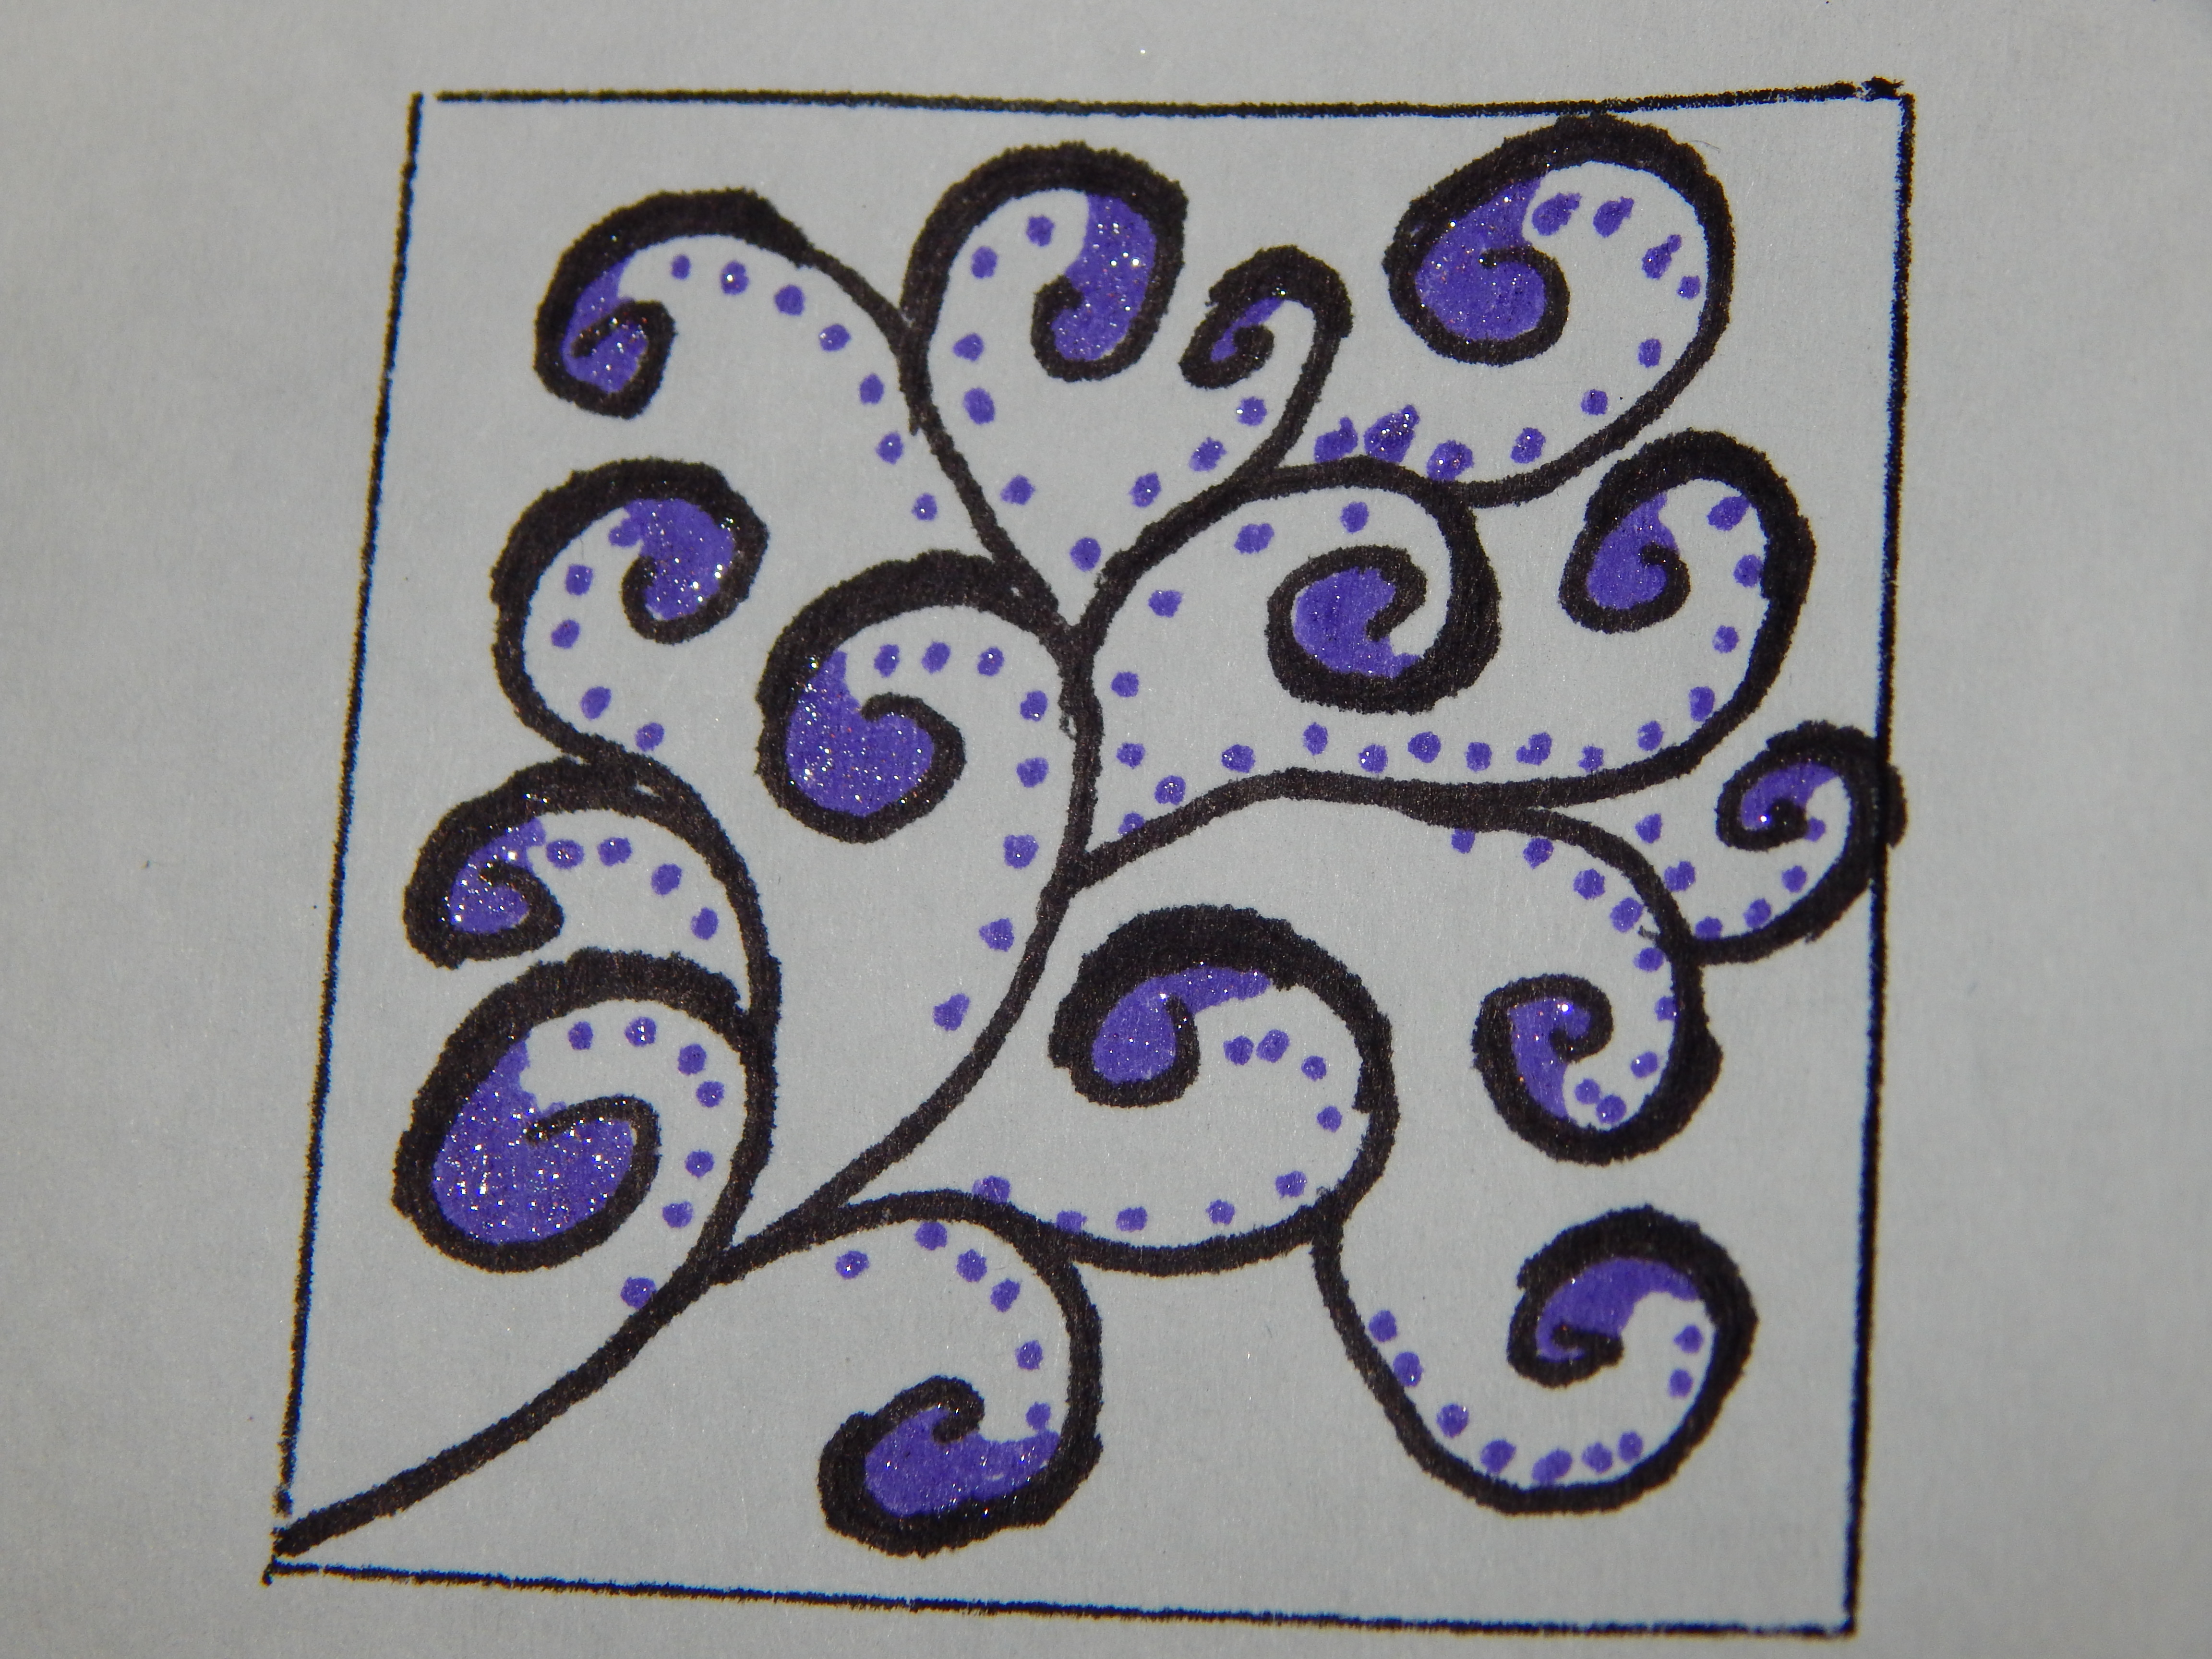
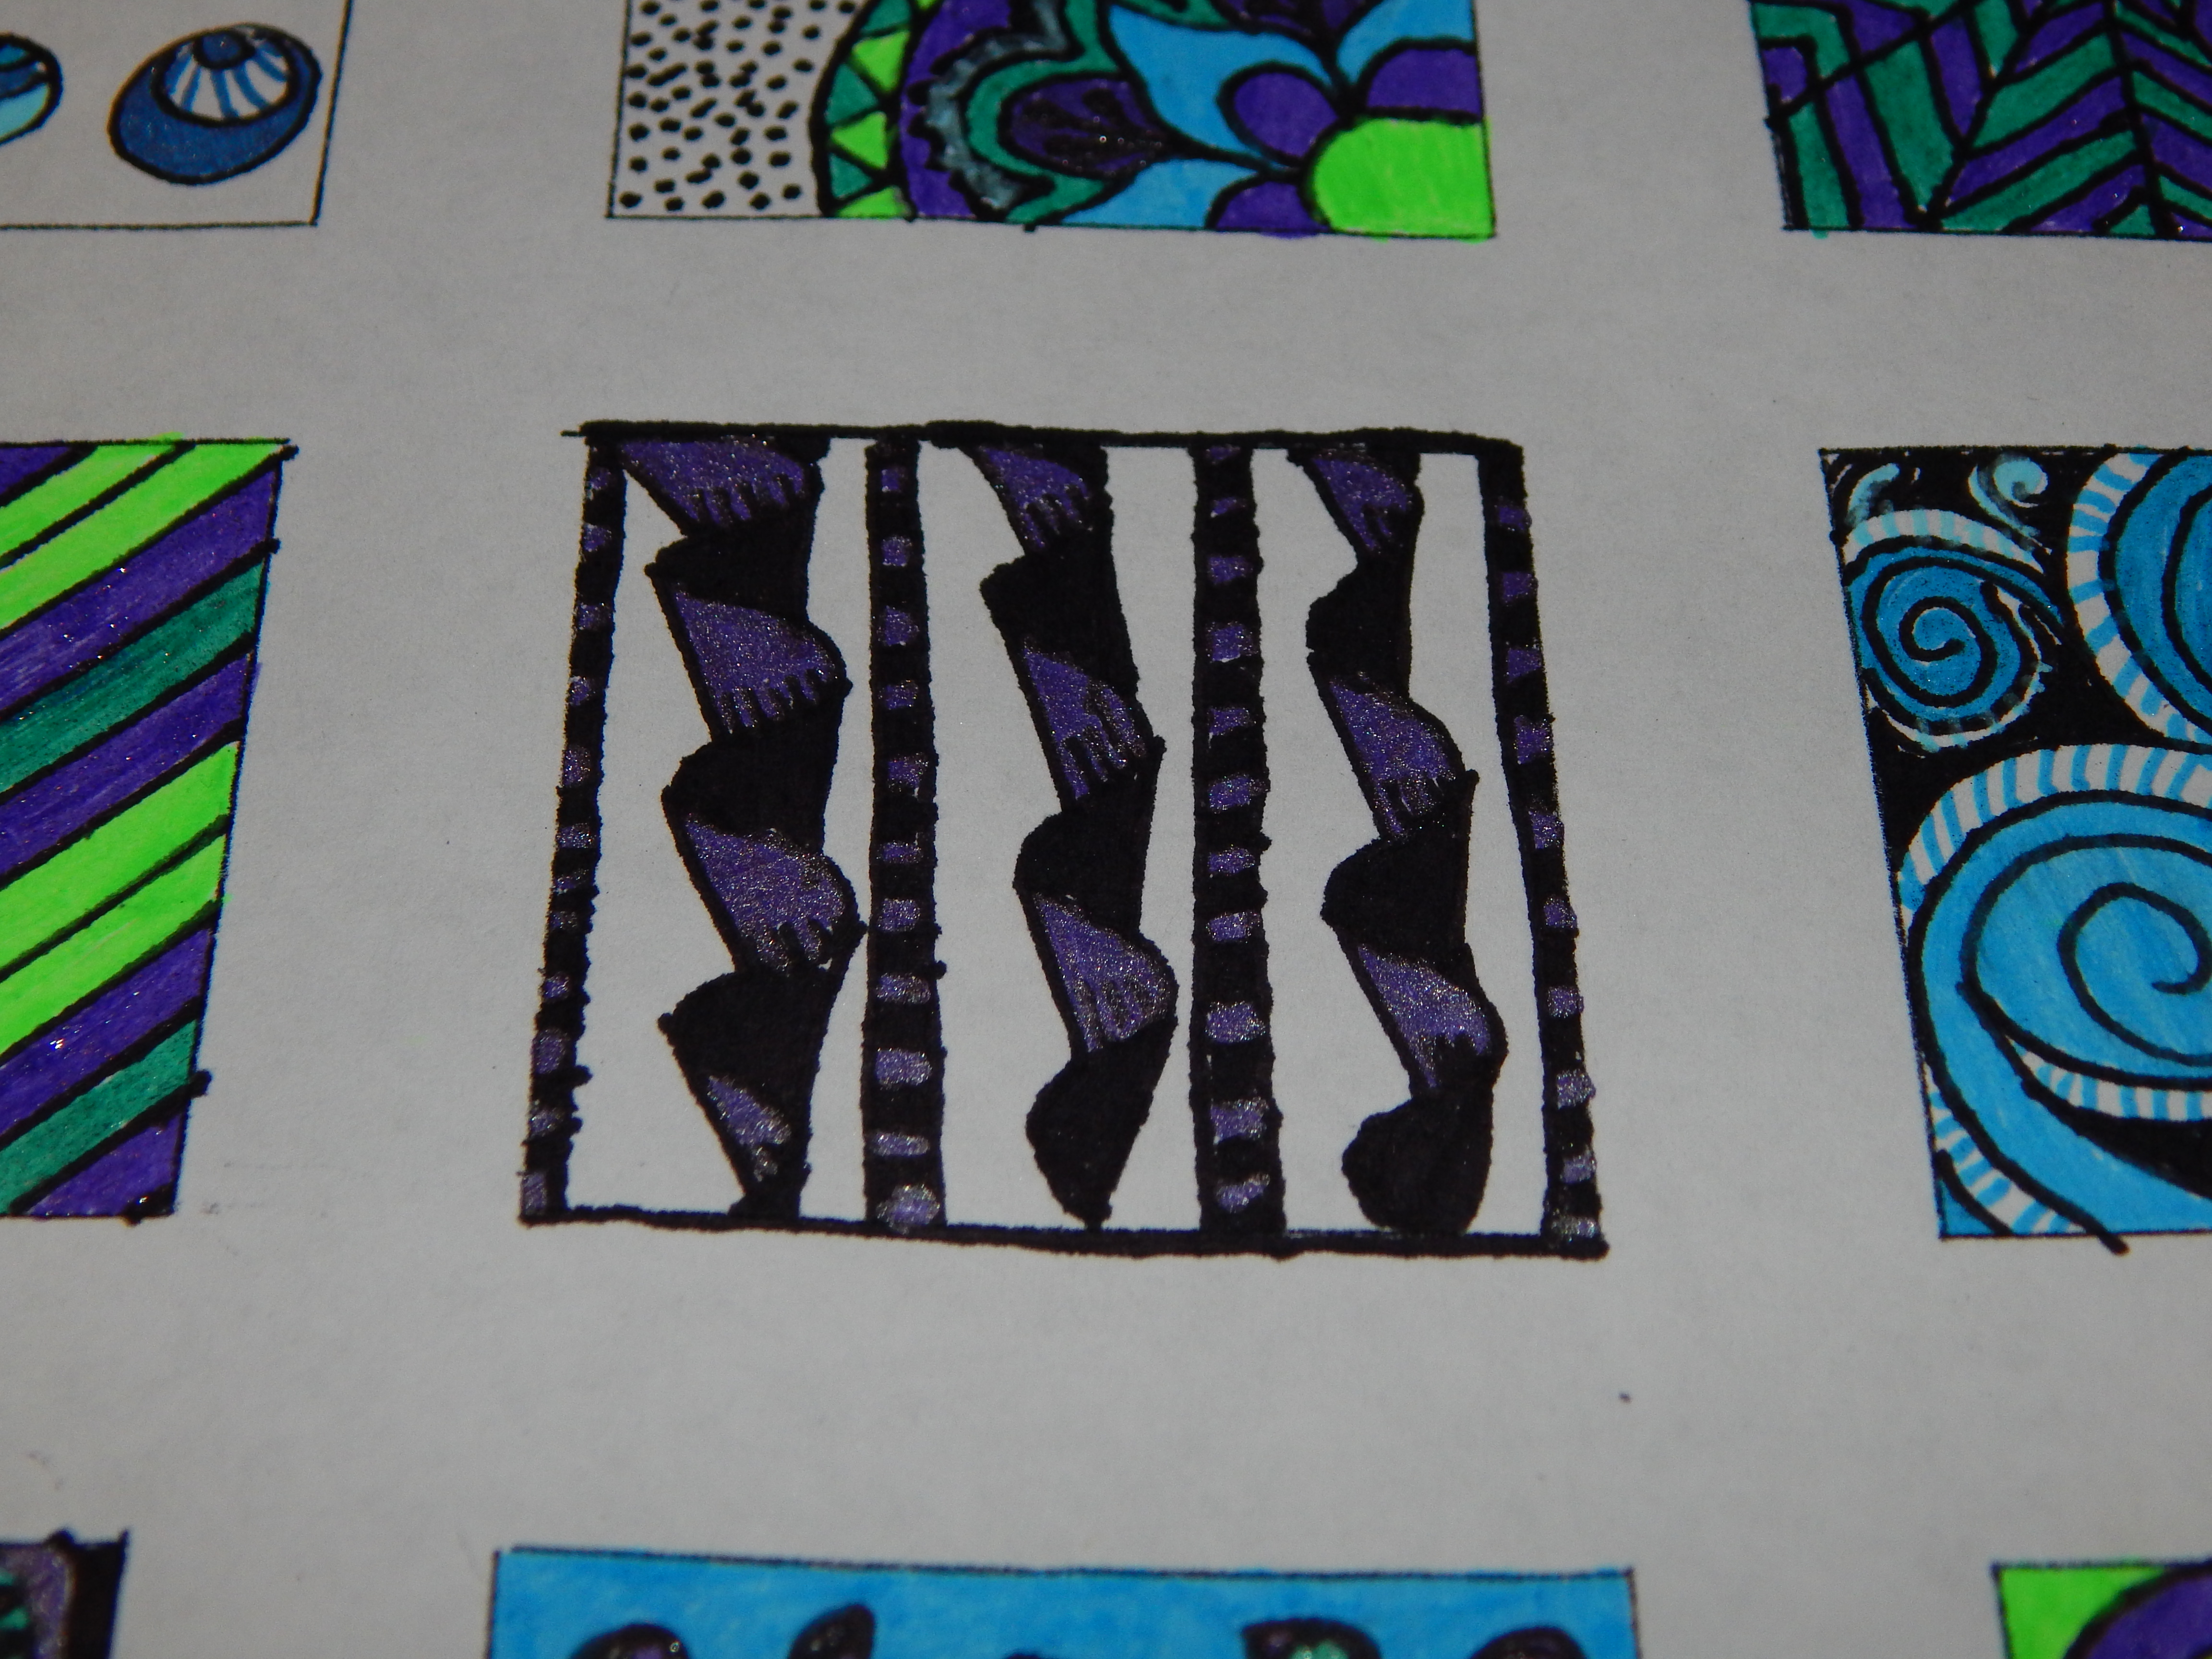
This is really fun to do because you can use a bunch of different kinds of doodles and they all come together to make a really nice piece of wall art. You could do a color scheme like I did, or make a colorful, rainbow square-doodle paper. I colored this with purple, blue, and green gel pens. I got some doodle ideas and I think even the whole square-doodle paper idea from this doodling blog: https://doodleaddicted.wordpress.com/
The hardest part about making this is making the squares to put the doodles in. You might be able to print off a template for this somewhere, but I just did it by hand by measuring it off.
You could also do this in random circles across the page or put the doodles in outlines of hearts or whatever you want.
(Sorry, some of these pictures aren’t as good as they could be because I took them in my room in the evening.)
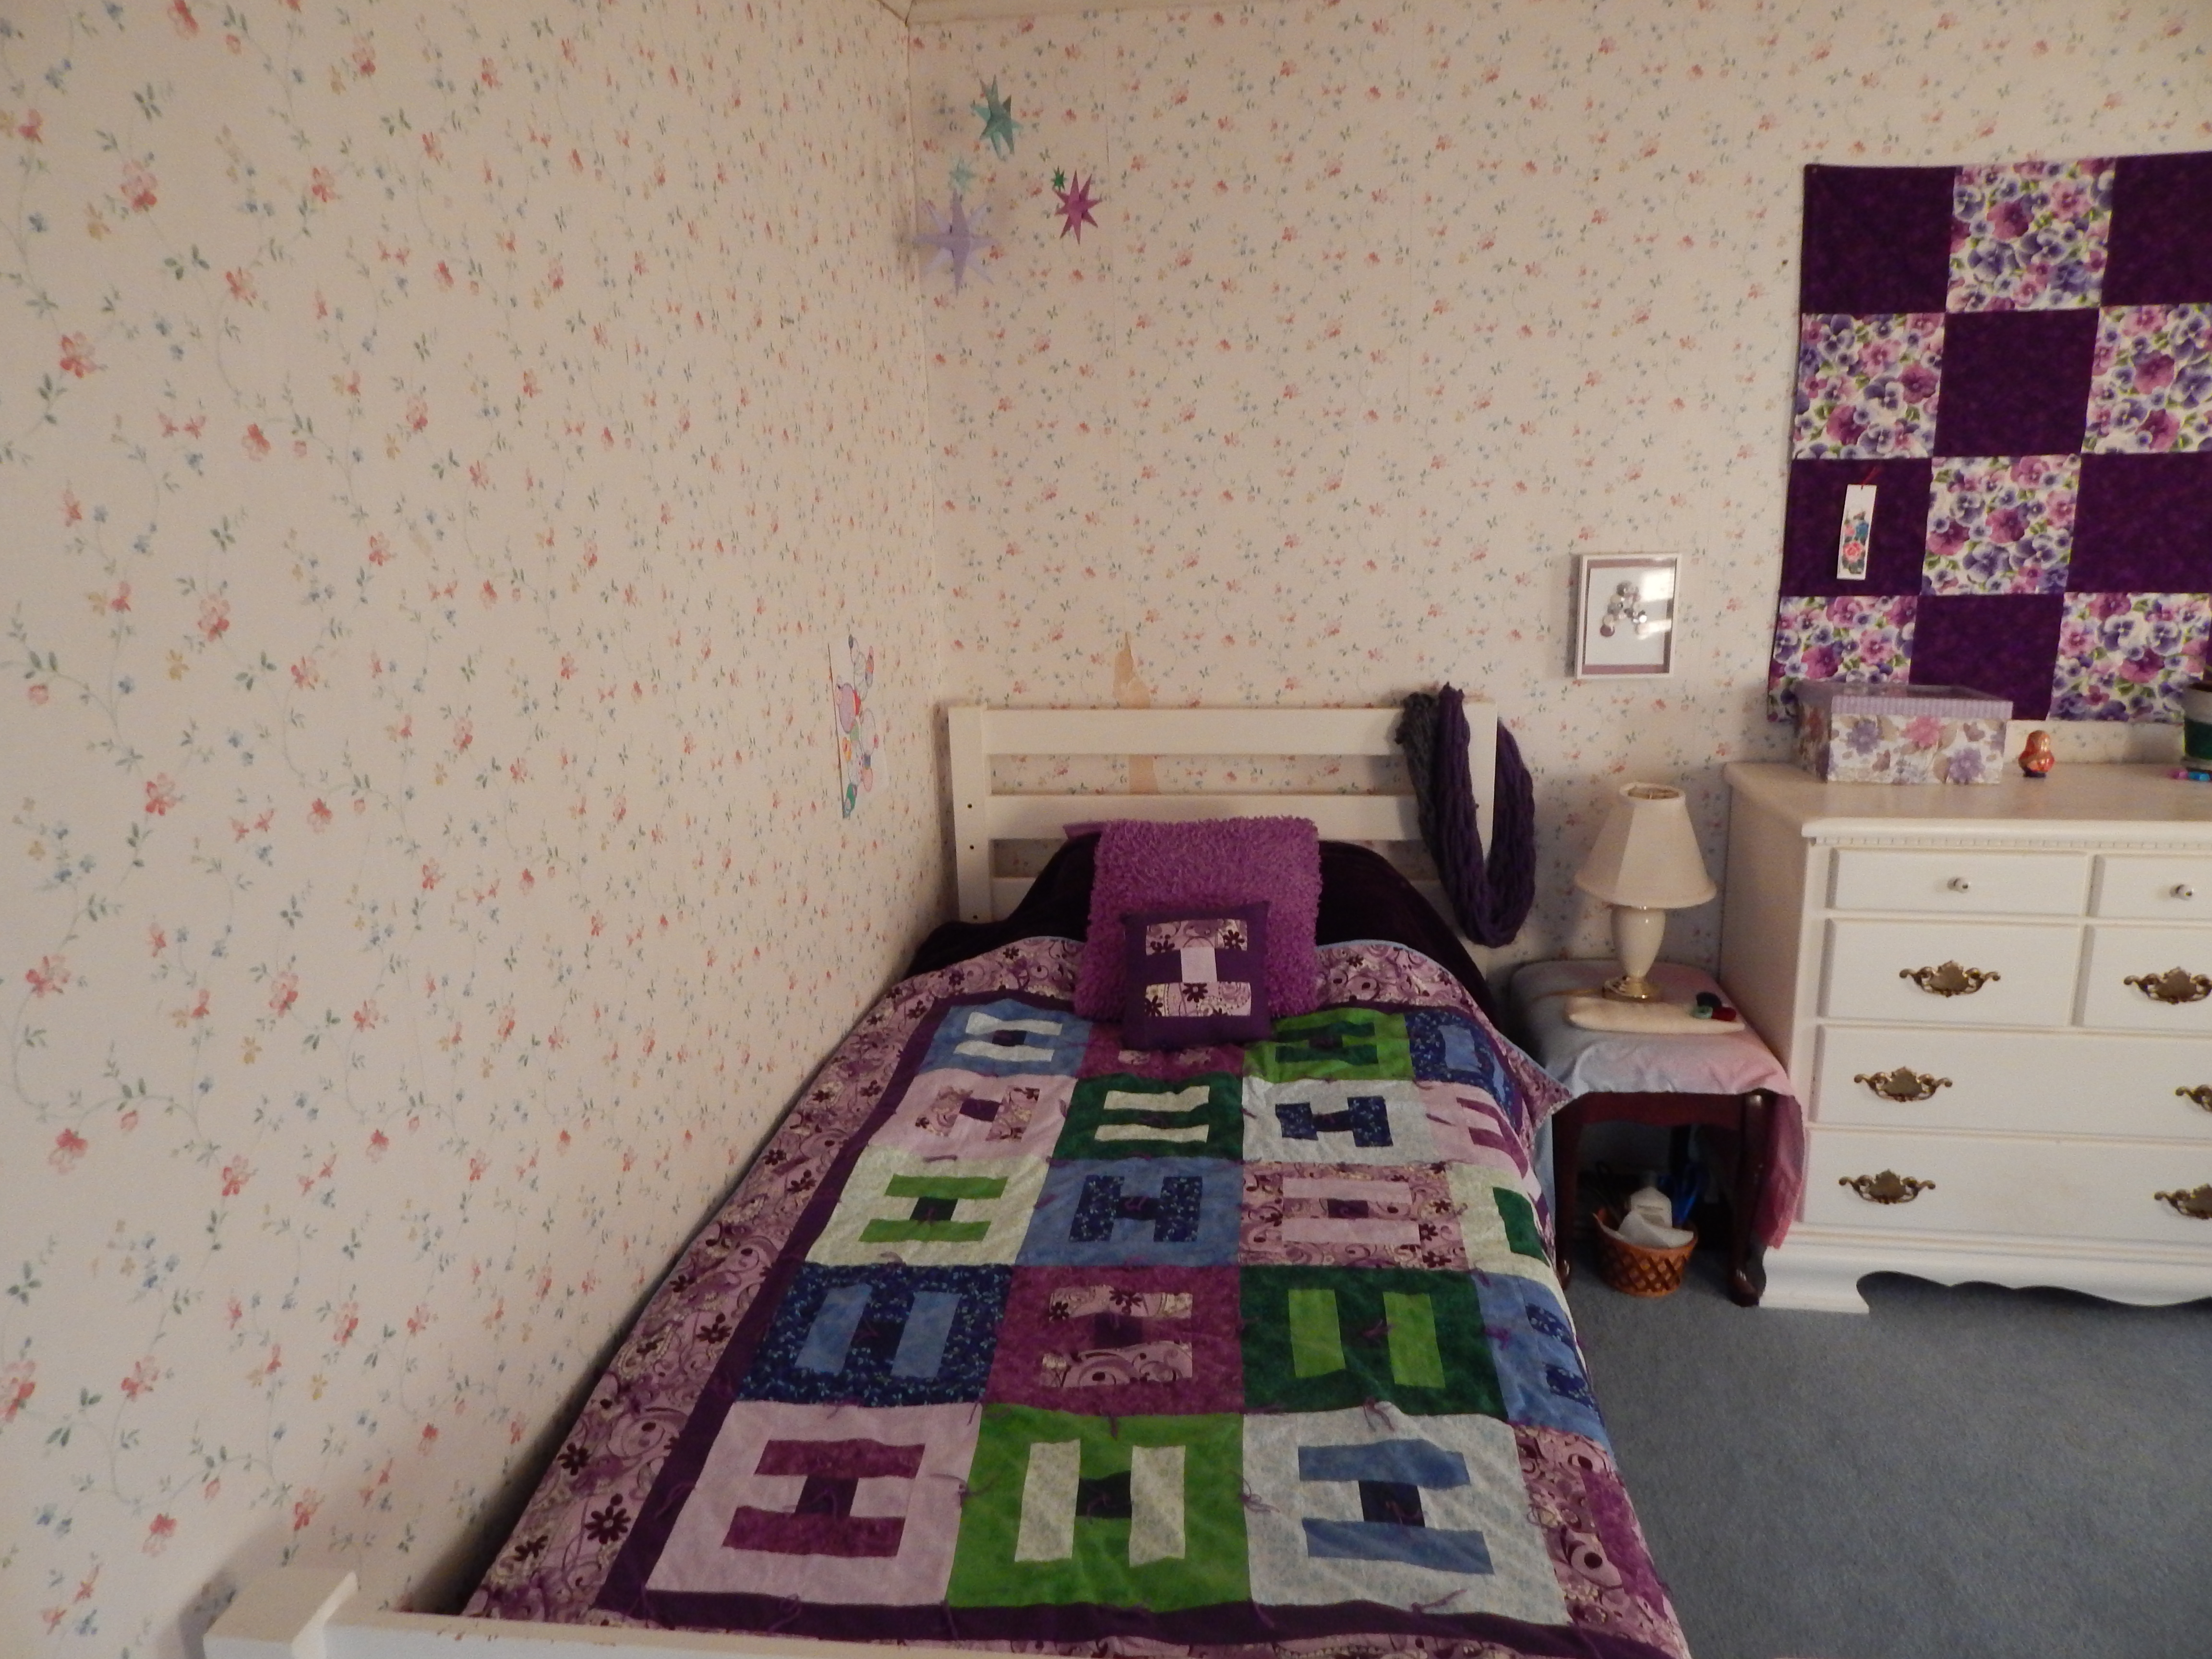
My sister Megan and I switched room’s with my younger sister Carmen. We got a bigger room and… we got to decorate it! We might paint the room later, but for now we have flowered wallpaper.
This is my little corner:
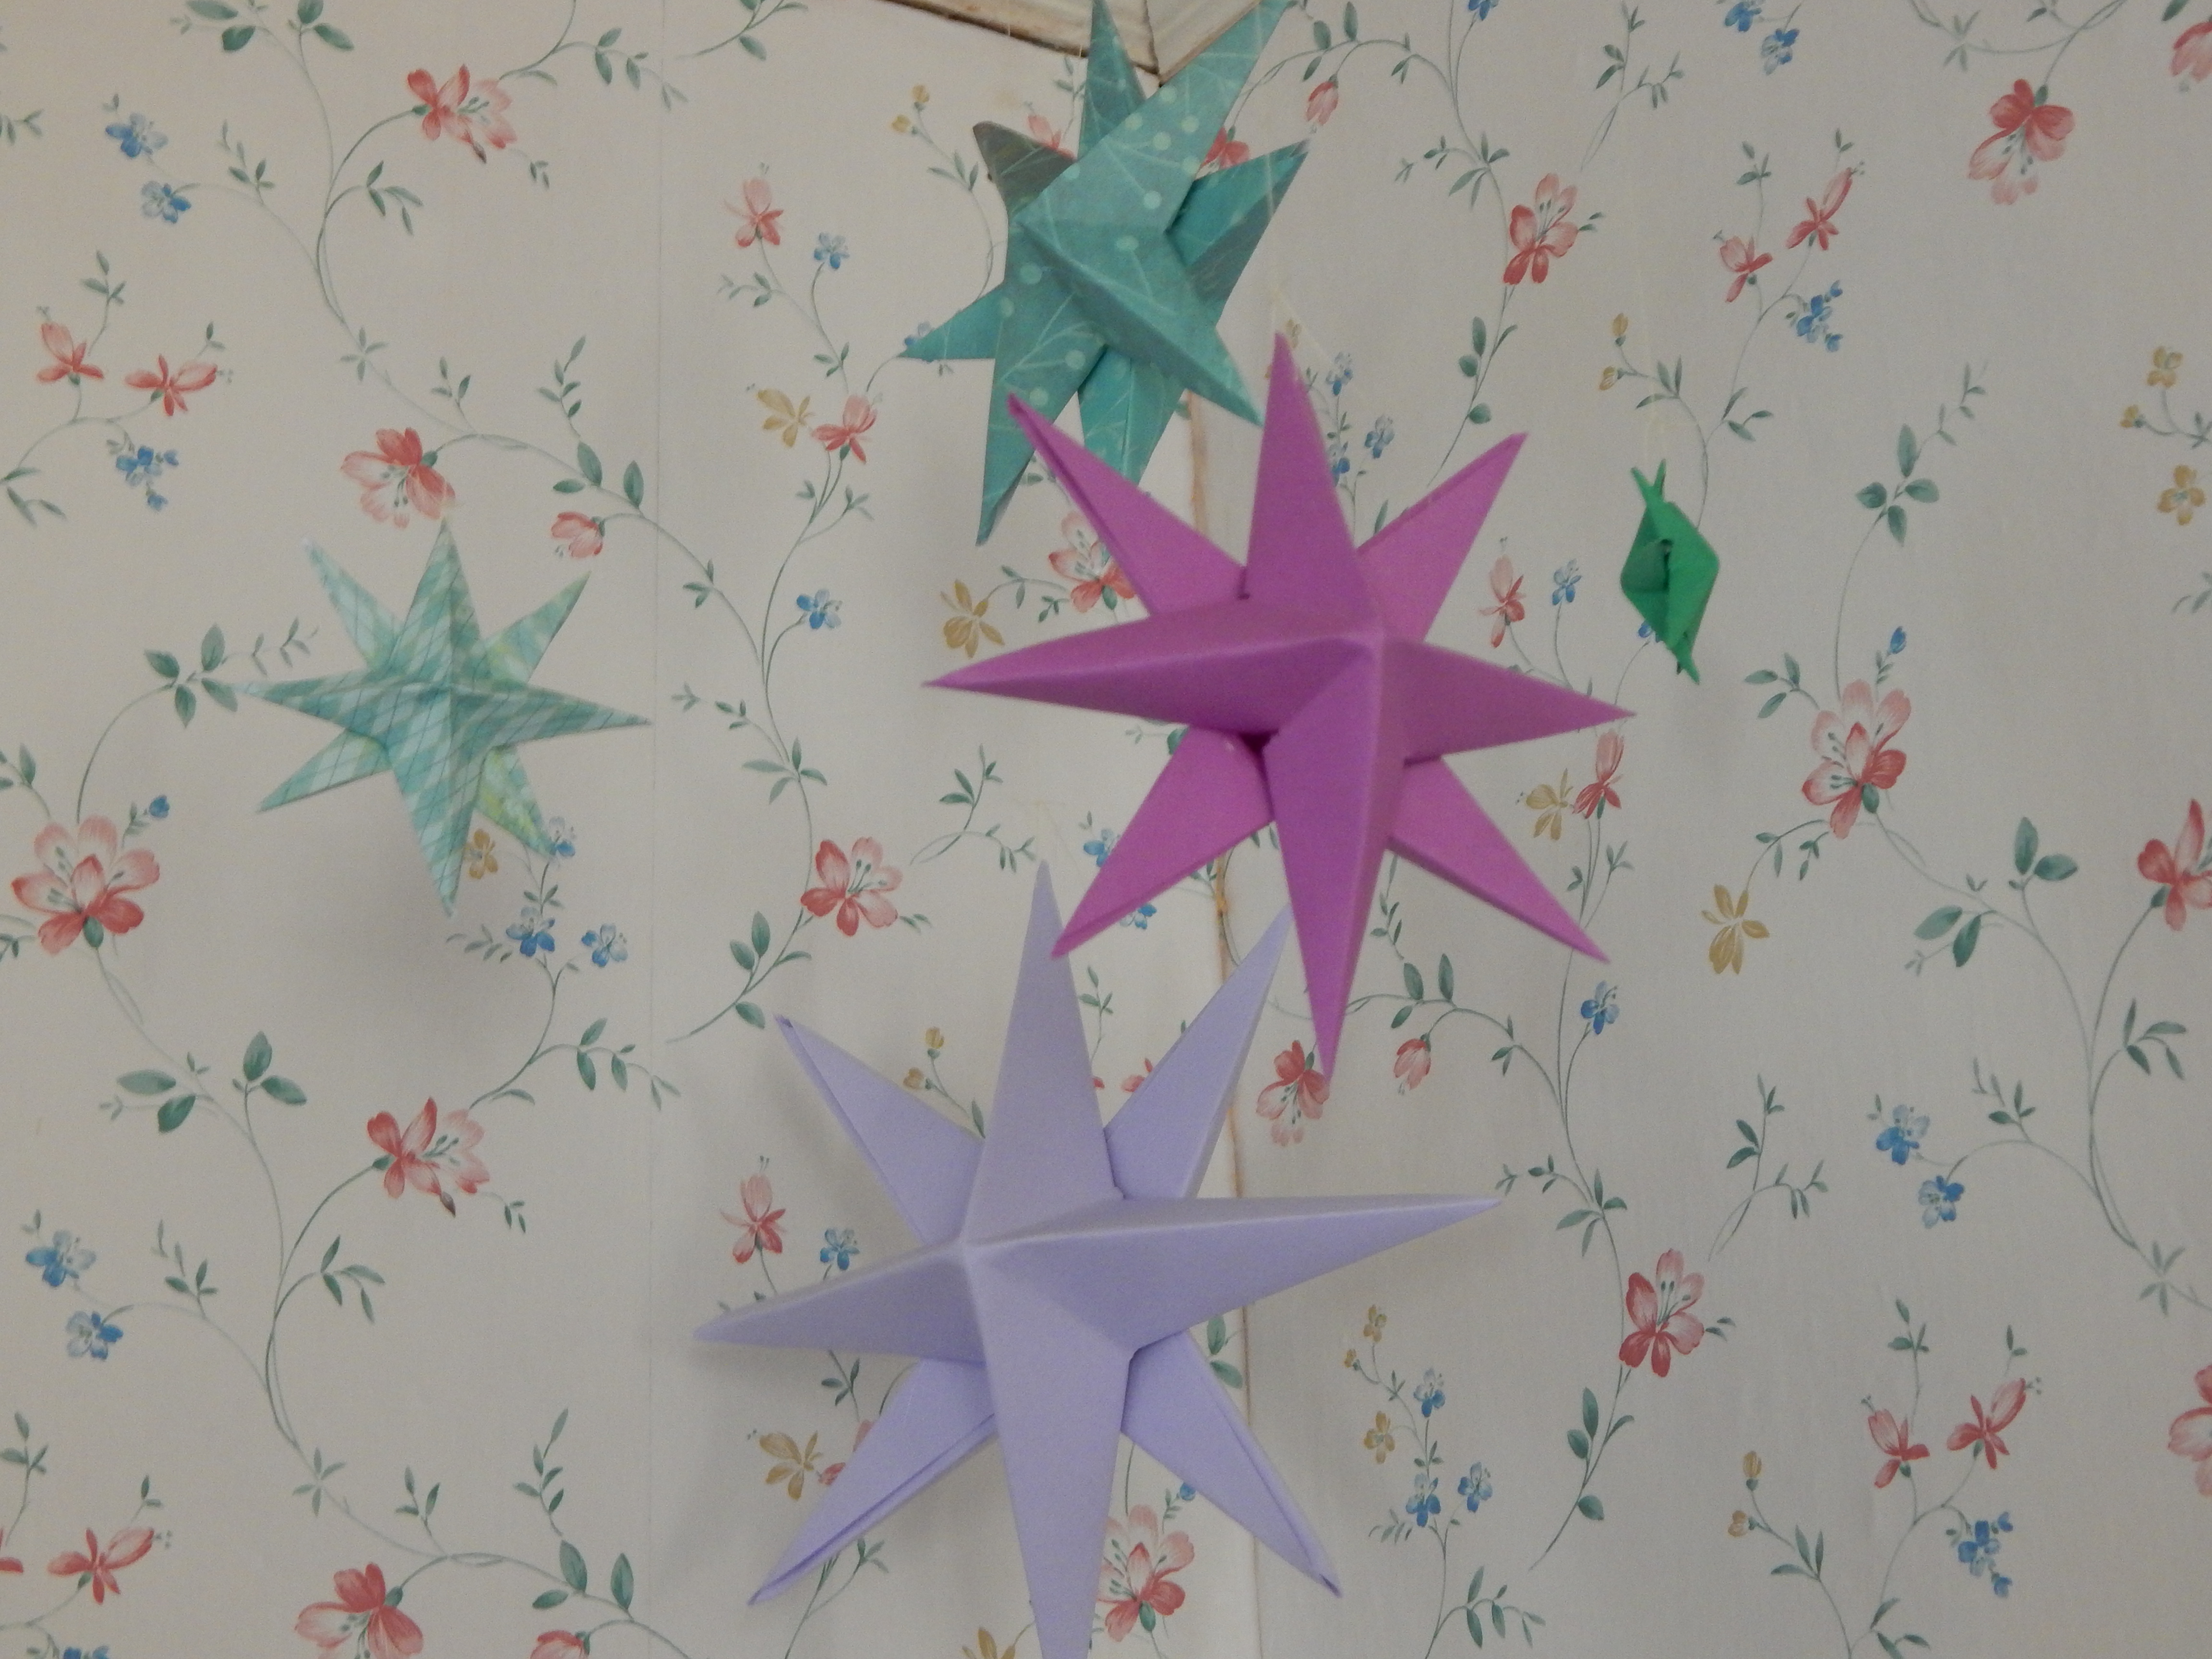
Megan and I both made stars to hang near our beds.
I also made this little circle-doodley thing, because I love to doodle. I think I’ve seen something like it on Pinterest, but I didn’t pin it.
I hung my arm-knit scarves on my bed post. They are color coordinated, of course, because I just LOVE it when everything is color coordinated. ☺ And I did pin this to my Pinterest board here. You should seriously make one of these.
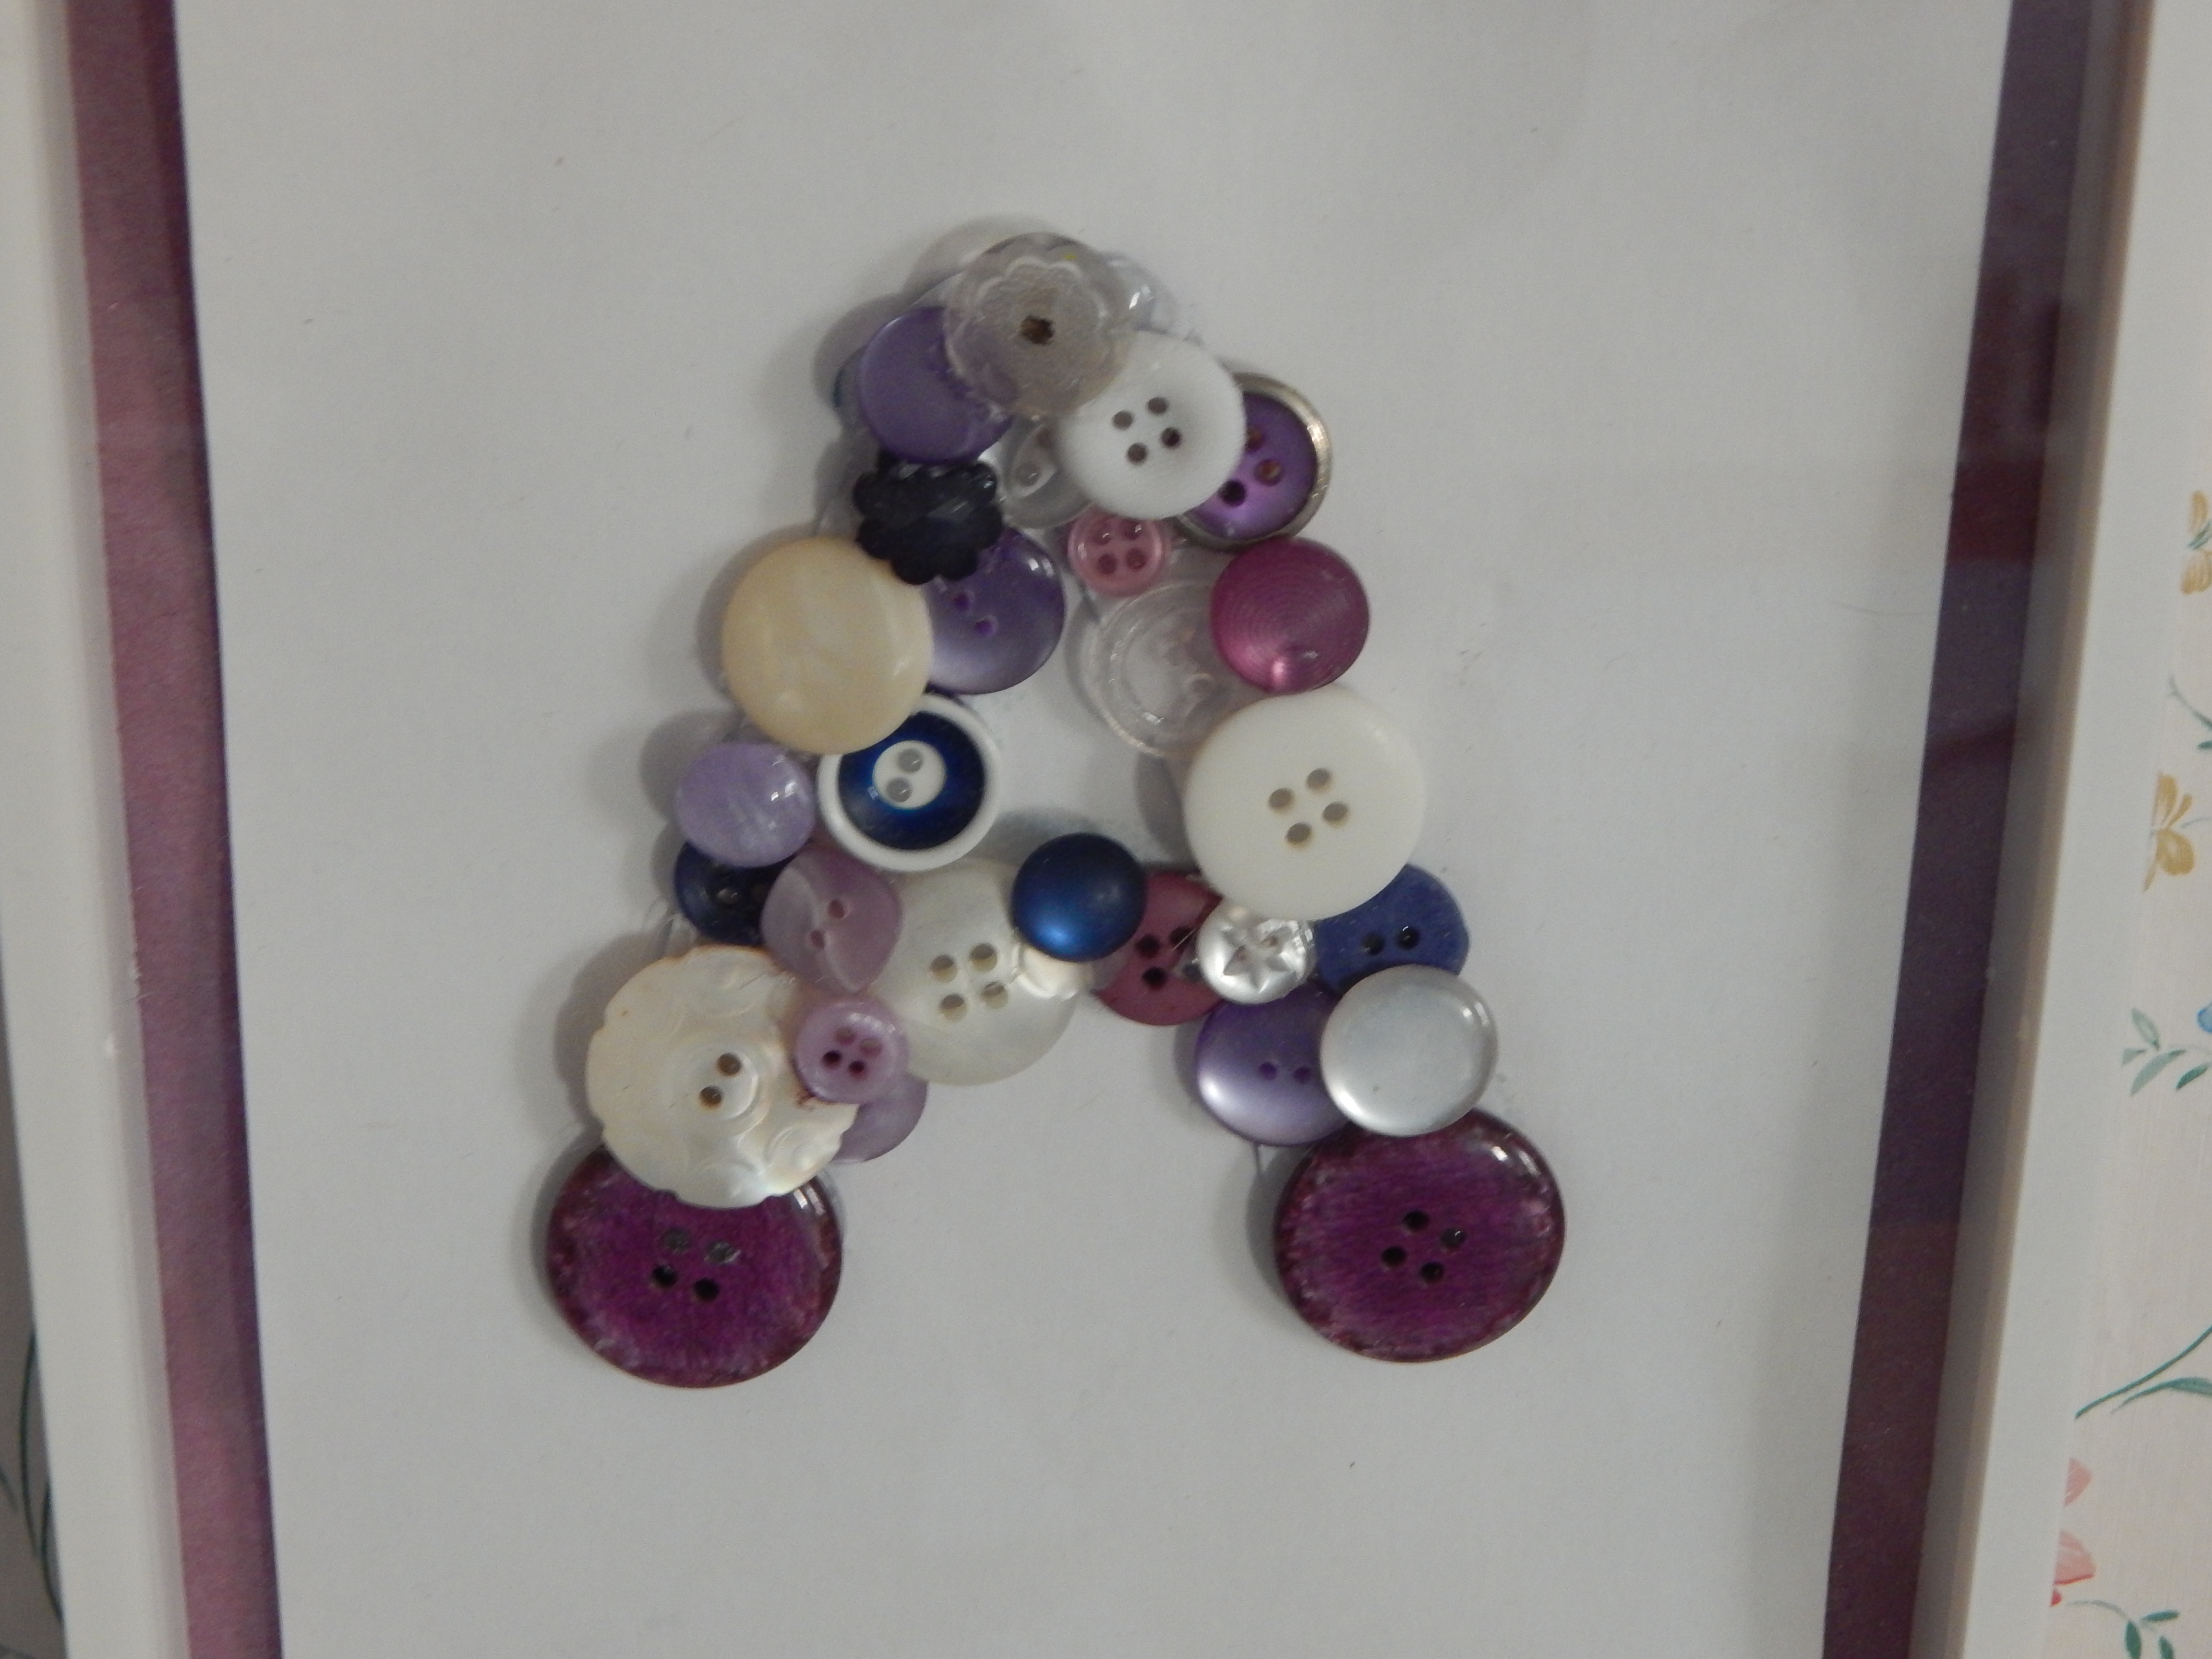
A buttoned initial. (I ♥ buttons!)
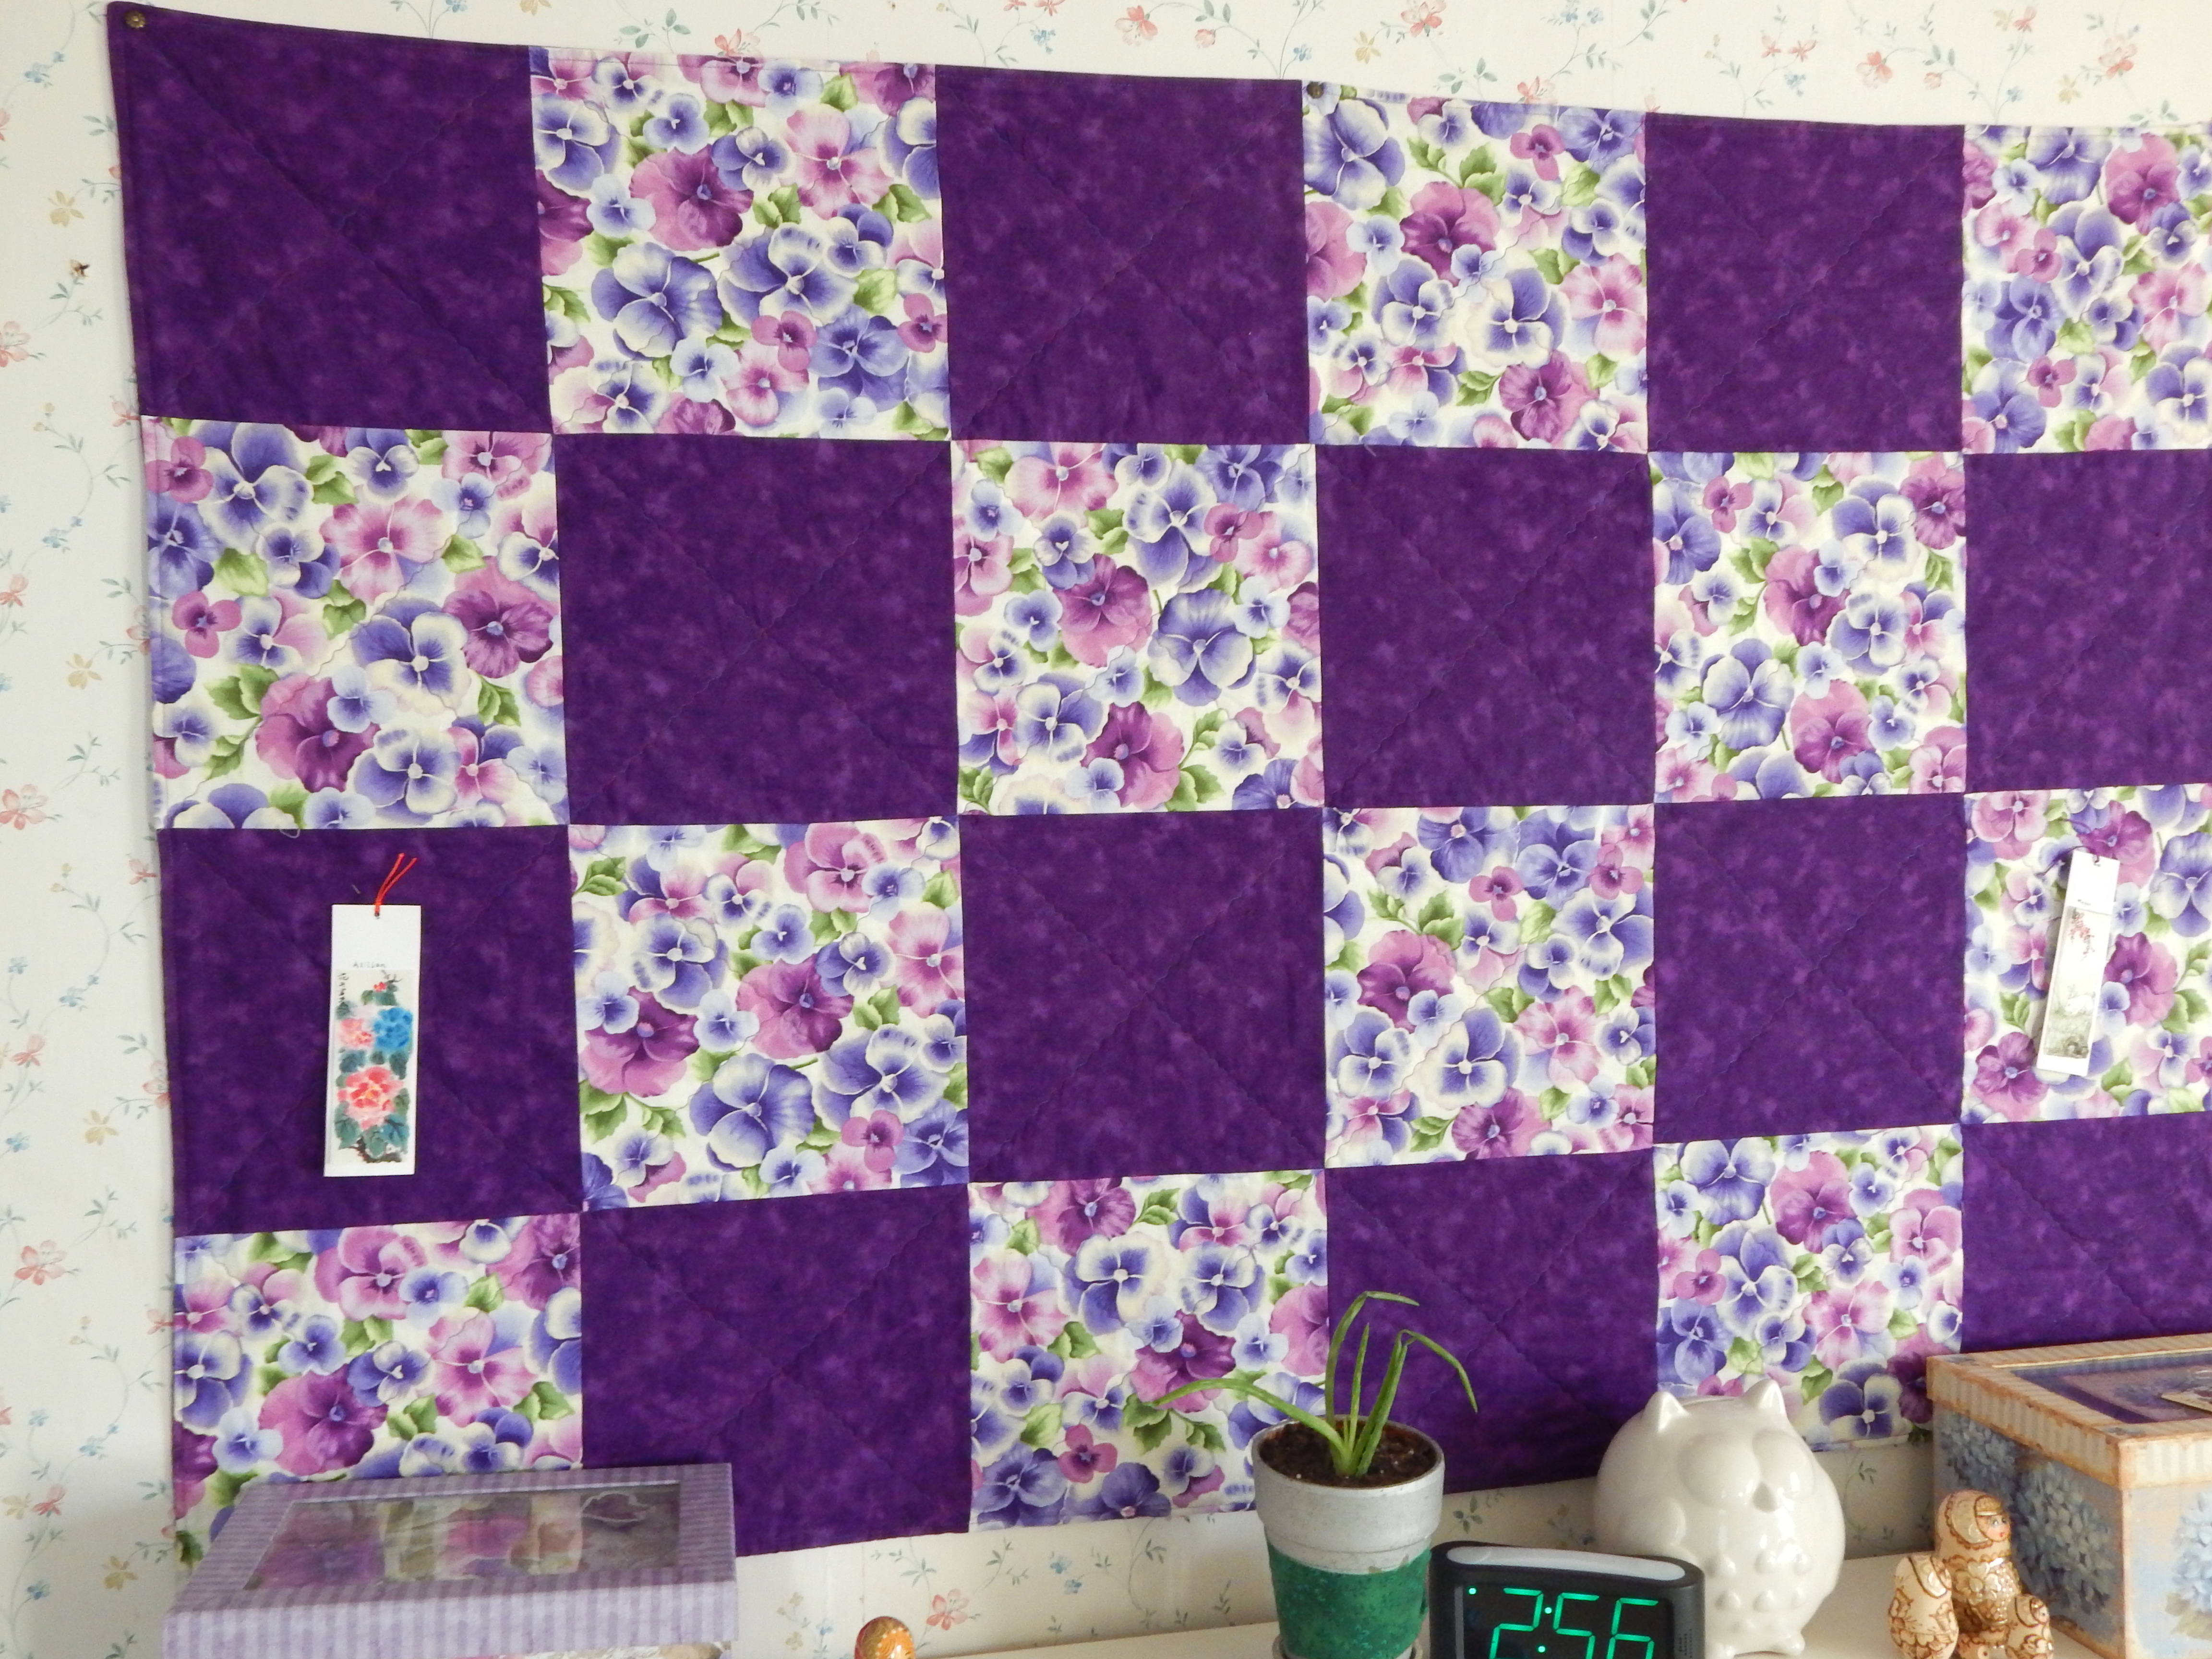
My dad hung a quilt I made a few years ago over our dresser, and it doubles as a decoration and a bulletin board.
Can you tell what my favorite color is from these pictures?