Today I have a different sort of photoshoot for you. While I was taking pictures for my Day in the Life post, I found a bunch of interesting subjects in our library and just kept snapping as I walked around. 😛 I usually prefer nature photography, but it was fun to capture the texture of man-made things and the character of our old farmhouse from the inside. I hope you enjoy the tour!
GUYS GUYS GUYS I AM SO INCREDIBLY EXCITED. Because, as you probably guessed, I’M GETTING AN ART STUDIO. 😀 I have wanted my own space for arts and crafts for practically forever, and I can’t believe I finally get to have one!
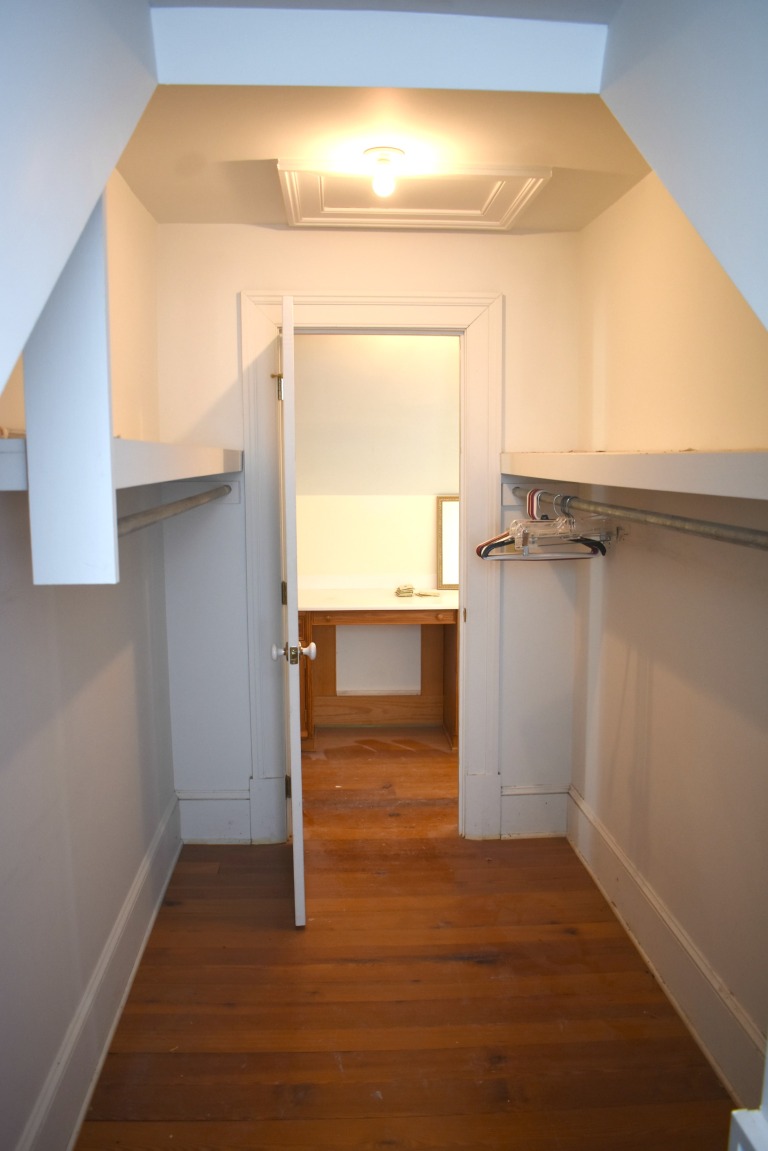
My new studio is actually in a closet. XD We definitely don’t need all four closets in our bedroom + bathroom at the new house, so Mom thought I could make the biggest walk-in closet into my studio!
It’s basically a small room, complete with a window and shelves for storage. It’s only about 60 square feet, but I think it will work great for just me. 🙂 However, it certainly wasn’t set up for a studio at first, and that’s what I’ll be showing you today: how I turned a closet into a space for a studio!
PLUS, Photowall contacted me and wondered if I wanted to do a review for them in exchange for a free product, and I was like, “OH YES PLEASE.” (I didn’t actually say that.) XD Are you as excited about this post as I am? I DOUBT IT. XD
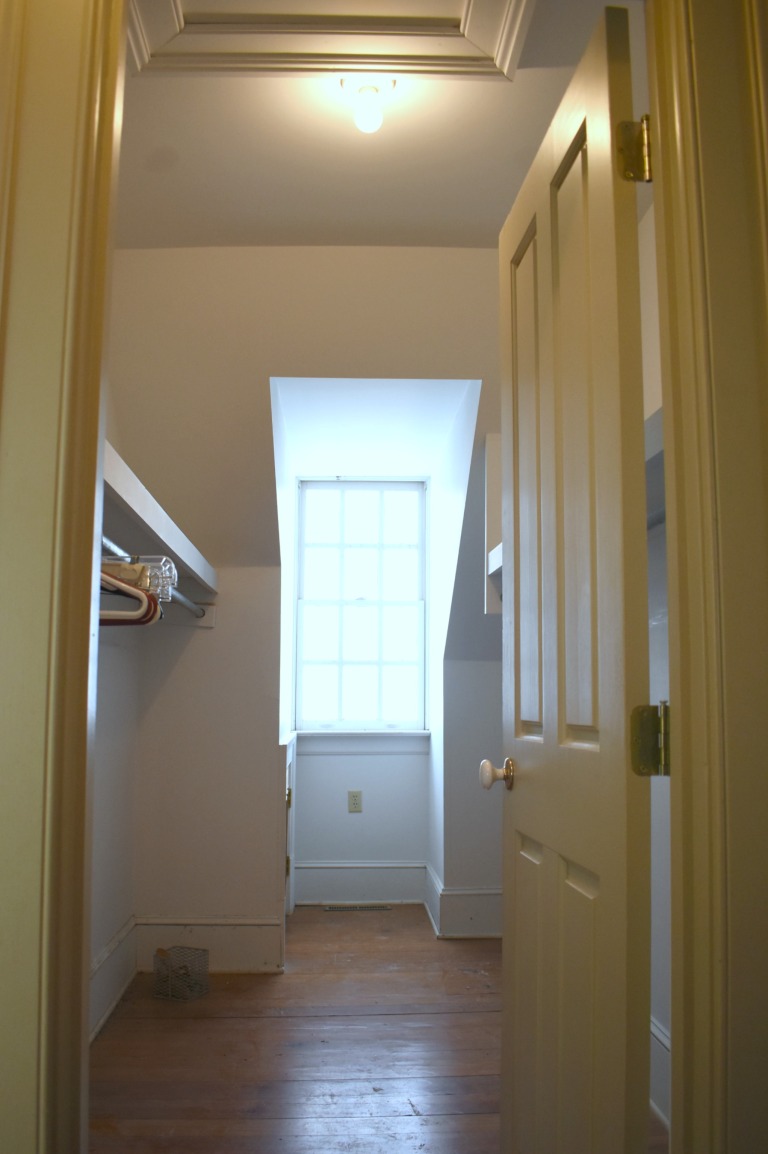
Alright, let’s get started! First, this is how the closet looked to begin with:
Doesn’t exactly look like a studio yet, huh? Well the first step toward that goal was to get rid of the shelves and to take off the door for more space. I decided to keep the shelves in that little cubby above because really, it was too small and had too low of a ceiling to turn into anything else.
My brother Jeff helped me with the demo, and then Dad spackled (or plastered) over the marks where the shelves and hinges had been (and where Jeff had applied the crowbar a bit too vigorously, heh heh). After a few coats of plaster and some sanding, it was ready to be painted! I painted it in Valspar’s “Dove White” because I want the studio to look clean and bright, with pops of color.
I’ll get more into my color scheme and décor in a later post, but I’m thinking white, navy, purple, pink, and gold. ❤ Ahh, I can’t WAIT!
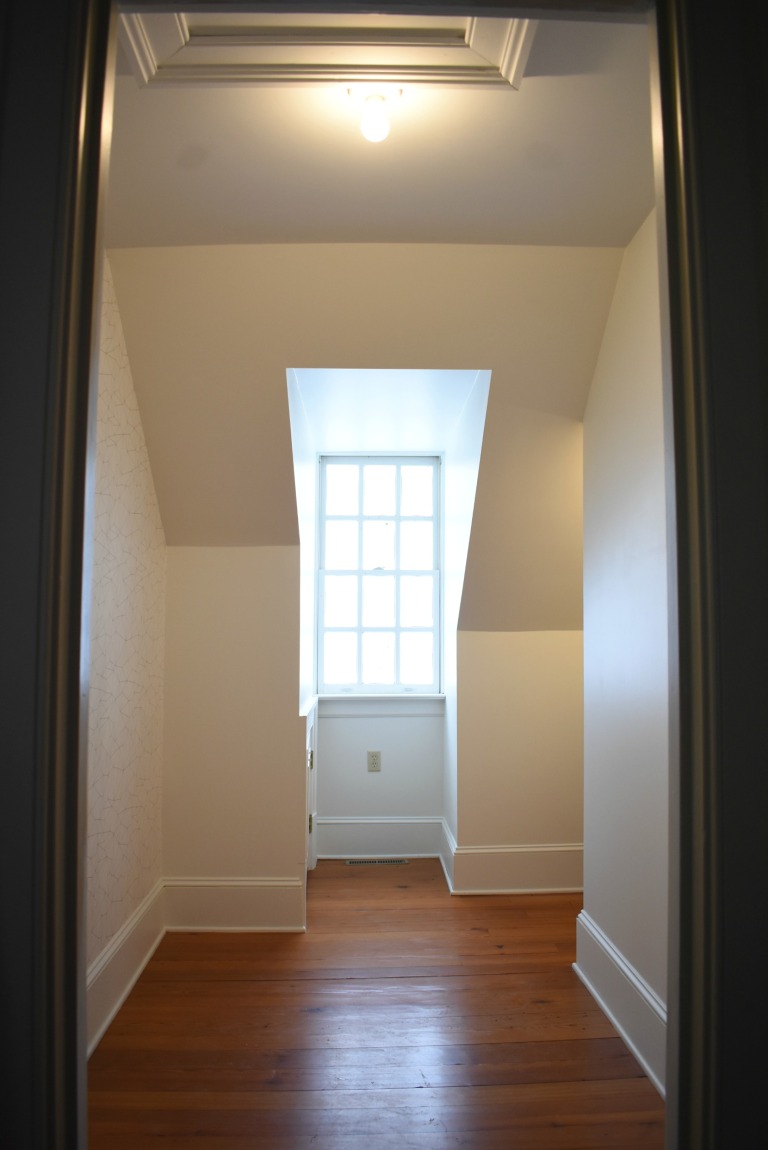
Anyway, here’s what it looked like after taking out the shelves and door, plastering, and painting. So much better already! Doesn’t it look a lot bigger?
Next, it was time to put up the wallpaper, and now it’s time for the review part of the post. As I said, I did get this product for free, but obviously I’m going to be honest about my likes and dislikes, because otherwise what use would a review be? 😉
Photowall is a Swedish design company that sells both canvases and wall murals/wallpaper. Also, one super neat part of their site is that you can upload your own image! So if you have a high-res picture, you can get wallpaper or a canvas with your own photo or art on it! I considered that, but decided to go with a more clean, modern look, like the White Grafo pattern I ended up choosing.
I went with the premium wallpaper instead of the standard, because hey, why not? It was wonderfully thick and almost rubbery-feeling, like it would wipe off easily. The pattern was printed beautifully as well.
I ordered about 6.7 square meters, which cost $243. Preeetty expensive, especially considering you can get wallpaper at Home Depot for $0.79/sq. ft., compared to $3.67/sq. ft. at Photowall. :[] I also ordered the wallpaper kit, which you can get separately for $20.
However the shipping was free – and super fast! The customer service was also great, in my experience. Here are the boxes the products were shipped in:
The wallpaper box included the following:
wallpaper (duh)
wallpaper paste powder
instructions
And as for the kit box, I was surprised at how many different things were included! It seriously has EVERY SINGLE THING you need to put up wallpaper, except supplies pertaining to mixing up the paste (water, a bucket, and a stir stick).
paste brush
wallpaper brush
trim guide
seam roller
spirit level
knife
pencil
And now for putting it up! It took a bit to mix up the paste and let it set, and it was definitely more work than using pre-pasted wallpaper (or so my mom tells me), but it seemed to work pretty well. Thanks to my mom for taking the next two pictures. 😉
One helpful feature of this wallpaper is that the panels are numbered. It’s not just one big sheet, it’s split into several sheets that you cut apart and then paste on. You do have to match up the seams, but it feels more manageable. 🙂 It still took about 2 ½ hours, though, with Mom and I putting it up together.
It looked SO good once we got it all up, eep! But one thing that really scared me was these brown patches that appeared on the paper as it was drying:
Yikes, what a terrible picture. :[]Thank goodness they don’t stay! It must just take a really long time to dry (more than three days, in fact), but that’s probably because it was cold in there and not super well ventilated. And now, this is how the studio looks thus far:
Thanks to my sister Megan for taking this picture. 🙂
AHHH I LOVE IT. The wallpaper actually made the space feel bigger for some strange reason, and it definitely made it feel more like a room than a closet. I’m really happy with my pattern choice and with the product itself. 🙂
To recap…
PROS
Fast, free shipping
Excellent quality wallpaper
ENORMOUS selection of beautiful prints and patterns
Easy-to-use website and instructions
Great customer service
CONS
Very pricey
Doesn’t come pre-pasted
Fairly long application and drying times (at least for the premium paper)
Basically, I absolutely love everything but the price. I would highly recommend the product and company itself – the wallpaper is beautiful, high quality resolution, and scratch/tear-resistant – but I personally would go with a cheaper option if I did it again and not for free.
If the price doesn’t worry you, though, or if you just want one of their beautiful and unique murals you can’t get anywhere else, then Photowall is the company to buy from! Even if you don’t need any wallpaper at the moment, you should totally check out their website – remember they also have a huge selection of canvases, and I’ve heard they’re pretty great too! 🙂
I hope you enjoyed reading this rather lengthy post, and stay tuned for Part 2! In the next art studio post, I’m going to furnish the studio and put up at least some of the decorations. ❤ YAY!
Thanks for stopping by, dears, and have a lovely day!
Wow, I haven’t had this long of a post gap for a long time. Okay, a week really isn’t “a long post gap.” XD But like I said, posting is going to be somewhat irregular because we’re moving! Before we do, there’s a good bit of work to be done in both the houses and the new farm in general, and that’s what we’re doing right now. Going down there for a couple of days a week keeps us pretty busy, phew!
Anyway, I thought I’d make a series of posts showing our process, with pictures that we can look back on as a sort of “before-and-after” of the whole project. Today I’ll be sharing our work on this house so far, which we call the Cedar House:Isn’t it cute? This is the second house on the farm, and the one we will use as a guest house (and possibly an Airbnb later!). We’re fixing it up first so we can stay there while we fix up the main house, which will need more big-picture repair, like the roof and ceilings.
But before we get to the renovations, I wanted to show you these pretty pictures from the drive there. I love mountains. ♥
This one is probably over-edited, but I like it. 🙂
The walls were marked up pretty badly and in definite need of a fresh coat of paint. Heh heh.It looks so much better now! We painted it “Intense White” from Benjamin Moore, but the name is rather misleading because it’s more like a nice, light gray. My grandmother (in the picture below) is super good at painting and she comes up and helps us often. 🙂 I rather like this picture. ♥Oh, and speaking of painting, we painted this popcorn ceiling (you can kind of see it in that picture) in an upstairs bedroom, and the next day, it was coming down. The popcorn texture was just peeling off the ceiling, so we had to scrape it all off and sand it down. AND THEN IT HAPPENED AGAIN in the living room. It was awful, especially the fact that plaster dust gets seriously everywhere. The house was coated in it after we were done, and we had to clean hard and long to get rid of it. Woohoo.
The dust doesn’t just get on the house, it gets on YOU. See? Poor Megan. XDMoral of the story: NEVER PUT UP POPCORN CEILINGS.
I, thankfully, didn’t have to sand because I was… um, very busily employed in doing other things. XD But don’t worry, I was working. My little sister Carmen and I cleaned out the kitchen and arranged and organized the few utensils and glasses and such that we had.
It’s so funny, but we both love organizing – and cleaning too, when we’re in the mood. That day we were so much in the mood that we went on to other parts of the house and cleaned windows and swept the deck and all sorts of things. It was quite satisfying. 😛We got creative and decided to decorate a jar and tin can with painter’s tape. XDIsn’t this next picture so cute? I just find it amusing that my seven-year-old sister would do this in her free time. :’)Strangely enough, there are ladybugs all over the house, especially in the corners of the walls. But hey, I’m not complaining – I’d much rather have ladybugs than flies or spiders or stinkbugs. *shrugs*One evening when we were getting a bedroom ready to be painted, we found these strange round stickers on the wall. We all wondered what they were there for, because they were scattered all over the room and kind of blended in with the paint – they didn’t really seem to serve a purpose. But then one of the kids (I think it was me 😛 ) thought to turn off the lights and it was beautiful! The stickers were glow-in-the-dark, and it felt like standing in space because there were so many “stars” on the walls.
It was REALLY hard to get a good picture of, which is probably why I didn’t. Heh. It was much more impressive in real life, believe me. 😉Since we (the kids) thought they were so neat, we peeled off all the stickers and put them on a basement wall in the main house. 🙂
Speaking of stars, you can see so many here! Even though we live out in the country at our current farm (well obviously XD), you can see seriously like five times more stars here! It’s less like individual pinpricks and more like a whole pot of silver glitter spilled across the sky. I love it. 🙂 And yes, I did take a picture, but it’s even worse than the one of the fake stars, so I’ll save it for… uh, never. XD
How ’bout a picture of frost crystals instead to end the post? Guys, it is SO cold at both farms. How’s the weather where you live?Well, that’s about it for this part. I have several more pictures and adventures for later, so stay tuned! 😉
Has you or your family ever renovated a house? Or maybe repainted a room or bedroom? I’m excited to decorate our new bedroom in the main house – and don’t worry, I’m sure I’ll post about that when we do. XD
Well, see you later, dears, and thanks for reading! Have a lovely day, and stay warm. 😉
Megan and I recently changed our bedroom a bit, so I thought this would be a good opportunity to do a room update. (You can see my first new room redecorating post here, and second here.) I also wanted to mention a few tips and tricks for making your bedroom fresh and bright and pretty – not that I’m an professional interior designer or anything. XD
Ahem. Let us begin the tour. Won’t you step inside?
Welcome to our room. Please pardon Jinx, our cat. He looks like a black boulder. O.o
Right next to the door we have Megan’s bulletin board filled with random stuff, but mostly pictures and NeedtoBreathe lyrics. XD
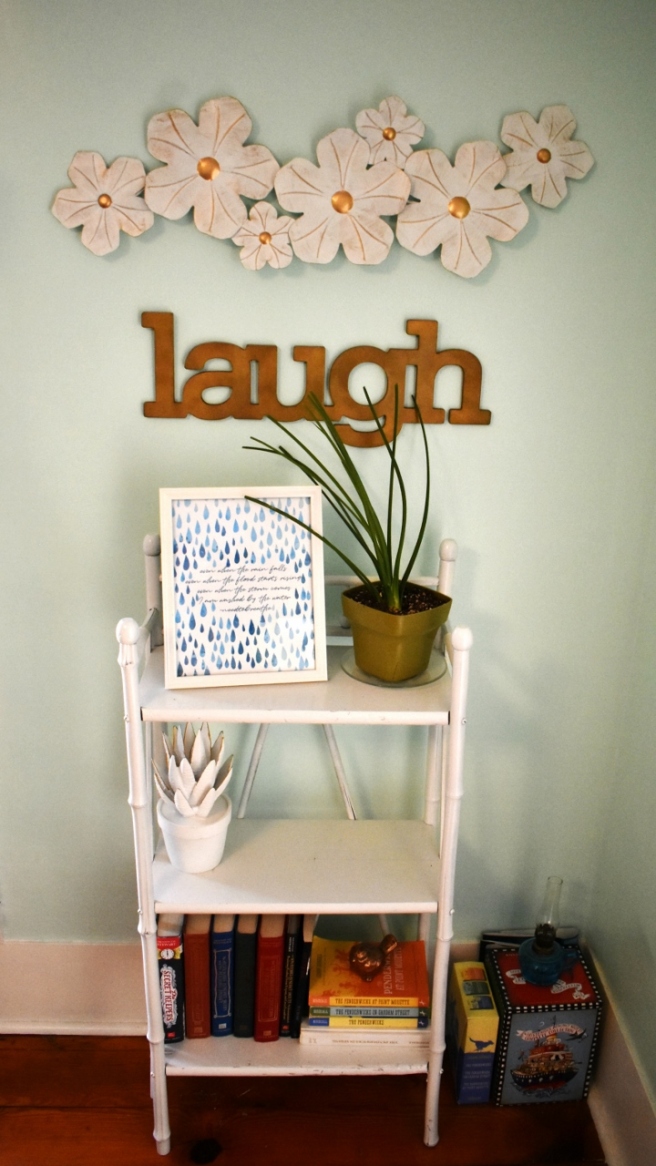
(Ugh, sorry for the AWFUL picture quality! This corner doesn’t get much light.) Our small but tiny bookshelf holds on top of it a framed graphic print (made by Megan) and a spiky plant that resembles green onions but is nonetheless cute. The middle shelf is currently missing the KOTLC series because our cousin is borrowing it. 😉
The mantel doesn’t look much different than it has in previous bedroom posts, so…
And now we’re at the dresser. More on that later.
Okay, now for the light garland! I love the string of lights above our bed. ♥ (They’re from Hobby Lobby, by the way.) They aren’t fairy lights, but I think they’re just as pretty. It makes the room so cozy and, well, aesthetic. 😛 Oh, and that’s Megan, listening to Christmas music BEFORE IT’S EVEN THANKSGIVING. *sigh*
Interesting story: Shutterfly had a “101 free 4″X4″ prints” deal (you had to pay for shipping, though), so Megan and I ordered it! :O Megan wanted to hang some of the pictures in between our lights, and while I was a bit skeptical at first, I think it looks lovely now! All of the photos up here are of our bunnies, except one of Megan and one of me. 😉
This is my bed, starring Jinx (again), an elephant I made in sewing class, and a canvas I painted when we first redecorated.
Also starring… a quilt made in sewing class and Megan looking at the iPad.
I wanted to make a picture mosaic with some of the other 101 photos, and I’m rather pleased with how this turned out too! I chose only the cool-colored pictures from our selection so it wouldn’t be too overwhelming.
While we’re here, this is our beloved fuzzy cube. Pretty much the only change in this corner is the (also fuzzy) needle-felted fox I made. He may feature in a later post. 😉
Now for our plants. One day we had a friend over and since we were bored, we decided to name all of our plants. Heh.
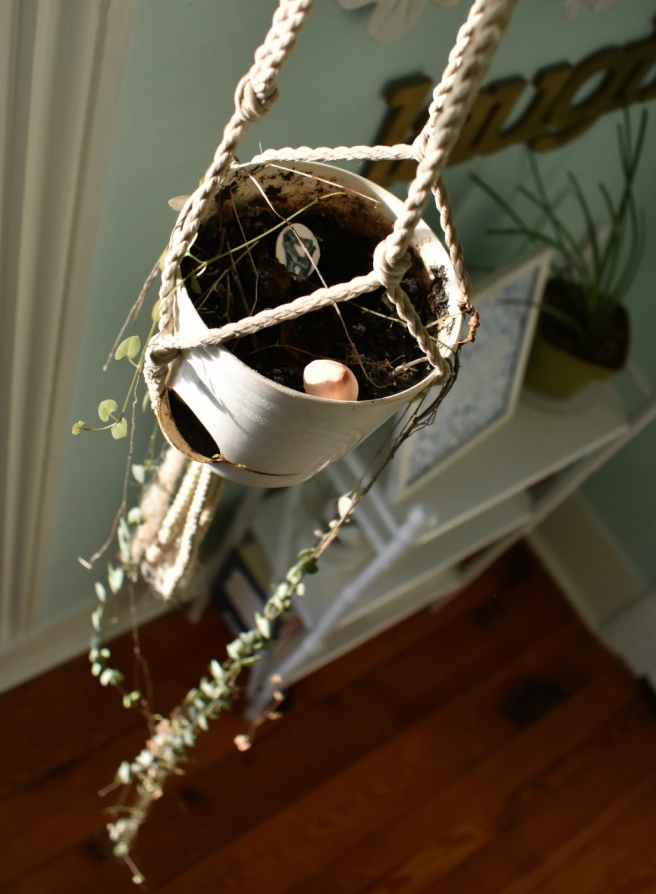
First up we have Rapunzel, who is rather hard to get a picture of, but her hair reaches all the way to the floor. Impressive, no? (Also, yes, those are random clay things in the pot.)
On the dresser we have Finley…
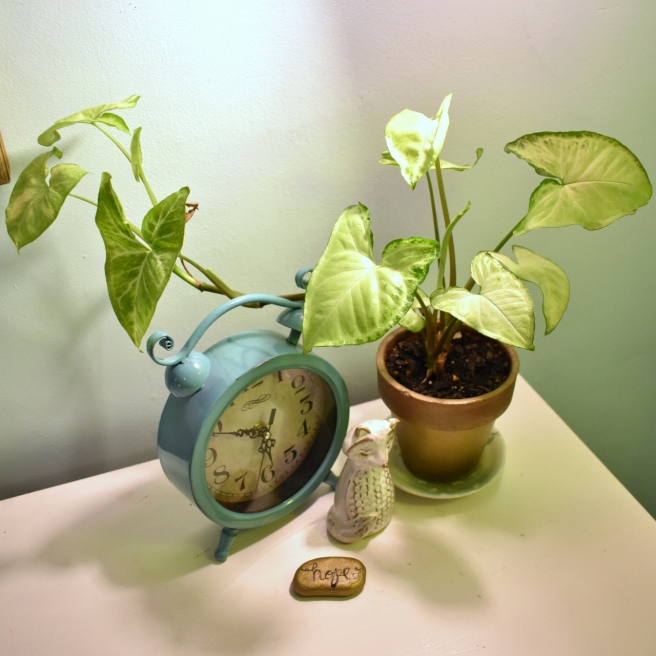
And Einstein, a new addition. Don’t you think the name fits perfectly?
Here’s Einstein’s brother, Sylvester.
This is Droopy.
This is not a plant. This is me. Hiiiii! 😀
And then we have our plant rehabilitation center (aka, the spot in front of the window). In the foreground we have Cottontail (it’s a Rabbit’s Foot fern), and then in the background we have Puff the Magic Fern on the left and Miss Crispy on the right. *sigh* I do hope they recover.
And… that’s about it for the room tour! Before we leave, here are my three simple but helpful tips for a fresh, clean look. I hope they help!
My tip-top top tip is to declutter your room. This is seriously the best thing you can do. Go through your stuff – the little knickknacks lying on your dresser, papers poking out from your bed, clothes piled on the floor – and either give away the extra, throw it away, or put it into a nice container, box, or basket so it doesn’t sprawl all over the place. Don’t like cleaning your room? Trust me, this will help. If you don’t have as many things to get out, you won’t have as much to put away!
Okay, that probably wasn’t a very popular tip, huh? XD But you try it and tell me if I’m wrong! Anyway, my next tip is to choose a limited color palette. Our colors are mint green, white, and purple, but mainly mint green (obviously). Keeping your decorations to two or three different colors really helps your room look more fresh, clean, and pretty, especially if you choose light colors.
Which reminds me. Choose a light color scheme. Now, this isn’t necessary of course, but light, bright colors like white, mint, light blue or pink, etc. make your room seem fresher, bigger, and even cleaner! This is important for the wall color, especially. But if you can’t change your wall color, don’t worry, the first two tips will still help a ton, and you can make your decorations are light. 😉
Well, that’s all I have for today! I hope you enjoyed the room tour. 🙂 What was your favorite part of our room? If you’d like to see more details on the parts I didn’t cover, make sure to check out my other room posts (linked at the top of this post).


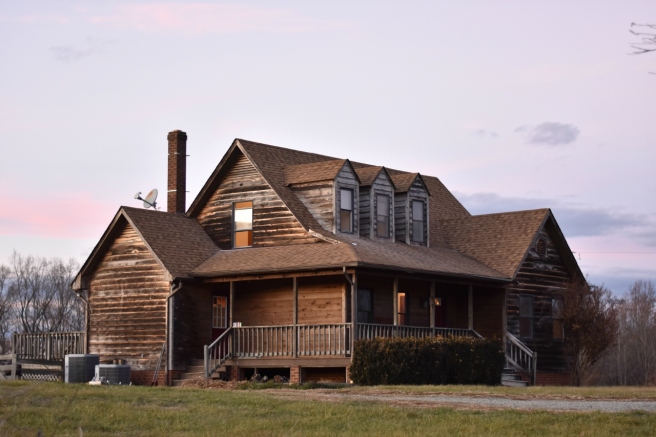 Isn’t it cute? This is the second house on the farm, and the one we will use as a guest house (and possibly an Airbnb later!). We’re fixing it up first so we can stay there while we fix up the main house, which will need more big-picture repair, like the roof and ceilings.


 The walls were marked up pretty badly and in definite need of a fresh coat of paint. Heh heh.
 It looks so much better now! We painted it “Intense White” from Benjamin Moore, but the name is rather misleading because it’s more like a nice, light gray. My grandmother (in the picture below) is super good at painting and she comes up and helps us often. 🙂 I rather like this picture. ♥
 Oh, and speaking of painting, we painted this popcorn ceiling (you can kind of see it in that picture) in an upstairs bedroom, and the next day, it was coming down. The popcorn texture was just peeling off the ceiling, so we had to scrape it all off and sand it down. AND THEN IT HAPPENED AGAIN in the living room. It was awful, especially the fact that plaster dust gets seriously everywhere. The house was coated in it after we were done, and we had to clean hard and long to get rid of it. Woohoo.
 Moral of the story: NEVER PUT UP POPCORN CEILINGS.
 We got creative and decided to decorate a jar and tin can with painter’s tape. XD
 Isn’t this next picture so cute? I just find it amusing that my seven-year-old sister would do this in her free time. :’)
 Strangely enough, there are ladybugs all over the house, especially in the corners of the walls. But hey, I’m not complaining – I’d much rather have ladybugs than flies or spiders or stinkbugs. *shrugs*
 One evening when we were getting a bedroom ready to be painted, we found these strange round stickers on the wall. We all wondered what they were there for, because they were scattered all over the room and kind of blended in with the paint – they didn’t really seem to serve a purpose. But then one of the kids (I think it was me 😛 ) thought to turn off the lights and it was beautiful! The stickers were glow-in-the-dark, and it felt like standing in space because there were so many “stars” on the walls.
 Since we (the kids) thought they were so neat, we peeled off all the stickers and put them on a basement wall in the main house. 🙂
 Well, that’s about it for this part. I have several more pictures and adventures for later, so stay tuned! 😉