Art Lab, Episode #4: Rainbow Puzzles

*Announcer’s voice* Hello, and welcome to the fourth episode of Art Lab! XD

If you recall (and even if you don’t), Hayley and I are doing a collaborative series called The Art Lab wherein we hope to inspire you to make fun and beautiful art. 😉 Click on Hayley’s name up there to visit her blog and see her beautiful entries and other lovely posts!

Recently I’ve been having fun arranging simple rainbow patterns in interesting ways. This is pretty much no-fail art. As long as you can wield a marker and a pair of scissors without dying yourself blue or hacking off a finger, you’re in good shape. XD

Word Prompt: Rainbow

Rainbow is kind of boring, and unoriginal, right? Wrong! Here is how to spruce up a plain rainbow drawing (or any drawing, really):

Start by covering your paper in rainbow stripes, splotches, swirls, or pretty much any pattern you can think of. Here is a pattern I drew: (Note: Your pattern can be super simple – plain rainbow stripes work wonderfully.)

004 (1280x960) (2)
The colors were brighter in real life. 😦 Bad camera! (Or maybe just bad photographer. XD)


Now, cut it up! (Although if you really like your art so far, you should save it and make another piece to cut up.) You may cut it up into nice even strips, but it’s much more fun to go wild. Cut it up into big pieces and small pieces, jagged and smooth, circles and stripes. Now place your “puzzle pieces” on a paper, but leave spaces between each of them. This is what makes it neat. The white space distorts your picture while still letting the pretty design show through. Like so…

For this one I cut a circle from the above design, then hacked it to pieces and re-glued it onto an ATC with spaces between each of the jigsaw pieces. The circle spread into a sort of Easter-eggish shape.

005 (1280x960) (3)

This one started as a simple rainbow-striped square. You can see how all of the pieces fit back together.

002 (1280x960)

The background of the next one came from a marker-testing swatch. 😀 It makes things more interesting if you cut out shapes, like I did with the circle here. Just make sure that the inner circle is small enough to be glued on with space to spare.

001 (1280x960)

Oh, and I almost forgot: rainbow stripes make bright and fun envelope art too, especially if you have several different shades of each color:

rainbow envelope (1280x960)

So there you are! A simple way to make beautiful art. Now break out those rainbow markers, colored pencils, or watercolors, and get drawing!

***Allison***

AAWC Challenge 4: Blue Eyes, Part 2

Hola, amiga! (Or amigo.) XD

I’m participating in Misty’s really fun writing challenge, Aspiring Authors Writing Challenge, or AAWC for short. (Read about it here.) (And see my other entries here.) The word prompt for this challenge was “Bright.” I can collect two extra points for my team if I work my team mascot into the story, so I did (I’m on Team Swan)!

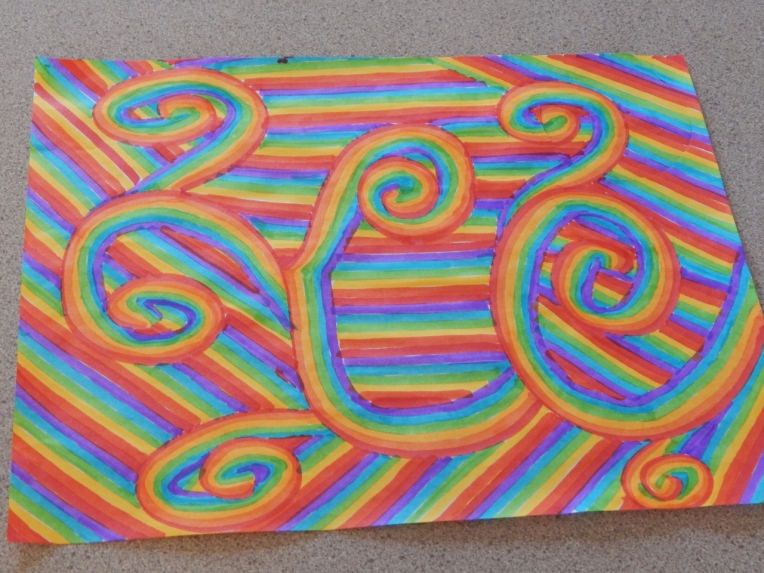
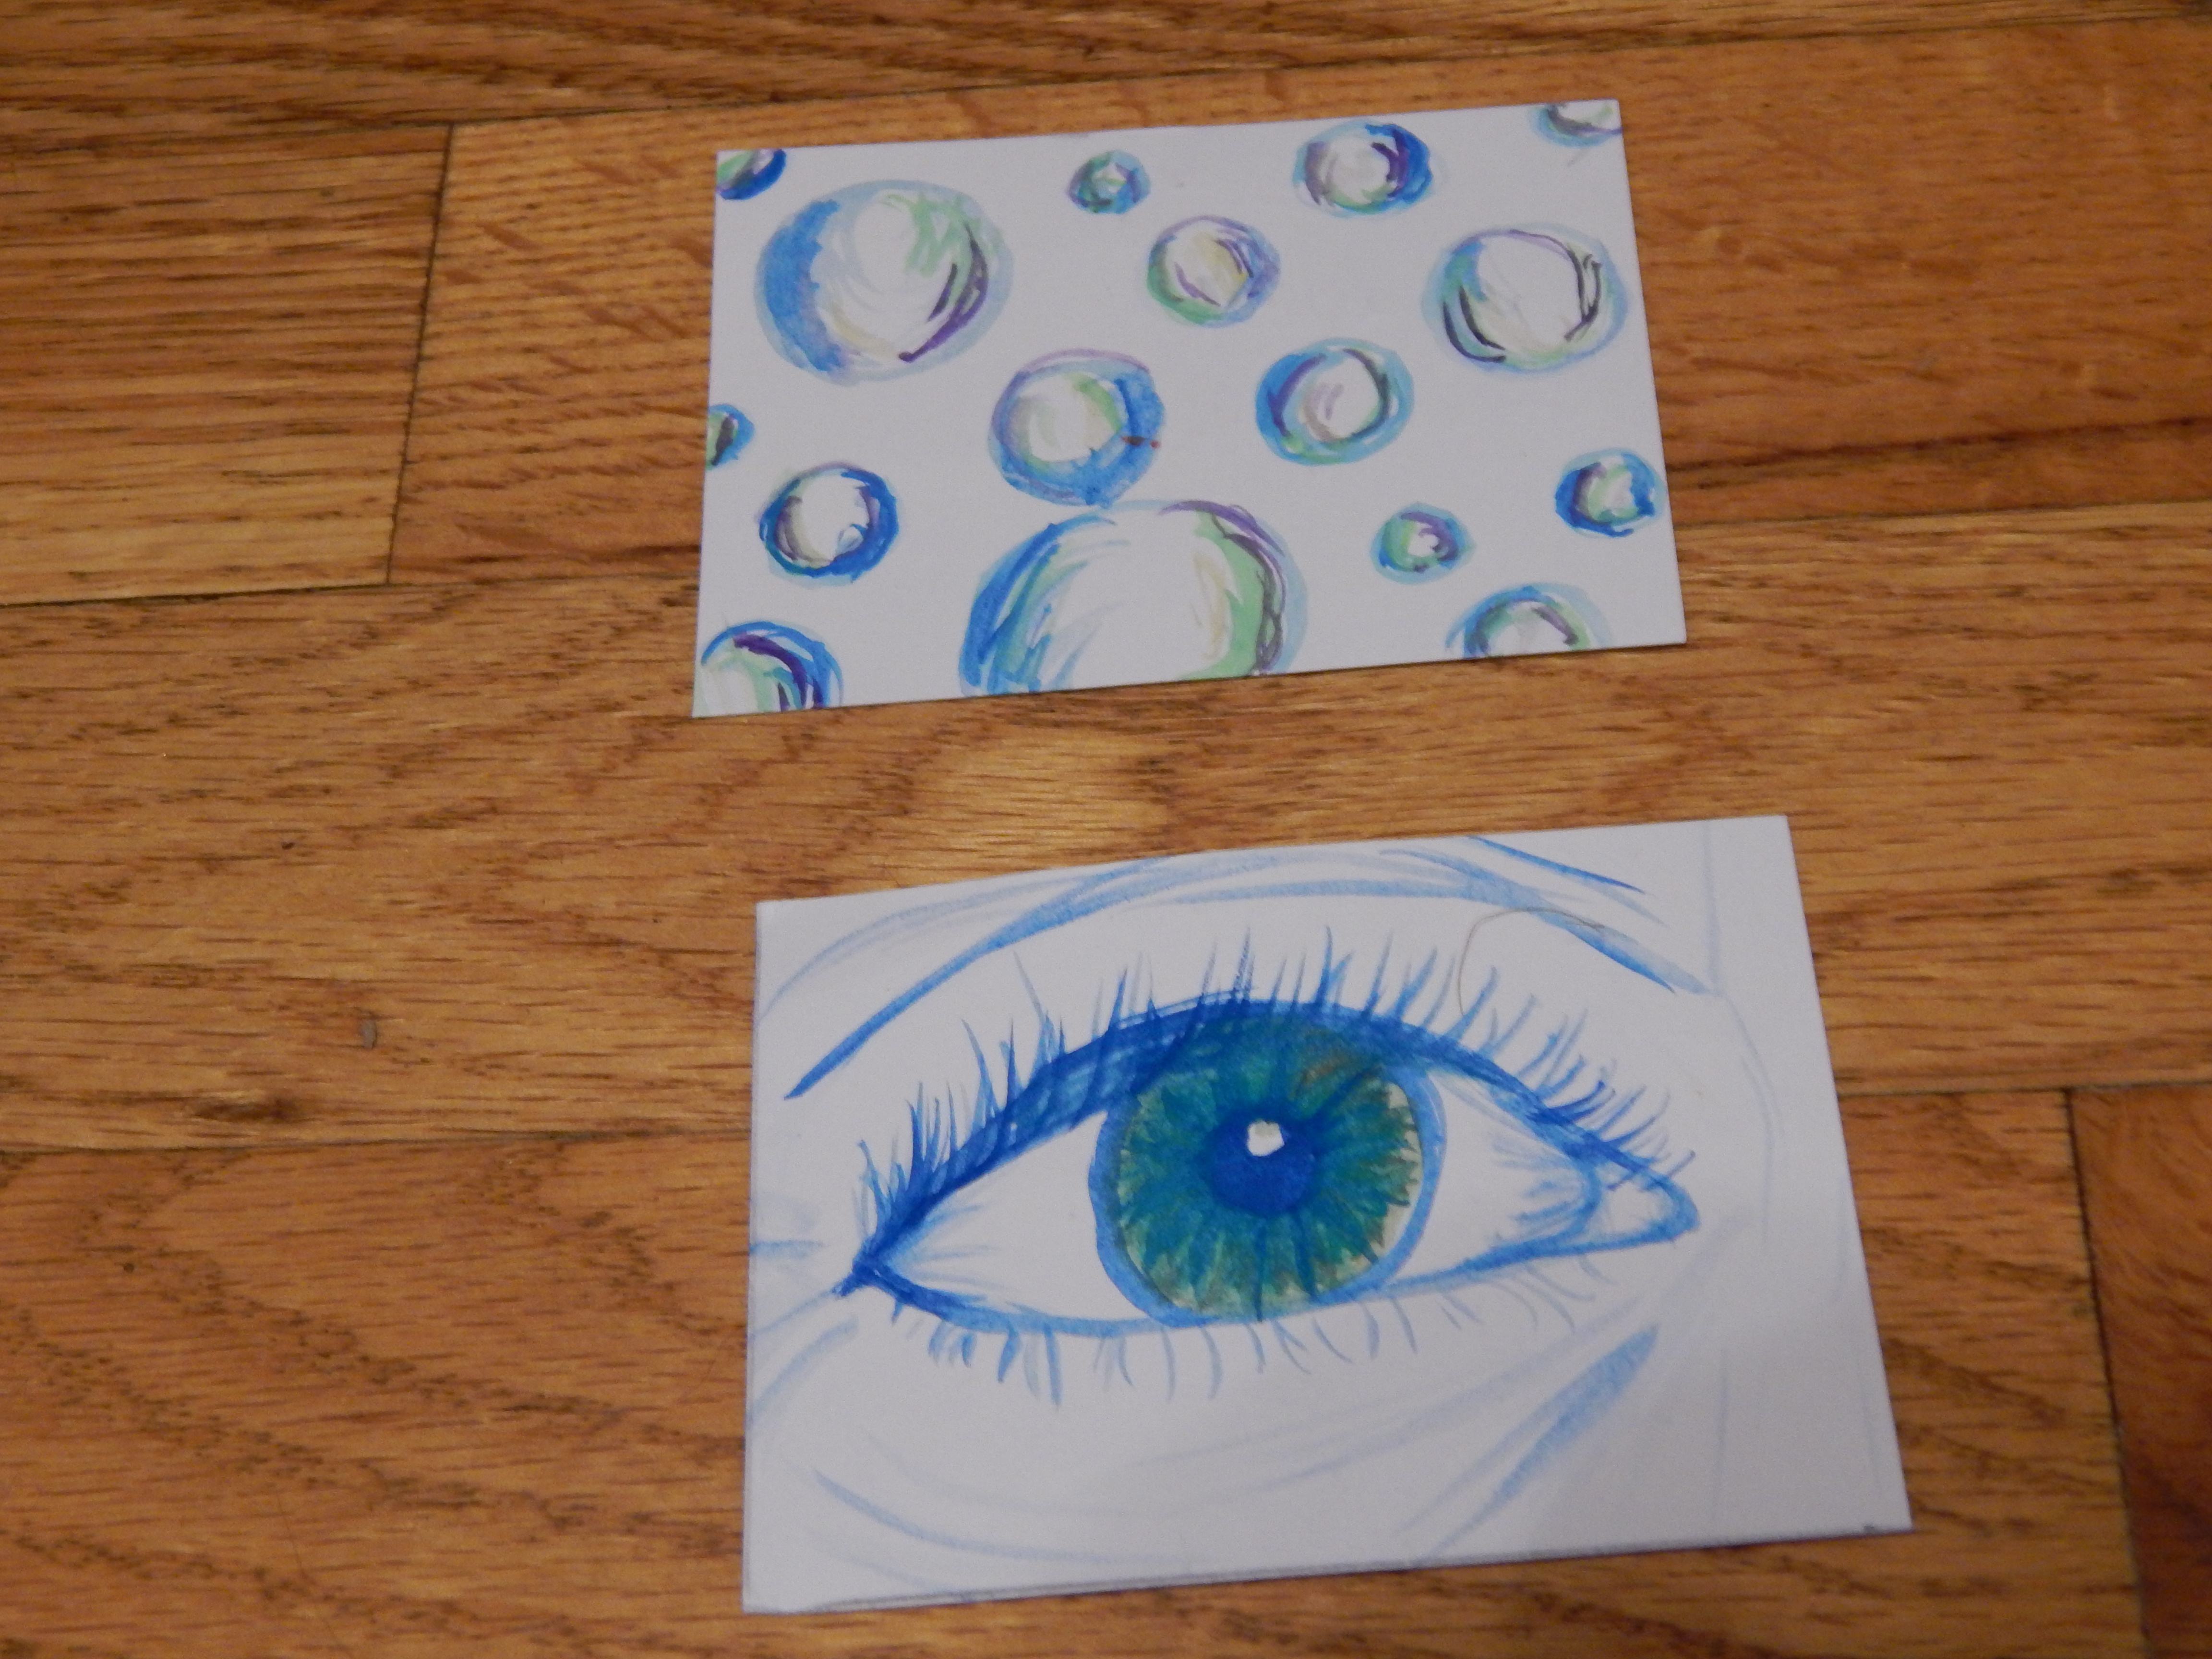
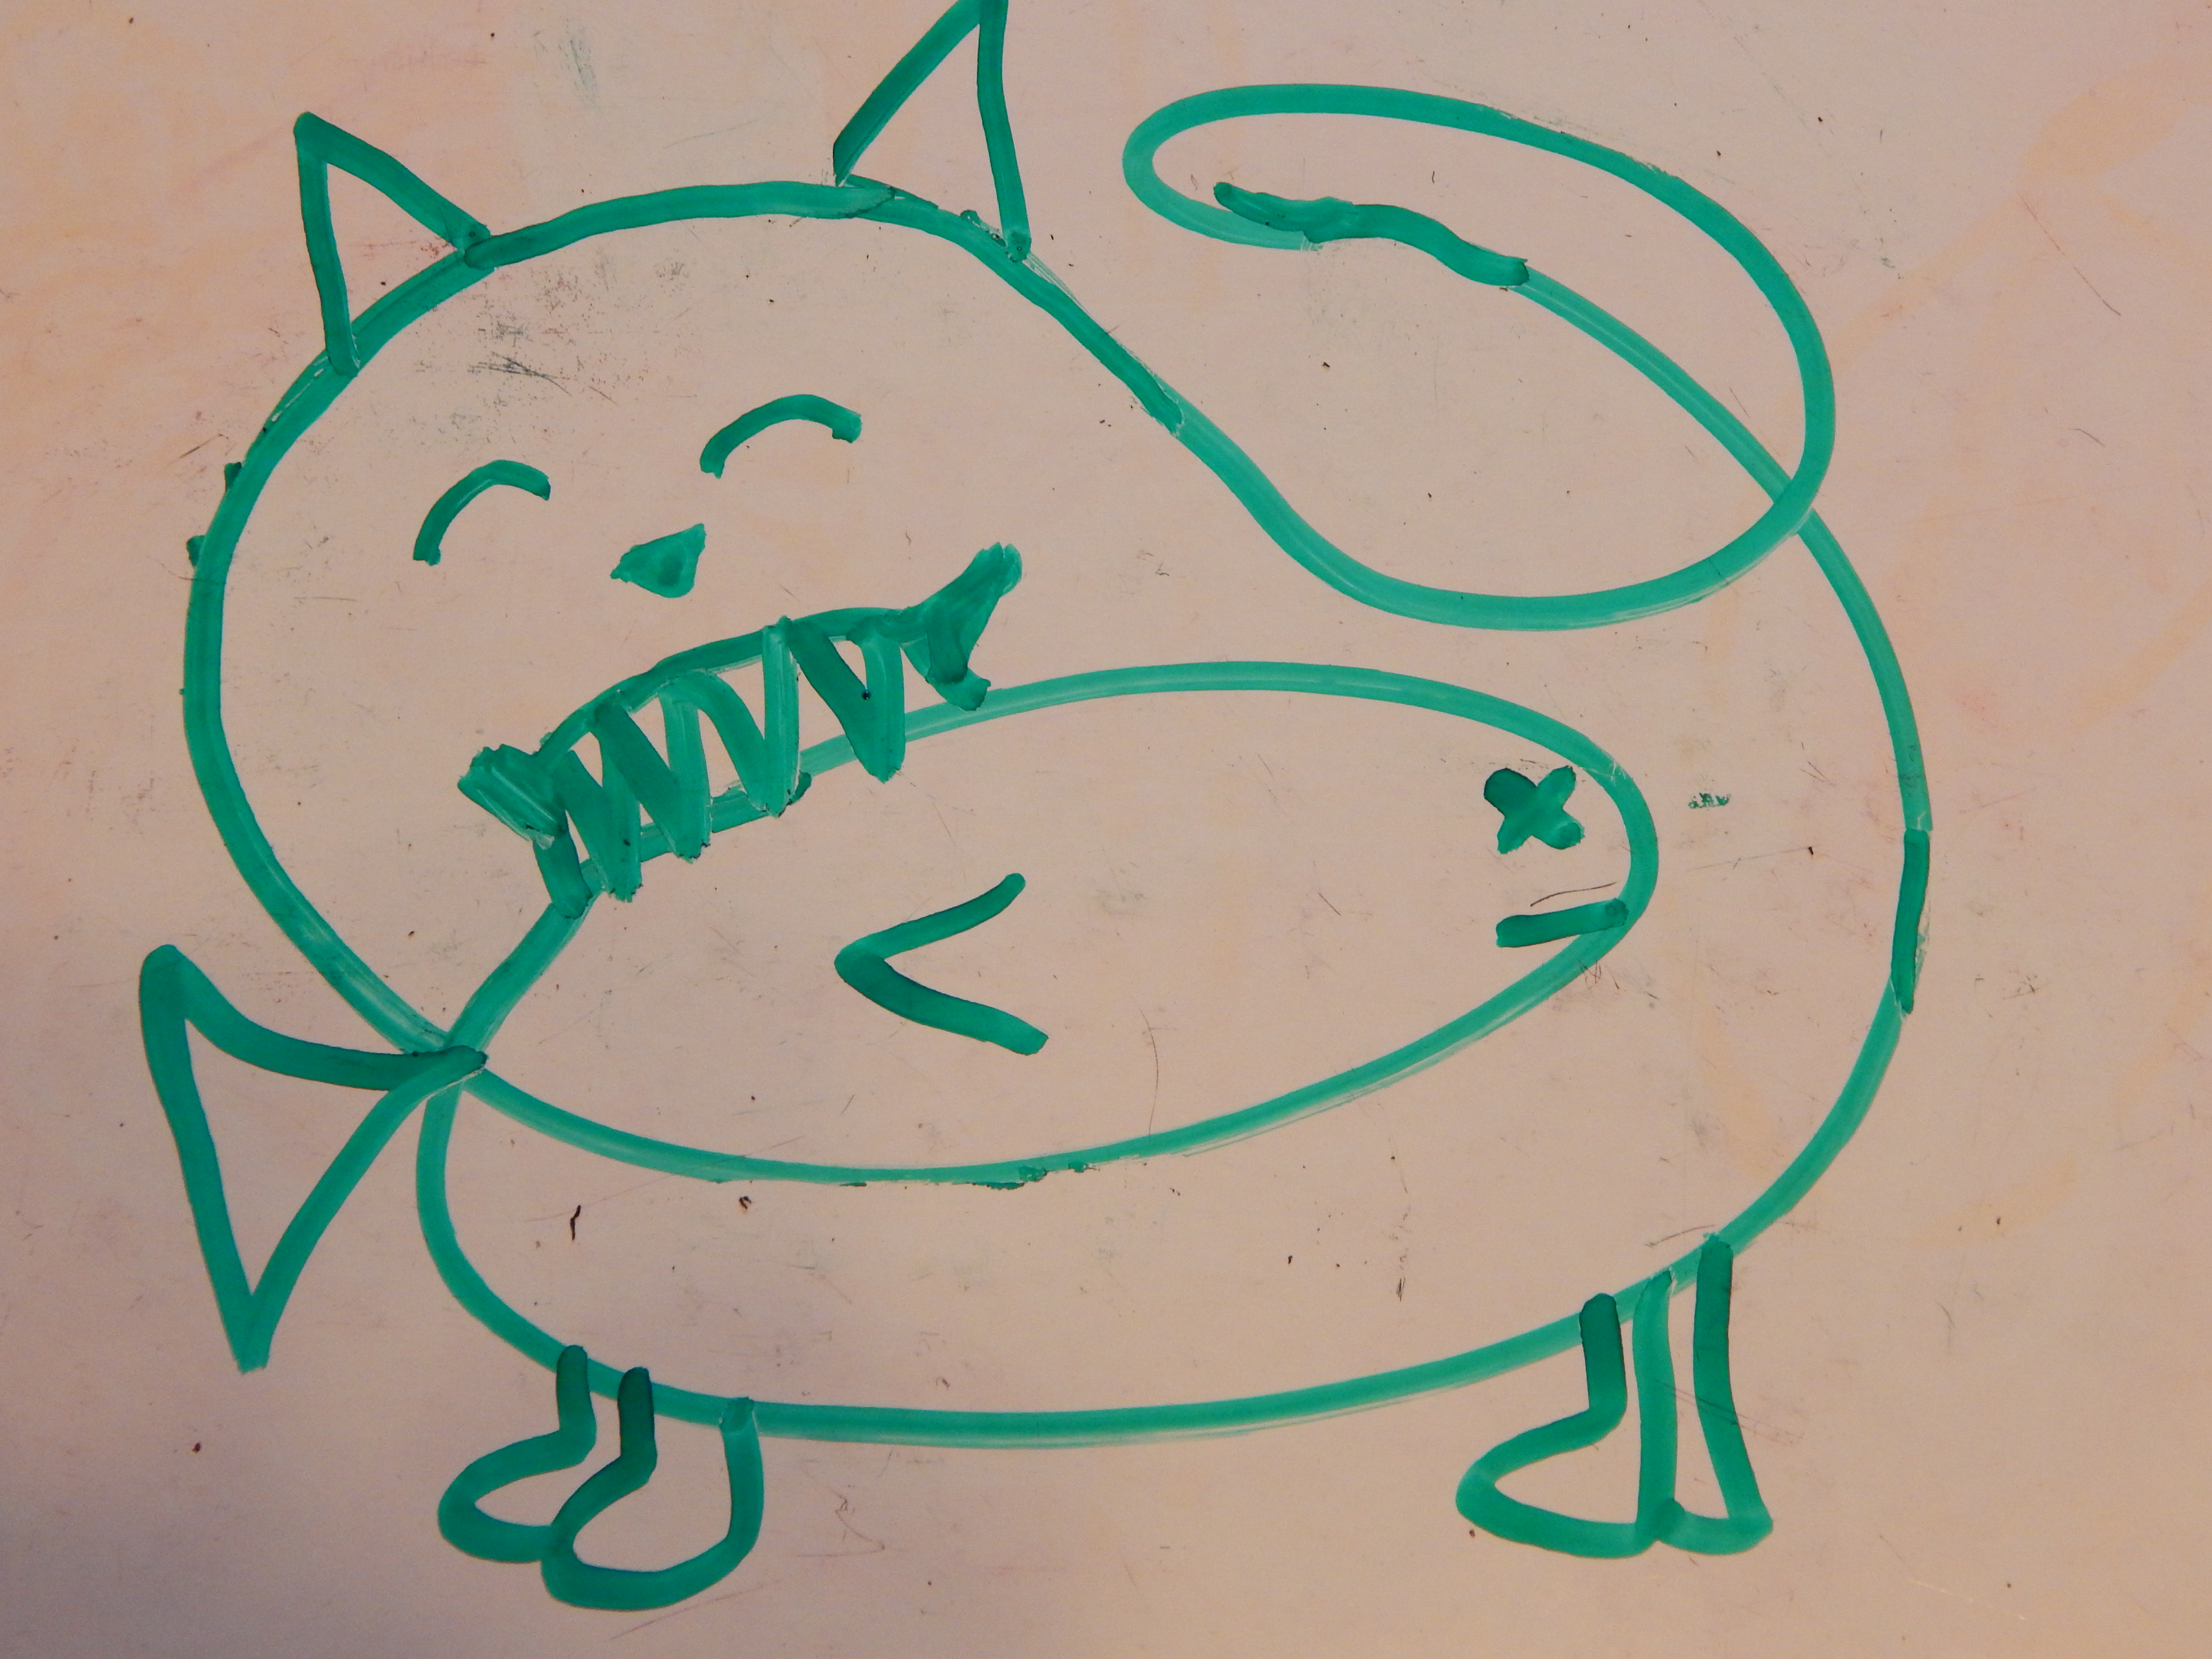
So for this entry I decided to make a sequel to “Blue Eyes” as Jaclynn suggested. 😀 (Click here to read the first part of “Blue Eyes.”) I also drew a picture to go along with the story.

______________________________________________________

I began my journey alone. No child of gray could enter that colorful paradise beyond the mountains. Only my blue eyes would gain me passage. I trudged over the colorless rocky road for miles while the white sun slowly climbed the invisible hill in the sky. My thoughts were centered on one subject: what would a colorful world look like? I couldn’t even imagine. I walked faster.

After hours of walking, I arrived at the glowering mountains and crept nervously down a trail between them. I was coming closer and closer to the last corner, closer to a world of color. My heart thumped like my father’s drum in my chest. I closed my eyes and felt my way toward the corner. Even through my closed eyes I could feel the warm sun on my face, and something else – something bright and beautiful that I had never felt before.

I opened my eyes. I was blinded at first by the staggering brightness of the scene before me, but then…

“Oh my.”

A tiny whisper was all that I could manage. One thousand tints and hues of color clung to everything. The grass was brilliantly lush and the hundreds of flowers beneath my feet were an astounding array of bright and soft, light and dark, streaked and solid color. The lake in front of me reflected every nuance of color and threw it back in fantastic glinting shades. And the sky! What my grandparents had said was true – the cloudless sky was the bluest blue of all, bluer even than my sky-blue eyes. I just stood there in astonishment. There was nothing I could do but fill my color-starved self with great gulps of color.

My first thought was, I will never leave this place. I could never make that long, gray trek home through our colorless land. Now that I had seen this, I could never live without color. All I wanted was to stay here forever.

Then I heard a splash and a swan landed in the lake in front of me. It was pure white with a black beak. No color. My mind rushed back to a lake near my house where we fed the lone swan that lived there. It too was pure white with a black beak. No color.

The spell was broken. I shook myself out of my trance. The colorless swan, so like the one at home, had jerked my mind sharply back to my mission. I gritted my teeth. I must. I resolutely pushed the thought of the long gray journey out of my head and set about collecting color. I plucked flowers of every hue, grass and leaves of every brilliant shade, dull sticks and twigs, and even a richly colored butterfly. I filled my little pouch with the precious objects; then, with one last longing look, I turned and hurried down the mountain path. All throughout the long journey home, I cradled the colors gently in my hand, a treasure more valuable than a chest filled with jewels and gold.

Finally, as the white sun puffed slowly down the side of the invisible hill, I was home. My family rushed out to greet me. I stood there tired but triumphant, light streaming from the pouch in my hands. They didn’t speak a word, but I could tell from the joy on their faces just what they were thinking.

My hands trembled as I gently poured the precious contents of my pouch onto the ground. The colors lay there almost living and breathing. My family gathered around me with shining faces.

We all held our breath as the colors of the bits of flowers and leaves grew brighter and brighter. They were a blazing fire of brilliant shades, a heatless flame of tremendous beauty. At last, color was living in our land!

And then… nothing. The color suddenly drained out like the ebbing tide, and we were left staring at nothing but grays and blacks and whites.

Nothing. My whole mission had come to nothing. I wanted to fling myself on the ground and wail, or better yet, to rush back to the land beyond the mountains. But I didn’t. I just stood there heartbroken. I knew my family was too.

But then something began to happen. A faint blush of color came into the ground beneath the wilted pieces and slowly strengthened. Then, as if it was a flower that had suddenly taken root, the pool of color blossomed upward and outward in glorious swirling tendrils. The color was surging over the ground now, a churning rainbow whirlpool. It reached out with eager fingers and clung to every blade of grass and every spot of earth, every tree and every house. It flew over the ground, faster and faster, a blur of rainbow covering everything in its path. When it had spread out as far as we could see, the color flashed into intense brilliancy, so bright that it nearly blinded us. Finally the show ended in a spectacular whirling rainbow tornado. The whirlwind flung itself into the sky and disappeared.

-Allison(cardboard roll shelf, Willow) 033 (1280x1237)

My family and I looked around us in a daze. For the first time we could see the color of our hair and eyes; for the first time we could see the magnificent colors of the sun resting in sunset splendor from his long climb. I danced and laughed with overflowing joy. My mission was completed. Our once dull and colorless land was now dazzlingly bright with color. Our broken world was whole once more.

_______________________________________________________

My favorite part is definitely the second to last paragraph. 🙂 Thanks for reading!

***Allison***

Host an ATC Party (And Some of My ATC’s)

My friends and I got together and came up with the idea of an ATC party where you make and trade ATC’s, eat snacks, and have fun! (If you don’t know what ATC’s are, you can read more about them here, here, and here.)We put our plan into action and it was a great success! Here are some tips in case you would like to plan your own.

  1. First, know how many people are coming. About 15 people came to our party, and mostly they were friends from church who make them.
  2. Cut out blank ATC’s ahead of time, or have your guests each bring a few. We used on average from 5-10 cards per person. It kind of varied.
  3. Set out a bunch of supplies. We also had a painting table and a drawing/gluing/etc. table. Here is a list of some supplies you can set out:
  • Sequins
  • Colored scrap paper
  • Glitter
  • Buttons
  • Magazine pages
  • Pretty tape
  • Stamps and stamp pads
  • Fabric scraps

And of course the basics:

  • Markers
  • Crayons
  • Colored pencils
  • Scissors
  • Glue/ fabric glue/ tape/ glue stick

So yeah, it was a lot of fun. (But it did take quite some cleaning afterwards! 🙂 ) It’s a good idea to put a scrap piece of paper down at each person’s place, and maybe a tablecloth on the table.

And now for my ATC’s. These are some of my favorites:

Top: Mushroomscape

Bottom: Toadstools. Get it? The toads are sitting on the mushrooms?

001

Top: Whimsical Landscape

Bottom: And…

002

Top: Cute as a Button

Bottom: A Full Heart

003

Top: Transformation (I kind of forget the title, actually. 🙂 ) I made this one by folding a paper in thirds, gluing the middle fold to the ATC, and cutting the two edge folds into three sections.

Bottom: Rainbow Hedgie I got the idea for this from Pinterest

004

Top: Scallops

Bottom: Crayon Resist This one I made by drawing with crayon first, then painting with watercolor over top. The paint doesn’t stick to the crayon lines, but it does stick to the paper.

020

Top: Coat Pocket Made out of fabric, marker, button tape, and sequins

Bottom: Herringbone I made the prints from scratching the pattern in Styrofoam, and using it like a stamp with a stamp pad.

021

Top: Oodles of Doodles

Bottom: Connect-the-Dots This one was a lot of fun to do. I just drew lines through the white dots on the paper to make a picture.

022

Top: Bubbles

Bottom: I’ve Got My Eye on You

023

Uh… Top and Bottom: Fall Collage

024

Whew, that was a lot of “favorites!” Do you like making ATC’s? It would be fun to see your ATC’s too!

***Allison***

Make Your Own “Tumble” Game

There is this game called “Tumble” or “Kerplunk”, and one day I decided to make my own version, with a few tweaks to the original game.  It’s fairly easy to make and it’s very customizable.  This game could also make a cute gift for a child of any age.

To start with you will need the following:-Allison(tumble game) 001 •••••••••••••••••••••••••••••••••••••••••••••••••••••••••••••••••••••••••••••••••••••••••••••••••••••••••••••••••••••••••••••••••••••••••••••••••••••••••••••••••

♥ Some sort of cardboard roll (I used the roll from a roll of curling ribbon this time, but I’ve also used a toilet paper roll)

♥ Some sort of wooden stick that is longer than your cardboard roll (such as bamboo skewers or toothpicks)

♥ A hole-punch (a small punch works best)

♥ Marbles (or any small, round ball)

♥ Something to decorate your tube with (I used pretty tape)

♥ Markers (you can also use paint)

♥ Scissors (no parentheses needed, except I just used them…)

•••••••••••••••••••••••••••••••••••••••••••••••••••••••••••••••••••••••••••••••••••••••••••••••••••••••••••••••••••••••••••••••••••••••••••••••••••••••••••••••••

1. Make sure both ends of the cardboard tube are open.

2. Decorate it however your heart desires!  -Allison(tumble game) 002
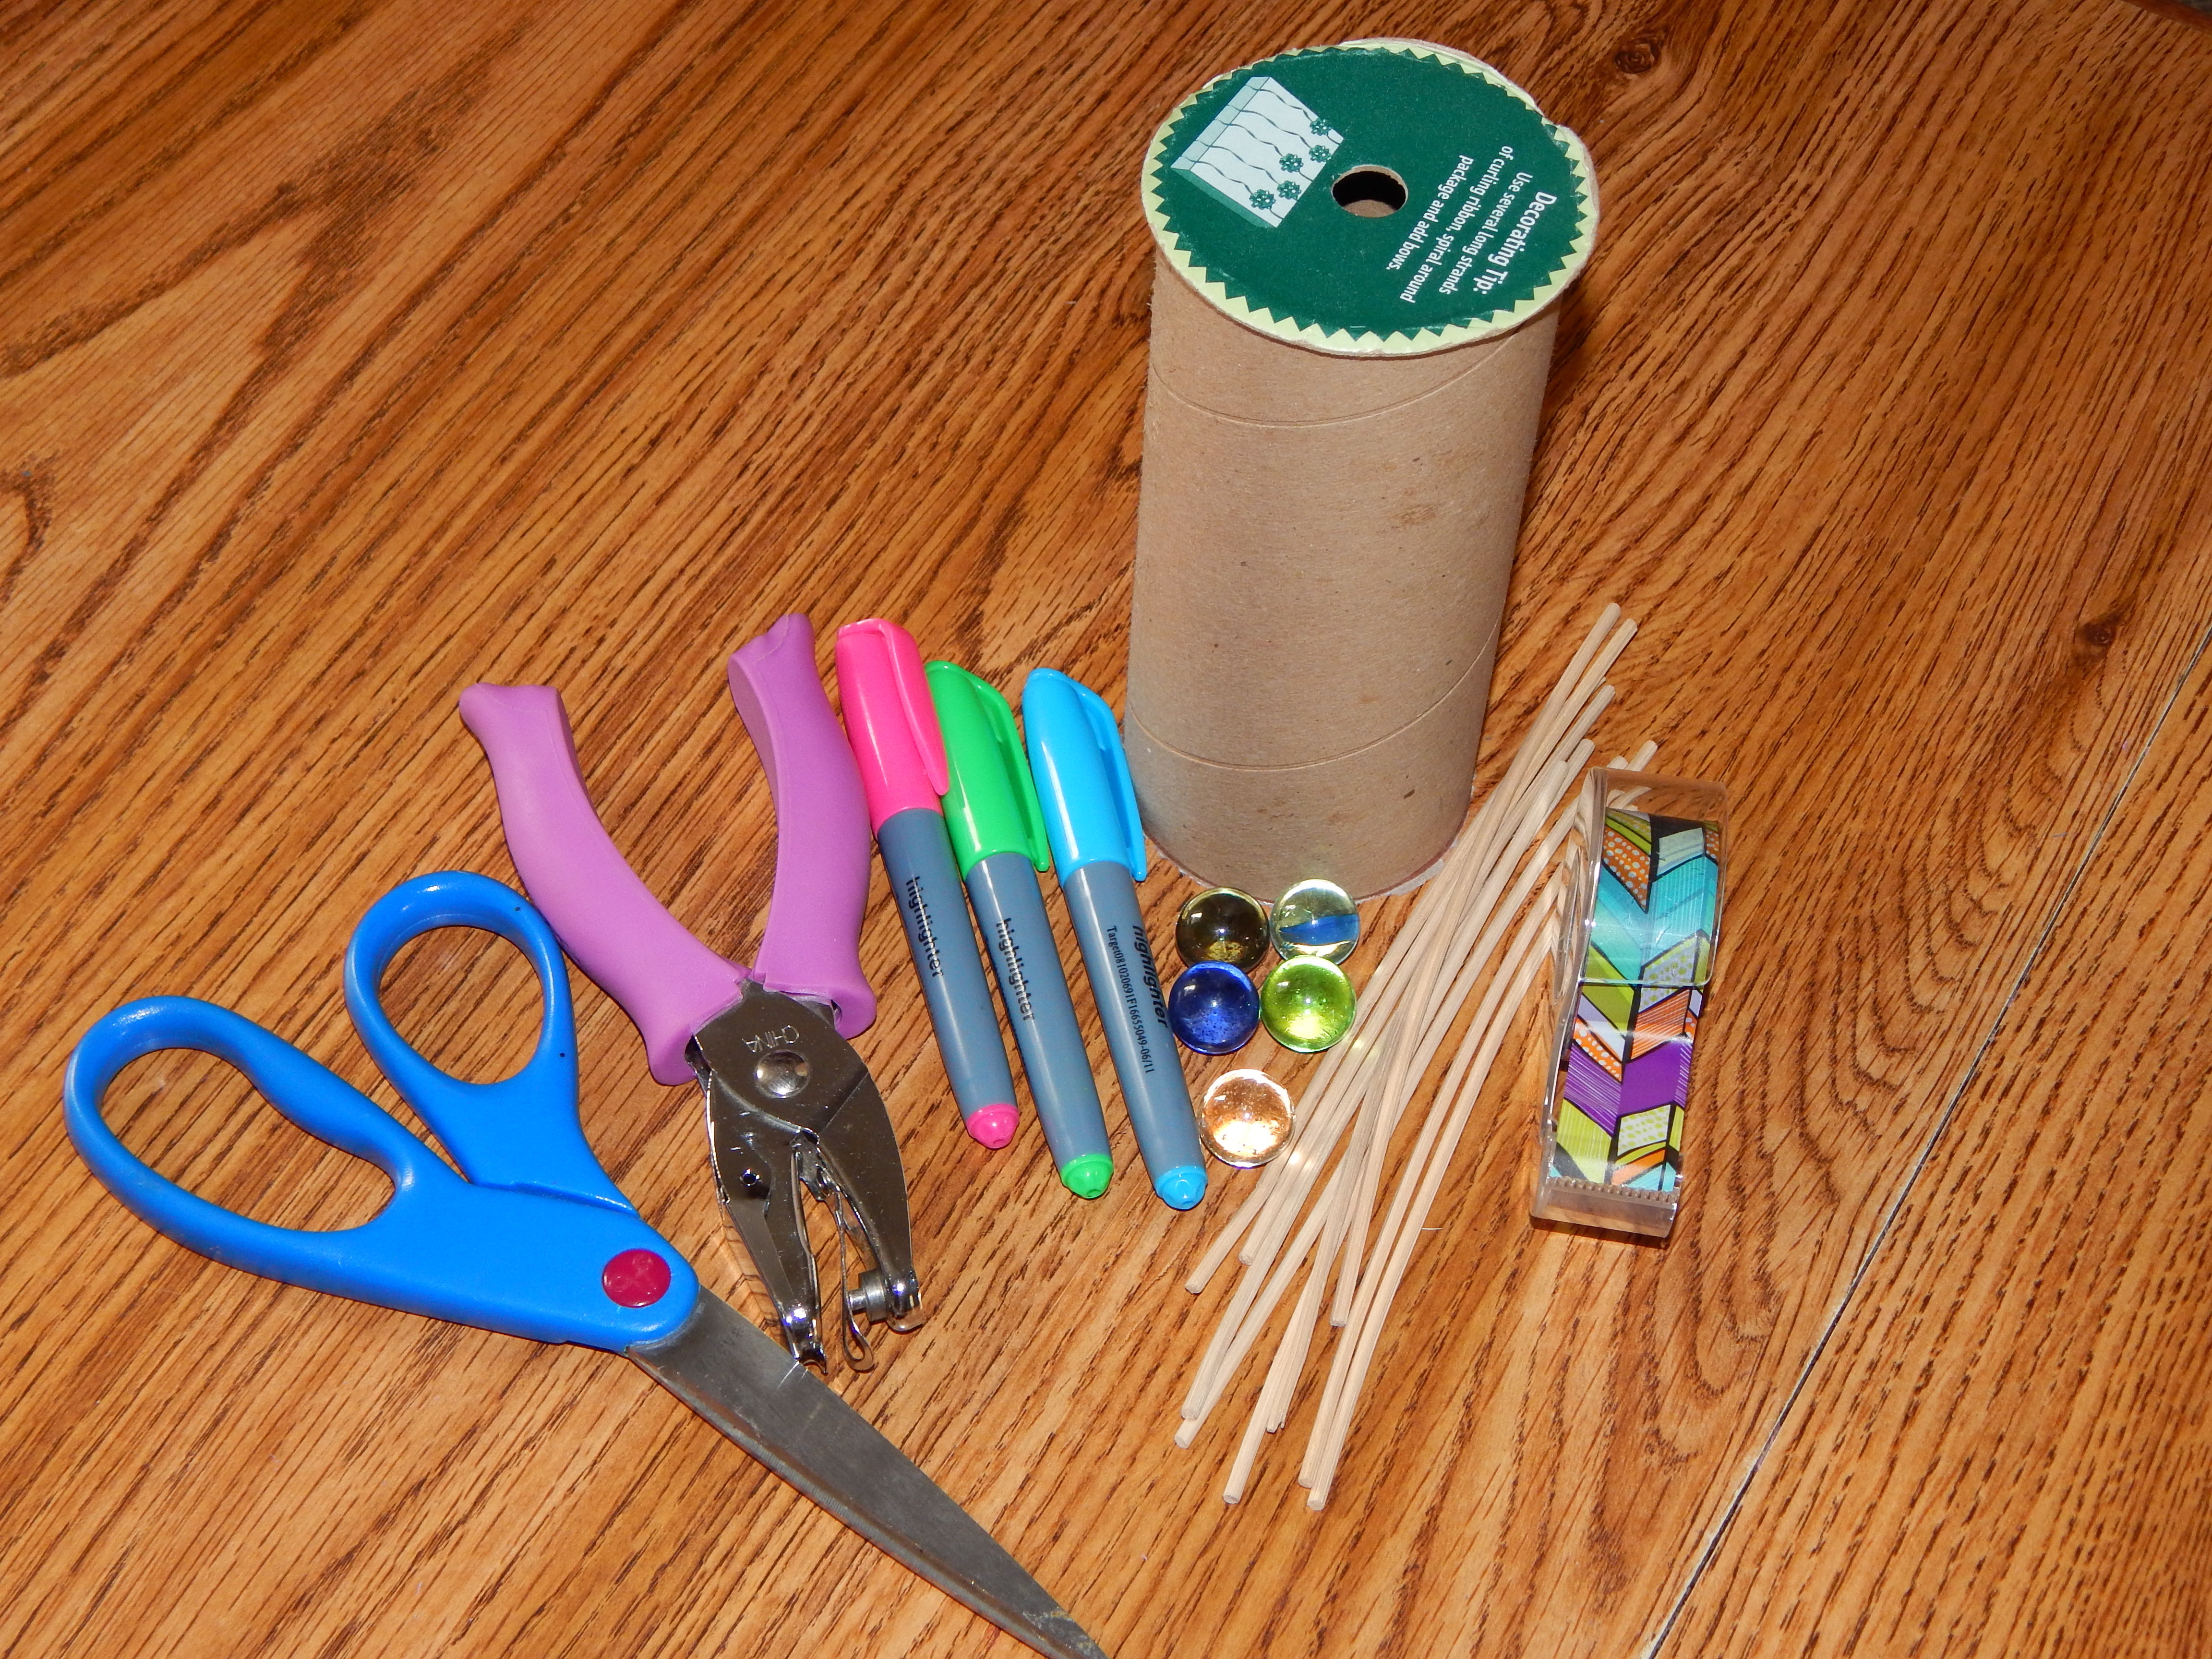
3. This is the hardest part.  Punch holes in the top of the tube, making sure to stagger their placement. (See the picture below.)  If you make all the holes the same distance away from the top of the tube, the sticks will bump into each other and will block each other from fitting into the holes.  Also make sure there are enough holes for the sticks.
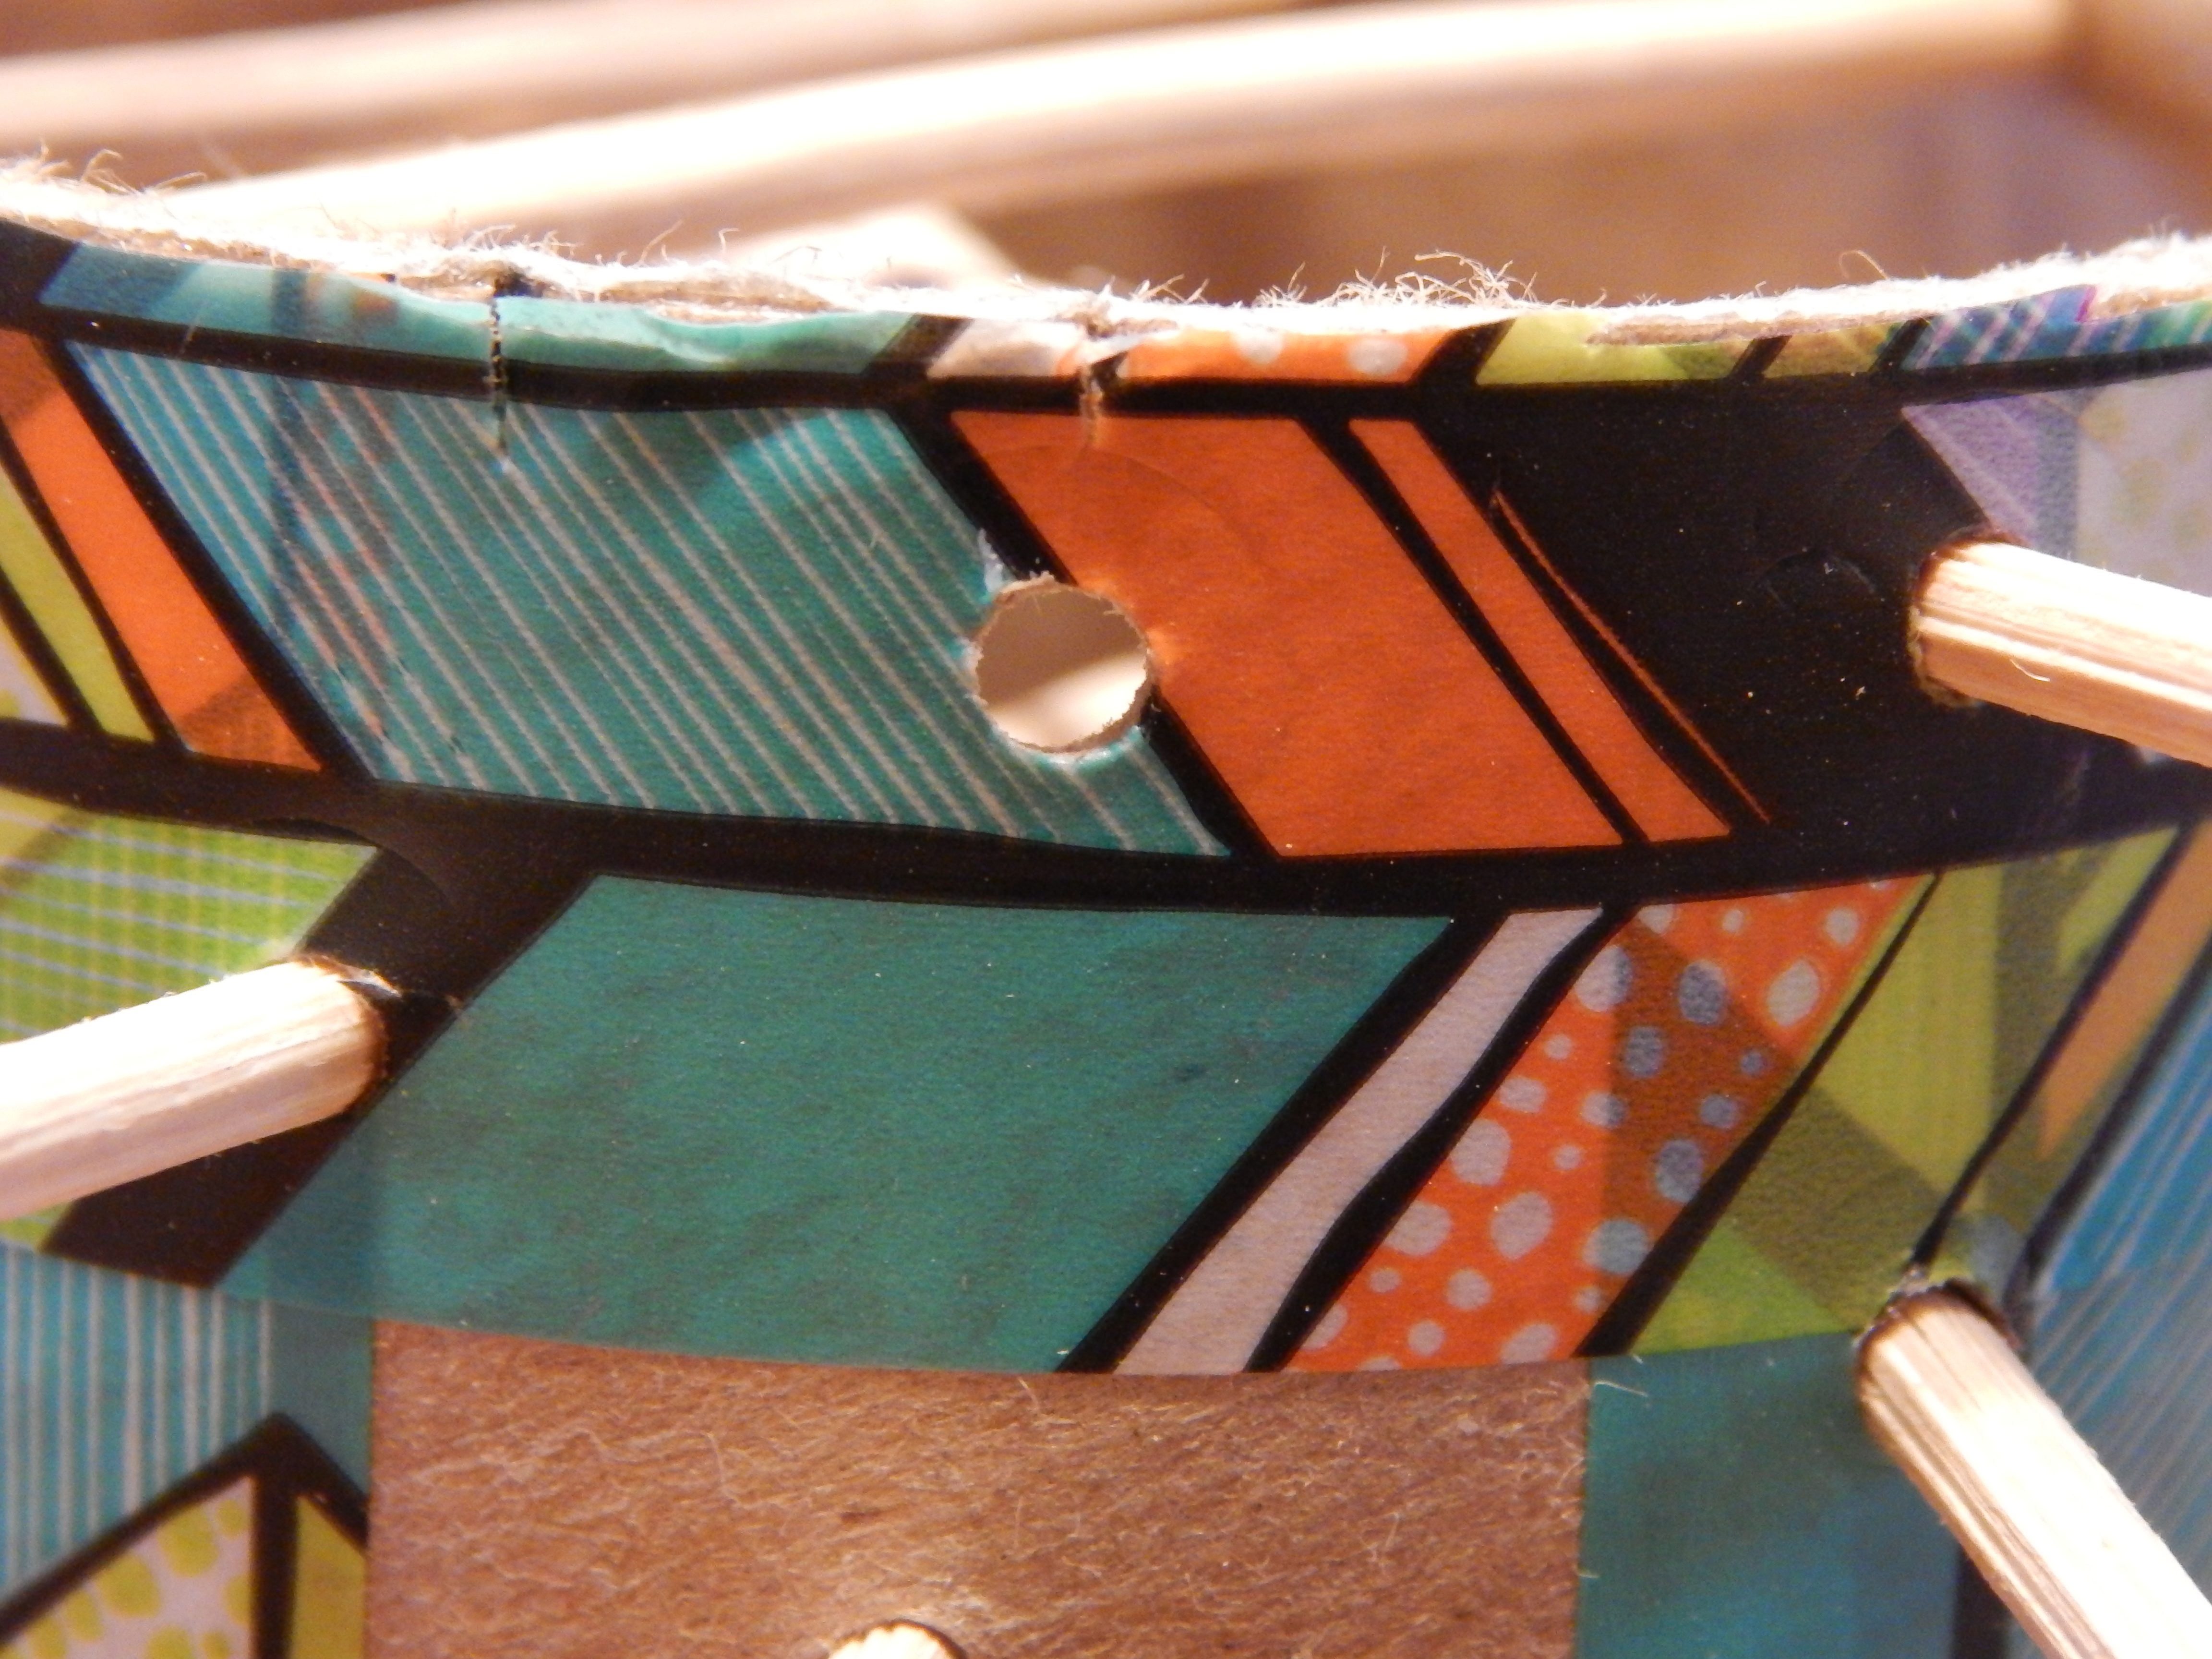
-Allison(tumble game) 0034. To make the sticks, color or paint the ends of all but one of them.  It works best to have a lot of sticks divided into three or four colors.  Make one stick stand out by coloring it all one color, making it a different color, whatever you like.-Allison(tumble game) 0065. Optional step: Cut semi-circles from the bottom of the tube to use as doors for the marbles.

6. Another optional step: You can make balls out of polymer clay to use instead of marbles if you like.

6. Play the game!

To set up, put all the sticks randomly into the holes, then sprinkle the marbles on top.  If the marbles fall through, it means you need to add more sticks to fill up the gaps where the marbles fell.  Punch some more holes for the sticks if necessary.

Here are the rules: Each color of stick is worth a different amount of points.  The one that is different from all the rest can be the special stick.  Make it give you, say, 10 points plus another turn, or something like that.  Here’s a scoring chart that you can change to fit your game:

************************************

Green-tip: 40 points

Blue tip: 30 points

Pink-tip: 20 points

Blue stick: 15 points + another turn

**************************************************

Each player takes turns pulling out a stick, one at a time (unless it’s the stick that gives you another turn).  If, while pulling out a stick, you make a marble fall, you lose 20 points, and you don’t get the points from the stick you just pulled out.  Whoever has the most points after all the sticks are pulled out, wins the game!

Have fun!

***Allison***


Fun with Dry-Erase Markers

There are lots of fun things to do with dry-erase markers besides draw on a whiteboard.  These things make good boredom-busters, and are good things to do on a rainy day.  Some of these things are good for parties too.

The first two things are “painting” your nails, and drawing your own temporary tattoos.

2014-8-23-Allison (moth) 008 2014-8-23-Allison (moth) 010

Drawing on your fingernails with dry-erase markers is fun for those who love to paint their nails, or those who aren’t ready for “the real thing” yet.  When your ready to “paint” a new design, just wipe off the marker with your finger or the whiteboard eraser.

2014-8-23-Allison (moth) 013

To completely clean off your nails, wash them with soap and water, and, if you need to, a damp washcloth.

********************************************************************

Now for the temporary tattoos: Just draw anything you like onto your skin.  (My nails are “painted” with dry erase marker in this picture, and I have a dry-erase marker “tattoo”)

2014-2 001

Just wash skin like you did for your nails, and voila! a clean slate.

2014-2 002


2014-8-23-Allison (moth) 0172014-8-23-Allison (moth) 018

This can be used as a party or group game.  Draw or print out several sets of doodles beforehand.  Give each player a paper with the same doodle on it.  Each player makes it into a drawing, then compares it to the other players’ drawings.  Every drawing will turn out differently.

***************************************************

The last thing to do with dry-erase markers is fun and simple: just draw with the markers on a mirror or window.  It wipes off easily with a damp paper towel.

**************************************************

Note: Test out your markers in a small spot before you try any of these activities, in case the markers don’t erase for some reason.

I hope you try some of these ideas out, and have fun!

***Allison***

Doodle Fun

If you like to draw or doodle, you’ll like this!  These circle doodles are really fun to make, and they turn out really neat.  They’re only made out of circles, so they’re easy too.

To start with, draw a circle.

2014-8-9-Allison 008

Next, draw a few more circles inside the big one.

2014-8-9-Allison 010

All you have to do now is fill in the leftover space with circles, circles and more circles.

2014-8-9-Allison 013

(Sorry for the blurry pictures here)

2014-8-9-Allison 015

You can stop here, or keep going.  You could make a stepping stone,

2014-8-9-Allison 016

Or go color crazy!

2014-8-9-Allison 017

Experiment with drawing the outline of the circles in different colors…

2014-8-9-Allison 004

Then make a bunch of bubbles!

2014-8-9-Allison 018

There are so many things to do with this.  What did you draw?

******************************************************************************************************************************

I learned how to draw this from this video.  (It’s called “Infinity Elephants”) There are lots of other great doodling videos here.

Have fun!

****Allison***