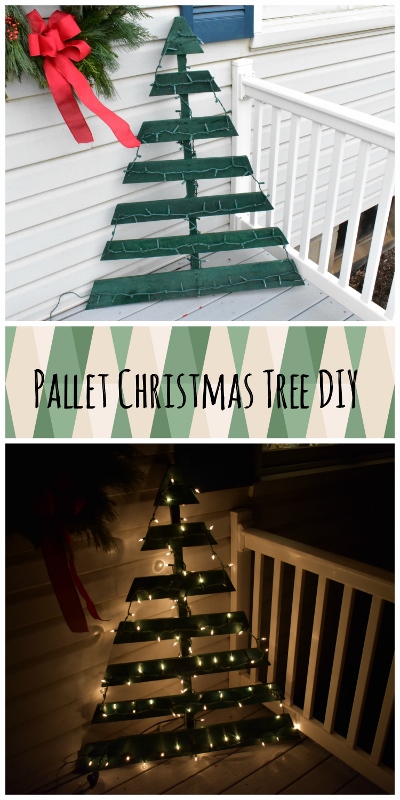
The kids made this little tree for our mom’s birthday. It wasn’t that hard (well, we made it ourselves!) and it turned out great! I put together a little tutorial for you guys. 🙂
- Pick your pallet. We have a huge pile of pallets behind one of our barns, so we had plenty of options. You don’t want the boards to be too far apart or it looks odd. This is the one we chose: (*Shudder* I know these next few pictures are terrible quality, but I can only say that the lighting in Dad’s shop is also rather terrible. XD )

- Draw the line. We simply set a board on the pallet at the angle we wanted, and traced a line with a pencil. You might want to use a carpenter’s pencil or Sharpie so you can see the line better. You can measure and all that boring stuff if you want to be more precise, but we just traced. 😉
- Cut it out. We – meaning my brothers – used a Sawzall to cut along the lines. This was definitely the trickiest part of the process, and my brother accidentally broke one of the branches when he stepped on it. O.o (We fixed it by first tracing the broken pieces onto an extra pallet board, then cutting it out, and then screwing it back to the tree’s “trunk”.) Make sure to saw the boards at the right angle so you don’t hit the back boards while you’re cutting the top ones.
- Trim it up. You’ll have to cut or break off the back boards so they don’t stick out in front. We did this by a combination of cutting them off with a Sawzall and whacking them off with a hammer. (Be as careful as possible, though – don’t want to break any limbs (human or tree)! XD ) Lookin’ good!

- Sand it smooth. We didn’t actually sand it completely smooth because we wanted it to have a rustic look, but it’s a good idea to at least sand the sawed off edges a bit.
- Secure the branches. Some of the pallet boards were a little loose after all that, so we put in a few extra screws to secure them.

- Paint it. Yay, now for the fun part! We painted ours all green, but you could also do red and green stripes, or leave stripes of raw pallet wood for a more rustic look.
- Bring on the lights. This is optional, but we strung some pretty Christmas lights on it to make it more interesting. We used white, but you could also use colored lights.
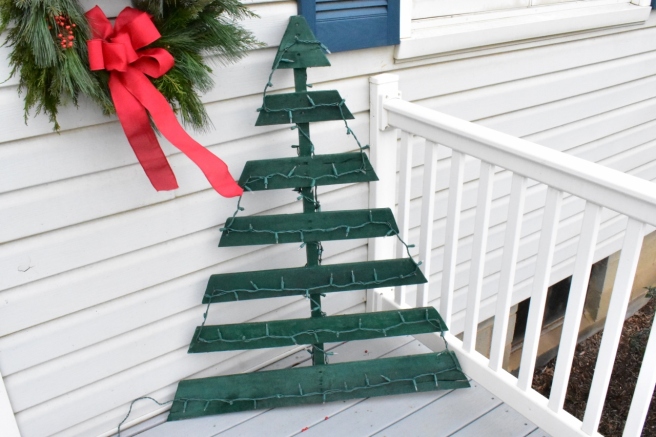
- Display it proudly. Ta-daa! You’re finished! You may want to stop at that, but on the other hand I think it would look neat to make a forest of trees in different sizes and colors. So fun!
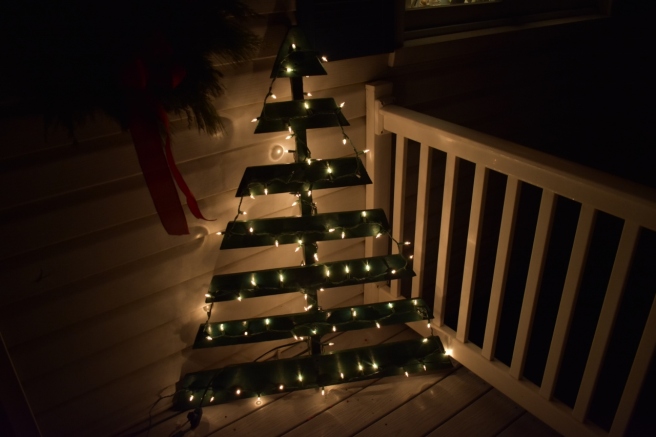
I hope that wasn’t too confusing. ![]() Anyway, do you like how it turned out? I think it’s pretty cute! You can click here to see my sister’s post which has a bunch more pictures of us making the tree. Thank you, brothers, for doing a lot of the hard work for us. 😀 ♥
Anyway, do you like how it turned out? I think it’s pretty cute! You can click here to see my sister’s post which has a bunch more pictures of us making the tree. Thank you, brothers, for doing a lot of the hard work for us. 😀 ♥
Merry Almost-Christmas! (HOW CAN IT BE SO CLOSE ALREADY?!)
***Allison***