
Hello, dears!
This week it’s my turn for Art Lab, and I have something a little different than my usual watercolor art for you today. 🙂 Quite different, in fact: in this post I shall give you guys a tutorial on how to make a cute owl with graphite and colored pencil shavings! 😀
But first, the inspiration behind the art:
Art Inspiration:
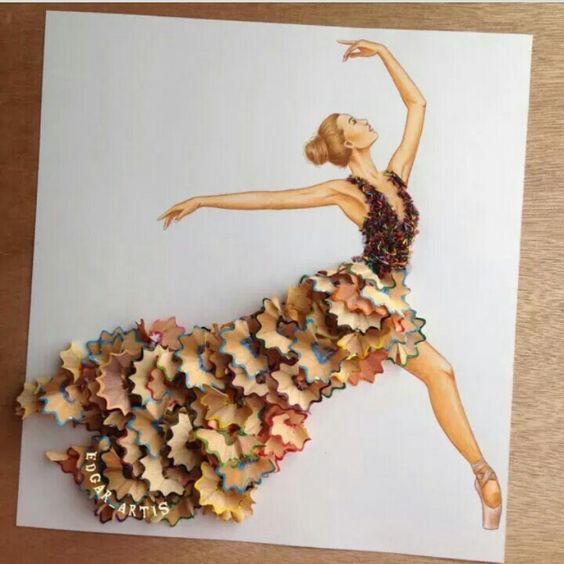
Pretty neat, isn’t it? I’ve seen things like this before and I think it’s a great idea, so I decided to make something like it myself! Let’s get started.
You will need the following:
- paper or a canvas of some sort (I used an ATC)
- sketching pencils or a normal pencil
- a tortillon/blending stump or a tissue
- a hand sharpener (NO WAIT I mean a pencil sharpener, but not an electric one XD)
- colored pencils
- liquid glue (I used Mod Podge but Elmer’s glue or Tacky Glue would also work)
- Begin by lightly sketching a rounded rectangle onto your paper.

- Sketch a wide “u” at the top of the rectangle to shape the owl’s “horns.”

- Fill out the horns, and add a small teardrop-shaped beak.

- Make the eyes. Don’t make either the iris or the pupils complete circles for a more realistic look.

- Start shading. I colored the pupils with my darkest pencil (soft ones in the “B” range work well), leaving a small highlight, and then shaded the iris darker at the top, gradually fading toward the bottom. Don’t worry too much about the rest of the facial details because we’ll fix them up in the next step…

- Now take your blending tool and soften everything but the eyes. As you can see, I made my owl quite soft and fluffy. You can keep yours more neat and trim if you wish. 🙂 After all smudging is complete, darken any areas that might need it. I also added a starburst of lines around the owl’s eyes for a cute detail. I suggest skipping to #8 at this point, if you want to learn from my mistakes. XD

- Now the fun part! If your sharpener is already full of colorful shavings, you can use those, but otherwise you’ll need to sharpen some bright colored pencils. Turn the pencil slowly and firmly to get a nice shaving. My pencils were already so sharp that it hardly worked to sharpen them again, so your feathers might look different (and better!) than mine. Glue them on from the bottom up, overlapping the shavings as you ascend the owl’s body.

- I really should have added the wings first because they were hard to color in without breaking off the shavings, but oh well. XD Now add two parallel curves on both sides for wings, and two little feet holding on to a branch. If you took my advice and skipped #7, go back and do it now.

And you’re done!
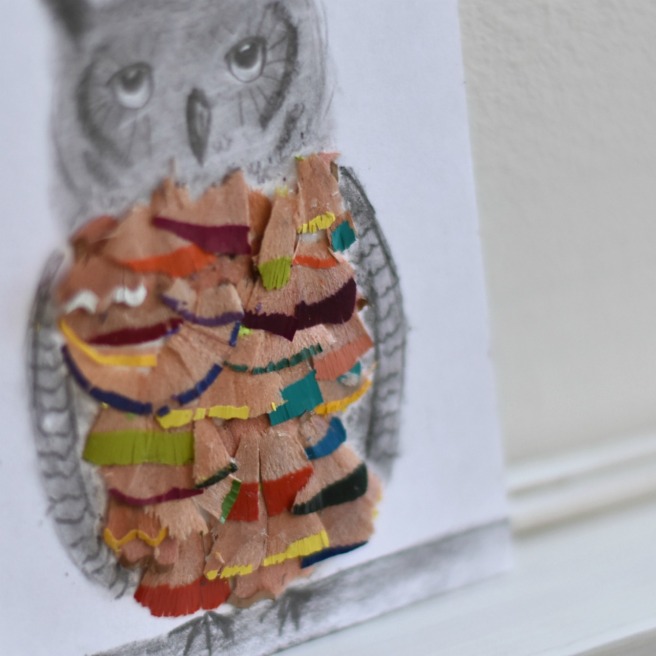
Nothing very complicated or impressively realistic, but fun for different, I think. 🙂 I love how the colored shavings pop against the gray graphite, don’t you? Oh, and I covered my ATC with packing tape to protect the feathers once I was done, but you don’t have to if yours are glued down well enough.
What do you think? Did it turn out pretty cute? Have you ever used colored pencil shavings to make art or used an art supply in an unexpected way?
Oh yes, and if you make art inspired by this piece, we’d love to see it! Check out this page over on the Art Lab blog to help us fill our art gallery. 😀
Thanks for reading, dears, and have a lovely day!
***Allison***


So cute! I adore owls and the idea of using pencil shavings is so creative! 😀
LikeLiked by 3 people
Thanks so much, Livy! I know, owls are pretty cute. 😀 And yeah, I thought so too!
LikeLiked by 1 person
Wow! So creative,Allison! Never thought of it that way!
LikeLiked by 2 people
Why thank you! 😀
LikeLike
Wow. What a fabulous idea. I can’t wait to show my grandson. You know Allison you make an old woman smile over here. X
LikeLiked by 2 people
Awwwww, that comment made my day! You make ME smile! ❤ Thank you. 🙂
LikeLike
This turned out so cute!! Owls are my favorite animal, so I’ll definitely be trying this out soon. 😉
LikeLiked by 2 people
Thanks, Sapphire! Ah yes, owls are great. And YAY, I hope it turns out well!
LikeLiked by 1 person
Wow, I love how the colors on the pencil shavings pop, like you said! 😀
LikeLiked by 1 person
Me too! Thanks, dear!
LikeLiked by 1 person
so cool😊
LikeLiked by 2 people
Thanks! 😀
LikeLiked by 1 person
Very clever and beautiful owl !
LikeLiked by 2 people
Thank you so much! 😀
LikeLike
cool!!
LikeLiked by 2 people
Thanks, Mary!
LikeLiked by 1 person
Your oh so very welcome!!
LikeLiked by 1 person
Fun! That is a neat idea! 😀
LikeLiked by 2 people
Thanks, Gracie! I thought so too. 🙂
LikeLiked by 1 person
I love this idea!! So unique and creative 🙂
LikeLiked by 2 people
Thanks so much, Allyson! ❤
LikeLike
That’s really pretty! You did a great job!
LikeLiked by 2 people
Why thank you, Bella!
LikeLike
Anytime!
LikeLiked by 1 person
THAT IS SO CUTE! I love it, Allison! (Oh, and I’ve just realized how helpful packing tape can be, especially after someone sent me an entire box just COVERED in it…XD XD)
LikeLiked by 2 people
THANK YOU THANK YOU. (Heheheheh yeah that took a while. XD XD)
LikeLike
Oooh, now my creative juices are running all over the place….flowers, birds, animals…..
*send a mop!*
🙂
LikeLiked by 2 people
HAHAHAHA! XD Ahem, I shall mop up SOME of your creative juices, but I have to leave some for you to use. *nods* XD XD
LikeLike
This is such a unique idea! The drawing of your owl turned out really nice too!
Also, I recently sent in an email to the art lab of the popsicles I painted with your tutorial. Did you get it?
~Gracie
LikeLiked by 2 people
Thank you so much, Gracie!
Oh dear, I’m not sure… the email wasn’t working on my computer, so let me ask Megan. But I hope we got it, because that sounds SO pretty! Thanks so much for sending it!
LikeLiked by 1 person
Your owl is so cute! This is such a cool idea 🙂 Seems like fun too!
LikeLiked by 2 people
Thank you so much, Michelle! It IS fun! 😀
LikeLiked by 1 person
That owl is so cool! My younger sister is really crafty so I’m going to have to tell her about this. 🙂
LikeLiked by 2 people
Thank you! Aw, that’s great. My little sister is too, and she actually made an owl like this as well. 😀
LikeLiked by 1 person
How fun!
LikeLiked by 1 person
Ive seen this idea before, there so cute!!! You did a pretty good job!! 😀
LikeLiked by 1 person
Thank you, dear! I like the idea too. 🙂
LikeLike
Wow, what a cute owl! Such a great idea 🙂
LikeLiked by 1 person
Hee hee, thank you!
LikeLiked by 1 person