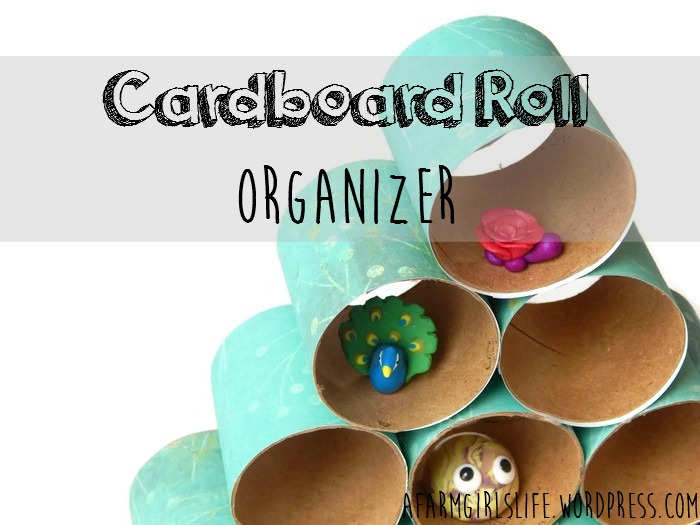
I finally finished this birthday haul post a month after my birthday. XD It’s not really a birthday haul post, actually. It’s more just reviews of some of the things I got for my birthday. Get ready for a really long post!
____________________________________________________
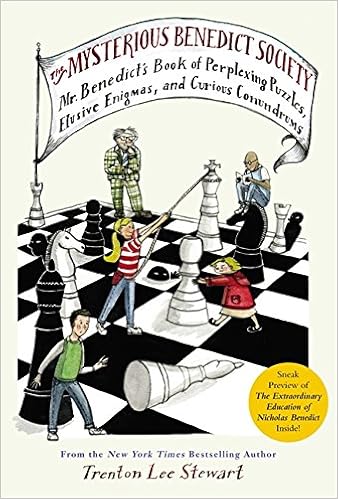
Mysterious Benedict Society Series:
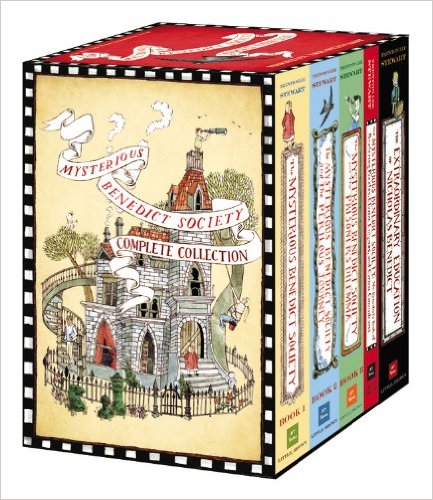
Click here to see the Amazon listing
(The link is for the hardcover collection which I have. You can also get a paperback collection on Amazon.)
I absolutely LOVE this series by Trenton Lee Stewart. It’s probably my favorite series! “The Mysterious Benedict Society” is a group of extraordinary children who are sent on several extraordinary missions. The characters are so fun to read about – there’s Reynie, Sticky (you’ll understand his name when you read the books), Kate, and Constance. Once you pick up these books, it’s hard to put them down! They’re filled with exciting action, surprising plot twists, hilarious anecdotes, and riddles and puzzles that will stretch your brain.
Notes: The synopses are not actual back-of-the-book summaries, I just wrote them myself. Also, the pictures of each book are from their Amazon listing. If you click on the “via” links, it will take you to the listing. Some of the covers on the books below are a little different than mine, but mainly the same.
***************************
The Extraordinary Education of Nicholas Benedict
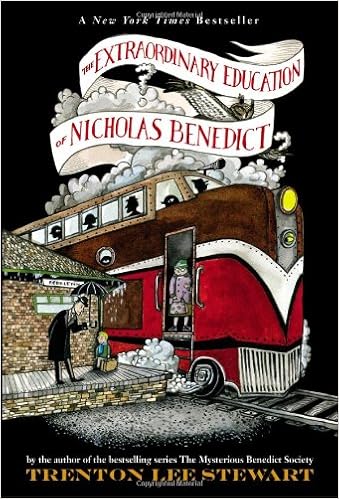
Pages: 470
This book is a prequel to the series although you don’t necessarily have to read it first. (I didn’t.) Like in the rest of the series, the plot twists, clues, and riddles throughout the book keep your brain whirling. There are a bunch of mysteries in this book, and some of their conclusions may surprise you. It’s exciting to read how Nicholas uses his genius mind to solve problems and outsmart the Spiders and other fearsome foes. Nicholas also has a condition called narcolepsy (which is real by the way), which means he falls asleep at random times.
Synopsis: This story covers about a year in the childhood of Nicholas Benedict, the man behind The Mysterious Benedict Society. Nicholas moves to a new orphanage filled with surprises – from a huge library to a secret overlook, tough bullies to loyal friends, and maybe even a treasure! Nicholas will need all of his talents and genius to unpack the mysteries surrounding him – and to do so before it’s too late.
The Mysterious Benedict Society
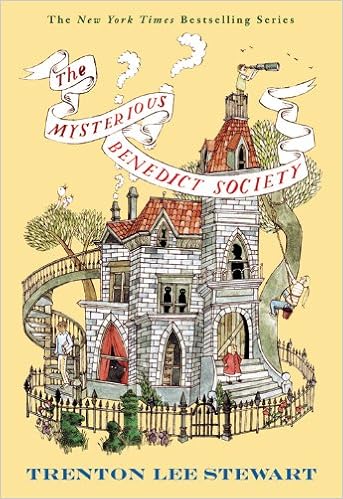
Pages: 485
This is probably my favorite book in the series. I especially love the beginning when everything is so mysterious and there are gobs of strange riddles and puzzles that bend your brain. The book is exciting and clever, and some of the plot twists just blow you away. At the end you learn something totally unexpected and funny about Constance. You HAVE to read this, guys!
Synopsis: An advertisement in the newspaper starts it all: “Are you a gifted child looking for special opportunities?” Join Reynie, Sticky, Kate, and Constance on the adventure of their lives. After passing a series of mind-bending tests, they are sent on a very important mission: to save the world from an evil genius with a terrifying plan to control the world – and the minds of everyone in it. They will have to work as a team and put all of their extraordinary gifts to use after arriving at a strange institute. What is Mr. Curtain’s evil plan? Who is Milligan really? What is the Whisperer? These are just a few of the puzzling questions the Mysterious Benedict Society has to answer.
The Mysterious Benedict Society and the Perilous Journey
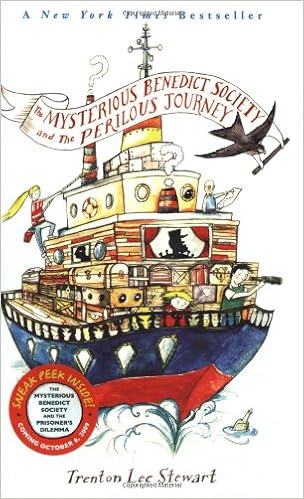
Pages: 440
This isn’t my favorite book of the series, but it’s still great. I love that you learn something new about Constance in this book. Her newly discovered talent really adds to her personality. You also meet some new characters like Cannonball and the Bullfrogs. The duskwort plot thread is really interesting and exciting too. (See synopsis.) Here is a quote I like from this book: (Cannonball is comforting Constance, who is quite short, by the way.)
” ‘You know what I like about buttons?… They’re very small things that hold bigger things together. Awfully important, buttons – little but strong.’ ” – page 154
Isn’t that sweet? “Little but strong.” 😀
Synopsis: After a year apart the Mysterious Benedict Society reconvenes. They have been anticipating a surprise Mr. Benedict planned for them when they find out that someone has unpleasantly surprised him. Their beloved Mr. Benedict is in danger! Will the scavenger hunt lead them to their heart’s desire, or into a trap? In the meantime, Constance discovers a new talent, and a plant named duskwort is of imminent importance. If the duskwort falls into the wrong hands, everyone is doomed.
The Mysterious Benedict Society and the Prisoner’s Dilemma
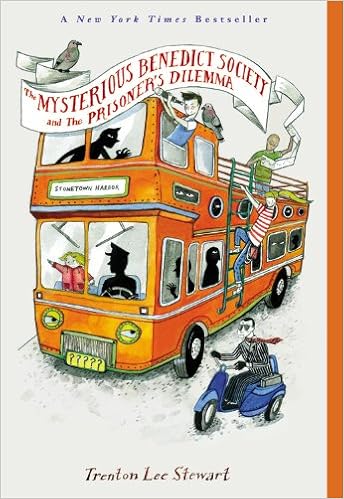
Pages: 391
The Prisoner’s Dilemma is the last book in the series. (Except for the puzzle book, but that doesn’t really count.) I really like it! It’s fun and suspenseful to follow the clues with the Mysterious Benedict Society gang, but not everything is as simple as it seems. You might be surprised – actually you probably will be! The end is quite satisfactory. 😀
Synopsis:
The Mysterious Benedict Society is bored, bored, bored. They have been cooped up together in Mr. Benedict’s house for months because it’s not safe to leave: Mr. Curtain will do anything to get back his precious Whisperer, including snatching up certain children in his way. But when Constance disappears after an appointment with the Whisperer, boredom is flung to the winds. Reynie, Sticky, and Kate are on a race against time to find their grumpy companion before the Ten Men do. They must decode secret messages and follow curiously easy clues… that lead them to an unexpected place. This adventure includes two brave girls and two smart boys, a Salamander, a missing friend, sneaky clues, a couple of “S” pies, a red bucket, and a few daring leaps.
The Mysterious Benedict Society – Mr. Benedict’s Book of Perplexing Puzzles, Elusive Enigmas, and Curious Conundrums
Whew! Why do the titles have to be so long? XD I’ll just abbreviate it “Perplexing Puzzles.” Perplexing Puzzles is a really fun book filled with… well, riddles and puzzles. It is a gorgeous book – it’s printed on glossy pages and the whole book is in color instead of black and white. Most of the puzzles are quite hard, but a few of them are easy. (There are hints in the back of the book to help you along. If you need another hint, I might be able to help you too! 😀 ) Scattered throughout the book are quotes from the series, illustrations and profiles, and other “archival materials” as it says. I love the a riddle at the very end that requires you to use letters and numbers from previous puzzles to reveal a last secret message.
Here is one of the riddles: (your answer has to fit in the blanks)
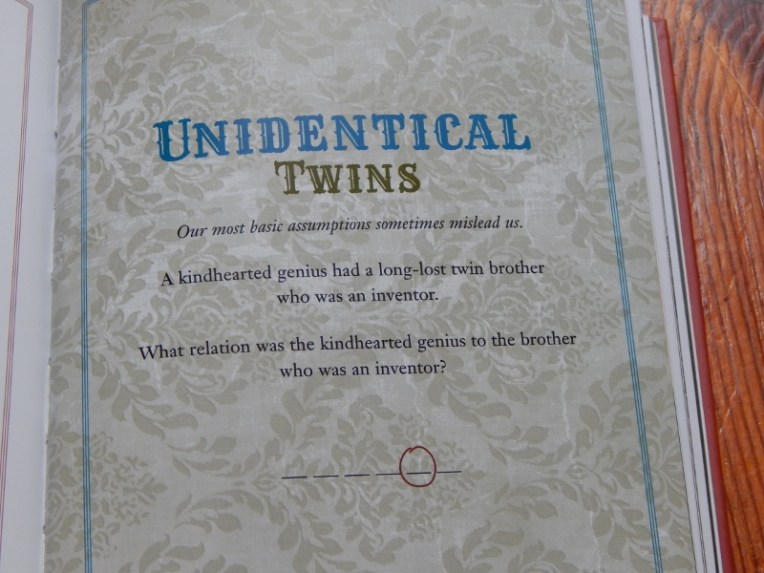
Umm… I can’t really do a synopsis of this one. XD
************************
Pros and cons: The covers all have delightful illustrations on them, and the books are all beautiful and well-made. Like I said, the Perplexing Puzzles book is particularly gorgeous. The box that they come in is really nice too! The inside looks like it has been plastered with newspaper clippings from the first puzzle in Perplexing Puzzles. Umm… there aren’t many cons. 😀 Of course I liked some books better than others, but I enjoyed them all. The one problem is that it’s a little hard to pry a book out of the case, but that’s okay. 🙂 I highly recommend both this series and this hardcover collection.
______________________________________________________
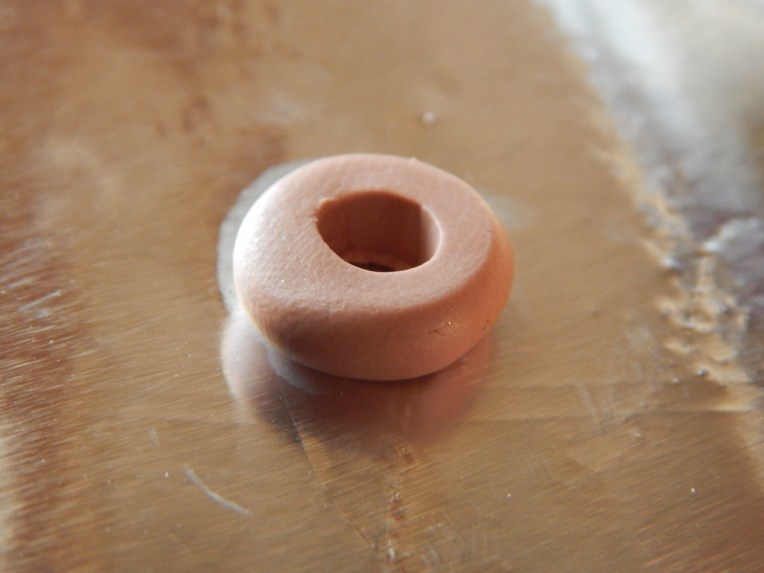
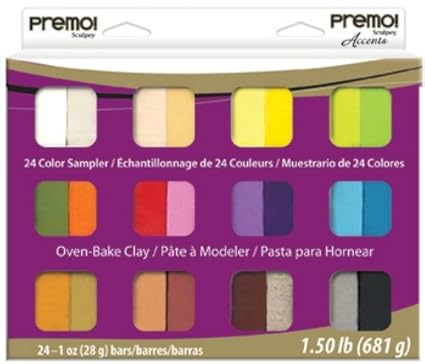
Premo Polymer Clay
Click here to see the Amazon listing
(I’m pretty sure you can find a pack like this for cheaper if you shop around Amazon or stores like Michael’s or Hobby Lobby, but this is the listing I found.)
Premo brand polymer clay is a very good quality clay. (At least in my opinion and from what I’ve read.) You can see lots of things I made with it here.
Let me compare and contrast it with Sculpey III, a popular brand of clay made by the same company. Premo is more of a professional clay, while Sculpey III is more of a recreational, hobby-type clay, not meant to be super durable. Premo is much stronger when baked than Sculpey III, and not as gooey and hard to work with as Sculpey III can be. (But see “Pros and cons.”) Although I do think Sculpey III has more colors available. They are both good for different reasons, but I prefer Premo to Sculpey III.
Pros and cons: Usually I love this brand of polymer clay, but the pack I got this time was a lot softer than normal. That is really helpful for conditioning and mixing clay, but not so good for sculpting. Normally though, it’s a really great clay – not too hard, not too soft – and this sampler pack comes with some really neat options, such as translucent clay (which looks transparent-ish when you brush a gloss over it), and faux rock clay which really looks like rock! The sampler pack lasts a long time if you make small things, like I do, but I found it helpful to get an extra pack of white Premo clay because I use white a lot. Even though the changeable pliability is annoying, I would still recommend this product.
____________________________________________________
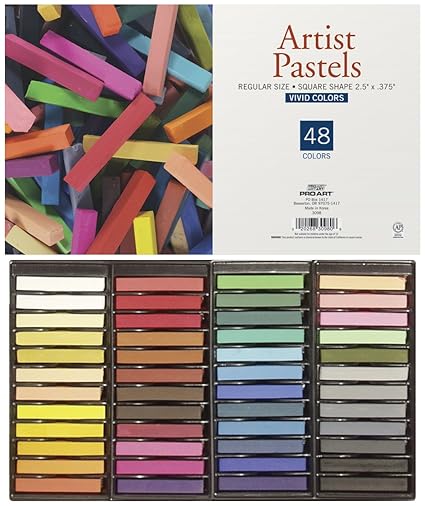
Artist’s Pastels
Click here to see the Amazon listing
I requested these to use on polymer clay. They’re kind of like chalk. First you scrape them on paper to obtain colored powder, then you use a paintbrush to paint the powder onto baked or unbaked clay for more realistic shading effects. It’s kind of like paint, only more subtle. Pastels work very well for shading miniature food. The cookie on the left is not shaded with artist’s pastels, and the one on the right is. (Sorry, it’s not a very good picture, but trust me, some clay artists can do amazing things with artist’s pastels! Like Tracey, for instance.)

Pros and cons: Certain shades of brown are missing that would be helpful, but at least you can mix colors. I haven’t had much experience with artist’s pastels, but these work quite well for my purposes! I would recommend this product.
______________________________________________________
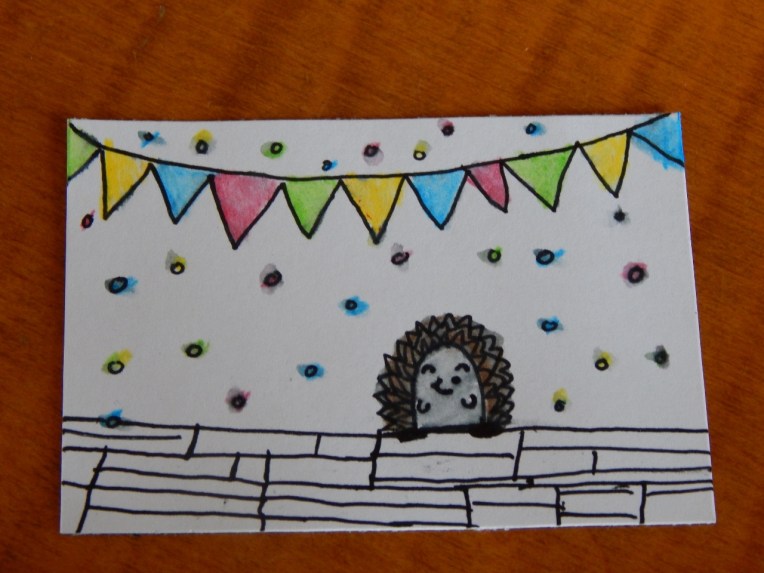
“Gelly Roll” White Gel Pens:
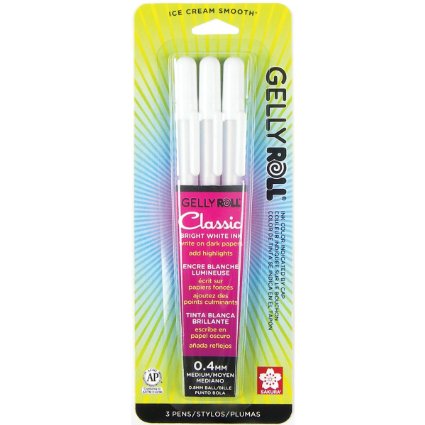
Click here to see the Amazon listing
These pens are really nice! Not to mention there are three of them, so they should last me a while. 🙂 They have a fairly fine tip and write smoothly as long as you don’t write too fast. You can use them to mark highlights on your drawings, for things such as hair and eyes:

The ink is almost marker-resistant – you can see on the left of her hair one of the squiggles is slightly more muted. That’s where I drew over it with marker and the gel pen still showed through. When you draw on top of marker, the marker ink bleeds a tiny bit with the gel pen ink, so it’s usually not quite completely white. (In the picture above, the ink turned a little grayish.)
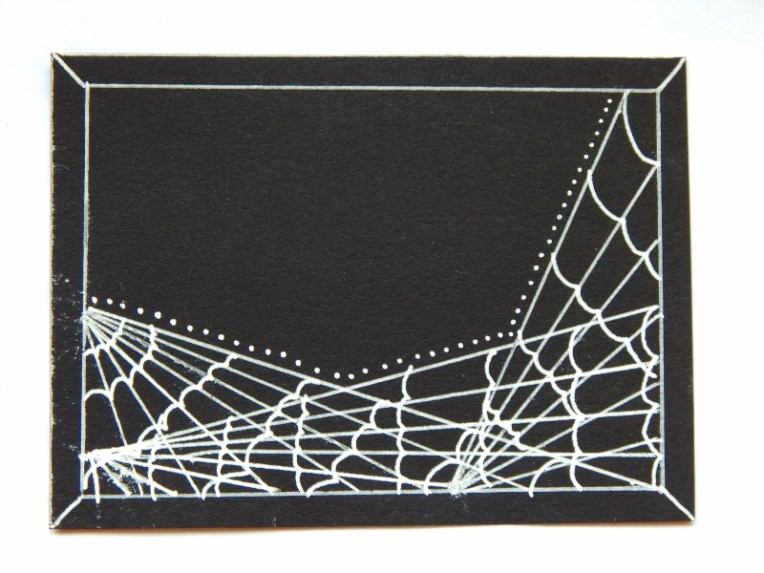
The white ink looks stunning on black paper! Here is an ATC I made with one of the gel pens:

Pros and cons: The pens write quite smoothly unless you write fast; then they’re a little scratchy. The optimum background seems to be black paper. The ink will smudge if you’re not careful, but it’s not super smudge-prone. I would recommend this product.
_________________________________________________________
PicMonkey Royale
I was really excited about getting this, because I use PicMonkey a lot. (Royale gives you access to lots more features – extra effects, overlays, collage options, and more. But you do have to pay for Royale. 😉 ) Three of my favorite things about PicMonkey Royale are the “Custom Effect” feature, Clone feature, and the Royale collage options. You make a custom effect by adding different effects to a photo like usual, then saving all the things you did as one effect that you can use over and over again.
Here is a photo I edited with Royale: (More kitten pictures coming soon! 😀 )


I used clone to “wipe off” some dirt, Miniature Effect, Eye Brighten, and then several other non-Royale effects and features. So cute!
Pros and cons: It’s definitely nice to be able to use features like clone, Custom Effect, extra Overlays and Collage layouts, and more. Pretty much the only con is the price. If you don’t use PicMonkey a lot, or don’t use it much besides the basic touch-ups which are free, you probably won’t need this. However, if you love photo-editing or PicMonkey or both, I recommend this feature!
__________________________________________________
Of course I got a bunch more things for my birthday, but it would take a few more months to review them all at this rate. XD I hope you enjoyed this! Which was your favorite item? Do you have any of these things?
***Allison**


 Oops! I almost wrote “I got a little bit wrinkled.” XD


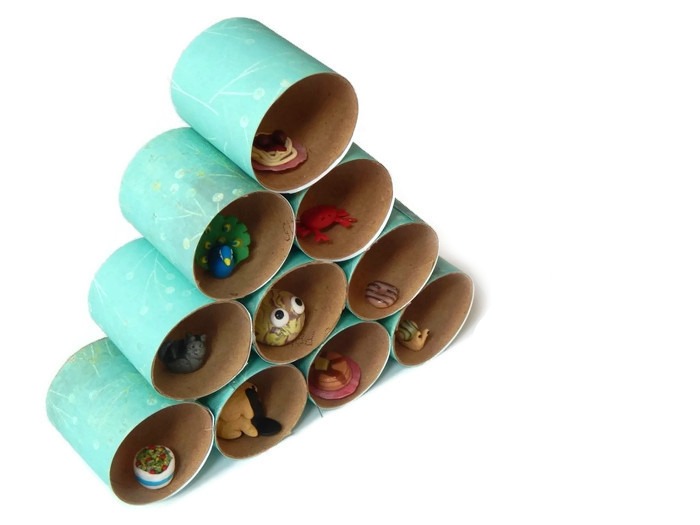
 Ta-daa! You have made a template. Now slip it on to the tubes you want to cut, and simply trace around the top with a pencil. No measuring needed!
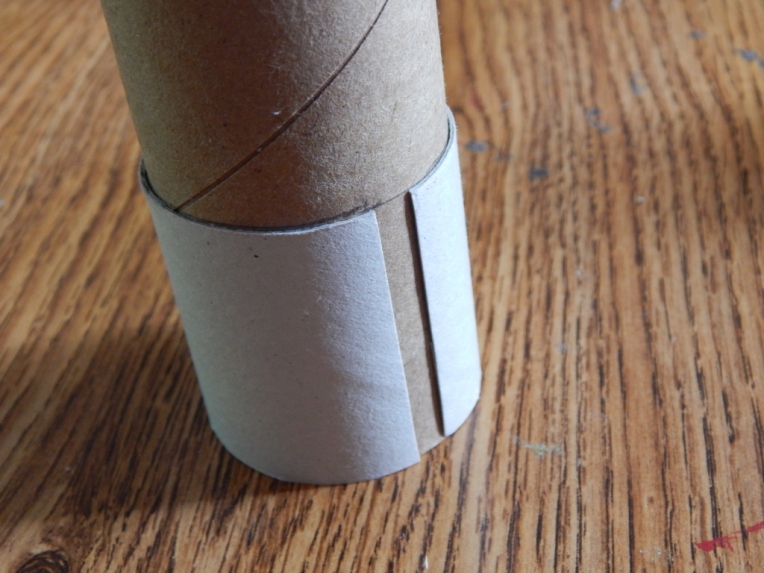
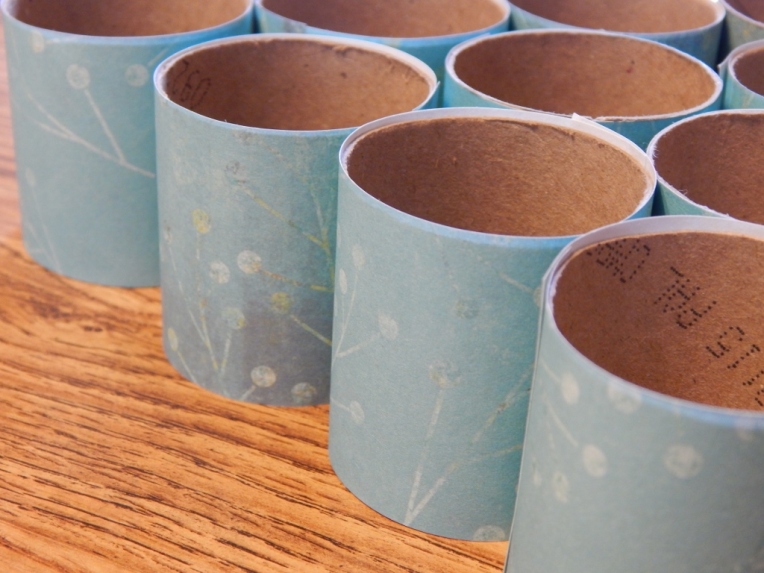
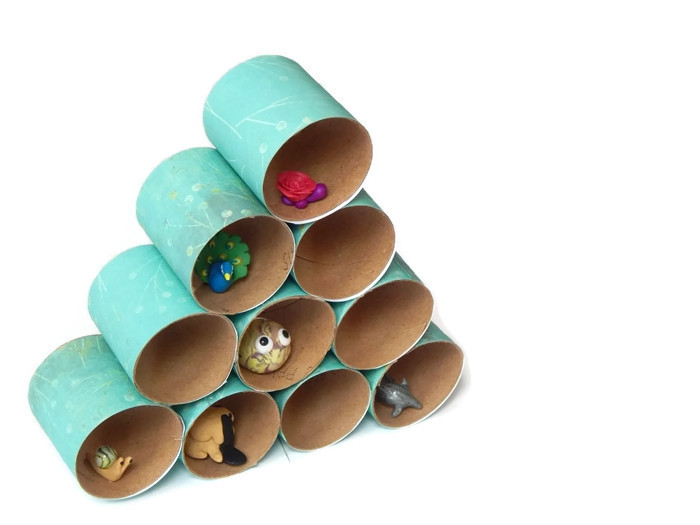
 I cut 10 lengths for my organizer, which used about 5 tubes (not counting the template tube).