50th Anniversary Celebration {Part 1}

Hello, dears!

This past weekend, Mom’s side of the family came up to our farm to celebrate Grandpa and Grandma’s 50th anniversary! It was AMAAAZING, ahhh! We made so many good memories, had so many fun adventures, and ate so much good food. XD I also took hundreds and hundreds of pictures, obviously. 😀 I got so many pictures that it was hard to pick a small enough amount for this post, but I hope you enjoy this selection of photographs and fun times with family. 🙂 Continue reading

Advertisement

Bedroom Update

Hey, guys! It’s been quite awhile since Megan and I did our room makeover, and I thought I’d do a post of some of the updates and changes we’ve made since then. (To see the original makeover, click here.)

The two main changes are updating the dresser area and adding a bookshelf. They look so pretty!

This is the bookshelf corner. We repainted an old bamboo bookshelf that my Dad had when he was a boy, and it looks so pretty now. The flower wall hanging is from Hobby Lobby, and I don’t know where Megan got the “laugh” wall hanging. (I told Megan it’s too bad it doesn’t say “read” instead of “laugh.” XD )

dsc_0169-1280x853

dsc_0195-853x1280

dsc_0215-1280x853
The bookshelf has three of my favorite series: The Penderwicks, The Mysterious Benedict Society, and…


dsc_0212-1280x853
The Keeper of the Lost City series. 🙂 Have you read any or all of those? Which one is your favorite?

Moving on now to the dresser area. We added a mirror, a new plant, two new vases… actually pretty much everything on top of the dresser is new. 🙂

dsc_0226-1280x960

dsc_0203-1280x853
I made these roses for decorations for a church potluck, and saved them to use in our room afterward. They’re made of paper streamers wrapped and twisted around a wooden skewer.

dsc_0204

dsc_0202-1280x853
More roses in a neat lantern Mom gave us.
dsc_0224-1280x853
Isn’t that twisty vase neat? (Ahem, excuse the leaves that have been chewed by a cat. XD ) I got the vase and the oil lamp from my grandparents, and the fox was a gift to Megan, the alarm clock is from Walmart, and the gold stones are painted by me. 🙂

Now for some random updates around our room.


dsc_0161-1280x853
I love our mantel decorations! The fox frame and mushrooms are from Hobby Lobby, and the hedgehog was a gift to Megan.

dsc_0198-1280x853

dsc_0168-1280x853
The reading nook or whatever it’s called…
dsc_0179-1280x853
The beautiful fern is from my grandma.
dsc_0182-1280x853
This plant is also from my grandma.
dsc_0220-853x1280
FUZZY CUBE! The cube and solid purple pillow are from Ross, and I made the patchwork pillow. (It’s actually a quillow – a quilt in a pillow.)


dsc_0223-1280x853
What an adorable little hedgehog! This was yet ANOTHER of Megan’s gifts. XD
dsc_0230-1280x853
Air plants are so neat! Why are my fingers neon pink in this picture?


dsc_0227-853x1280
Here’s our painted crate bedstand. Not much has changed here except the things we keep in it.

And last but not least, two pictures of our bedroom in general.

dsc_0221-1280x853dsc_0200-1280x853


*Happy sigh* I still love our bedroom so much, even now. I hope this gave you some inspiration if you are looking to redecorate your own bedroom! Do you have any redecorating tips to share? What is your favorite part about our bedroom? What is your favorite part or decoration about YOUR bedroom? Do you like interior design?

***Allison***

DIY Pallet Christmas Tree

diy (400x800).jpg

The kids made this little tree for our mom’s birthday. It wasn’t that hard (well, we made it ourselves!) and it turned out great! I put together a little tutorial for you guys. 🙂

  1. Pick your pallet. We have a huge pile of pallets behind one of our barns, so we had plenty of options. You don’t want the boards to be too far apart or it looks odd. This is the one we chose: (*Shudder* I know these next few pictures are terrible quality, but I can only say that the lighting in Dad’s shop is also rather terrible. XD ) DSC_0319.JPG
  2. Draw the line. We simply set a board on the pallet at the angle we wanted, and traced a line with a pencil. You might want to use a carpenter’s pencil or Sharpie so you can see the line better. You can measure and all that boring stuff if you want to be more precise, but we just traced. 😉
  3. Cut it out. We – meaning my brothers – used a Sawzall to cut along the lines. This was definitely the trickiest part of the process, and my brother accidentally broke one of the branches when he stepped on it. O.o (We fixed it by first tracing the broken pieces onto an extra pallet board, then cutting it out, and then screwing it back to the tree’s “trunk”.) Make sure to saw the boards at the right angle so you don’t hit the back boards while you’re cutting the top ones.
  4. Trim it up. You’ll have to cut or break off the back boards so they don’t stick out in front. We did this by a combination of cutting them off with a Sawzall and whacking them off with a hammer. (Be as careful as possible, though – don’t want to break any limbs (human or tree)! XD ) Lookin’ good!tree
  5. Sand it smooth. We didn’t actually sand it completely smooth because we wanted it to have a rustic look, but it’s a good idea to at least sand the sawed off edges a bit.
  6. Secure the branches. Some of the pallet boards were a little loose after all that, so we put in a few extra screws to secure them. screwing
  7. Paint it. Yay, now for the fun part! We painted ours all green, but you could also do red and green stripes, or leave stripes of raw pallet wood for a more rustic look.
  8. Bring on the lights. This is optional, but we strung some pretty Christmas lights on it to make it more interesting. We used white, but you could also use colored lights.dsc_0347-1280x853
  9. Display it proudly. Ta-daa! You’re finished! You may want to stop at that, but on the other hand I think it would look neat to make a forest of trees in different sizes and colors. So fun! dsc_0357-1280x853

I hope that wasn’t too confusing. :/ Anyway, do you like how it turned out? I think it’s pretty cute! You can click here to see my sister’s post which has a bunch more pictures of us making the tree. Thank you, brothers, for doing a lot of the hard work for us. 😀 ♥

Merry Almost-Christmas! (HOW CAN IT BE SO CLOSE ALREADY?!)

***Allison***

Room Makeover!

Welcome to the long awaited room tour! Goodness gracious this post took a while to get up. I have been wanting to write this for weeks!

Guys, you are going to love the before and after. SQUEEE it’s so pretty!! It looks like a totally different room. Are you ready? Here we go!

*

*

*

*

*

*

*

*

*

*

*

*

before and after (1024x512).jpg

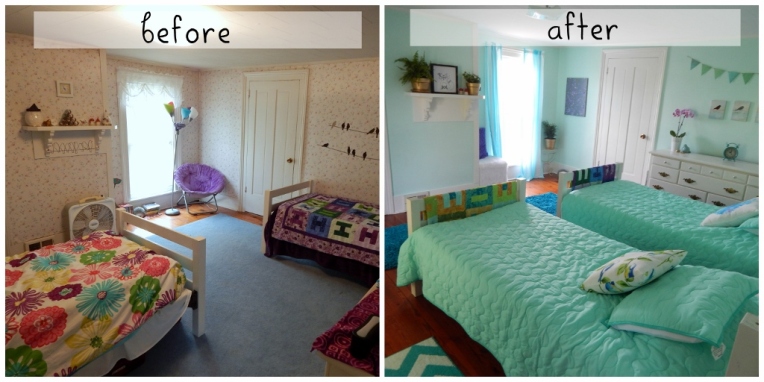
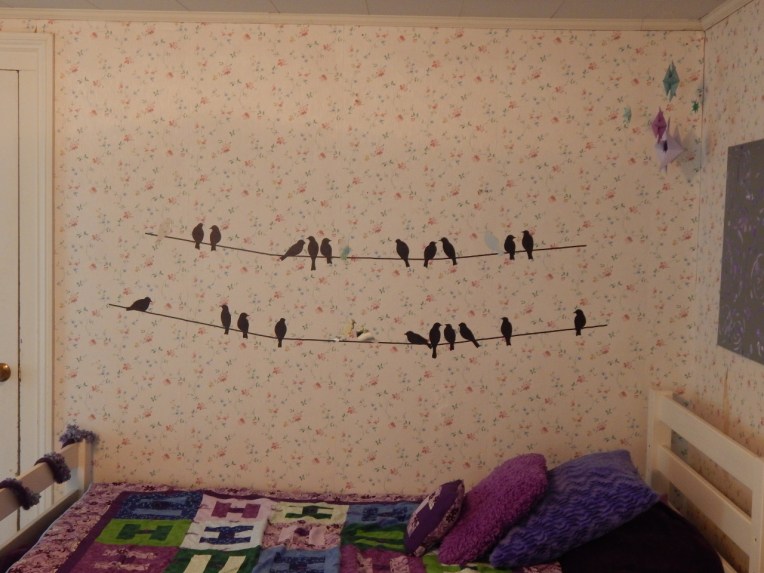
Isn’t that simply amazing? Both of those pictures were taken at the same spot, but they look completely different!

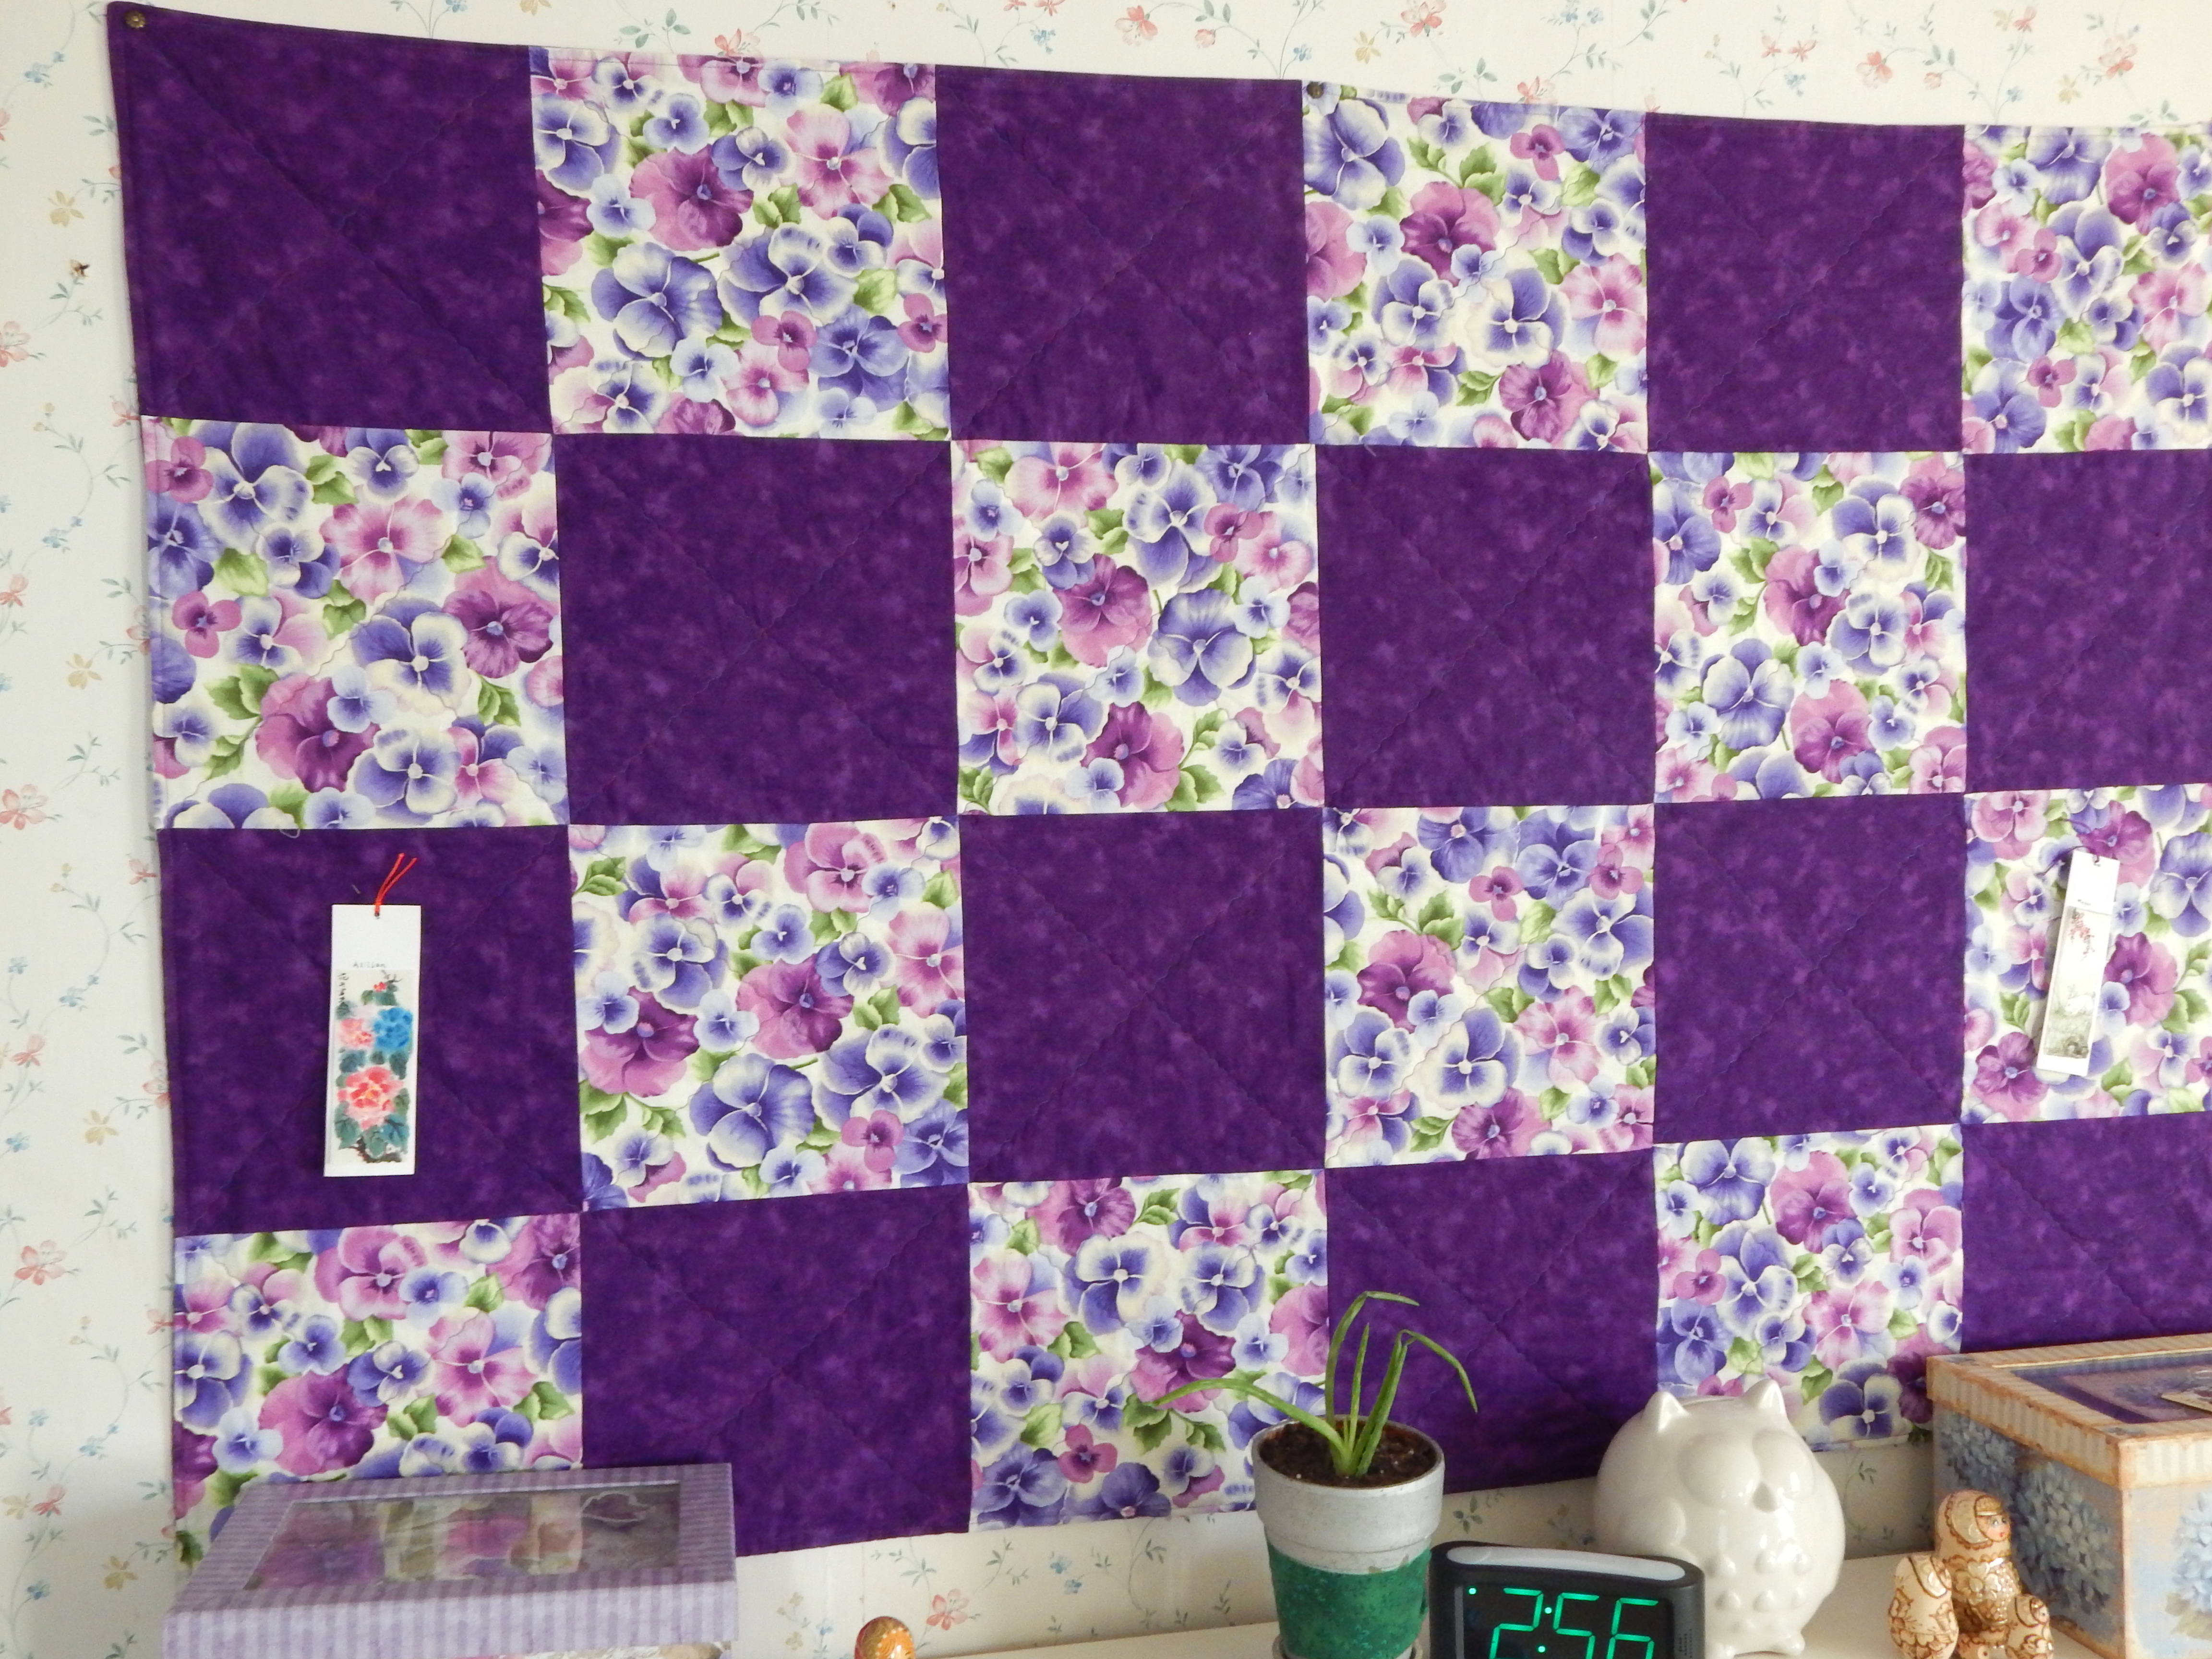
We had 30 year old wallpaper in our room, so we had to take down the wallpaper, plaster over nicks in the walls, sand the plaster, then paint the ceiling, trim, and walls. It was a lot of work – it took a whole week – but it was so worth it! I absolutely love the paint color and the decorations!

A few notes before we proceed to the room tour: I didn’t list the prices for every single thing in our room, just most of the stuff we got recently. Also, the prices are rounded.

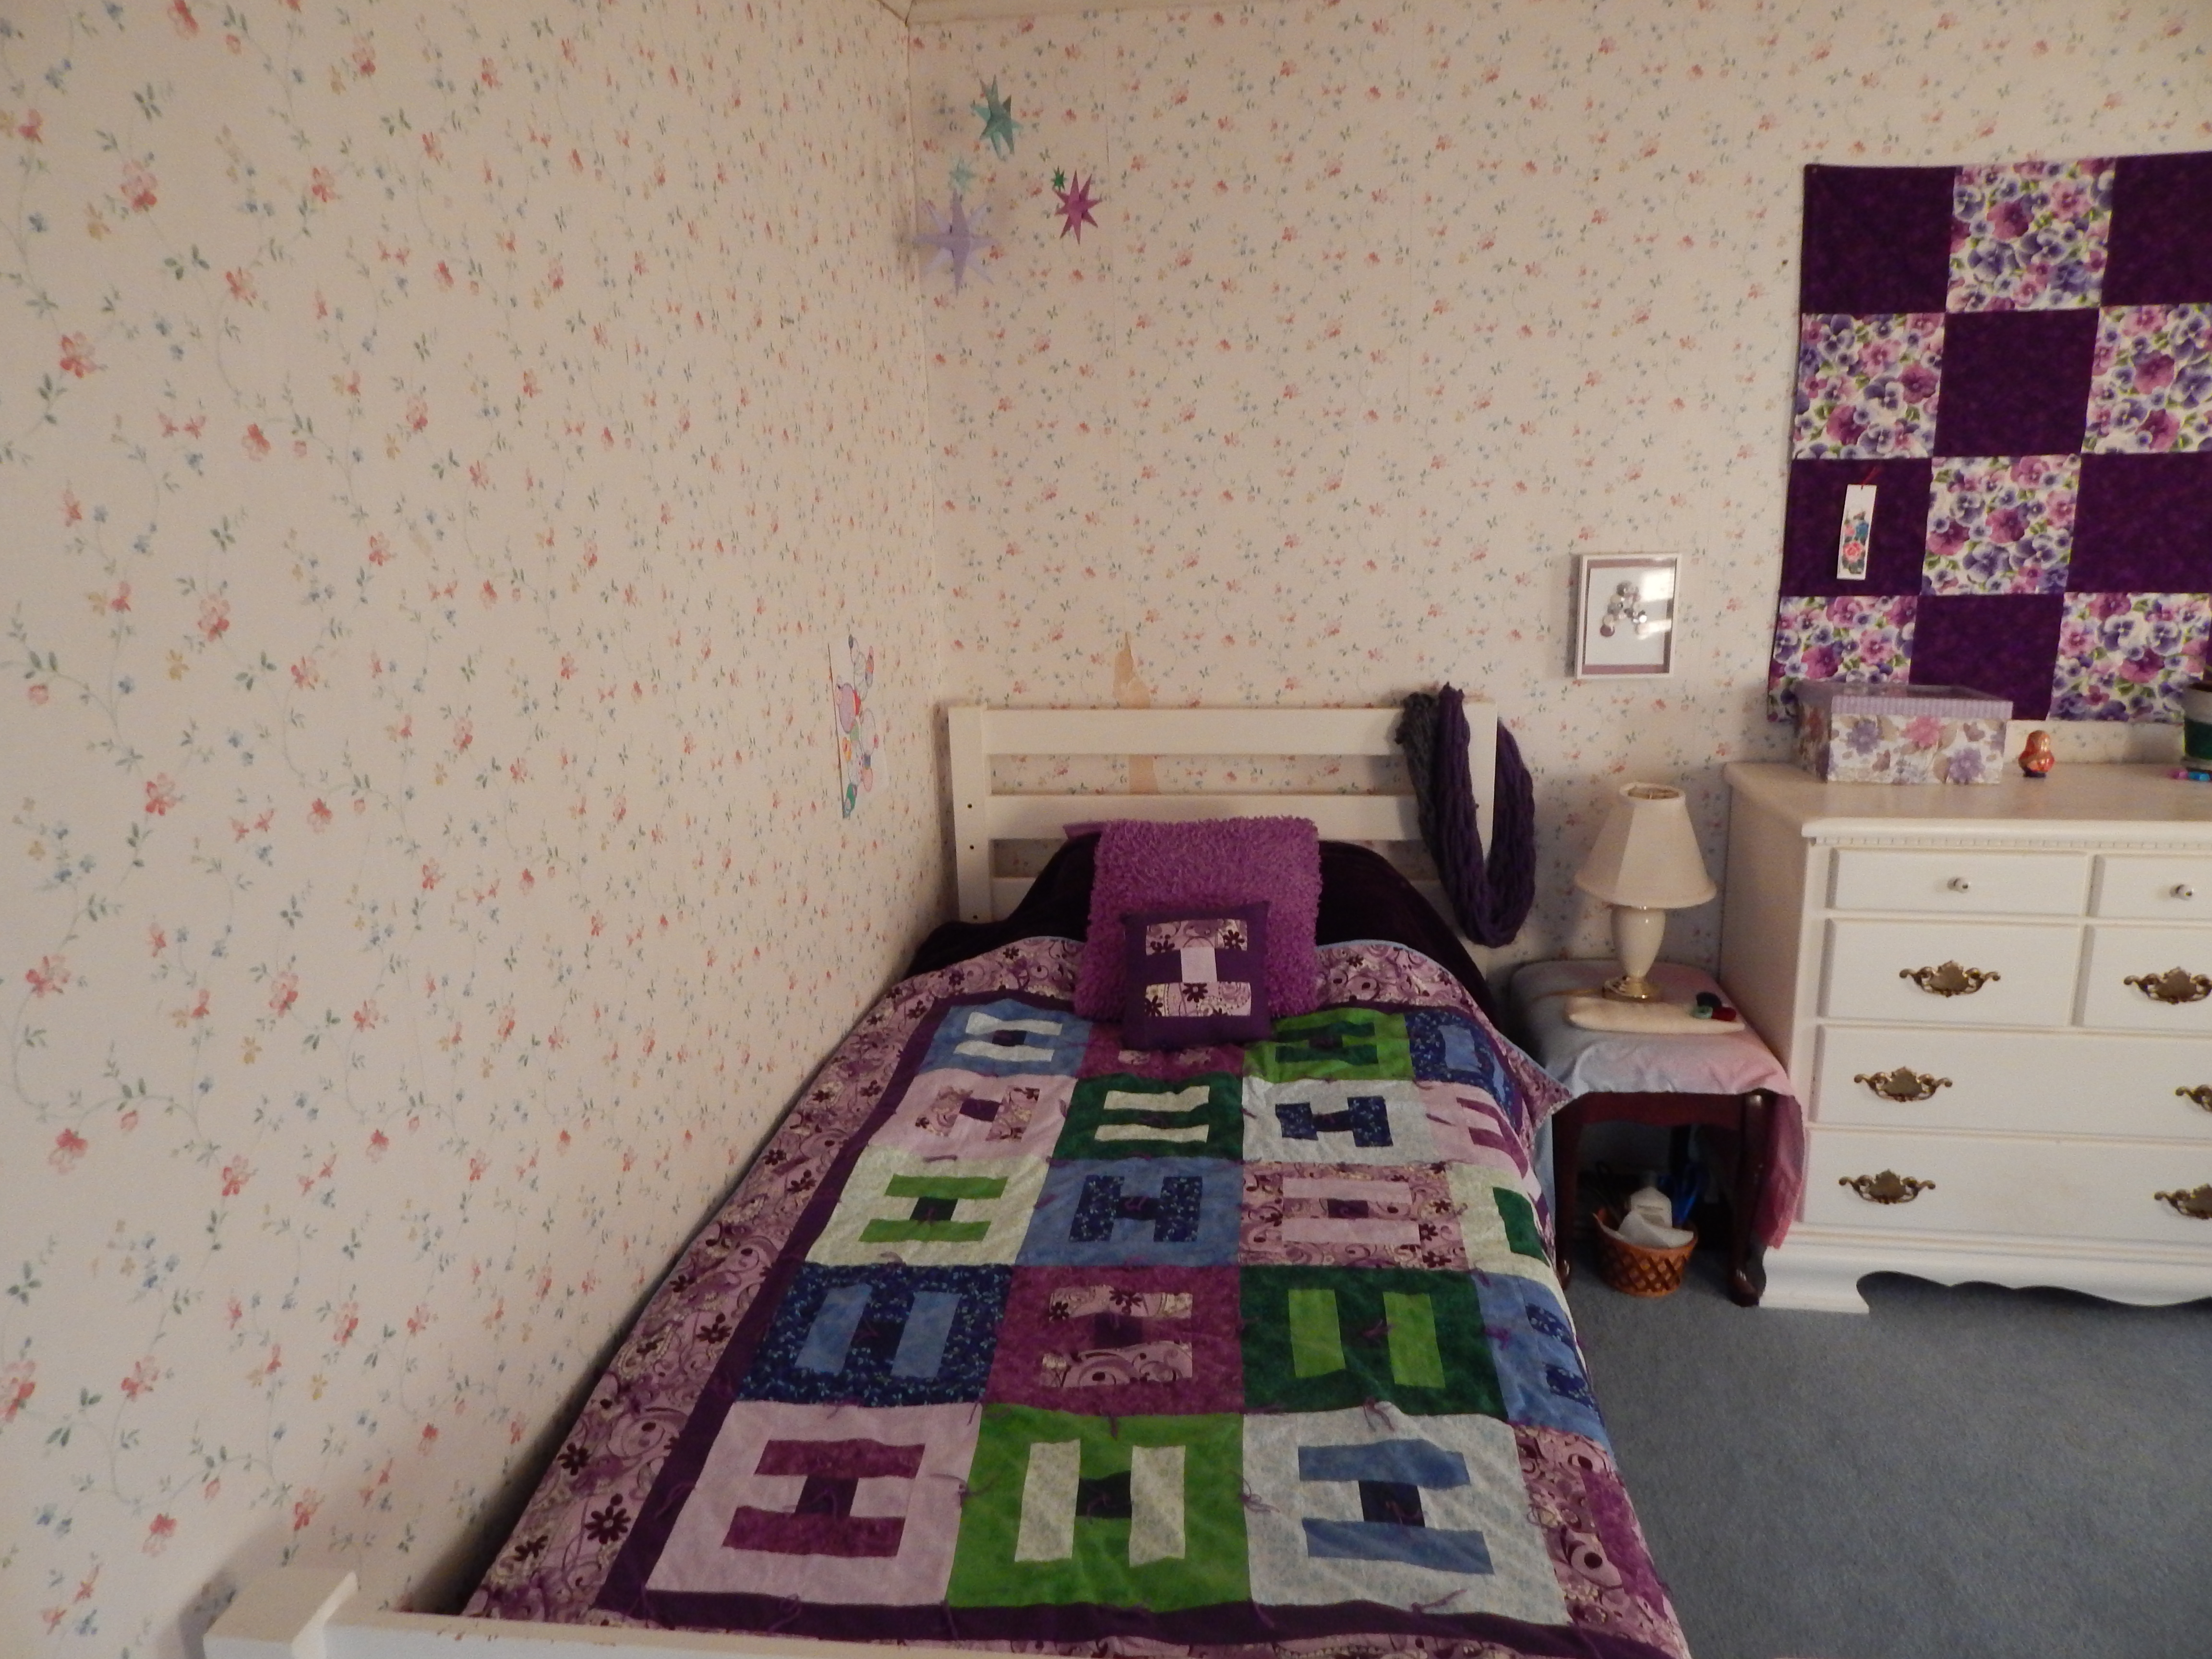
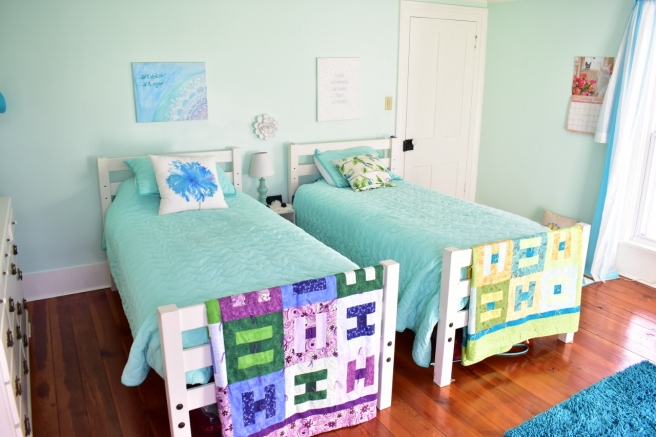
Now we can get to the good part! Let us begin with the bed section. First off, I love the bedspreads! They are simple but beautiful, and their simplicity makes them versatile. (If you’re wondering, my bed is on the left and Megan’s is on the right.)

after (7) (1024x768)

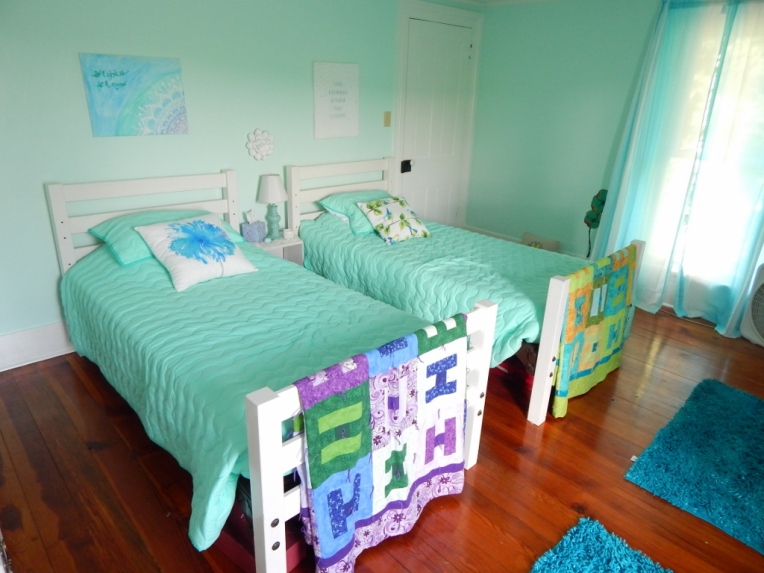
Bedspreads // $27 each – Target (Note: I rounded all of these prices. )

*****

These lovely pillows tie in our canvasses and handmade quilts with the bedspreads.

Watercolor Flower Pillow // $7 – Hobby Lobby
Bird Pillow //  $10 – Hobby Lobby

*****

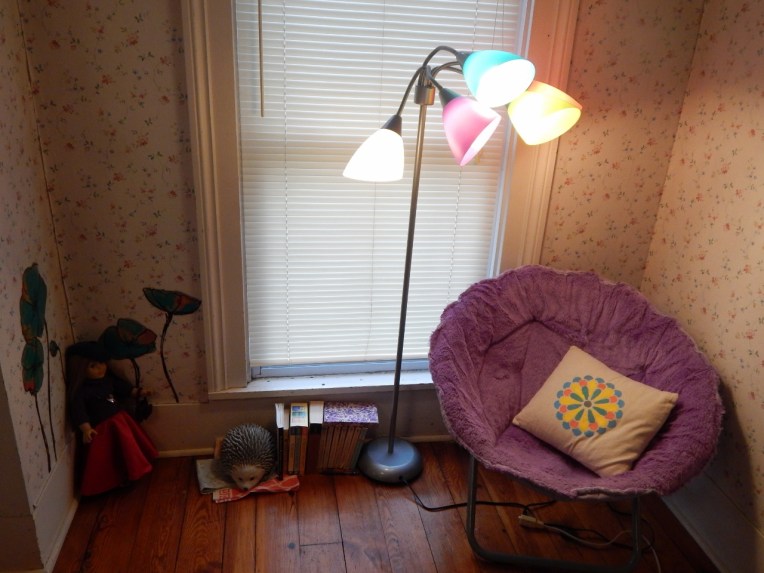
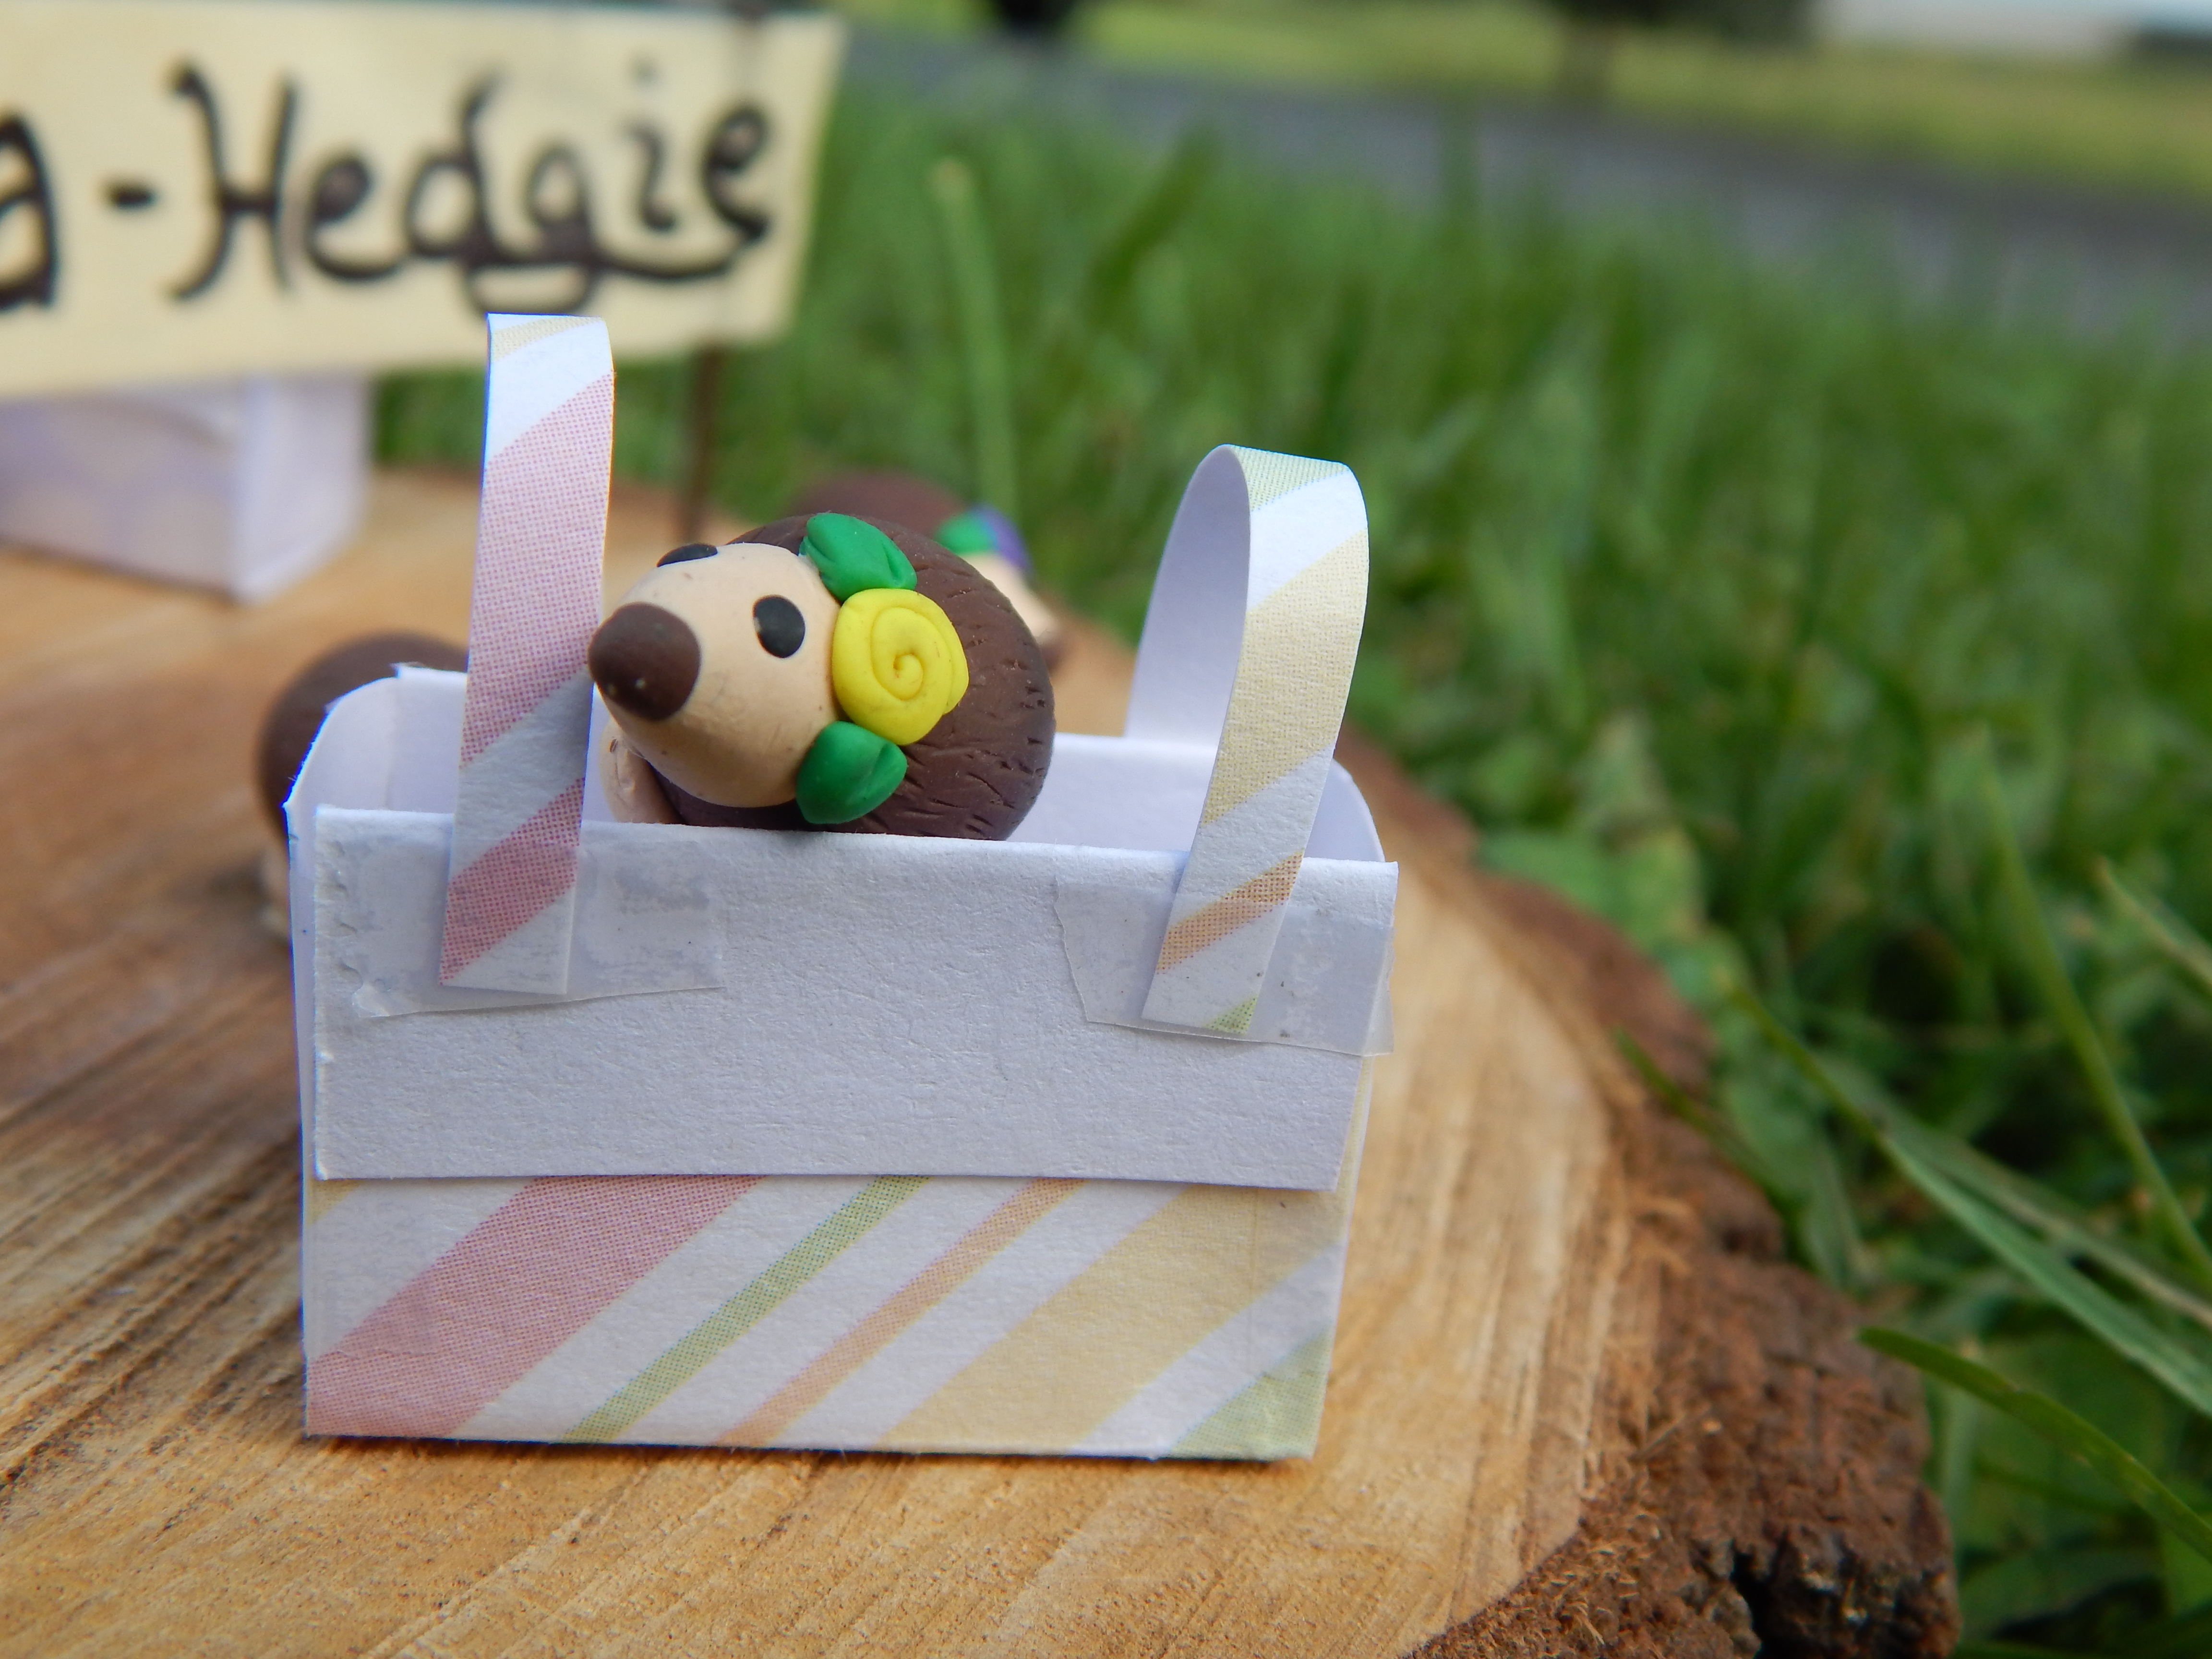
I’m very proud of our upcycled wooden crate. XD It was broken and rough to begin with, so we wood-glued it together, cleaned it, sanded it, and painted it. It works perfectly as a bedside stand!

after (12) (1024x768)

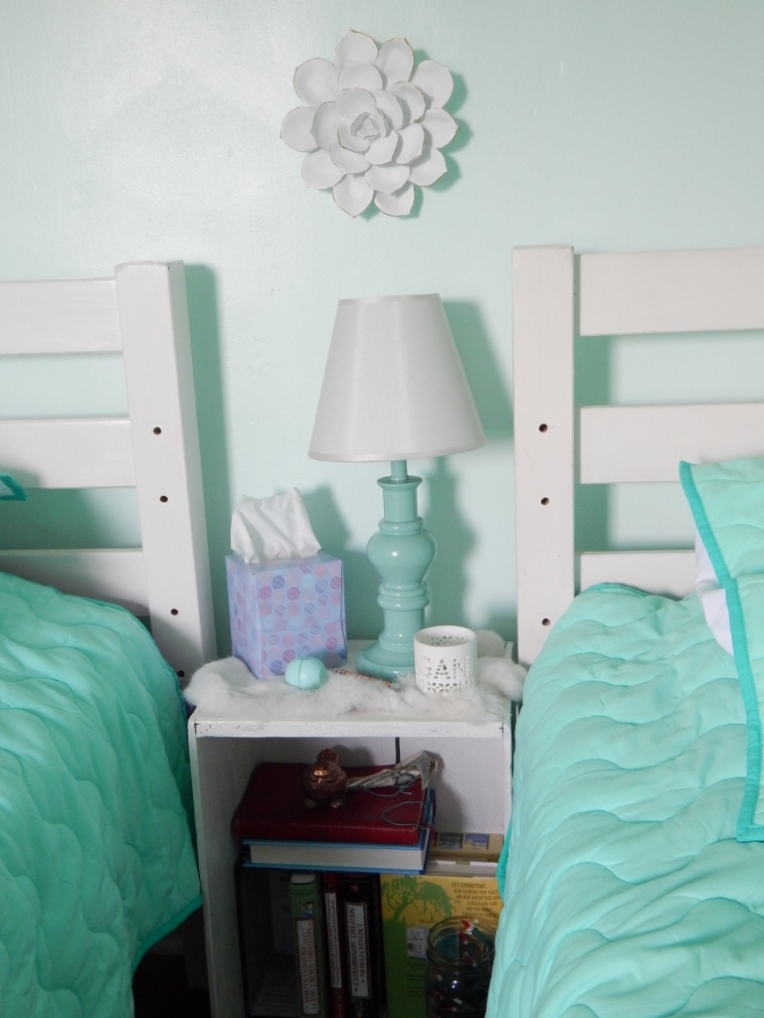
White Flower Wall Hanging// $8.50- Hobby Lobby
Lampshade // $5.50 – Walmart
Lampstand // $12 – Walmart
Crate Bedside Stand // DIY

 *****

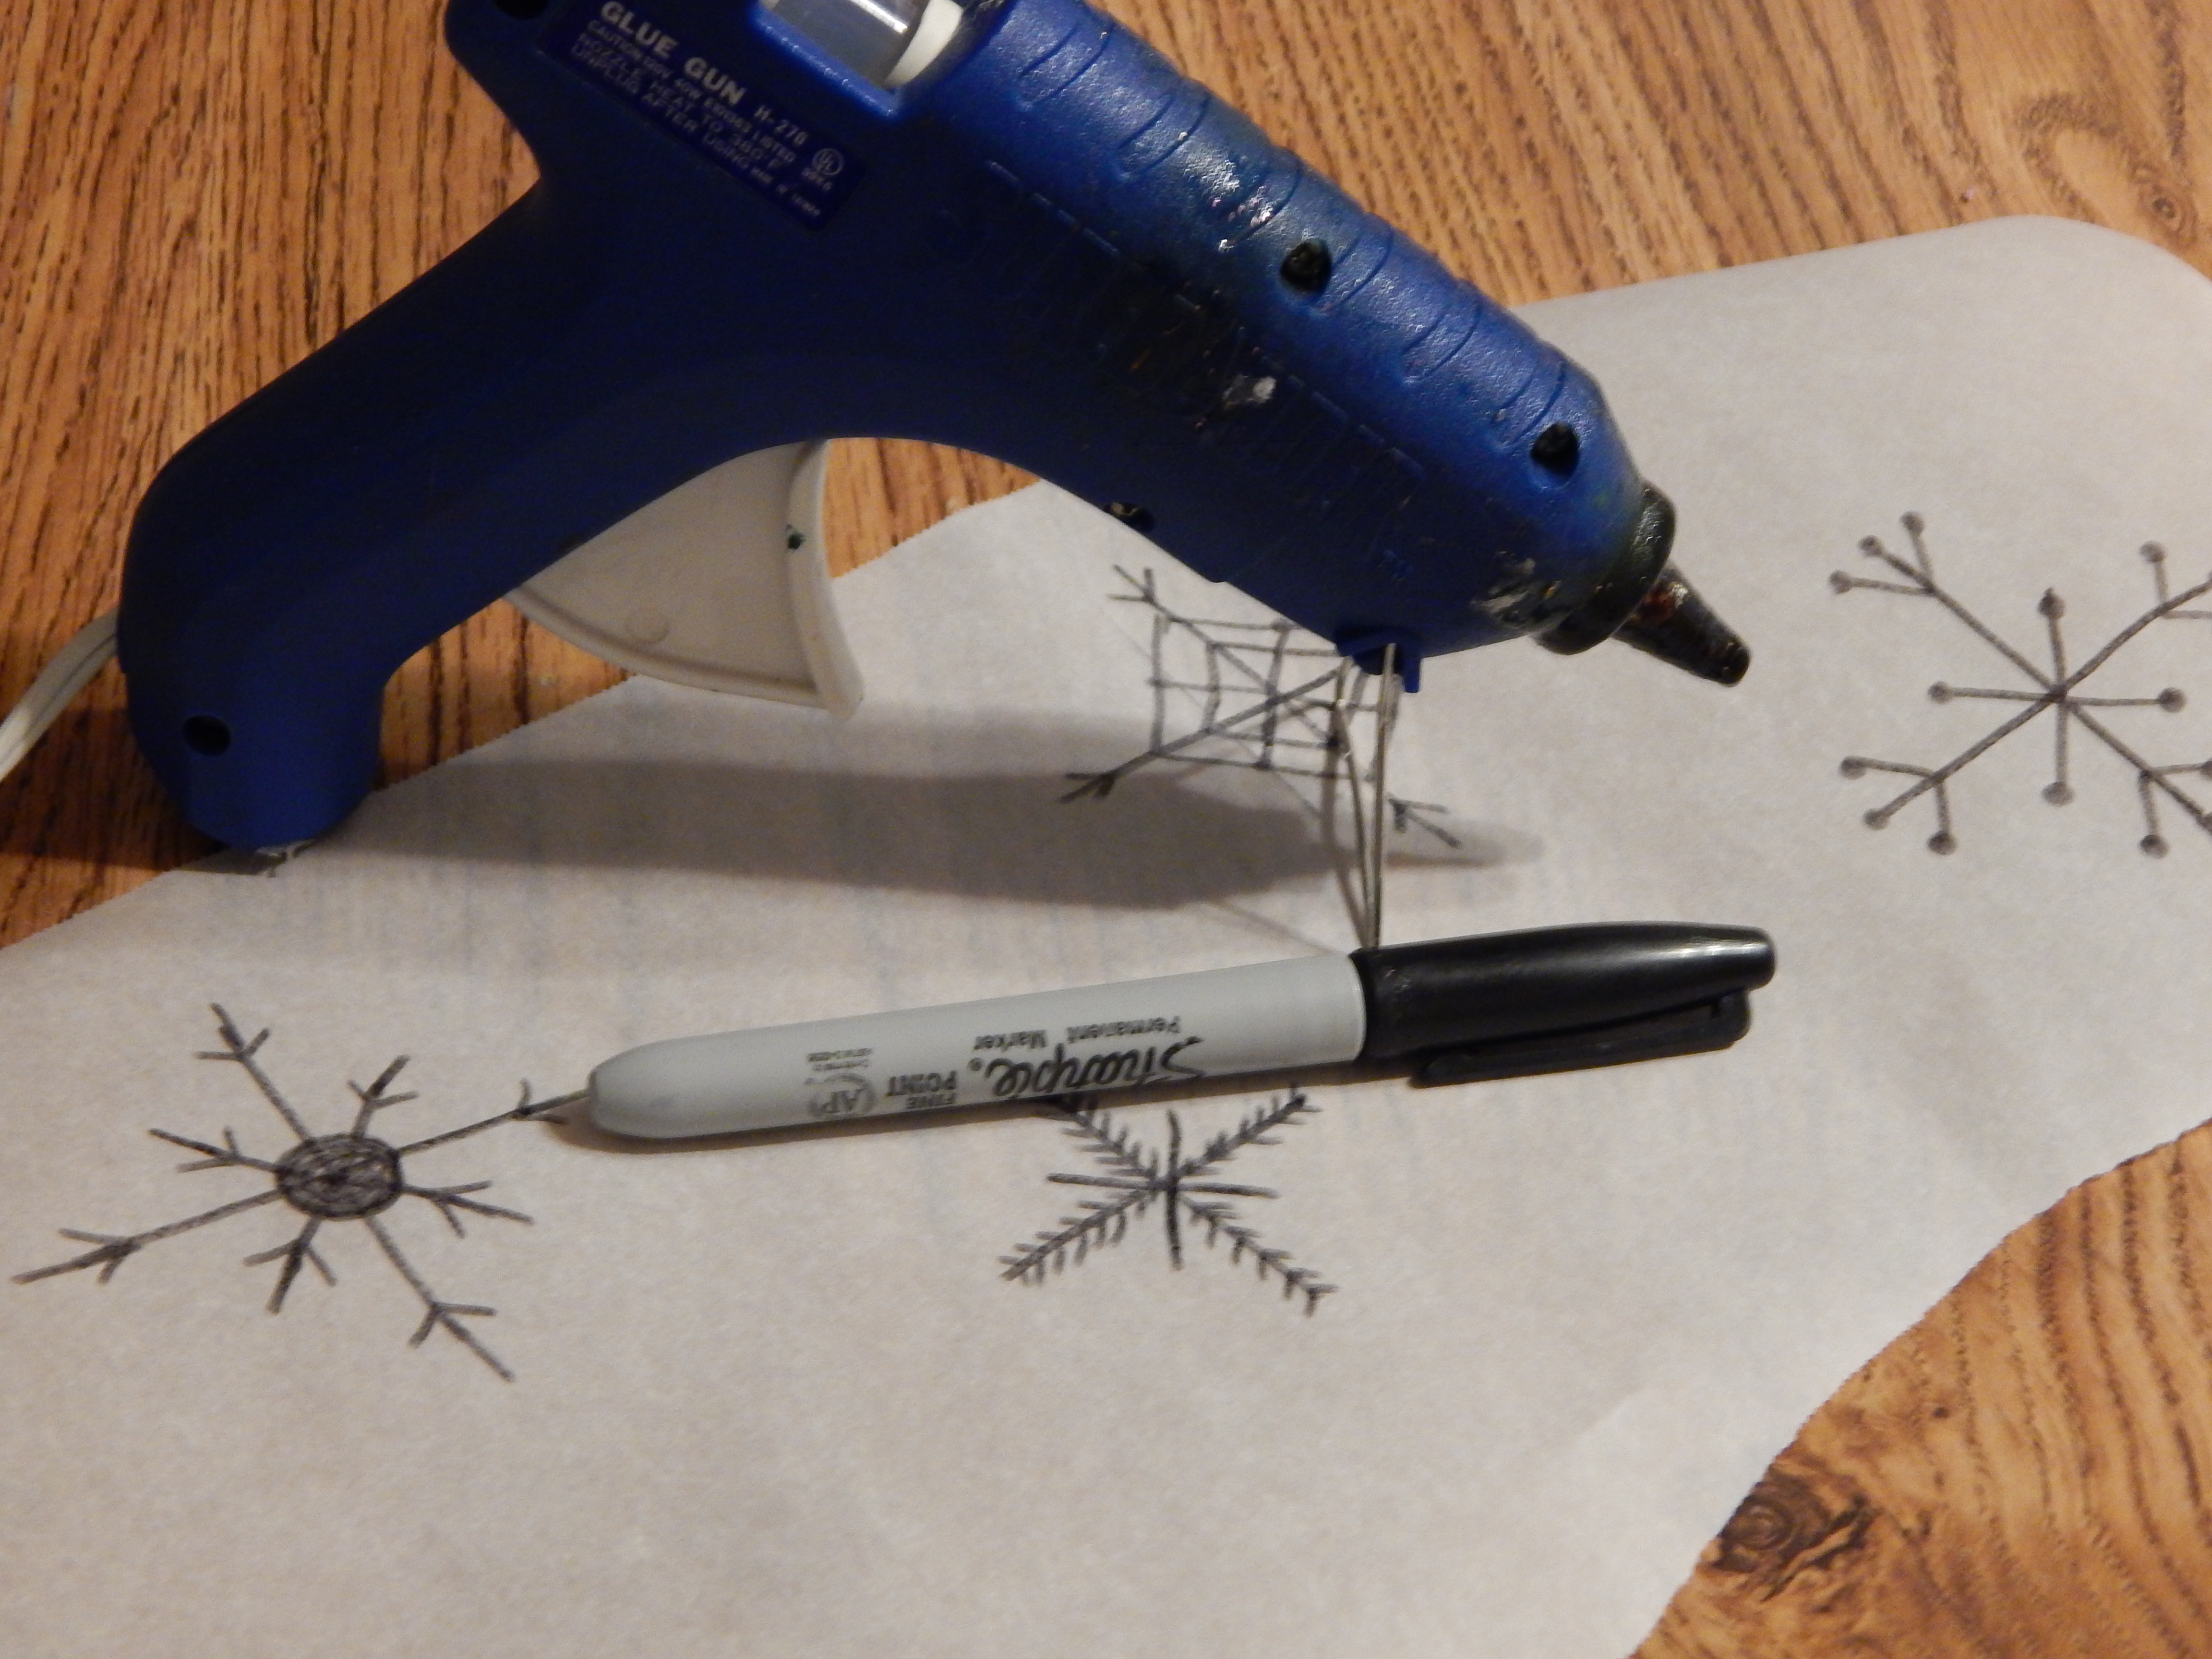
Megan and I each decorated a canvas to put above our beds. The first canvas is mine and the second is Megan’s. 😉 I painted mine with watercolor and gesso and wrote in the words with Sharpie and marker. Since Megan’s canvas had more words, we printed them out in a nice font and transferred them to the canvas using this tutorial. (The pencil rubbing part is the transferring part.) Then Megan Sharpied over the words and added confetti from the paint chips we collected while searching for a paint color.

after (10) (1024x768)

after 11 (1024x768)

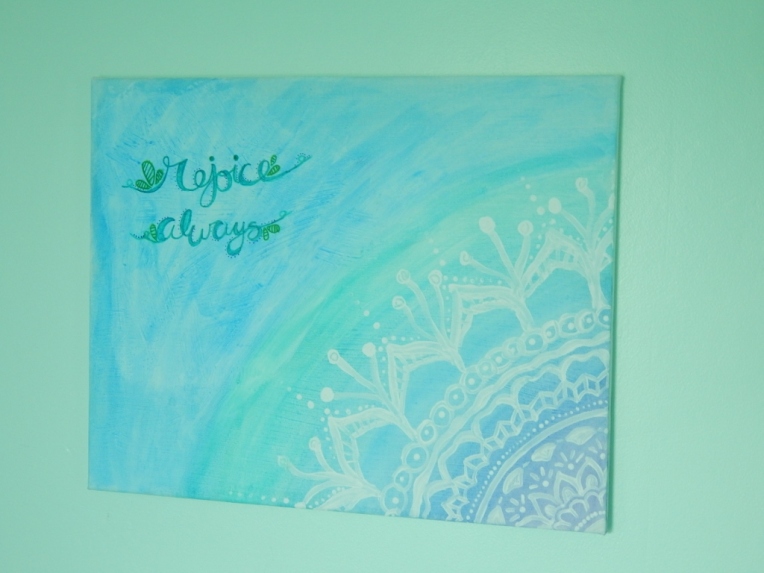
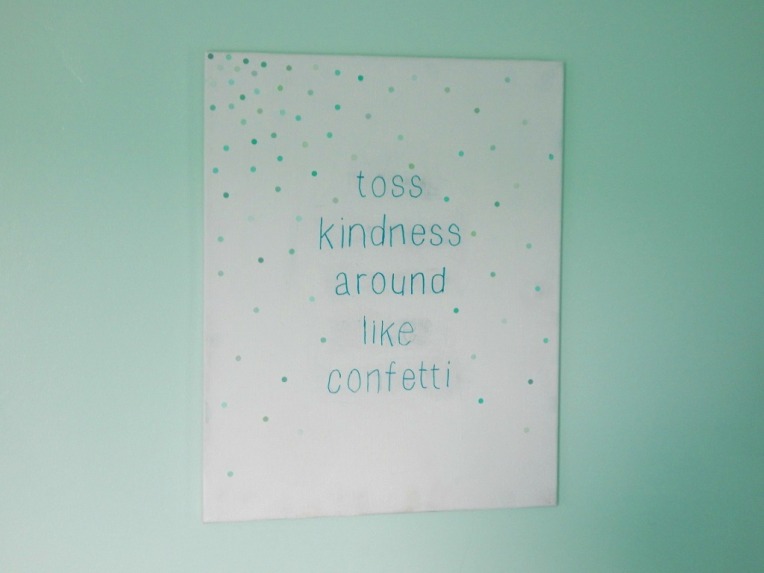
Above-bed Canvasses // DIY

 *****

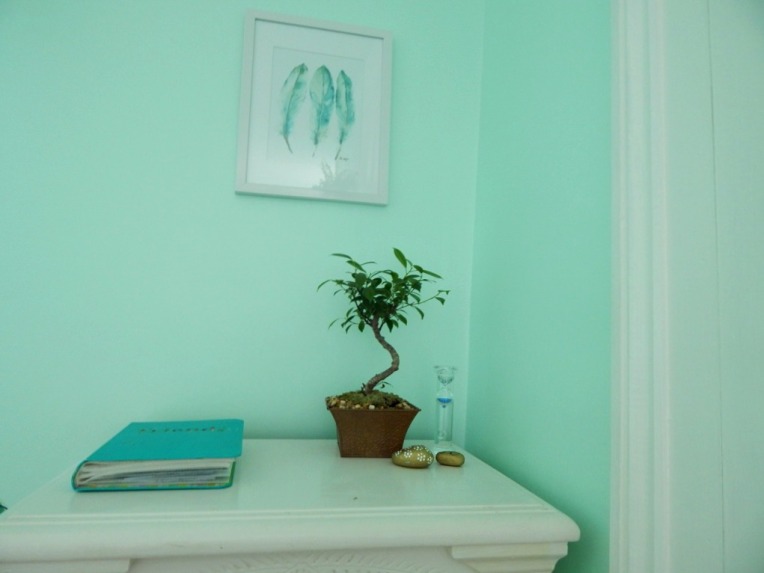
We got some really nice ombre curtains from Walmart. They’re opaque enough that we don’t need blinds, but they’re also sheer enough to let in light. And if you’re wondering, that speck in the hanging plant is a little stuffed owl. XD

(Sorry about the really bad lighting here. 😦 )

001 (1024x768)after 14 (1021x766)

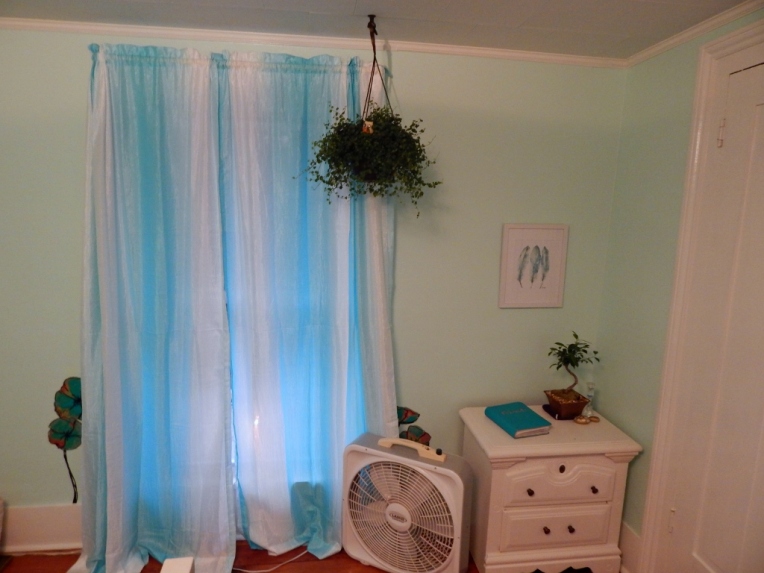
Curtains // $10 per panel – Walmart
Feather Print // $16- Hobby Lobby
Bonsai Tree // $12- Walmart
Hanging Plant // $16 – Walmart

 *****

The mantel is one of my favorite spots. I adore the fox print especially! We spray painted the flowerpots gold to add a extra pop.

after (2) (1024x768)

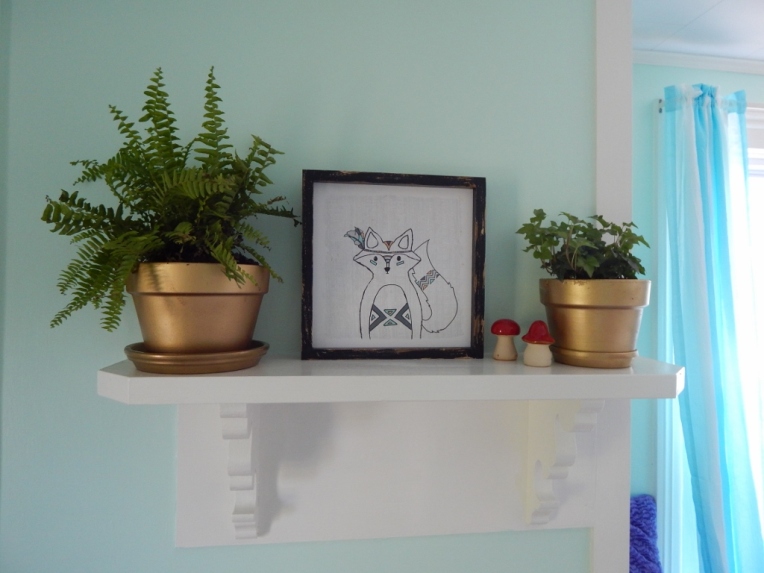
Fern // $5.00 – Walmart
Fox Print // $22 – Hobby Lobby
Ivy // $5.00 – Walmart

 *****

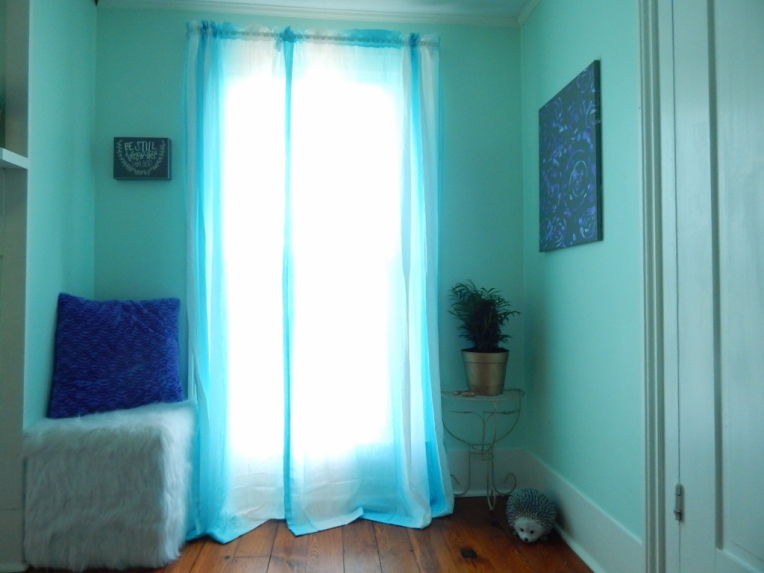
I also love this next spot. It’s sophisticated yet cozy. The white faux-fur cube is one of my favorite purchases – it’s a comfortable seat and a storage chest!

Funny story: My littlest sister was writing a wish list while we went shopping, and  she wrote “fuse cyoob” for the fuzzy cube seat. Isn’t that adorable? You have to love little kid spelling. XD

after (3) (1024x768)

(Horrible pictures again, I know. :/ )

after 15 (705x941)after 16 (1024x768) (768x1024)

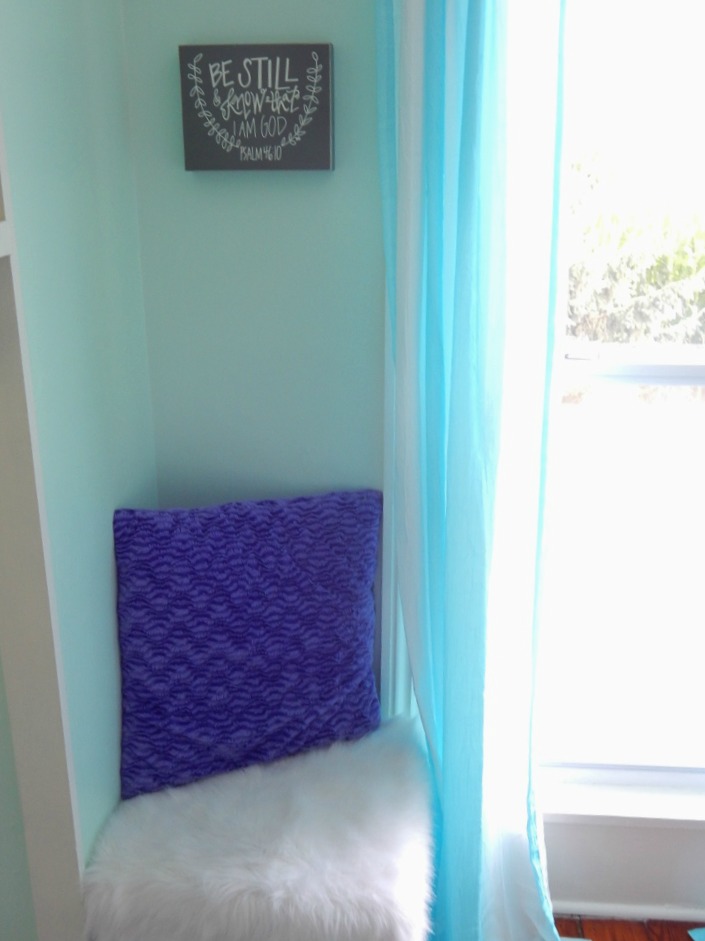
Faux Fur Cube // $50 – Ross
Bible Verse Canvas // $12 – Hobby Lobby
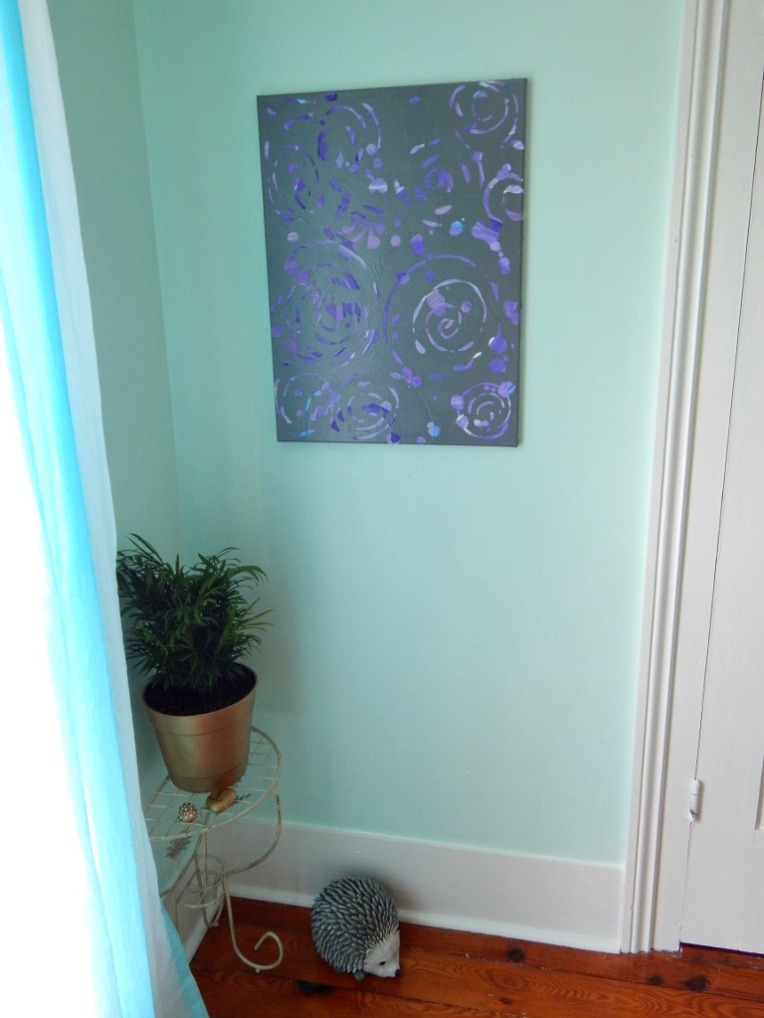
Mini Palm // $10 – Home Depot
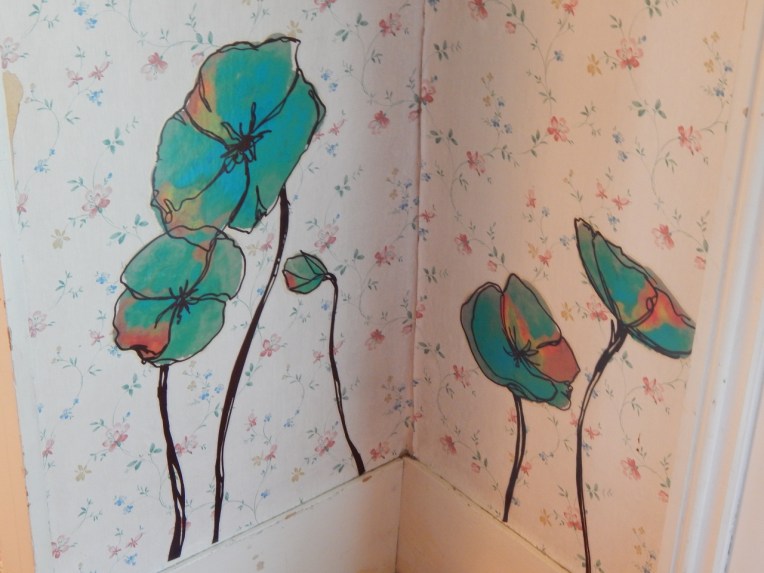
Purple Swirl Canvas // DIY

*****

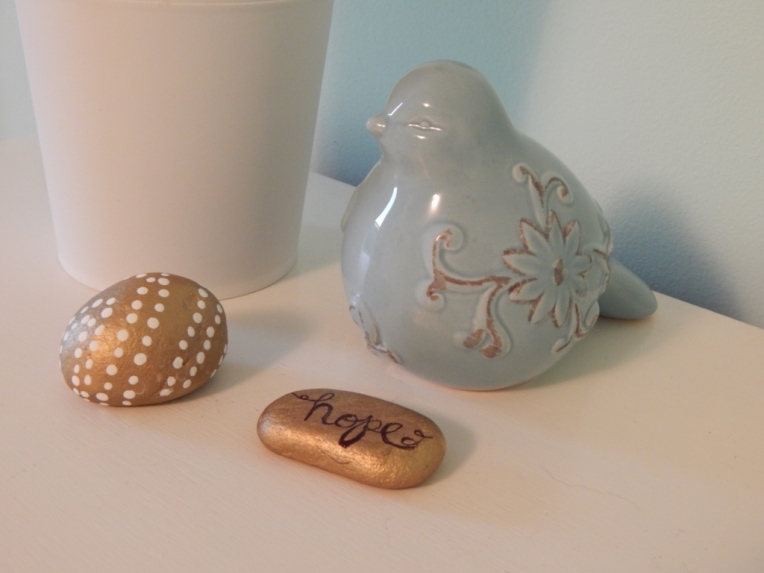
Moving on to the dresser… The bunting banner I made myself (remember this tutorial?), and I also hand-decorated the gold rocks around our room. We spray painted smooth river rocks gold, then I either hand lettered words on them with Sharpie, or dotted them with white paint. They turned out really well!

after (5) (1024x768)003 (1024x768)002 (1024x768)

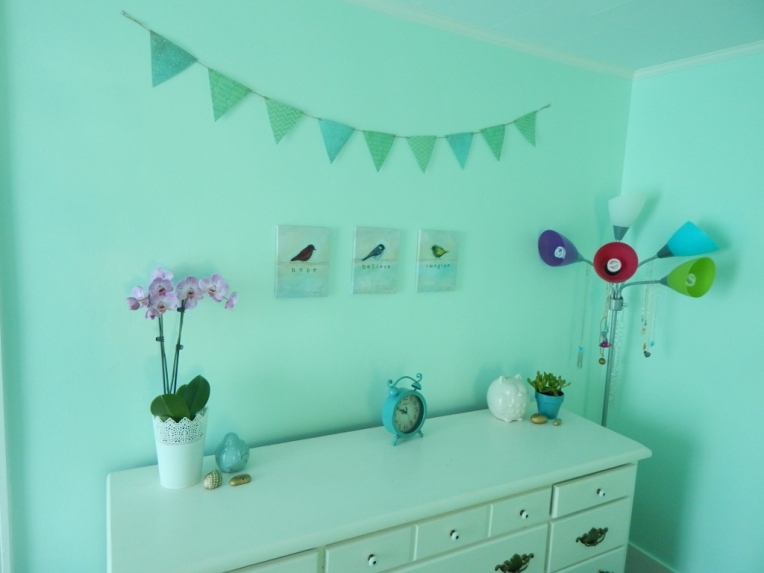
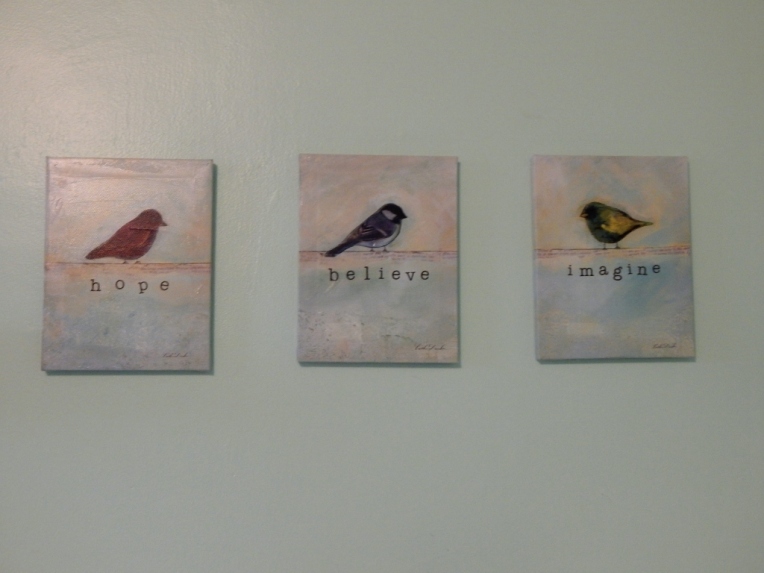
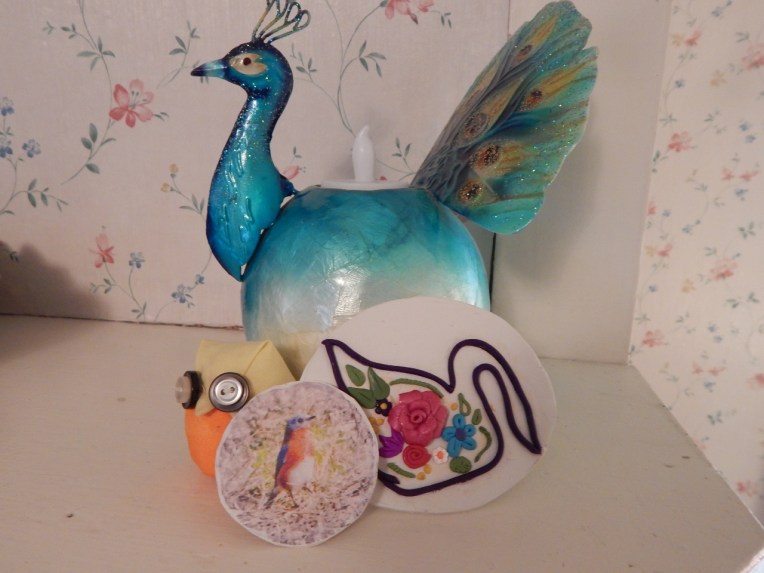
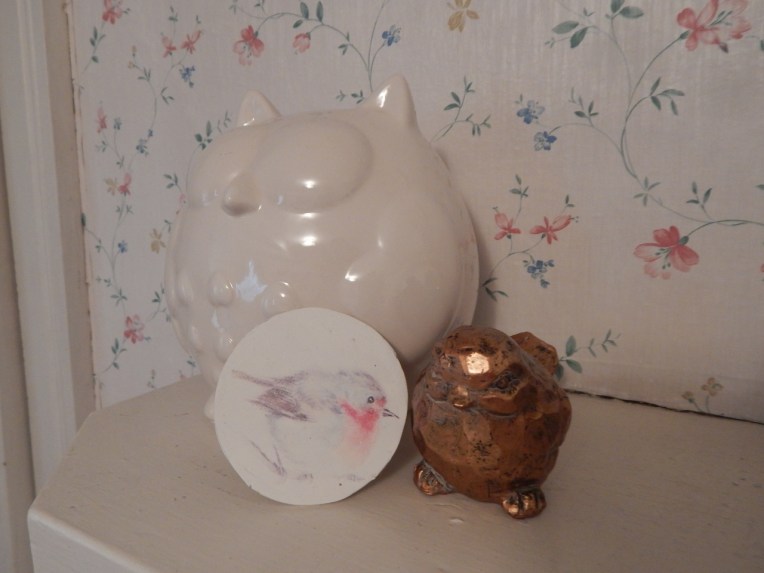
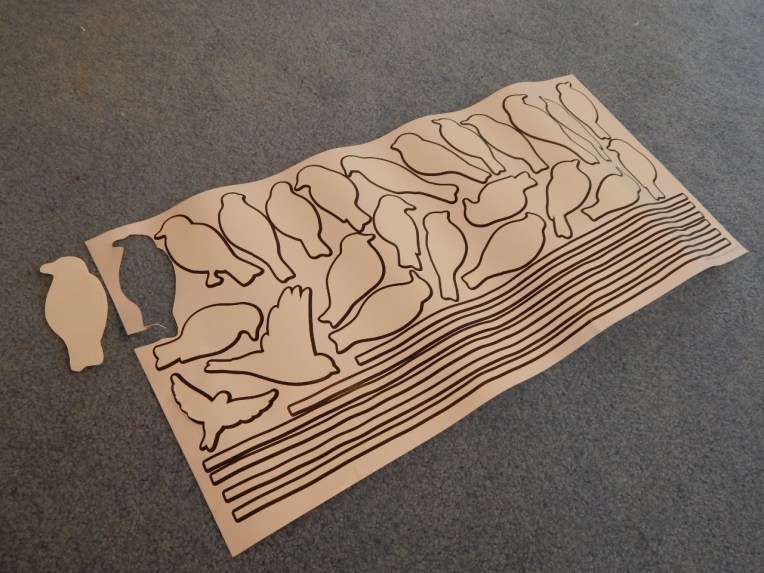
Bird Canvas Set // $4 each – Walmart
Orchid // $13 – Home Depot
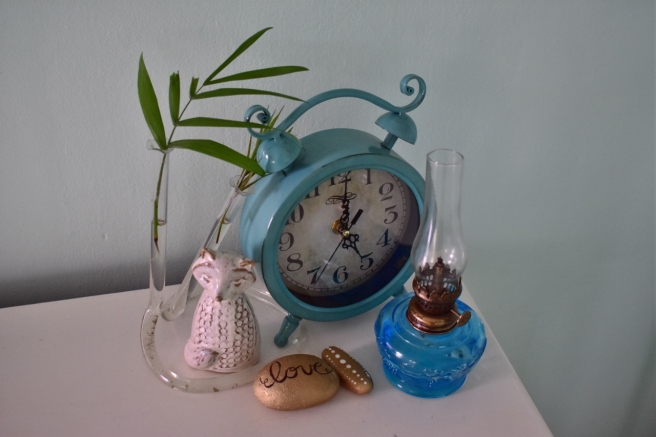
Mint Clock // $10 – Walmart
Succulents (in the blue pot) // $4-$5 each?? – Home Depot
Bunting Banner // DIY
Gold rocks // DIY

*****

And lastly but not leastly, we needed some new rugs since we took our big blue carpet away. Behold!

Chevron Rug // $16 – Walmart
Teal Rugs // $19.50 each – Walmart

*****

And thus concludes my room tour! I hope you enjoyed it! Are you going to redecorate your room anytime soon? Have you redecorated recently? What was your favorite part of our “new” room?

***Allison***

P. S. WordCrafters 2 is coming right along! Nicole just recently finished her chapter – read it here. Hmm, Katri seems more and more suspicious, isn’t she? I had no idea!

PFA #1: Hot Glue Snowflakes (and Bunny Slides)

Okay, I guess I’ll need to explain the title… 😀 PFA stands for “Posts from the Forgotten Abyss” and it’s a new series I’m starting where I drag back a post from long ago that I like, and that no one had really noticed, and repost it, along with a new photo or tidbit so the post is not entirely the same. It’s kind of like Photos from of Old. (Which I will post more of probably in spring.) So! Today’s post I thought seemed appropriate for winter, and since we, sadly, do not have any snow, here’s a way to make your own!

But first, here is the new part of the post: bunny slides! I took some videos of Lily and Willow sliding down a little sliding board that we’ve had for years, and I turned parts of the videos into pictures – they’re so cute and funny!

A pile of fluff is going down!

056 (1280x960)

↓Lily is going to be so mad at me for taking a picture of her in this highly undignified pose. XD

Wasn’t that hilarious? XD Okay, now I am about to transport you back about one year… hang on!

~~~~~~~~~~~~~~~~~~~~~~~~~~~~~~~~~~~~~~~~~~~~~~~~~~~~~~~~~~~~~~

These really look like snowflakes (well, giant, oversized ones) because of the color of hot glue.  They are very easy to make and just take a few supplies.  Let’s get started!

You will need:

*********************************

Hot glue gun (with hot glue)

Parchment paper

Sharpie (optional)

snowflake pattern to trace (optional)

*************************************

-Allison (hot glue snowflakes) 014

There are several different ways to do this.  You can either

1. Draw a snowflake directly onto the parchment paper (the sharpie lines will show up on the finished snowflake)

2. Print out a simple snowflake drawing from your computer and place it under the parchment paper

3. Just use hot glue to make a snowflake freehand.

What ever way you do it, the basic idea is to make a snowflake by squirting out hot glue onto parchment paper and letting it dry.

-Allison (hot glue snowflakes) 017-Allison (hot glue snowflakes) 025

Since it is hot glue, it won’t take long to dry (YAY!).  If you want, you can sprinkle some glitter over the snowflake before it dries.  When you’re sure the hot glue is dry enough, carefully peel it off the parchment paper.  You may need to remove those annoying hot glue strings too.

To activate the cling, turn it upside down in the palm of your hand and run it under water.  Gently shake the water off, but don’t dry it off.  Press the snowflake to a window.

-Allison (hot glue snowflakes) 040

The water helps it stick to begin with, but even when the water dries, the snowflake stays on.  You can also make little swirls, dots, and other snowy doodles to go along with your snowflakes.

Make a whole blizzard!

***Allison***

P. S. You get one point if you remembered the snowflake post. XD What do you think of this new series?

Room Makeover!

For Christmas, Megan and I asked for some home décor items and Hobby Lobby gift cards (I ♥ Hobby Lobby!)so we could redecorate our room. (We share a bedroom.) We decided to theme it with birds. We did get some décor items and several Hobby Lobby gift cards, so we did redecorate our room! And so I shall show you a tour of our newly decorated room. Do come in!

One of my favorite new decorations are these beautiful birds-on-a-wire wall decals that I got from Hobby Lobby.

-Allison (room, science museum) 005 (1280x960)

It came with a few mirrored birds as well as a bunch of bird silhouettes. (Ack! ‘Silhouette’ is really hard to spell. XD) It was fun to take pictures of the mirrored birds.

-Allison (room, science museum) 012 (1280x960)

Since there were so many of the silhouettes, I scattered a few around the room in different places.

-Allison (room, science museum) 007 (1280x960)

You know how wall decals come in a sticker sheet? I found a way to get double the amount of stickers, at least as long as there is an outline around the sticker. You just peel of the real sticker, in my case the bird silhouette, and cut around the remaining outline on the sticker sheet. Here is a picture where I first took off the silhouette sticker of the cut out bird, then the bird out of the sticker sheet, and peeled off the thin black outline.

-Allison (room, science museum) 009 (1280x960)

The downside is that the outlines are hard to apply because they are so flimsy, but once you get them up, they look nice:

-Allison (room, science museum) 010 (1280x960)

Here are some more pretty decals I got at Hobby Lobby. -Allison (room, science museum) 008 (1280x960)
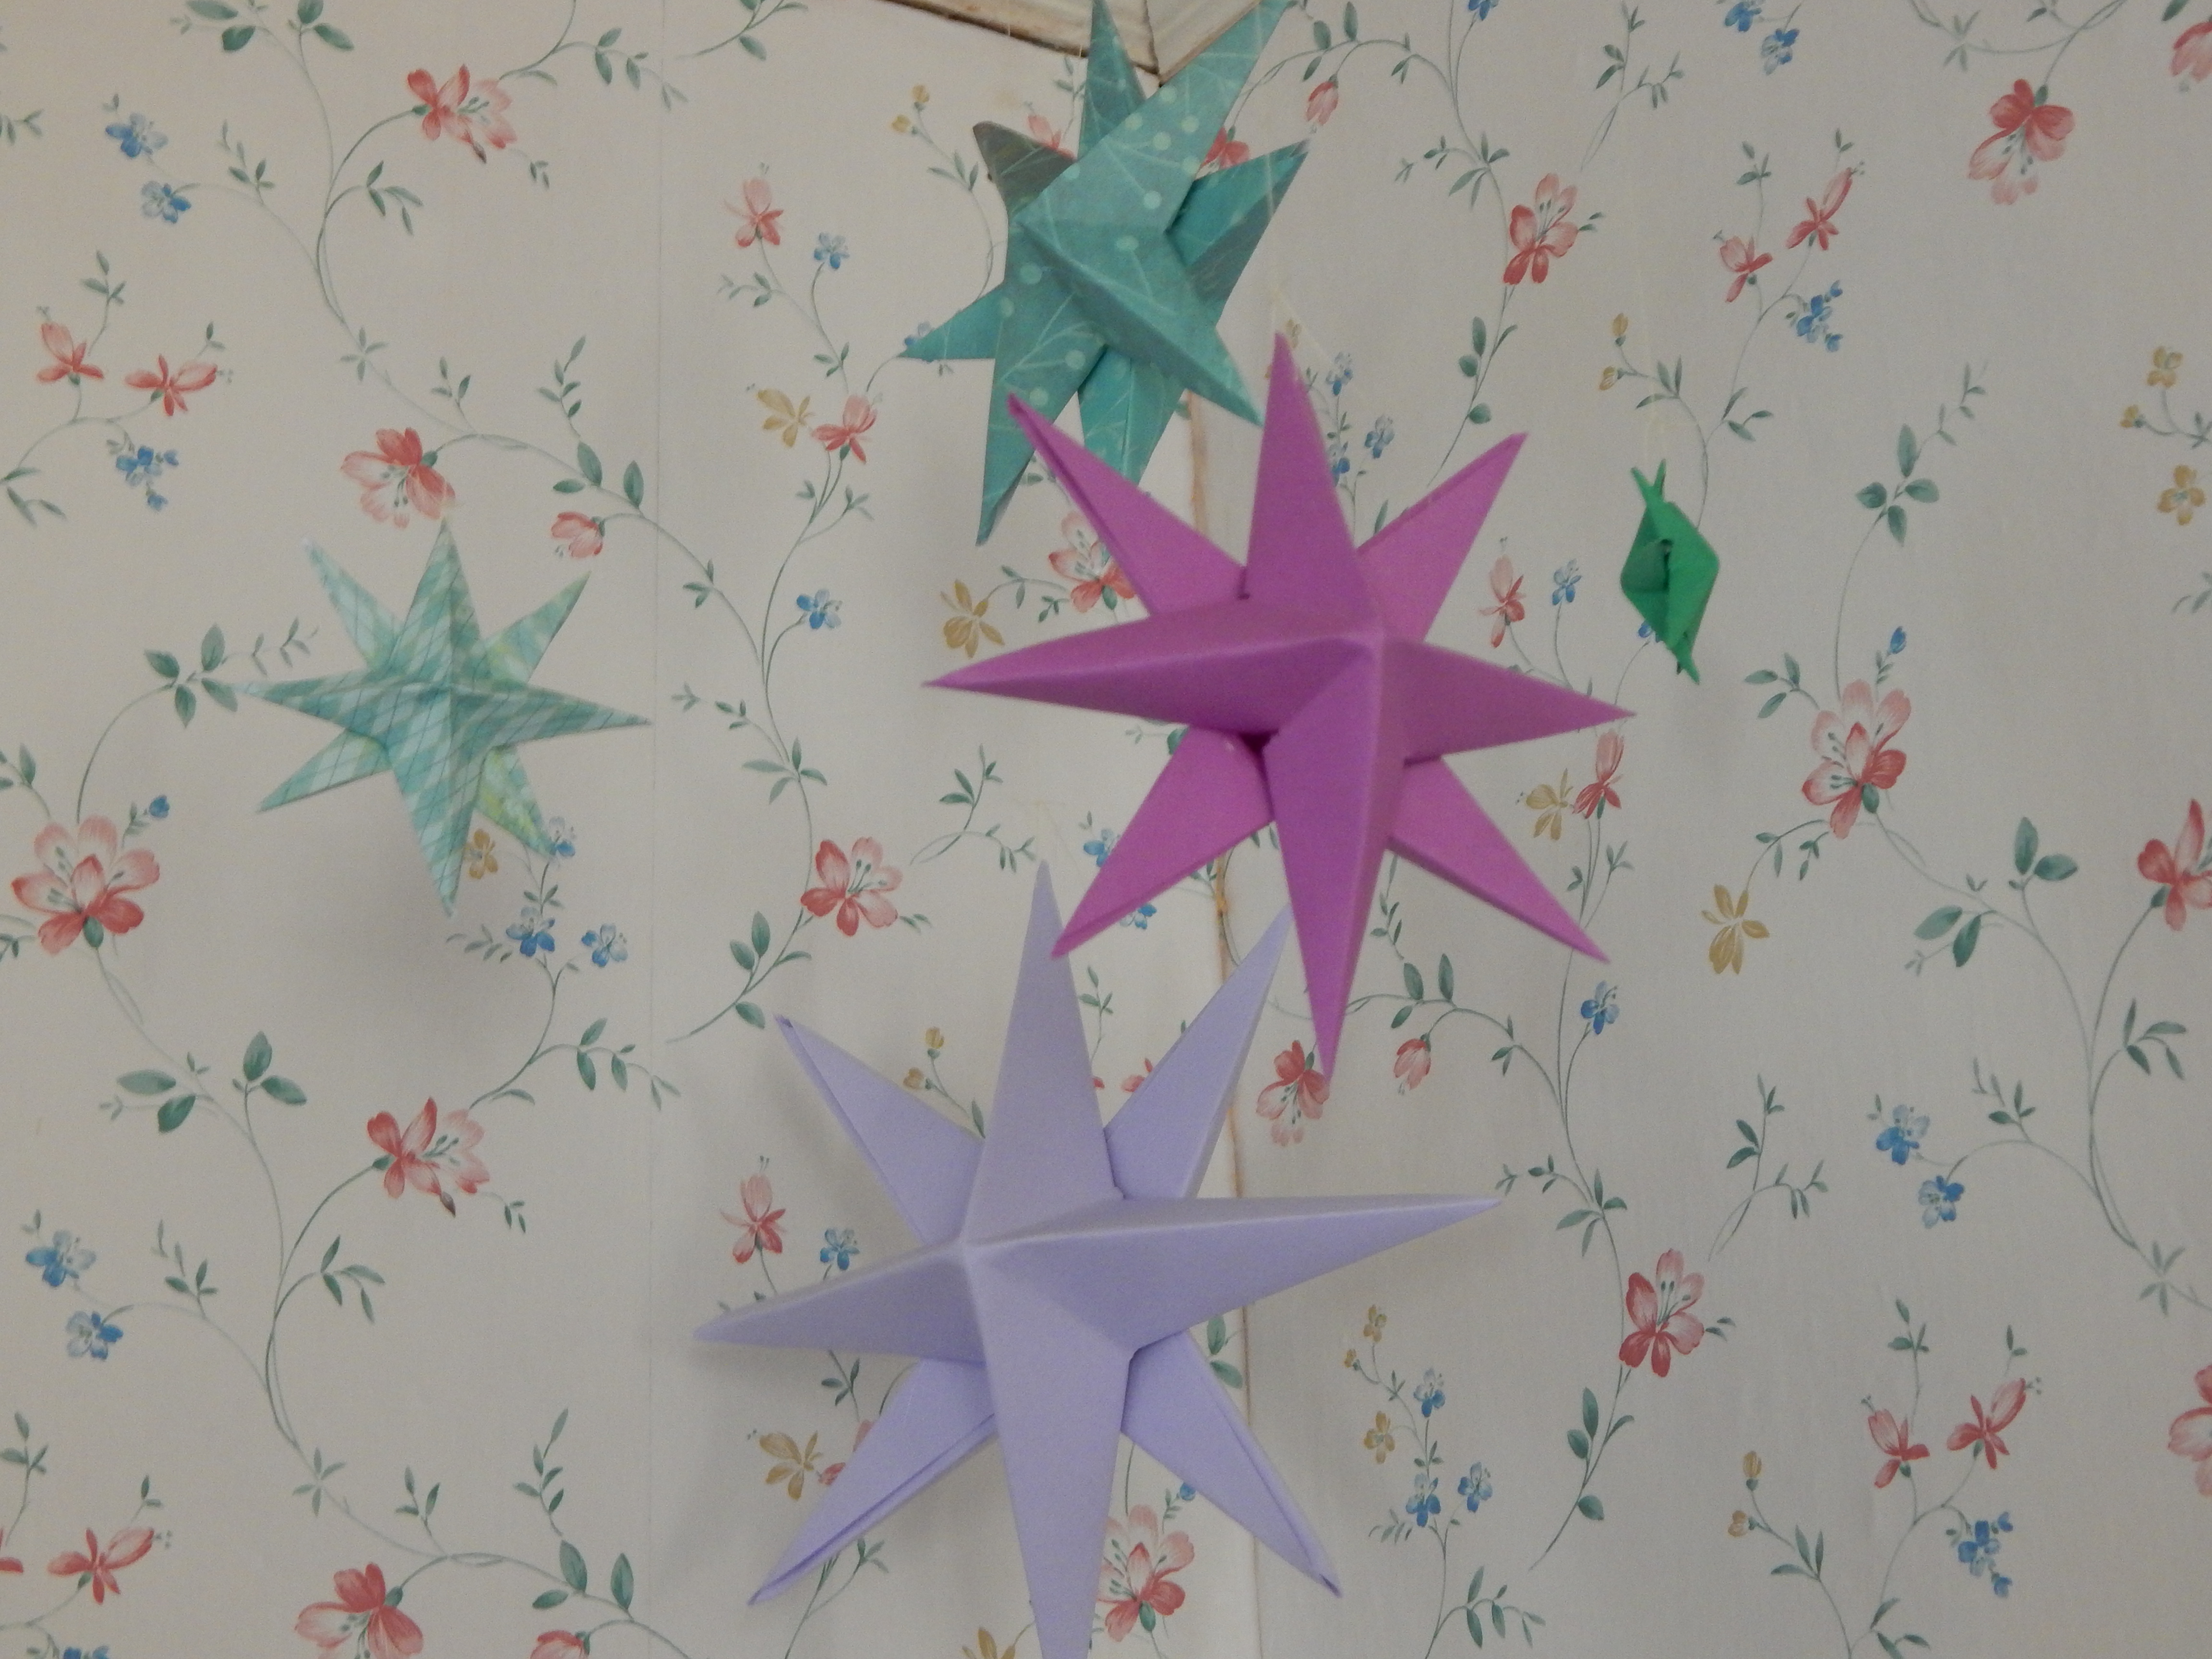
We put these in one corner of our “book nook.”

-Allison(Jinx & bunnies, room) 015 (1280x960)

We have started collecting bird figurines for our shelf. We also made these neat clay transfers. You basically print out a picture (it works best to use a laser printer), smooth it out onto a sheet of clay, and bake it between two ceramic tiles.

-Allison(Jinx & bunnies, room) 034 (1280x960)
My parents gave me the bird jewelry holder for Christmas, and the bird picture for a long-ago birthday present. 🙂


-Allison(Jinx & bunnies, room) 026 (1280x960)
My collection: I got the pretty peacock candle holder for a birthday, and I made the stuffed owl, the transferred bluebird, and the clay swan. For the clay swan, I transferred a swan image onto a polymer clay oval, traced over the lines with thin logs of purple clay, and added clay embellishments and flowers.


-Allison(Jinx & bunnies, room) 027 (1280x960)
Megan’s collection: She got the owl for a birthday present, she made the cute little robin clay transfer, and bought the little gold birdie at Hobby Lobby.

And I guess we’re done now. I hope you enjoyed it! Do you like Hobby Lobby? (Hint: the answer is YES! XP)

***Allison***

Woodland Birthday Party

My sister Megan’s birthday was yesterday!  She chose to have a woodland themed party with hedgehogs as the “life of the party.” (Hee-hee!)  I thought I’d go through the decorations for the party and how we made a few of them.  (Megan didn’t especially want to do all the decorations, so I got to make most of them – hooray!)

The colors of the theme were green and brown.  For the decorations, I hung up twirled green and brown streamers and green balloons.

-Allison(Megan's B-day Party) 052

I also drew and cut out some forest floor type things like toadstools, grasses, and pebbles.  It would have been better to make the toadstools out of red paper, but we didn’t have any. 🙂

097

Meet Mr. Hedgehog, the gift guy.  I designed him; Megan painted him.  Megan also had the great idea to use him to show the guests where to put gifts.

-Allison(Megan's B-day Party) 053

The table was really fun to decorate.  We got the tablecloth, plates, napkins, and cups at Party City (which was FUN, by the way!).  My mom made the cute cake, I made the hedgehogs, and Megan made the labels for the “Dew Drops” (water) and “Twigs” (pretzel sticks).  I found the ideas for twigs, dew drops (which was originally named “Morning Dew”), and hedgehogs from Pinterest.

-Allison(Megan's B-day Party) 054

-Allison(Megan's B-day Party) 055

-Allison(Megan's B-day Party) 056

Here’s a tutorial on how to make this cute little hedgehog for snacking on. (Poor guy!)

-Allison(Megan's B-day Party) 051

For one hedgehog you will need

**************************************

A pear

Whole, black olives

Grapes

Toothpicks

Whole cloves

**************************************

First, peel the top of the pear for the hedgehog’s head.

-Allison(Megan's B-day Party) 046

You can try sticking a whole olive on the tip of the pear, but it worked best for me to cut the olive in half.

-Allison(Megan's B-day Party) 047

Stick two whole cloves above the nose for eyes.

-Allison(Megan's B-day Party) 048

Now make him prickly!  Skewer a grape onto a toothpick, then stick the toothpick into the unpeeled part of the pear.  I put the skewered grapes on in rows.  I started with a row next to the head, then progressed all the way back to give him the proper rounded shape.

-Allison(Megan's B-day Party) 051

Such a prickly little guy!

Now for the party favors.  I like to make things out of polymer clay, so I made clay hedgehogs for favors, along with little bags to put them in.  At the end of the party, the guests each got to “adopt a hedgehog.”

-Allison(Megan's B-day Party) 001

-Allison(Megan's B-day Party) 003 -Allison(Megan's B-day Party) 004

So there are a few ideas for a woodland party.  I hope I’ve given you some inspiration!  (And thanks for letting me decorate for you Megan!)

***Allison***

Room Switcheroo

My sister Megan and I switched room’s with my younger sister Carmen.  We got a bigger room and… we got to decorate it!  We might paint the room later, but for now we have flowered wallpaper.

This is my little corner:

-Allison(rooms) 007

Megan and I both made stars to hang near our beds.

-Allison(rooms) 001

I also made this little circle-doodley thing, because I love to doodle.  I think I’ve seen something like it on Pinterest, but I didn’t pin it.

-Allison(rooms) 008

I hung my arm-knit scarves on my bed post.  They are color coordinated, of course, because I just LOVE it when everything is color coordinated. ☺ And I did pin this to my Pinterest board here.  You should seriously make one of these.

-Allison(rooms) 003

A buttoned initial. (I ♥ buttons!)

-Allison(rooms) 004

My dad hung a quilt I made a few years ago over our dresser, and it doubles as a decoration and a bulletin board.

-Allison(rooms) 005

Can you tell what my favorite color is from these pictures?

So, yeah, I’m really enjoying my new room.

***Allison***

Hot Glue Snowflake Window Clings Diy

These really look like snowflakes (well, giant, oversized ones) because of the color of hot glue.  They are very easy to make and just take a few supplies.  Let’s get started!

You will need:

*********************************

Hot glue gun (with hot glue)

Parchment paper

Sharpie (optional)

snowflake pattern to trace (optional)

*************************************

-Allison (hot glue snowflakes) 014

There are several different ways to do this.  You can either

1. Draw a snowflake directly onto the parchment paper (the sharpie lines will show up on the finished snowflake)

2. Print out a simple snowflake drawing from your computer and place it under the parchment paper

3. Just use hot glue to make a snowflake freehand.

What ever way you do it, the basic idea is to make a snowflake by squirting out hot glue onto parchment paper and letting it dry.

-Allison (hot glue snowflakes) 017-Allison (hot glue snowflakes) 025

Since it is hot glue, it won’t take long to dry (YAY!).  If you want, you can sprinkle some glitter over the snowflake before it dries.  When you’re sure the hot glue is dry enough, carefully peel it off the parchment paper.  You may need to remove those annoying hot glue strings too.

To activate the cling, turn it upside down in the palm of your hand and run it under water.  Gently shake the water off, but don’t dry it off.  Press the snowflake to a window.

-Allison (hot glue snowflakes) 040

The water helps it stick to begin with, but even when the water dries, the snowflake stays on.  You can also make little swirls, dots, and other snowy doodles to go along with your snowflakes.

Make a whole blizzard!

***Allison***