The Art Lab, Episode 31: Erase Artist’s Block

erase artist's block

WOOHOO Art Lab is back! I’m so excited to show you guys the post for today: 20 simple art prompts to help you erase artist’s block. 😀

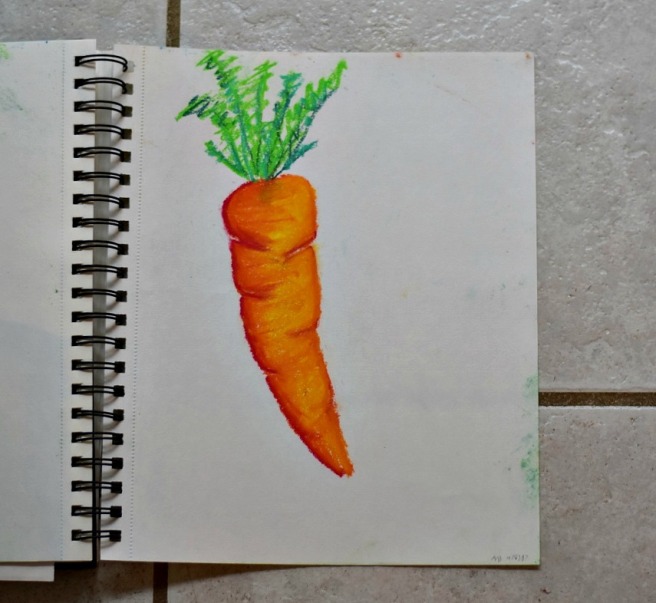
Alright. So I’m going to give you the art prompts, explain each one a bit, and show you some of the art I’ve made using the prompts. Quite a few of these work especially well for ATCs, but you can use your sketchbook, a canvas, whatever! Ready?

Go.

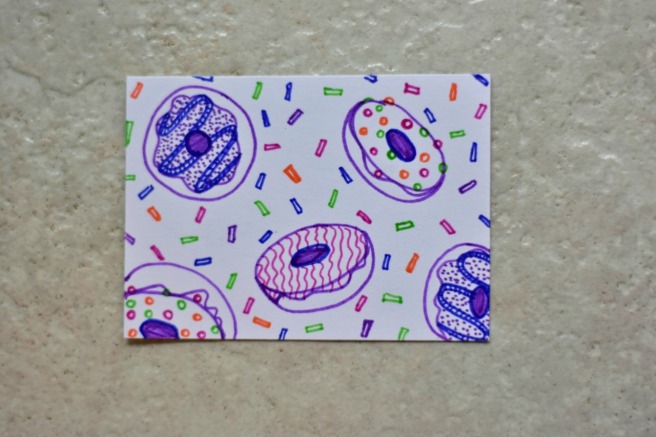
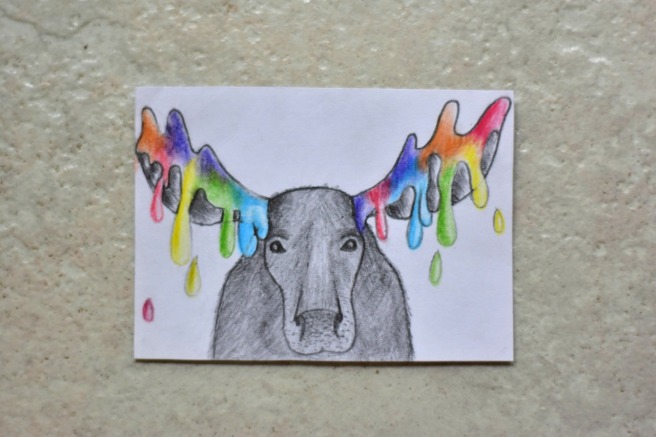
  1. Draw a colorful black and white animal. Because art is great for showing things you never see. Paint a colorful panda, zebra, penguin… skunk. Have fun. I made this ATC ages ago…DSCN8577
  2. Draw your favorite music. Put on your playlist and draw what you hear. What color is the song? Blue, yellow, black, pink? Is it a soft, wavy line or an angry spiky one? Draw three or five of your favorite songs stacked on top of each other and frame it.
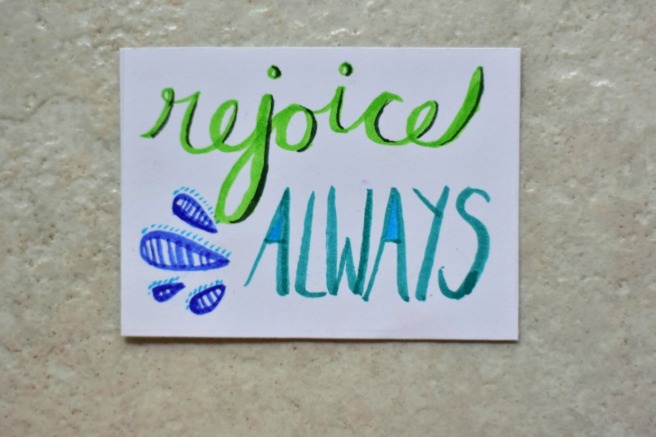
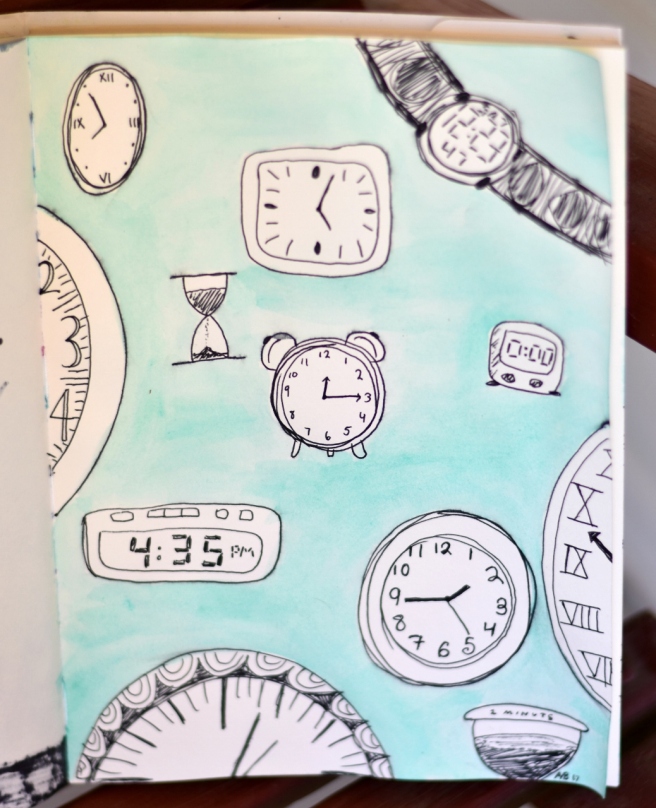
  3. Paint a pretty background and write a word/quote on top. Super simple, super pretty. I like to use watercolor and black or white gel pen. Look up pretty fonts on Pinterest if you like. art 4
  4. Use a white gel pen to doodle on black paper. This is SO satisfying and fun! I did another (rather short) Art Lab post about it here.
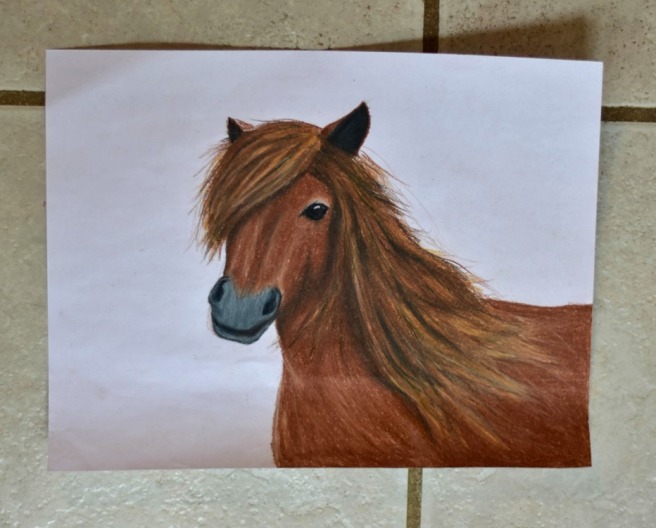
  5. Draw a huge picture of a tiny thing, and vice versa. A crumb, a bug, a part of your fingerprint… fill the whole page and draw in lots of detail. On the other hand, how small can you draw an elephant that still looks like an elephant? I know cats aren’t exactly huge, but I did draw them tiny. art 5
  6. Pick three markers without looking and only use those for a drawing. If you watch art videos on YouTube, you may know this as the Three Marker Challenge. 🙂 Somehow only having limited colors seems to kickstarts your creativity.
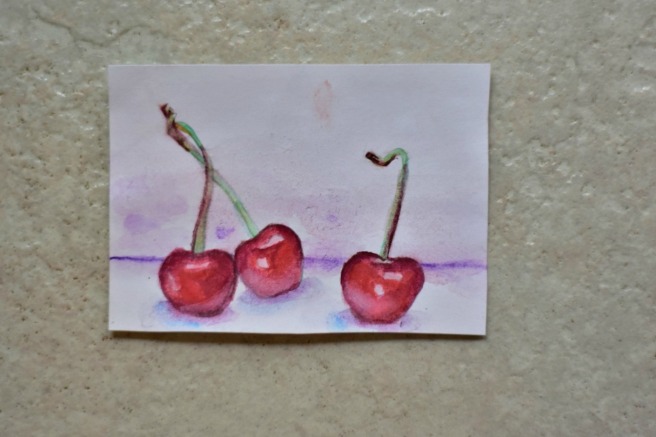
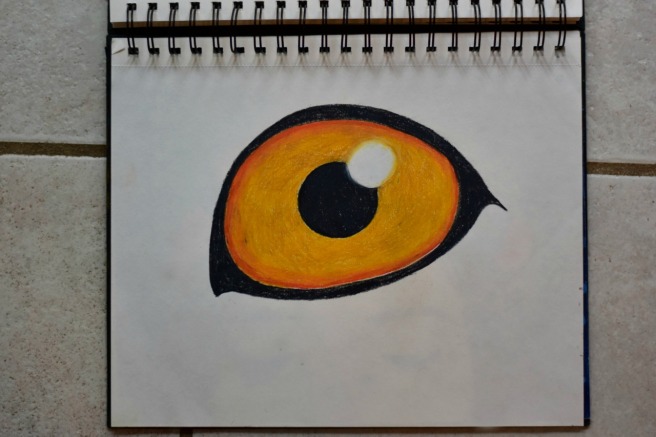
  7. Draw a close-up of a tiny detail of something. The stitching on your jeans, your dog’s nose, the center of a flower… I’ll bet a collage of several close-ups would look really neat! Like those mystery pictures in the backs of magazines. It’s also fun to draw several close-up views of one object: your cat’s eye, paw, nose, ear, whiskers, and put them together.
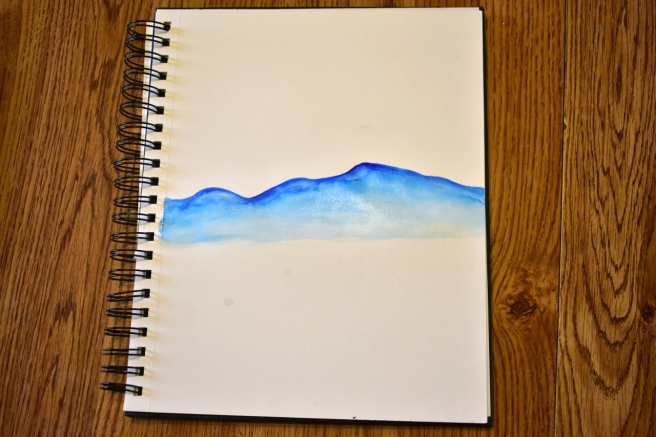
  8. Paint something by not painting. Negative space is fun to play with. I think watercolor is especially neat for this technique. It works well to paint the whole page with water except the silhouette of what you’re drawing, then swirl on some paint. What do you know, another cat.art 3
  9. Draw your dream house and decorate it. Or your dream bedroom, or craft studio, or kitchen. Who knows, this drawing might come in handy when you get a chance to build it!
  10. Close your eyes and scribble. Turn it into a drawing. This is a super fun and simple prompt, which I also made a post about here.
  11. Draw a silhouette with a galaxy behind it. Actually draw the galaxy first, but you know. And guess what? I ALSO made posts about how to draw galaxies! What do you know. There’s one here and one here. Once you’ve made the galaxy, draw a silhouette of a wolf, a person, a tree – the possibilities are endless (maybe)! Or you could draw a galaxy silhouette.art 8
  12. Draw on something unusual. A leaf, a crumpled brown paper bag, yesterday’s newspaper, an old book page, etc.
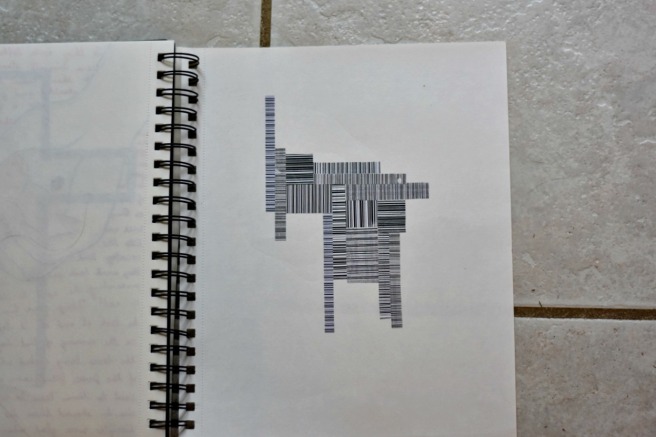
  13. Use words instead of lines to draw. Draw yourself a story. Instead of drawing lines, write tiny words. Instead of coloring something in, color it in with different colors of words.
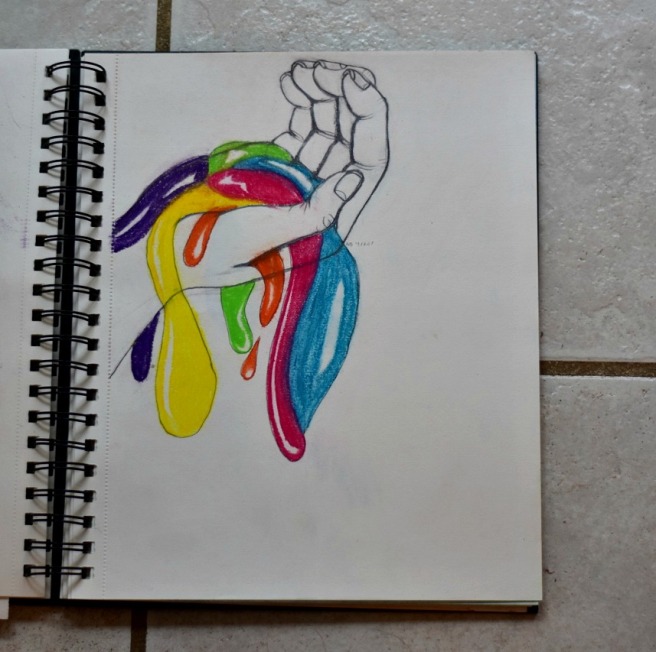
  14. Draw a picture of what nothing would look like if it was something. I… don’t even know if this is possible. If you do it, I WANT TO SEE IT!
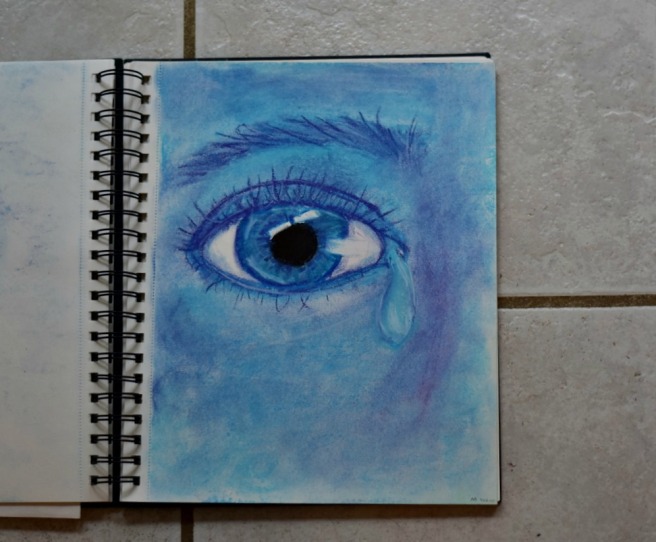
  15. Draw what smiling and crying feels like. Don’t actually draw someone smiling or crying. Use colors and lines (and objects besides people or facial features) to convey the feeling.
  16. Fill up a page with different versions of the same thing. Draw a hedgehog twenty different ways. Draw ten different cats. Fifteen different trees. It’s fun. CPC 3 (1038x1280)
  17. Draw with a non-art supply. Try using coffee, makeup, dirt, nail polish, smashed berries, food coloring, or whatever else you can find.
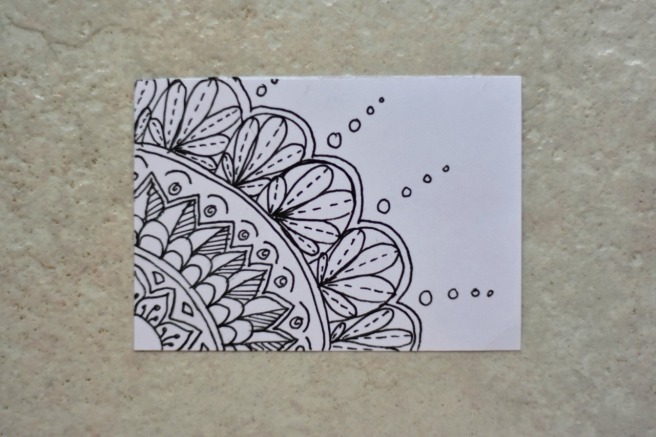
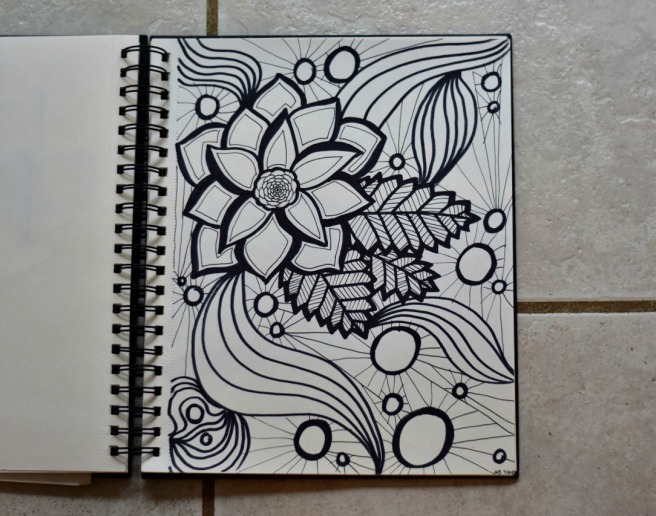
  18. Cover a page in lines, circles, or patterns, and watercolor on top. Another super simple but super pretty prompt! Just keep in mind that if you draw with a pen, you’ll need to let the ink dry before watercoloring over it. art 2
  19. Paint yourself without using lines – only colors that describe you. Go for sort of an impressionistic style here I guess. Use blotches of color instead of smooth lines, just for interesting.
  20. Fill a page with watercolor swatches and doodle on top. SO FUN! I got this idea from Pinterest here. And this is mine:

art 1

That was fun! I hope these ideas inspired you, dears. Which one was your favorite? Would you like to see more art prompt posts like this?

If you drew something inspired by these prompts, I’d love to see it! Click here to see how to send in a picture of your art and help us fill our gallery over at the Art Lab blog.

Also, here’s an image especially made for pinning if you want to save this to Pinterest for future reference. 😉

art block pin

Thanks for reading, and have fun! 😀

***Allison***

Advertisement

The Art Lab, Episode 25: Art Inspiration

Heh heh, so some of you are probably like, “What?! She just published this post!” Well yeah, I did… but I didn’t mean to. XD I accidentally hit the publish button before I finished. Oops. 😛 Now that I have explained all that, let’s get on with the real stuff. 🙂

Guys, guys, guys, look! It’s the 25th Art Lab post! WOOP WOOP! And today I’m doing something a little different, to celebrate. Okay, not really to celebrate – it’s mostly because I wanted to, but we can say it’s to celebrate, right? 😛 Ahem. As I was saying before I so rudely interrupted myself, today I’m just going to post some pictures of some of my recent art rather than using someone else’s art as inspiration. I’m always inspired when I look through bloggers’ art posts, so I hope this post inspires you to sit down and start drawing! 😀

First up I have a few ATCs. (If you don’t know what Arist Trading Cards are, I highly recommend you click here to find out! They’re so much fun!) Some of these are recent and some are not so recent.

YAY doughnuts! Yummy. I really like this one. 🙂

art (21) (1280x853)

I did these watercolor cherries from a tutorial on Pinterest (which you can see here). They turned out great – if you don’t look at the cherries on the tutorial, that is. XD

art (22) (1280x853)

I love this quote/verse thingy, and have a canvas with these words on my bed.

art (23) (1280x853)

We learned about geraniums in Nature Study, so I decided to draw one on an ATC.

art (24) (1280x853)

I made this ATC ages ago, but I still love it. 🙂

art (25) (1280x853)

This is the first page (besides the title page) in my new sketchbook. Eh, could be better, but it least it’s welcoming. XD

art (15) (1280x853)

It’s a rainbow lion! It didn’t turn out quite like I had hoped, but I still like it.

art (11) (1280x853)

I liked drawing the lion’s eyes so much that I did another one on a separate page.

art (12) (1280x853)

Ahhhh, I love this one! I wish our roosters looked this pretty. 😛 I actually just finished this today with my new Prismacolor colored pencil set. It took me several days to draw this, but I’m very pleased with how it turned out! (And in case you’re wondering, I did look off of a photo.)

art (16) (1280x853)

This is another of my absolute favorites! On my birthday I decided I wanted to draw a fox. I had a picture in my mind, and what do you know – I got it down on paper and it actually looked good! XD I didn’t copy anything but I did look off of some photos and drawings for reference. She’s such a cute wittle thing, don’t you agree?

art (17) (1280x853)

I drew this for my horse-loving friends, and for those of you who requested a horse drawing. Here you go, girls!

art (18) (1280x853)

Here’s another ATC which I drew a long time ago. I think it’s so funny but neat. XD

art (19) (1280x853)

Another mandala ATC…

art (20) (1280x853)

I drew this for art class because my art teacher wanted me to experiment with an art medium I’d never used before. I was like, “Um… I can’t really think of any art supplies that I have at home but have never used.” XD Finally we came up with artist’s pastels! It was fun to experiment, but I don’t especially like how easily they smudge.

art (5) (1280x853)
My little sister thinks this picture is so weird. XD


art (4) (1280x853)
And this one too. 😛 Well they’re kind of SUPPOSED to be weird, so…


art (6) (1280x853)

I haven’t finished this one yet and probably won’t for a long time, but I wanted to show you guys how it looks so far. I had the idea to make a collage of barcodes, and I think it’s looking really neat! I’m only using the ones off of receipts, so it’s going to take a while to collect enough to cover the whole page. Heh heh.

art (7) (1280x853)

A random Sharpie doodle…

art (8) (1280x853)

I love how this one turned out. I’m kind of proud that I could get the highlights to look fairly realistic because I usually have trouble with them. 😛

art (10) (1280x853)
Just in case you were wondering, my little sister LOVES this one. XD

We were playing around with charcoal in Art Class, and this is what my practice page turned out like:

art (2) (1280x853)


Here’s my actual drawing made with charcoal:

art (3) (1280x853)

And last but not least, one of my very favorite favorites, a picture I drew of Bethany from a photo Loren’s gorgeous post. I just LOVE how it turned out! The background was inspired by a super good teenage artist named Sydney Nielsen that I follow on Instagram. She also has a YouTube channel here. You should check it out – she’s really amazing!

art (13) (1280x853)

Are you inspired yet? XD I hope so! Which was your favorite piece of art from this post?

Also, I wondered if you have any drawing requests for me! I’m not guaranteeing I’ll draw whatever you ask, but I’d sure love to hear your suggestions and I’ll definitely try some of them!

Thanks for reading, dears, and have a lovely day (or night). ♥

***Allison***

The Art Lab, Episode 24: Watercolor Mountains

Oh my, I think it’s past time for an Art Lab post, don’t you? Today I want to show you a beautiful piece of art and some art I made inspired by it. Here’s the prompt:

Art Prompt:

Blue Ridge Mountains Watercolor Print / Nature от RainStain:

{via}

Ohhhh isn’t it gorgeous? I love it! And in case you don’t have mountains near you to look off of (you poor things XD ), I’ll give you a picture that I took of the real thing. (If you’re curious, it’s from this post.)

Photo Prompt:

sunset 3 (1280x960)
I love this. ♥


 Now are you ready to break out the watercolors? Here’s how I made my mountainscape…

Step 1:

mountain 1 (1280x853)

(The proper way would probably be to start with the background, but I started with the mountains because I didn’t know quite how far back they would go. 🙂 )

Use a really deep blue for the foreground mountains. Paint an irregular, medium-wet line of dark watercolor and draw it downwards, lightening it with more water as you go. (Okay that sounded really complicated, but basically just play around with it until you get dark at the top and light at the bottom. XD )

Step 2:

mountain 2 (1280x853)

Use a different, lighter blue for the mountain ridge behind it, and do the same thing. Keep going until the mountains fade away to barely visible. I also decided to add a few more ridges in the foreground, like so:

mountain 3 (1280x853)

Step 3:

mountain 4 (1280x853)

Next you can work on the hills. Use a few different greens, and gradient your color from dark at the top to light at the bottom like you did with the mountains. Looking great!

Step 4:

mountain 5 (1280x853)

Now for the sky. Again, start with a dark blue at the top and fade it downwards (are you starting to see a theme here? XD ). I dabbed off some of the paint with a paper towel to make puffy clouds.

And you’re done! So pretty! 🙂

mountain 7 (800x800)

I also made an ATC kind of like my painting but without the hills.

mountain 8 (1280x853)

So, do you like this idea? Which was your favorite, the main painting or the ATC? Do you have mountains where you live?

To see more art inspiration like this, check out the official Art Lab blog right here. If you made a piece of art inspired by this post, we’d love to see it! Click here to see how to enter your artwork into our Art Lab gallery.

Thanks for reading, my friends!

***Allison***

The Art Lab, Episode 23: How to Draw a Realistic Eye

I am so excited to show you guys this episode of Art Lab! As you may know, I absolutely love drawing and photographing eyes, so I thought this would be a fun post to do. 🙂

Art Inspiration:

The inspiration for today is this amazing tutorial (also shown below). The end result seriously looks like a photo, doesn’t it?

The reflection is what I have trouble with...:

AHHHH, I love it! Mine looks more like a drawing and less like a photo, but I’m still quite pleased with how it turned out. 😀

DSC_0627 (800x533).jpg

It was sooo much fun to draw! Today I’m going to show you a few tips and tricks I’ve learned from this and other tutorials and help you avoid some common mistakes. Now I am NOT saying I don’t make mistakes, because I do, and plenty of ’em! When you make a mistake you can’t fix, sometimes you just have to figure out what went wrong and start over. I know you’ve heard this about 2 billion times in your life, but seriously: if you want to get good at something, art included, just keep practicing! Sometimes you have to fail once or several times before you succeed.

Mistake #1: Eyelashes

Eyelashes can be incredibly hard to draw, am I right? They give me a lot of trouble sometimes. But here are some things to keep in mind that might help.

  • Most people’s eyelashes are not perfectly straight and thick like American Girl Doll eyelashes. It’s a sad fact of life, my friends. (Actually, maybe not so sad – that would be kind of creepy. XD ) Look in the mirror: eyelashes cross over each other and are often bunched together in little clusters.eye 11 (1280x853)
  • Lashes aren’t as thick and dark at the top as at the bottom. Press your pencil down hard when you start at the base of the eyelash and not as much as you curve the line upwards.
  • Peoples’ bottom set of eyelashes can actually be pretty long (or not, depending on the person). Draw them lighter and more sparsely than the top set. And again, they aren’t perfectly straight and thick. I think eyelashes in the bottom set cross over each other especially much. (Look at the “Art Inspiration” at the beginning of this post for an example.)

Mistake #2: The White of the Eye

Often people leave the white of the eye just that – blank white. But the truth is, your eyelid and eyelashes cast shadows on it, so it’s not perfectly white. Shade and smudge around the inner edges of your eye to make it really pop.

eye 12 (1280x853)

Now that you know what to avoid, I wanted to do a little tutorial for you guys. I already showed you the super amazing, super realistic tutorial for the art inspiration, but it was a bit hard to follow, wasn’t it? This tutorial should be easier to follow, even if it’s not as amazing. 😉

Step 1: Draw the shape of the eye. It’s a rounded almond shape, wider or thinner depending on the person. Don’t forget to add a rounded triangle thingy for the tear duct.

1

Step 2: Draw the iris, pupil, and highlight. (I just did a simple circle highlight for this tutorial.) Don’t draw the iris as a complete circle because you can’t see the whole iris in real life unless you’re opening your eye really wide. Sketch out the pupil until you find a satisfactory size – a too-small pupil can end up looking kind of weird.

Now add a curved line for the eyelid on top and another curved line at the bottom.

3

Step 3: Every person’s iris is different, but for this tutorial I went with sort of a starburst pattern. It’s okay if it isn’t perfect because it’s not always perfect in real life! Add a bunch of irregular dark lines coming out from the pupil.

5

Step 4: Color in the pupil the darkest you can and try to pull out the dark pigment into those lines surrounding it.

6

Step 5: Ooh, this is an exciting step! Finish the iris by adding more dark, inward pointing lines around the outside of the iris. Shade the top of the iris darker – remember those shadows! I smudged the pencil a bit in the middle of the iris where the starburst was to blend everything together.

7

Step 6: Woohoo, looking good! See what a difference those shadows make? Shade the top of the eye, the corners of the eye, and the tear duct. Smudge the pencil with your fingers to smooth out the shading.

eye 8 (1280x853)

Step 7: Add the eyelashes, and ta-daa! For extra credit and realism, you can shade the skin around the eye too, which I didn’t show here. (Note: Oops, the eyelashes didn’t turn out as well as I had hoped. I think I should have made them darker, longer, but not as close together. Remember what I was saying about making mistakes? Heh heh. XD Oh well, better luck next time!)

9

And there you have it! I hope this post was helpful to all you wonderful artists out there. 🙂 Do you have any tips for drawing eyes to share with me and the other readers?

Happy drawing! 😀

***Allison***

P. S. If you want to see another fun tutorial for drawing eyes, be sure to check out Anika’s post here! Her tutorial is super easy to follow (unlike mine maybe, heh heh) and shows you how to draw pretty, colorful eyes with pen and watercolors. I especially love all the expressions she did with the eyes at the end. XD 😀


Art Lab, Episode 21: Wuzzing Contest

the-wuzzing-contest-poster-800x800

Yay, it’s time! I’m so excited to show you guys all the creative entries for this contest. They were all so fun to see!

So here’s how this will work. I’m going to show you each contestant’s entry and their Wuzzing’s profile, then at the end of the post you can head on over to The Art Lab blog to vote for your favorite Wuzzing. Please judge fairly and don’t vote for your own Wuzzing! If everyone did that, it would kind of defeat the purpose. 😉

Alrighty then! (Just so you know, I’m not going in any particular order. 😉 )

Danielle’s Wuzzing

danielles-wuzzing

Profile:

His personality: He is a gentle creature. He is always sleepy and loves to eat scrumptious bugs. He is not a big fan of viciousness, but he defends himself spectacularly well when he has to. He is a bit prideful and vain when it comes to himself. Actually, he is very prideful and vain when it comes to himself.

What he looks like: He is only a foot tall on all fours with tall, silver horns to make him seem a bit bigger. He has tiny, fuzzy, silver wings that are tipped with sharp black points. His eyes are silver and are as big as a baby cows’. His snout is similar to that of a cow, but his sense of smell is fifty times stronger (to smell those scrumptious bugs). His ears are as big as a lion’s and can hear for miles around. He has shiny metallic hooves and a long fuzzy, silver tail that is tipped with a tiny flap. He is a deep metallic indigo blue, with a black belly.

Favorite color: Indigo blue (obviously)

Favorite food: Moths, especially the fuzzy ones, but he also likes glazed donuts.

Favorite Wuzzing: Himself (Duh)

Very creative, Danielle! I love his sleepy expression. XD

Clara’s Wuzzing

claras-wuzzing

Profile:

Name: Wuzzing

Height: 5 inches tall.

Hobbies: Bouncing off of things, exploring, and making art

Favorite food: Mini marshmallows

More Info: Wuzzings are often found hiding in human homes – making messes, hiding under beds, and slipping in and out of sight. When socks and buttons go missing, it’s most likely the case that the Wuzzing has been at work. They are extremely clever creatures and can create total havoc in your home if they wish to do so.

Despite the Wuzzing’s mischievous nature, they can make surprisingly loyal and lovable pets if tamed correctly by a human. Here is what you must do:

The trick is to provide plenty of hiding places for your local Wuzzing. Empty drawers, dusty shoe boxes, and large purses make excellent hiding places.

Once you have figured out which hiding spot he prefers, make a big show of leaving your Wuzzing’s favorite food (mini marshmallows) in front of his hiding spot while being sure he is watching you. If you step back and stand very still, he will venture out to eat, keeping his eyes on you as he munches. Once he is finished, he will retreat into hiding.

Repeat this process for about one week, standing a little closer to his hiding place while he eats each day. Eventually, you should be able to get him to eat right out of your hand. Soon, he will come bouncing out to meet you, climb into your pockets, and ride on your shoulder. At this point, you can choose to create a pillow fort for your Wuzzing to live in, as this is their preferred lodging. Your Wuzzing will have lots of fun bouncing around inside of his squishy fortress. Wuzzings don’t make much noise, but they do make happy squeaky sounds if you scratch them behind their horns. They make ideal pets in small homes.

Wuzzings love to travel and can fit comfortably in the pocket of a backpack or inside a purse. Your friends will be shocked and amazed when you show them your tiny, fuzzy pet! Just be sure to keep lots of marshmallows handy – Wuzzings have an appetite not unlike that of a dinosaur.

If you’ve noticed odd noises, missing buttons, or the strange disappearance of all of your marshmallows – take a look around your house and see if a Wuzzing has decided to call it home!

IT IS SO FLUFFY, CLARA! XD

Arunima’s Wuzzing

arunimas-wuzzing

Profile:

Name: The Wuzzing

Description: Tiny creature with white fur with teal and turquoise edges. It has little lavender hearts on it’s ear. It has yellow arms and legs.

Location: Flower Gardens

Diet: Grass

Sound: Makes a sound like wzzz wzzz 

Hops around

Safe to keep as a pet

Magical Abilities: can hop very high and can produce light

Aww, your wuzzing is so sweet, Arunima!

Mukta’s Wuzzing

muktas-wuzzing

Profile:

Meet Penelope, my hand-painted Wuzzing.

She loves squishing and petting, but if you poke her in the eye, I can’t guarantee yours will stay in its socket. 

Penelope’s natural habitat is anywhere warm and humid, but if your place is cold, you might as well reserve a warm corner in a cupboard for her. Her favorite food is boiled algae or ostrich eggshells, but she isn’t very fussy about food so any leftovers will do. Penelope is patient but stubborn. She may look like a harmless fuzzball, but if you put a toe out of line you may find your finger bit clean the next moment.

It’s sooo adorable and squishy, Mukta! I want to squeeze it. XD

Mirra’s Wuzzing

mirras-wuzzing

(The profile is on the picture.)

So cute, Mirra! I love how you did a completely different take on the prompt.

Allison’s Wuzzing

allisons-wuzzing

Profile:

Habitat: open meadows, near a source of freshwater

Diet: wildflowers (especially buttercups), grass seeds, wild strawberries, mushrooms

Size: 2-3 inches tall

Call/Sound: a soft “wuzz, wuzz” from which they get their name

Description: Wuzzings are tiny, furry marsupials with large eyes and no legs or arms whatsoever. They move about by rolling with their ears tucked against their body and their eyes closed. Adult female wuzzings have a small pouch to hold their babies in, while male and juvenile wuzzings are pouchless. Wuzzings change colors gradually as they mature. When born, baby wuzzings (or fuzzlets) are a deep purple, but they gradually change to blue, then green, yellow, orange, and red. Orange and red wuzzings are rarely seen because wuzzings tend to have a short lifespan. The picture above shows, from left to right, an adult male wuzzing, a slightly younger adult female wuzzing, and a baby fuzzlet.

Wuzzings’ fur serves many uses. Its water repellent quality enables the wuzzing to float on water and so repopulate itself in different areas. It’s also helpful for collecting food: adult wuzzings roll over the flower or mushroom or whatever they are collecting to bring it down to the ground, then grasp it with their small teeth and roll back to their den.

Wuzzings are harmless and fun to pet, but they are extremely timid and hard to catch. If you do happen to find one, approach it softly from behind and scoop it up quickly and gently. The wuzzing will probably curl into a ball to protect itself, but eventually it should uncurl in your hand if you stroke it.

Heh heh. I had a lot of fun making my wuzzing!

Gracie’s Wuzzing

gracies-wuzzing

Profile:

The Wuzzing is a friendly, fluffy creature, who can be found meandering in open fields and meadows. He is quiet and somewhat timid, but very curious. He will happily invade your space if he deems you friendly enough, and is a big advocate of hugs. So if you ever come across a Wuzzing, feel free to skip over and give his soft, furry self a bear hug. Just be warned: he might determine you to be his new ‘bestie’!

I love how unique yours is, Gracie! He reminds me of a fluffy Dr. Suess character!

**********

Weren’t those amazing? And so creative! Whether you win or not, I want you guys to know that I loved them all, and I’m so happy you entered. ♥ I think all the participants deserve a round of applause and a virtual bag of chocolate, don’t you? (Oh wait, I’m a participant too… yay! XD )

And now… are you ready to vote for “Best Wuzzing”? If so, kindly click here. 🙂 (The poll is at the bottom of the post.) Choose the wuzzing you think was the most adorable, creative, or interesting! May the best Wuzzing win! 😀

********

We had a lot of fun with this contest, and I hope you guys did too. Make sure to visit the Art Lab blog on March the 3rd to see who won!

***Allison***

Art Lab, Episode 19: Galaxy Art

galaxy-art-800x800

Hi, guys! Welcome back to Art Lab.

I’m so excited for today’s “art lesson” on how to draw galaxies! I learned this from the lovely video down below which was made by a teenage artist named Sydney Nielsen. She is super good at drawing!

Art Inspiration:

Ahh, so pretty. 🙂 I decided to use a slightly different technique but with the same idea for today’s art.

I started with a black paper, so it would blend in with the rest of the drawing better, but you could definitely use white if you want. I also wanted to try using oil pastels instead of colored pencils, and it turned out very well! So just a note: whenever I say “oil pastels” in this tutorial, you can also use colored pencils like she showed in the video.

Let’s get started!

You will need the following:

  • paper, blank envelope, or ATC
  • oil pastels (or colored pencils – the higher quality ones like Prismacolor work best for blending)
  • white acrylic paint
  • paintbrush
  • white gel pen (optional)

1. Like the video showed, I started with light colors and gradually blended in the darker shades. I used the pink and blue combination because 1.) it looked so pretty when Sydney used them and 2.) there were several shades of each in my oil pastel box. XD

galaxy-1-1280x854
Blech, what terrible picture quality. XD

galaxy-2-1280x854

2. Next I drew in the white sparkle stars. I think this is what makes the piece really special and space-y. 🙂

galaxy-3-1280x854

3. Almost done! Just need to finish the stars yet. Get out your white acrylic paint and start splattering. It works best to get your brush a little wet before splattering the paint, but you don’t have to. Do NOT do this step on your mom’s favorite fuzzy rug or in your best Sunday clothes. Trust me, that will not end well. XD

If you want, add a few more sparkle stars with a white gel pen. I like to do this because they stand out more than the pastel or colored pencil stars do. And you’re done!

galaxy-4-1280x854

Isn’t it pretty?
I hope you enjoyed this episode of Art Lab, dear readers. 😀 Have fun! And like always, if you make some art inspired by this post and would like to share it with us, we’d be delighted to see it! Get the details on how to send to us here, over at The Art Lab blog.

***Allison***

Art Lab, Episode 18: Bring on the Christmas Lights!

DSC_0427 (800x533).jpg

Are you guys excited for Christmas? I sure am! Today I have a fun Christmasy way to decorate an envelope for your pen pal or friend or family. Grab an envelope, fine-tip markers or gel pens, and colored pencils, and here we go…

Idea: Christmasy envelope

  1. Set the stage. envelope-1-1280x960
  2. Hang up the strands. envelope-2-1280x853
  3. String on the lights. envelope-3-1280x853
  4. Turn the lights on.envelope-4-1280x853envelope 5 (1280x853).jpg
  5. Add the lyrics of a favorite Christmas carol.

    dsc_0427-1280x853
    CHRISTMAS BOKEH!
  6. Send it off to make someone happy!

Ahh, I love Christmas lights. They’re so cheery, and really make Christmas feel cozy. Don’t you agree? Do you string lights up around your house? We don’t usually, but this year we strung some on our front porch, and it looks beautiful! 😀

If you made some art inspired by this post, we’d love to see it! Visit our “Art Gallery” page here to see the details. Thanks for reading! 😀

***Allison***

P. S. I have some fun sidebar changes planned… *rubs hands*. XD

Art Lab, Episode 16

Methinks it’s past time for another Art Lab episode, don’t you agree? Quite, quite. 😀

Well, today I have a fun “two-player” art prompt for you to do with a friend or a pen-pal (or of course you could draw the whole thing by yourself).

Art Prompt: Here’s a mandala I really like.

Henna on Canvas by KeepAustinDreaming on Etsy, $40.00:

{from this Etsy shop}

And here is a bunch of inspiration for mandala-type doodles:

50 Hand Drawn Vector Pattern Brushes - Brushes Illustrator:

{via}

Technique: Two-Player Mandala

My pen-pal Grace and I made this mandala together. We took turns adding a section each time we sent our letters until it turned out like this! Isn’t it pretty? 😀pen-pal-mandala-poster

Mandalas don’t have many rules. The basic idea is to create a symmetrical,  circular design by adding consecutive rings of doodles. It’s fun to play with the position of the mandala – you can have it in the center of the page, running off the page, or in the corner, which is what Grace and I did. This is how the mandala looked from start to finish:

pen-pal-mandala

Wow. I realized this post is really short. XD Heh heh, oh well! I hope you enjoyed it, short though it may be! If you made some art inspired by this post, we’d love to see it! Visit this page to see how to help fill our art gallery.

Do you like doodling mandalas? Do you have a pen-pal?

***Allison***

Art Lab, Episode 13

marbling-with-paint

Welcome back to Art Lab! Today I’m going to show you how to make some fun marbled art inspired by some this gorgeous art prompt!

Technique: Marbling

Art Prompt:

Ooooohhhh! Marbled/swirled paint.:

{via}

Wow. Aren’t those marbled canvases just stunning? I’m going to show you how to create your own mini marbled masterpiece using just acrylic paint and a toothpick! (I’m afraid they won’t look quite the same as the canvases above, but… XD 😉 )

Step 1:

Spread a layer of paint on your paper (heavy paper such as cardstock works best). Make your layer nice and “juicy” but not too thick.

allison-002-1024x768

Step 2: Pour or drip a little bit of different colored paint onto your base paint. Here I added a drop of purple and pink-purple (which was already kind of marbled together in my palette).

allison-003-1024x768

Step 3: This is the fun part! Drag your toothpick through the paint to marble it. It works best if you drag through the paint without scraping the paper underneath. I chose to drag from the center point out which made a beautiful starburst pattern!

allison-004-1024x768allison-014-1024x768

Here are a few other marbling suggestions:

Start with four different colors:

allison-009-1024x768

Go wild with your toothpick! Swirl it, drag it, move it up and down and side to side…

allison-012-1024x768

Make a swirly pattern by drawing a spiral with your toothpick:

allison-011-1024x768

Isn’t this neat? I put a drop of white down, then purple, then white again, and dragged the white outwards to make a star-ish shape. Then I dropped some white and purple spots around. Beautiful!

allison-019-1024x768allison-017-1024x768

You can even make marbled hearts:

Start with a few drops of paint close together on a contrasting color…

allison-026-1024x768

Then drag your toothpick through the drops vertically: (Sorry, this example didn’t turn out too well, but trust me, it looks really neat when it works! 😛 The top two hearts are what they’re supposed to look like.)

allison-027-1024x768

If you swirl the paint in your palette before dropping it onto your paper, you can get more blended designs:

allison-024-1024x768

Or you can simply drop paint onto paint:

allison-025-1024x768allison-021-1024x768

allison-025-1024x768

allison-008-1024x768

The paint may take a while to dry since it’s pretty thick. When it’s completely dry you can hang up your canvas/sign your art, or make a “sampler” ATC of your experiments!

allison-039-1280x960

allison-040-1280x960
I especially love how this turned out. 🙂

allison-041-1280x960allison-042-1280x960allison-043-1280x960


What do you think? Have you marbled with paint before? I love seeing how each piece turns out – they’re so different but so beautiful.

***Allison***