Random Farm Photography


Hola, mis amigos! 😀

I hope you are having a lovely weekend. Tonight is family movie night for us, yippee! And we didn’t have to gather eggs today… yippee again! XD Anyway, today I wanted to show you a collection of photos from around our farm. It’s so beautiful here, even in winter. ♥ 😀 Enjoy!

dsc_1393-1280x853

farm-1-1280x853
We call this the Island because it’s an island of trees in the middle of the field. XD


dsc_1395-1280x853
Golden hour. ♥

farm-3-1280x853


dsc_1396-1280x853

dsc_1398-1280x853
Mini nature study/farm lesson: all the green stuff in these fields is triticale (pronounced trit-ih-KAY-lee).
farm-2-1280x853
So pretty! ♥


dsc_1401-1280x853

dsc_1406-1280x853
There’s a cute little picturesque white church just over the hill from us. I wish it was our church – we could just walk right over on Sundays! 😀 But sadly, it isn’t.
dsc_1475-1280x853
The rest of these pictures are from a hidden, rather muddy pond in one of the fields. 😀
farm-8-1280x853
It is quite hard to get into because it’s surrounded by brush and thorns and cedar trees. But it’s so secluded and neat once you get in.


dsc_1472-1280x853

dsc_1474-1280x853
I have no idea what these are, but they’re so cute!


farm-5-1280x853
I also found this weird gall on a cedar tree. Mini nature study lesson again: galls are made by certain insects that secrete a sort of chemical or irritant that makes the branch or leaf puff up into a gall. This protects the larva or insect inside. Doesn’t this one look kind of like a brain? XD


farm-6-1280x853
Ahhh, I love moss so much!


farm-7-1280x853

farm-10-1280x853
The boys were throwing rocks in the pond, and I had fun getting pictures of the splashes. XD


farm-11-1280x853

And thus we come to the end. 🙂 Which picture was your favorite? I hope you enjoyed them! 😀
***Allison***

P. S. The girls and I over at The Art Lab decided to put on a little contest for you guys. 🙂 Your goal is to create an imaginary creature named the “Wuzzing,” and whoever’s Wuzzing gets the most votes becomes Art Lab’s official mascot! 😀 Click here for more details. I can’t wait to see all your wonderful Wuzzings, and show you mine too. XD

How To Edit Photos, Part 2: Adding Effects

How to Edit Photos, Part 2 (1280x1280) (800x800).jpg

Hello, my friends! 😀

I’m so happy that you guys liked the first part of this series! (If you missed Part 1 or would like to review it, click here.) Are you ready for Part 2? Today I’m going to show you how to use some beautiful and fun effects, along with a few tips and tricks as well.

Again, I’m going to be working with the PicMonkey editing site, so go ahead and open that up on your web browser and choose the photo you want to edit. Last time we used the Basic Edits section of PicMonkey, but today we’re going to use the Effects tab. It’s represented as a little sparkly wand symbol on the left hand sidebar of the PicMonkey Editor, just below the Basic Edits tab.

Alrighty, let’s do this!

How to Add Effects

To be honest, I don’t use effects that terribly much, but there are a few very helpful tools in the effects section of PicMonkey – and all of the effects are just so fun to play with! I’m going to edit a picture and walk you through the steps so you can do it too.

Here’s our starting picture. ♥


To begin with, I used the Focal /soften tool. This is a very useful effect, especially if you don’t have a DSLR or if your camera doesn’t allow you to adjust aperture. See, by adjusting the aperture to a smaller or lower f-stop, you can make the subject sharp and in focus while the background is beautifully soft and blurry. Personally, I LOVE this effect, and so do a lot of other people. It looks professional. But if you take photos with your phone or a little pocket camera, it’s not easy to get a blurred background. But that’s why you’re here, my friends! 😉 Let me show you how…

First, find the “Focal Soften” Tab. It’s toward the bottom.

edit-focalsoften-1227x520

If you’re a little overwhelmed by all the different sliders, don’t worry! Trust me, it’s not as complicated as it looks. I’m pretty sure you could all figure it out by just playing around with the sliders, but in case you want some more detailed information, here it is. 😉

The Blur slider simply adjusts how soft or blurry it is around your subject. Tip: Be careful not to add too much blur or the effect will look fake. Focal size adjusts the size of the part of the photo which is sharp, or in focus. Edge Harden determines how distinct the edge is between the blurry and non-blurry parts of the photo. Tip: I suggest normally sliding the edge hardness to zero or close to zero. This provides a smoother, more natural transition. And lastly, the Fade slider controls how much of the whole effect, Focal Soften, shows up on your picture.

Okay, next I used the “Boost” effect.

edit-boost-1215x513

Tip: A little “Boost” can go a long way. You will quickly see this if you play with the slider. I used 8% boost for my picture, just to make the colors more vibrant.

I also added a teensy bit of the HDR effect.

edit-hdr-1216x512

This is yet another effect to use sparingly – although it’s really fun to play with the sliders and create weird and wonderful artistic effects. HDR is basically a more interesting, advanced form of the “Sharpen” tab in Basic Effects.

Lastly, I finished it off with another of my favorites: the Miniature effect.

edit-miniature-1232x523

Now, as you can see by that little yellow crown up there, this effect can only be used by Royale members. Like I mentioned in Part 1, Royale is an upgraded version of PicMonkey that gives you access to more effects, more graphics, and generally more features all around. I have Royale and I love it! You really get a lot of fun and useful stuff when you buy the package, including this Miniature effect. Tip: If you’re not sure whether to get Royale or not, you can always try out PicMonkey’s free trial!

Ahem, getting back to the effect… The Miniature effect is kind of like a combination of Focal Soften and Boost, but it’s a little different from either. For one thing, you can choose whether to make the focal shape linear or circular – in other words, make the in-focus part of the picture a rectangular section or a circular section. For landscapes and such, it works best to use the linear option, but for close-ups and individual objects, use circular. Adjust the Boost and Impact sliders to control the saturation and blur of the effect respectively.

Alright, I’m finished! Here’s the before and after photo: (before on the left and right on the right side)

before-after-2-2-1280x640
So pretty!

I’m going to go through these next photos a little faster now that you know basically how the effects work.

Black and White

The classic B&W. 🙂 I like to use this effect when 1.) my photos are cluttered or have a distracting background, and 2.) when I want the photo to have a special, nostalgic feel. PicMonkey seriously has like 7 different black and white effects, and they’re all a bit different. Tip: Start with classic Black and White, then add some toned-down Super B&W or Tri-X to make your photo pop. If you use the Fade slider on Super B&W or Tri-X without first making the photo black and white, you’ll end up with a bunch of washed out colors instead of true black and white. Which, incidentally, is another neat editing technique of its own.

Here are some black and white photos I edited.

tag

As you can tell, this isn’t completely black and white. If you click the little paintbrush symbol on the Black and White tab, a little menu with even more sliders pops up! Choose “Effect” at the top of the menu to paint on the effect you’re using, and “Original” to erase it off. I erased the black and white effect off of only the cupcakes here, for a fun pop of color.

tag

This is an example of B&W used to create a nostalgic or special atmosphere. Black and white is great for preserving special memories or sweet moments like this. Isn’t is adorable? ♥ (By the way, the original picture was from this post.)


Clone

This is a VERY useful tool, but sadly, it is a Royale feature. 😦 Clone can be used to erase unwanted items right out of a picture – from power lines to trash – as long as the unwanted object is fairly small. Simply click on the part of the photo close to the unwanted object, and start erasing. This tool takes a bit of practice to master, but it is quite helpful once you do. Take this photo, for example:

allisonvacation-52

Gorgeous Niagara Falls, right? And annoying blue people, huh? Well we can whisk those people far, far away with the Clone tool. Ta-daa!

edit-clone

Isn’t that amazing? I simply copied the bushes and rocks from around the people and painted over all that blue.

Other Tools and Tips

  • Two other very useful tools which I didn’t show are “Dodge” and “Burn.” Both are located at the bottom of the Effects page, and both require Royale membership to use. Use Dodge to brighten specific areas of your photo; use Burn to darken specific areas of your photo. Tip: Dodge is helpful when the face of your subject is dark or cast in shadow.
  • A really neat feature which PicMonkey added recently is the ability to create your own effect by layering other effects together. It’s a little button labeled “Save custom effect” up at the top of the Effects tab. But… you guessed it, it’s a Royale feature too. I actually don’t use it that much anymore, but it’s really fun to play with. 🙂 Tip: Mix up your own custom effect to provide the photos for your blog or business with one cohesive (and personalized) look.
  • Be creative! I encourage you to try out all the effects in the tab and play around with the sliders. Even if you don’t have Royale, PicMonkey at least lets you preview the Royale effects.
  • One last tip: have fun with editing, but don’t go overboard! Sometimes over-edited photos are much worse than the original. Think of the effects like make-up – use them to enhance your photo’s natural beauty, not plaster them on until your photo is unrecognizable and fake-looking. Unless, of course, you’re doing an artistic effect on purpose.

Phew! That was a lot to take in, but I hope you guys found it helpful! Let me know if you have any questions about that, and I’ll do my best to answer them. 🙂

Have fun editing!

***Allison***

Generations {A Farm Girl Essay}

Hey, guys! I’m going to do something a little different today. I had to do an interview for school, so I interviewed my mom and my grandmother who were both farm girls growing up. I wanted to compare their growing up years to mine, and show the changes and similarities of their world versus ours.  And, as you have probably guessed, I decided to post my essay on here too – but in a much revised and shortened form (it was 7 pages long originally XD ).

Note: Italic notes in the answers were added for you guys – they weren’t originally in my essay. 😉

I hope you enjoy it!

*****

Gram:

  1. What did you do for fun?

Gram and her siblings loved playing in the creek, but unfortunately the “bloodsuckers” (leeches) loved it when they played there too. “After we played we’d check our toes, ‘cause usually between our toes there were leeches, so we’d pull them off and put them on the grass to die.” Gram said they didn’t think about it too much at the time, but looking back it seems pretty gross. Blech! It sure does! I haven’t encountered leeches very often, but the few times I have were not very pleasant. 😛

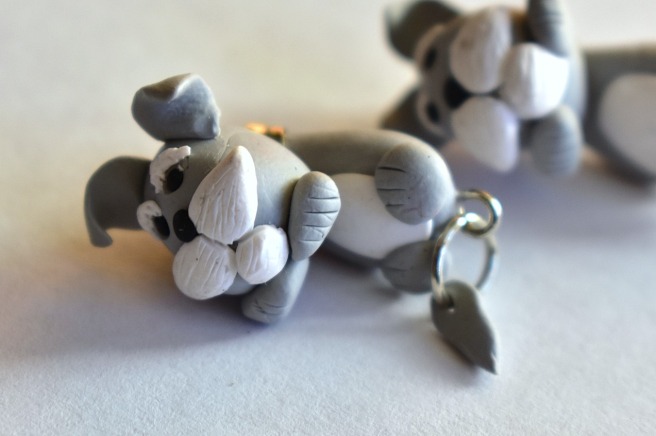
Isn’t this so cute? Poor little barn kittens. XD “We’d get our doll clothes out and find the bonnets and the dresses,” and then “[We’d] dress up our kittens and take them out in our little doll carriages and ride them around. Talk about a lot of fun!”

  1. What are a few of your school memories?

“We had to walk down the blacktop to the bus stop, and while we were waiting, we’d pick up beer cans. If you stomped on them, they’d stick on your shoes.” Back then, Gram says, the fad was for kids to put little gadgets called “heel taps” on the bottoms of their shoes which made clinking, tapping sounds when they walked. The popular kids and the rich kids had those heel taps, but Gram and her siblings didn’t. But that didn’t stop them – who needed heel taps when you could make your own from old beer cans?

  1. What was the technology like? What toys, clothes, etc. were popular?

Growing up, Gram’s family had just one phone, a rotary phone, and it was right beside their Dad’s chair. When they answered the phone, their Dad was sitting right there, and he could hear every word they said. So when Gram and her siblings got boyfriends and girlfriends, they finally convinced him to get a longer cord for the phone so they could step into the bedroom for a little privacy! Yikes! Isn’t that funny? XD

Their family didn’t have a TV. TVs had been invented, but they weren’t very common – mostly just rich people had them. They did have a big radio, though, and they listened to a few programs on it (the ones their Dad approved of).

Their stockings reached all the way up to their waists, like tights, and had suspenders to keep them up. They also wore girdles, which were like corsets, and made their waists slimmer. Ugh, that must have been so uncomfortable. One woman told Gram that she could always tell when someone wasn’t wearing her girdle! Dear, dear! XD I thought that was pretty funny. XD

Instead of getting spices at the grocery store, a McNess man named Mr. Rogers would come round to their door. “He was… this little old man. He always had his cap and he had a big ol’ hump on his back. He would open [his car] from the back and he had these boxes of spices and detergent and cleaners.” Mr. Rogers came around to their house about every month to see if they needed anything, and Gram’s mom was always ready with a list. I thought that part was really neat. It sounds like old times, doesn’t it?

  1. What were Sundays like?

They always went to church on both Sunday mornings and Sunday evenings, and in between they had to do the farm chores and milk the cows. But they still found time for occasional picnics in the pasture. “That was something that was really special,” Gram remembers. They’d plan the picnic before church, so that when they got home they could fill up their picnic basket with food and head right down the hill.

For non-picnic Sunday lunches they always had chicken with broth, crackers, milk, and pie for dessert. Gram’s mom made all kinds of delicious pies – apple, cherry, pumpkin, lemon, and Gram’s favorite: blueberry or peach pie. In the evening that had a light supper or snack of grape juice and popcorn because they had to eat early before they went out to milk the cows again.

  1. What chores did you do?

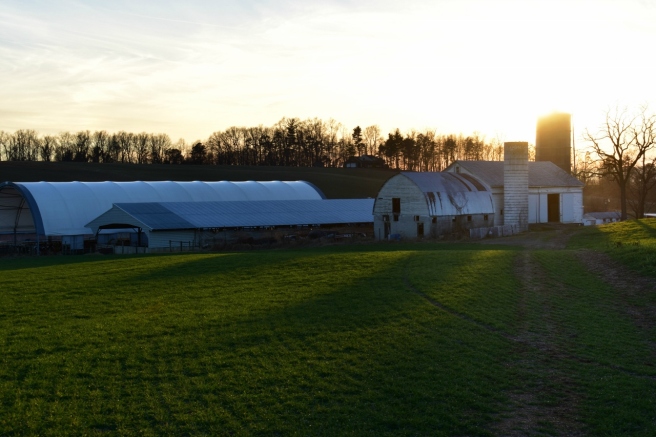
When Gram and her brother got up in the morning, they went out to the barn to clean out the manger and scrape out the manure. In the evenings they fed the calves and taught them to drink out of a bucket instead of a bottle. They had to milk the cows, too. They had a stanchion barn that could hold 40 milk cows lined up side by side – but sometimes they were packed so tightly that they squashed you between them when you were milking them.

On Saturdays they cleaned the house and baked. The girls made cookies or cakes, and Gram’s mom usually made the pies. But when it came time for Gram to learn the art of pie-making, somehow they just didn’t turn out quite the same. Her brother could always tell when Gram had made the pies.

“Well I know Mom didn’t make these pies,” he grumbled, “they must be yours!” Heh heh. That was one of my favorite parts of this interview. XD The way she said it was just so funny!

They helped in the garden, too – weeding, picking, and harvesting the vegetables. They canned peaches, applesauce, and grape juice, as well as all kinds of pickles: several varieties of cucumber pickles, and watermelon rind pickles and mixed pickles – a pickled mixture of all the leftover produce such as old corn or old beans. They really liked mixed pickles. I tasted mixed pickles once. They were okay, but I don’t know if I would say I like them or not… And you don’t hear of watermelon rind pickles every day, now do you?

“You didn’t buy that stuff at the grocery store,” Gram explains, “you either canned it or you didn’t have it.” Well that’s certainly changed.

  1. What do you miss about your childhood?

When Gram was little, she loved to work out in the fields with her dad and drive tractors for him. She said she could hardly remember learning how to drive a tractor – she just knew for a long time. But after she got married she didn’t drive them as much. “The tractors got complicated and so then I kinda quit driving tractors.” She says she misses the old, easy to drive tractors.

  1. What don’t you miss about your childhood?

Milking, cleaning the barn, and ironing. Ironing was quite a process: her mom would take a little pop bottle that had a cork with holes punched in it, and she’d lay the clothes out flat, and sprinkle them. Then she would roll them up and put them in a bag to soak. Gram said they would have to be careful not to leave the clothes soaking too long or they’d get moldy. Yikes! O.o

  1. What traditions did you have?

Every summer Gram’s family would get together with their friends and make a whole bunch of potato chips and doughnuts. Another fun tradition was an Easter one of dying eggs and hiding them. After they had found them all, they ate the eggs.

  1. What did you do for celebrations or for special?

Gram always looked forward to Fridays, because her Dad often gave them a little bit of money to buy a treat with. “He would be down at the milk house when we passed by on our way to the school bus, and he’d say, ‘Well do you need a dime today?’ And we’d always say, ‘Sure!’” For a nickel they could buy an Imp or a dreamiscle, and for a dime they could buy a drumstick or an ice cream bar. Usually Gram bought two different treats for a nickel each instead of spending her whole dime on one thing. Whoa, ice cream for a nickel?

  1. What are your favorite memories from childhood?

Gram loved the picnics in the pasture, and she loved playing in the creek, despite the bloodsuckers. And she always looked forward to making potato chips and doughnuts with her friends every summer.

Mom:

  1. What did you do for fun?

“I mostly liked to play outside in the barn with kittens, or watch the cows,” Mom says. She loved the outdoors and she loved to run barefoot through the fields. She also loved to play in their creek – where fortunately there were no leeches!

  1. What are a few of your school memories?

Mom always packed the same lunch in her little tin Strawberry Shortcake lunchbox: a sandwich, chips, fruit, and cookies, with a Thermos of water. Always.

  1. What was the technology like? What clothes, toys, etc. were popular?

Their radio was “this big piece of furniture, a big wooden chest” she says, much larger than our modest radios today. “We would lay on the floor and listen to the radio since we didn’t have a TV,” she remembers.

Mom had a doll called a Real Baby that was supposed to be the same weight and height as a newborn. “I was so proud of that.”

“And did it look like a newborn?” I asked her.

“No, it didn’t look like a newborn at all!” Ha ha! XD

  1. What were Sundays like?

“We didn’t shop on Sundays, and we only did the necessary farm chores.” They always went to church every Sunday morning and usually every evening too. Sometimes they stayed at home for Sunday lunch (only they called it “dinner” instead of “lunch”), and sometimes they ate at a friend’s house.

Mom’s Sunday evening supper sounds remarkably like Gram’s: “sandwiches, popcorn, and a jar of home-canned grape juice.”

  1. What chores did you do?

Mom and her sisters had to feed the calves and of course clean the house on Saturdays. “Then when we got a little older – ‘bout twelve or thirteen – we had to milk the cows.” They also helped out in the garden.

  1. What do you miss about your childhood?

“I miss the small farm and the cows in the pasture. We would just sit and watch the cows and it was just so peaceful – more idyllic instead of commercialized like it is now.” Mom and her youngest sister would sit up on the haybale feeder and let the cows come up and eat around them. They got to know the cows’ personalities, and even named a few of them. I really liked Mom’s description of that.

  1. What don’t you miss?

“I don’t miss getting stickers in my feet from running barefoot through the fields. I’d do that a lot,” she says with a laugh. “I’d dig out splinters from my feet all summer.”

  1. What did you do for a celebration or for special?

“On Wednesday night Dad promised that if we were good at church we would go to High’s afterwards and get a hand dipped ice cream cone – and we could pick our flavor! That was fun.”

  1. What were some of your traditions?

The main tradition was each of the kids choosing their own birthday supper, but they had some smaller traditions too. A daily tradition was to sing a prayer or hymn before their meals instead of praying. It felt strange to say a prayer before a meal instead of singing it. We still usually sing a prayer or pretty hymn when we go to Grandma and Grandpa’s house for a meal.

  1. What are your favorite memories from childhood?

“Wading in the creek, finding kittens in the barn…” Sometimes, they would take a picnic back to the field and eat their lunch on a blanket. Other days, “Dad would say, ‘Let’s go to the lake today,’ so we would leave after breakfast and stay there until we had to be back for milking – about 3 or 4 o-clock.”

Snow days were sure to be fun as well: “If we stayed home from school on a snow day we would almost always make doughnuts.” Yummy! I’ve made doughnuts a few times, and it’s a lot of fun.

*****

Wow, isn’t it amazing what has changed? You certainly can’t get an ice cream cone for a nickel anymore, and you certainly can buy pickles and such at the store – and pretty much anything else. Radios are much smaller, TVs are an electronic staple in most homes, and the fads have changed from heel taps to iPhones and coolest brands of clothing.

But then again, a lot of things will never change: the pleasure of summer picnics, the freedom of running barefoot over the grass, the cuteness of little kittens, and the fun of wading in a (hopefully leech-free) creek.

I hope you enjoyed that essay, even though it was still pretty long. What was your favorite part? Thanks for reading! ♥

***Allison***

Some Recent Clayations

Hey guys! Today I – oh wait. IF YOU ARE MALLORY, DON’T READ THIS POST UNTIL AFTER YOUR BIRTHDAY! XD Ahem. This post may, um… contain some classified birthday material. 😉

But anyway, as I was saying: today I wanted to show you some of my recent polymer clay creations! (To see my previous clayation posts, click here, here, and here.) Making clay miniatures is one of my favorite hobbies. 🙂

Let’s start with a hippopotamus, because it’s really fun to say. XD I made this hippo for my little sister’s birthday, and she really liked it! She has a safari themed room, and she wanted some more hippo things for it. 😛 Basically it’s just a shallow bowl with a hippo head and legs. Oh, and I brushed it with triple-thick glaze. Kinda cute, huh?

hippo-2-800x533

hippo-1

hippo-3

Next up, we have a cute wittle bunny. I used a brown artist’s pastel to shade her ears and face.

bunny-1

bunny-2
For some reason I like taking pictures of my creations in my hand. You can see the size of the thing better, and it just looks more cute and personable somehow. 🙂

This is a miniature of my old camera: a Nikon Coolpix L830. Which I would HIGHLY recommend, by the way. 🙂

camera-1-1280x853camera-2-1280x853

A yummy looking doughnut…

doughnut

And some coffee (or tea or hot chocolate) to go with it. 🙂

coffee-1280x853

I made this thingy quite a while ago. I meant to use it for a hair clip, but I just never got around to finishing it.

flowers-1280x853

Aww, I love how this little guy turned out!

owl-1280x853

These are clinging earrings: basically the front of the earring is the dog’s head, and the back part is his body.

puppies-1

I also made similar earrings, but with a scottie rather than a schnauzer. 🙂 Such cuties!

scottie-earrings-1

Yet another little pup…

puppy-1-1280x854puppy-2-1280x853

Okay, this is rather random. I felt like making an octopus one day, so I made an octopus. XD He’s holding on to a blue pebble for dear life.

octopus-4

I made one of these pendants for my Etsy shop because I made one for myself that I love and wear often.

rose-bouquet-pendant-3

Last but not least, this is my current masterpiece. 😛 My cousins wanted me to make a “mad King Herod” to go with their nativity scene. (You know how he would have been furious since the wise men didn’t obey his orders?) So behold. XD He’s pretty tall – about 8 inches, which is much bigger than what I usually do, but I’m very pleased with how he turned out!

dsc_1008-853x1280dsc_1010-1280x853dsc_1031-1280x853

 I hope you enjoyed this post!
Which clayation was your favorite? Do you like to make things out of polymer clay? If you’ve never tried it, you really should! It’s a lot of fun. 🙂
***Allison***

How to Edit Photos, Part 1: The Basics

how-to-edit-photos-part-1-800x800

Hey, guys! 😀

Grace recently wondered if I could do a tutorial on how to edit photos, and I thought that was a great idea! I decided to make this a mini-series, covering basic photo editing, adding effects, touching up photos of people, and maybe a little bit of graphic design and collaging too. I’m really excited!

Anyway, let’s get started. Today I’m going to go over the basic photo editing tools and then show you how to use those tools to fix two common photo problems.

Introduction

I use PicMonkey for pretty much all of my photo editing, and I highly recommend it! It’s very easy to use, and it’s free – although you can pay to upgrade to Royale and get some extra features. (I have Royale, by the way, and I would definitely recommend it if you edit photos a lot. I’ll talk more about Royale later in the series.) But don’t worry about that for now. All the tools I’m going to go over today are completely free.

So, open PicMonkey, and hover over the bar at the top of the page where it says “Edit.” Open the photo you want to work on. The section of the editor that pops up is called “Basic Edits,” and that’s what we’ll be using today.

Basic Edits

  1. Crop: The first tab of the “Basic Edits” section is “Crop.” Cropping is quite a valuable tool that allows you to cut out ugly surroundings from the corners of your pictures, make the composition of your photo more interesting, or simply zoom in closer to the subject.
  2. Canvas Color: This just covers your whole picture with one color. You won’t use it to edit your photos, although it’s great for graphic designing.
  3. Rotate: The rotate tab allows you to flip your picture any way you want. It also allows you to straighten your photo, which is very helpful if you were accidentally holding your camera crooked and your subject looks like it’s sliding off the picture. 😀
  4. Exposure: In my opinion, this is the most important tab in the Basic Edits section (well, maybe it’s tied with “Crop”). You can work wonders simply by adjusting the exposure of a photo, and we’ll be using this tab a lot, later in this post.
  5. Colors: This tab includes sliders for saturation and temperature, as well as a mysterious button called “Neutral Picker.” Actually, it’s not that mysterious. 🙂 Basically, when you click on the parts of your photo that should be white, the Neutral Picker auto-adjusts the temperature to turn those off-colored spots white again. Temperature controls how warm or cool a photo is – in other words, whether it has a red (warm) tint or a blue (cool) tint. And saturation, as you probably already know, makes the colors of your photo more saturated and bright.
  6. Sharpen: Sharpness and Clarity actually ARE different – just a bit. My unscientific description is that Sharpness yields a more subtle effect and focuses on sharpening the details, while Clarity is bolder and boosts the contrast of your photo while giving it a gritty effect at the same time.
  7. Resize: This simply downsizes your photo to a smaller file size so it takes up less space on your computer (or blog). Anywhere between 800 and 1280 (and even a bit larger) would be a good size for sharing online. One thing to keep in mind is the smaller the size, the lower the quality of the picture.

Using Your Tools

Now that you know what everything does, let’s put your tools to use! I’m just going to show you a few examples and walk you through what I did. (Note: the “before” pictures are on the left, and the “after” pictures on the right. Just in case you couldn’t tell. 😉 )

before after 8.jpg

Isn’t it amazing what the Shadows slider can do? That’s seriously all I did. I moved the “Shadows” slider to -44, and that’s it.

before after 4 (1280x640).jpg

This is a more subtle edit, but I think the “after” picture definitely looks more vibrant. The photo on the left is kind of drab and gray, so I upped the saturation a bit and adjusted the exposure. I also straightened the photo so the ocean isn’t tipped to one side like that. (And hmm, I might have lowered the temperature also, but I can’t recall for sure. Oops. XD )

before after 7.jpg

The main difference in this photo is that now you can actually see the cute wittle kitten instead of losing him in the surrounding scenery. I told you cropping was a helpful tool! 😀 I also straightened the photo so the kitten wasn’t falling off the face of the earth, upped the “Sharpness” slider, and adjusted the exposure just a tad.

before after 3 (1280x640).jpg

Wow, so much better! This picture was washed out to begin with, but by lowering the brightness and shadows, and adding a little bit of contrast, it looks bright and beautiful again like it’s supposed to. And speaking of over-exposed photos, we should move on to the fixer upper part of this post. (By the way, I l♥ve the show Fixer Upper! Have you ever watched it? It’s sooo good. Ahem…)

How to Fix an Over-Exposed Photo

An over-exposed photo is one of my most common problems. But thankfully it’s easy and fun to fix!

This is the photo we’ll start with:

087

Eh. The content is good, but the lighting is off: it’s too bright and has a sort of bland grayish-white wash over everything. We must rescue this poor photo in distress!

Pretty much everything you need to fix an over-exposed photo is in the Exposure tab, so go ahead and open that up. The two main things to do for an over-exposed picture are to lower the brightness and lower the shadows. Here’s a screenshot of what I did:

photo editing part 1 5 (1033x518).jpg

You can tell from the sliders that I lowered the brightness and shadows significantly (to -14 and -18 respectively) and added a tiny bit of contrast and highlights. And that’s pretty much it! (Note: I did also use the “Burn” tool to darken a few spots in the photo, but I’ll talk about that more in another post. For now, just concentrate on using the “Exposure” tab.)

Before and after. So much better!

before after 6 (1280x640).jpg

How to Whiten a Photo

Sometimes photos have a weird yellowish or bluish tint, especially on the light parts of a picture.

Like in this photo:

snowy-owlet-1-1-1024x768

This really isn’t a bad picture, but you can see a slight orangish tinge over everything, which makes it look dingy rather than fresh and clean. It’s especially important to get good, clean-looking photos of products you sell, and this owl just so happens to be in my Etsy shop. So, let’s clean him up a bit, shall we?

First, open the “Exposure” tab.

photo editing part 1 10 (1179x522).jpg

The main thing you need to do here is bump up the highlight slider, but I also messed with the brightness and shadows slider a bit too. Here’s a tip: use mostly highlights instead of brightness to brighten up a photo, because too much brightness will make the photo look washed out. “Highlights” brightens just the white parts instead of the whole photo.

photo editing part 1 11 (1182x528).jpg

Next I opened up the “Colors” tab. Since my picture is too red, I moved the Temperature slider down to -10, which added some blue to even it out.

And here’s the before and after. A subtle difference, but do you see how the one on the right looks cleaner, fresher, and more appealing?

before-after-2-1280x640

Well, I guess that’s it! I give you a pat on the back and a virtual bag of chocolates if you read that whole thing. O.o XD

Heh heh. I hope that was helpful to you! Feel free to ask me any questions in the comments if you didn’t understand something. 🙂

Have a lovely day, lovely people!

***Allison***

Art Lab, Episode 19: Galaxy Art

galaxy-art-800x800

Hi, guys! Welcome back to Art Lab.

I’m so excited for today’s “art lesson” on how to draw galaxies! I learned this from the lovely video down below which was made by a teenage artist named Sydney Nielsen. She is super good at drawing!

Art Inspiration:

Ahh, so pretty. 🙂 I decided to use a slightly different technique but with the same idea for today’s art.

I started with a black paper, so it would blend in with the rest of the drawing better, but you could definitely use white if you want. I also wanted to try using oil pastels instead of colored pencils, and it turned out very well! So just a note: whenever I say “oil pastels” in this tutorial, you can also use colored pencils like she showed in the video.

Let’s get started!

You will need the following:

  • paper, blank envelope, or ATC
  • oil pastels (or colored pencils – the higher quality ones like Prismacolor work best for blending)
  • white acrylic paint
  • paintbrush
  • white gel pen (optional)

1. Like the video showed, I started with light colors and gradually blended in the darker shades. I used the pink and blue combination because 1.) it looked so pretty when Sydney used them and 2.) there were several shades of each in my oil pastel box. XD

galaxy-1-1280x854
Blech, what terrible picture quality. XD

galaxy-2-1280x854

2. Next I drew in the white sparkle stars. I think this is what makes the piece really special and space-y. 🙂

galaxy-3-1280x854

3. Almost done! Just need to finish the stars yet. Get out your white acrylic paint and start splattering. It works best to get your brush a little wet before splattering the paint, but you don’t have to. Do NOT do this step on your mom’s favorite fuzzy rug or in your best Sunday clothes. Trust me, that will not end well. XD

If you want, add a few more sparkle stars with a white gel pen. I like to do this because they stand out more than the pastel or colored pencil stars do. And you’re done!

galaxy-4-1280x854

Isn’t it pretty?
I hope you enjoyed this episode of Art Lab, dear readers. 😀 Have fun! And like always, if you make some art inspired by this post and would like to share it with us, we’d be delighted to see it! Get the details on how to send to us here, over at The Art Lab blog.

***Allison***

A Little Winter Walk {the Second}

I took my camera along today for our nature study walk and got some pretty pictures of moss and farm scenery and sister’s eyes and such to show you guys. 🙂 Enjoy!

Note: I don’t always edit my pictures, but I did edit most of them this time – and it was a lot of fun!

walk-1-1280x853

walk-2-1280x853
Doesn’t this look a little like a city skyline?

I’m kinda fascinated with eyes. They’re so beautiful and unique! This is my sister Megan’s eye:

walk-4-1280x853

walk-5-1280x960
I love this picture so much! The angle makes her eye look especially large and dramatic – and pretty. 😀
walk-6-1280x853
What do you think this thing is? Believe it or not, it’s actually a praying mantis nest! Come springtime a bunch of little babies should hatch out. 🙂
walk-7-1280x853
Heh heh, Maggie. XD

walk-8-1280x853walk-9-1280x853

walk-10-1280x853
I love our farm. ♥
walk-11-1280x853
My friend kindly allowed me to take a picture of her!
walk-12
I used the miniature effect on PicMonkey for this photo.

I loooove moss. The vibrant, cheery color just makes my heart happy. ♥


walk-13-1280x853walk-14-1280x853walk-15-1280x853walk-16-1280x853

walk-20-1280x853walk-19-1280x853

walk-21-1280x853
My friend found quite a large mushroom. O.o


I hope that brought some sunshine into your day! 😀 Which picture was your favorite?

As always, thank you so much for reading, and have a lovely day (or night). ♥

***Allison***

P. S. WordCrafters 2 is underway once again! Bella, (from Many Marigolds) it’s your turn to write a chapter! 😀

Sister’s Q&A, Part 4

Sister's Q&A (800x800)

Wow, it has been quite a while since I posted an episode of the Sister’s Q&A! Remember that? It’s like a normal Q&A, but Megan and I have to answer you guys’ questions for each other instead of for ourselves. It’s a lot of fun to write, and I hope it’s fun to read too!


Christian Homeschooler:

What kind of pencils do you like to use best: regular number 2’s, or mechanical?

Guess: Well we don’t have many mechanical pencils, so number 2’s.

Answer: I would say regular pencils since that’s pretty much all I use, but mechanical pencils are okay too. Except I hate it when the pencil lead is too short and it disappears when you press down – argh! XD

Which do you like better: dogs or cats?

Guess: Cats.

Answer: Cats. I like dogs, but they’re not nearly as clean or cuddly as cats. 😉

When you want to look up a word’s definition, do you use a real dictionary, or do you look up the word on the computer?

Guess: Hmm… I don’t know what Allison would do. Maybe look it up on the computer. 😉

Answer: Hmm… I don’t know. I do both. It depends on where I am and what I have close by I guess. But maybe computer?

Do you use your WordPress Reader?

Guess: Yep!

Answer: Sure do! I try to read every post. (I only follow about 30 blogs, in case you were wondering. It would be really hard to read every post if I followed hundreds of blogs!)

Which would you prefer: swimming in a pool or playing in the snow?

Guess: Probably swimming.

Answer: Swimming! Snow is so much fun, but it’s also cold and kind of messy. Plus when it’s swimming time it’s also summer vacation!


Clara:

What’s one thing you really want right now?

Guess: Hmm. I… don’t know! Maybe she’d like a lifetime supply of polymer clay?

Answer: I’m not sure… Um, more time so I can publish this post and play piano before I have to go to bed? XD

Least favorite meal?

Guess: Almost got it…. Some Mexican dish but I don’t remember what! Some sort of enchiladas?

Answer: Something with mushroom soup in it or most Mexican food (or any spicy food). XD Or maybe cabbage rolls with super spicy Spanish rice and grape soda. YUCK! No one would ever combine those things for a meal anyway, but oh well. Bleh. XD

What is a sport you’re really terrible at?

Guess:   I don’t know, she doesn’t play sports often. So I’ll just go with hockey even though she’s never played it. I really have no clue. XD

Answer: Heh heh, I’m not too great at any sport (except I’m okay at Ping Pong if that counts XD ), but then again I don’t know that I’m horrible at a certain one. I’m not very good at tennis or badminton or something like that? I have no idea. XD

What’s something funny that happened to you recently?

Guess: Too hard. I pass. I really have no clue though.

Answer: Hmm. Ahh, why is this so hard? Okay, for lack of a better answer, I’m going to go with the time my siblings and I were discussing Keeper of the Lost Cities together, and Megan and Logan and I were discussing whether the cliffhanger at the end of Lodestar was huge or not that big. But my brother Jeff, who hasn’t finished the series yet, HATES spoilers, (even though we giving anything away at all), so he kept yelling, “Argh! Stop! Guys, don’t tell me ANYTHING!” And stuff like that. XD He was very adamant. 😛

If someone gave you a baby tiger, would you want to keep it?

Guess: Hmm, probably not.

Answer: Maybe. I might want to keep it for a little while until it got big, and then maybe take it to a zoo or something. But even assuming I would want to, I’m sure I wouldn’t actually keep it. 😉


Lily:

What’s it like being a blogger AND your sister being a blogger?

Guess: Annoying at times.

Answer: Mostly fun because we can talk about our blogger friends and the posts we read and stuff together, but also annoying because sometimes we both want to post the same thing at the same time. 😛


afcrocks99:

What is your favorite season?

Guess: I think Allison’s would be spring.

Answer: Spring! Although I looove fall too, and summer is nice. XD Winter is nice in some ways, but it’s my least favorite of the seasons.

What is your favorite Bible verse?

Guess: I don’t know. Maybe a verse in Psalms? 😛

Answer: One of my favorites is Zephaniah 3:17:

The Lord your God is in your midst,
    a mighty one who will save;
he will rejoice over you with gladness;
    he will quiet you by his love;
he will exult over you with loud singing.

I mostly like that one because there’s a really pretty song/hymn about it. It’s like this:

What are three things your sister almost always has with her?

Guess:   ??

Answer: My phone, my watch, and a bunch of ideas and plans running through my head. 😀


Lainey:

What is your dream career?

Guess: Running an Etsy shop, but she’d probably like to be a photographer too.

Answer: To have my own little craft shop where I can sell all the zillions of things my hands keep churning out from working on my zillions of hobbies. ♥ I also think it would be great to publish one of the games I made sometime.


Rutvi:

Which one of you is older?

Guess: Allison

Answer: Ooh, that’s a hard one. XD Just kidding – I’m the oldest! I’m actually the oldest of the kids in our family.

Favorite food?

Guess: Most any fruit.

Answer: FRUIT! CHOCOLATE! CHEESE! And also pistachios and clam chowder and crab legs and spinach and bread and… I like most things, actually. (Besides mushrooms and Spanish rice and cabbage rolls and grape soda. XD )

Favorite pet?

Guess: I can’t decide between Willow and Casey. I’ll just go with Casey I guess.

Answer: I ♥ my fuzzy bunnies Willow and Lily so much, but honestly I play with the cats more, so I guess maybe Casey.

Name 3 things you don’t like that start with the letter E.

Guess: Oh. Umm… Eggs (gathering them), Elephants stomping on her (I’m guessing she wouldn’t like that at least), and early awakenings? 😛

Answer: Eggs (gathering them), electric shocks, and erasers that are old and leave smudges on your paper? Ha ha, those are basically all the things I could think of that started with “e” anyway. XD


And that’s it! So, drum roll please, who won? It was…. *tallies up the points*

MEEEE!!! I narrowly squeaked past: I got 11 right and Megan got 10 right. 🙂

If you want to see my guesses for Megan, click here! Thanks for reading, guys! I hope you enjoyed it. 🙂

***Allison***

A Few Flurries {Snowy Photoshoot}

It snowed! I’ve heard that some of you guys got tons of snow, but sadly we didn’t get very much – only an inch or two. 😦  Never fear, though, I managed to get several snowy pictures for you guys. 😀

dsc_1062-1280x853
Snow always makes things so bright and cheerful in its own way. 😀

dsc_1065-1280x853dsc_1069-1280x853dsc_1080-1280x853dsc_1081-1280x853


dsc_1082-1280x853
I noticed this forlorn little nest “tied” to the branch. It wasn’t actually tied, but there was some baler twine pieces tangled around it, so it looked that way. 🙂

dsc_1085-1280x853

dsc_1098-1280x960
Mini mystery picture challenge: What is this? It’s probably pretty easy…

Maggie found a fallen branch that was apparently quite delicious, because she proceeded to devour it… well, chew on it, anyway. XD

dsc_1089-1280x853

dsc_1090-1280x853
Ha ha, I love this picture! XD
dsc_1091-1280x853
She looks perplexed. XD

dsc_1092-1280x853dsc_1093-1280x853dsc_1094-1280x853

dsc_1097-1280x853
Aww, Maggie girl! ♥

Strangely, that felt like a short post… I guess my normal posts are fairly long or something. Remember back in the days when I would post one picture and say like, two words about it? Heh heh. I’m glad I “outgrew” that. XD

Ahem, as I was SAYING. Um… what was I saying? Hmm.

Well then. Have a lovely day, dear readers! ♥

OH WAIT. The questions. Which picture was your favorite? How much snow did you get (if any)?

Okay, I’m really leaving now. Farewell!

***Allison***