Mystery Pictures #5 – Christmas Edition

I thought I’d do a mystery pictures post about Christmas-y things, since it is only 11 days until Christmas! (*Gasp!!* Eleven days! It hardly seems like December at all.) See my other mystery picture posts here, here, here, and here.

OK, here’s the deal: I will show you 5 mystery pictures. Four are related to Christmas, and one is not. If you think you can solve the mysteries, comment below with your guesses. In the near future I will reveal all of the mysteries, and show you the points tally for each person who guesses. I won’t approve the comments for this post until after I have revealed the mysteries, just to keep everything fair and square, so don’t worry if your comment isn’t showing up. Alrighty, are you ready?! Let’s do this!

#1.

-Allison(mystery pics, Willow walks) 014 (640x480)

#2.

-Allison(mystery pics, Willow walks) 017 (640x480)

#3.

-Allison(mystery pics, Willow walks) 016 (640x480)

#4.

DSCN7551 (3) (881x660)

#5.

-Allison(mystery pics, Willow walks) 006 (1024x768)

I’m afraid they’re rather easier than normal, but have fun anyway! I can’t wait to see your guesses. 😀

***Allison***

Make Your Own Game! Part 3: Game Pieces and Finishing Touches

Today I will finish up the Make Your Own Game Series with how to make game pieces and a box for your game to live in.  Let’s start with game pieces.

I think the most unique and customizable pieces can be made with polymer clay.  You can make them to go along with your theme, or just make an odd assortment of fun things, like I did.  I would recommend, though, that you make your game pieces more one size than I did, just so they look more uniform.

-Allison(game series 3) 001

There are lots of other options if you don’t want to use clay: use different colors of flat-bottomed clear pebbles, buttons with handles made from beads stacked together, small toys like toy cars or plastic animals, really you can use basically any small item that doesn’t roll off of the board.

It’s important to have a good box that keeps your game from getting bashed up when it’s on the game shelf, but also provides easy access to the game when you want to play it.  (In other words, don’t use a deep, barely big enough box or it will be hard to take your game in and out.)

I found the perfect box for one of my games: it is shallow, easy to open, and sturdy.  Unless the box has no writing or graphics on it, you will want to make a label to put on top.  You could just draw the logo on the label, or take a picture of the actual game and paste it on.  Make sure to draw the logo on all sides so you don’t see a blank side of the box from the shelf.

-Allison(game series 3) 004 -Allison(game series 3) 003

And there you go!  Have your friends and family test it out, and maybe someday you will even publish your game!

Until next time…

***Allison***

Make Your Own Game! Part 2: Spinners, Spaces and Cards

(See the first installment in this series here.)  Today we’ll look at some ideas for the spaces on the board, as well as cards and spinners for your game.  Definitely change the symbols and graphics if you want to, and uh… be sure to make your spaces and board neater than I did here! ☺

*******************************************************************

This is a fun little space I call a “spring space.”  When you land on it, you get to move your playing piece ahead to the next spring space.

-Allison(name picture card, game) 008If your board game has cards, you can make spaces where you pick up a card when you land there.  Just draw a square with the graphic on the back of your cards inside it.  (You’ll probably want to make a more interesting graphic than my boring ol’ “T.” ☻)

-Allison(name picture card, game) 010It’s fun to have money, coins, or tokens in a board game.  They can be the point of the game (whoever gets the most by the end of the game wins), you can buy something with them to help you, whatever!  You can have a specific way to earn coins, or have coin spaces on the board.

-Allison(name picture card, game) 013

A board game can’t have only good spaces – it needs some suspense!  One “bad” space is a go-backwards space.  Write how many spaces you’re supposed to go back on top of an arrow pointing backwards.

-Allison(name picture card, game) 009

A really exciting space is the shortcut.  The shortcut spaces (there are two) are where you find out if you can use the shortcut or not.  On the first space, write the numbers 1, 2, and 3, and on the other one, 4, 5, and 6.  When a player lands on a shortcut space, they must roll the dice.  If they roll any of the numbers shown on the space, they get to use the shortcut, but if they don’t, too bad for them.  Sometimes using a shortcut is bad, because if you land on the space at the far end of the shortcut and you have to use it, the shortcut takes you backward.

You can either have the player jump to the other end of the shortcut all at once, or divide it into spaces so that they still have to roll their way across.

-Allison(name picture card, game) 012 -Allison(name picture card, game) 011

A few more spaces I didn’t draw here:

Roll again

Pit (which makes you lose something like a coin or a turn.)

Now for cards.  I can’t really help you much here, because the kind of cards you make really depends on your game.  They could make you answer a question or do a certain thing in order to move ahead on the board, they could be superpowers to help you, they could be anything!  But as for making the actual cards, I think the best way is to either cut them out of cardstock with a paper cutter, or print them onto cardstock from your computer.  The nice thing about printing them is that you can design a nice graphic that will look the same on all of your cards.

You can make a spinner by printing out a pie graph divided evenly into the number of spaces you need, and pasting it cardboard.  An alternative to printing a spinner is drawing one.  Cut a square piece of cardboard and divide it evenly into the number of spaces you need.  Trace a circle onto the square, and cut it out.  For the spinner, cut a rectangle that comes to a point like an arrow at the end from cardboard.  Punch hole in the middle of the arrow and the spinner-board.  Put a brass-brad through the hole, but be sure to leave some room between the head of the brad and the arrow.

****************************************************************

Whew, that was a long post!  Hopefully it helps if you ever want to make your own game.

***Allison***


Make Your Own Game! Part 1: The Board

I love making up games.  Some turn out to be really fun, and others… not so much.  But for any kind of board game, there are at least a few things you’ve got to have.  This series will cover how to make some of the things you need to create your very own board game.

First I will list a few things that your game can be about.  Choose a kind of game that you like to play, but also keep in mind that, say Chance games are easier to make than Strategy.  (At least for me!)

Words/Spelling

Chance

Strategy

Drawing/Art (like Pictionary)

Get up and do something! (like Charades)

Memory

Skill

Puzzles

~~~~~~~~~~~~~~~~~~~~~~~~~~~~~~~~~~~~~~~~~~~~~~~~~~~~~~~~~~~~~~~~~~~~~~~~~~~~~~~~~~~~~~~~~~~~~

The Board:  Every board game has to have a board – that’s the whole reason it’s called a board game!  You can make a board out of stiff paper, thin cardboard, or you can cover an old game-board with paper and start over! (Make sure that you or your family don’t want the game before you cover it!)  Another great way is to draw the board on cardstock, and laminate it.  You can even tape together four pieces of paper after they are laminated for a bigger board.  Here are a few suggestions for making the board to get you started, but there are many more ideas you can use.

Square:  Think Monopoly – a square or rectangle, divided into spaces, going around the outside of the board.  The nice thing about a square is it’s easy to make.  Also, it allows room for you to put the name of your game or the logo in the center, as well as any stacks of cards.

DSCN6951

To make a square board, use a ruler to make straight lines a ruler-width away from the edge of the board.  Also use the ruler to divide the square you just created into spaces.  Make sure the spaces are big enough to hold several playing-pieces at once.  (Note: If a ruler-width isn’t wide enough, trace something else to make bigger spaces, or measure at intervals along the edge.)

Circle:  A circle board is more interesting than a square board, but it is hard to make one big enough to hold an adequate number of spaces, and the edges of the spaces will be slightly curved instead of the nice straight edges of a square space.  A circle board still has room for the logo and stacks of cards, if you make it big enough.

DSCN6949

To make a circle board, find two circle shaped objects, one smaller than the other, and trace around them, making sure the smaller one is centered in the big one.  Divide the circle into spaces.

Squiggle: This shape allows you to fit many spaces into a board, but there isn’t much room for anything else.  A squiggle also lends itself nicely to shortcuts (more on that in a later post.)

DSCN6950

To make a squiggle board, take your pencil back and forth across the board in a zigzag, but with curved corners.  There isn’t a good way that I know of to make the squiggles nice and symmetrical, but just try to parallel the two sides evenly.  You can make tight squiggles for lots of spaces, or loose squiggles so you have room to draw pictures, the logo, or put cards in between them.

Stepping stone:  Stepping stone spaces are made of individual pieces instead of one connected loop.  The nice thing about this is you can use up pretty scraps of paper making it!  You can fill up the entire board with spaces, but be sure to draw arrows that show which way the playing-pieces are supposed to move, because it’s hard to tell when the spaces aren’t connected.

DSCN6948

To make a stepping stone board, use a circle or square hole punch to punch spaces out of pretty or plain colored paper.  Draw arrows showing which way the playing-pieces are supposed to go.

*******************************************************************

So there are a few suggestions for the board.  A few more things:

Be sure to make your Start and Finish spaces big enough to hold the maximum number of playing pieces for one game.  (In other words, don’t make the Start space only big enough to hold one playing piece when there are 5 players trying to fit their pieces on Start.)

Have fun decorating around the board.  You can draw things pertaining to the game (i.e a forest landscape if the game is about woodland animals), or decorate it with doodles and designs.

Make up your logo.  Decide on the name of your game, and write it in fancy lettering somewhere prominent on the board.

~~~~~~~~~~~~~~~~~~~~~~~~~~~~~~~~~~~~~~~~~~~~~~~~~~~~~~~~~~~~~~~~~~~~~~~~~~~~~~~~~~~~~~~~~~

I hope you are inspired to make up a game!  Next up will the spaces of the board.

5 Fun Road Trip Games

Summer is the season for road trips!  Here is a collection of some fun games you can play while driving.

1.  Pink Toads – One person is “it.”  The other players take turns asking the “it” person questions, to which he can only answer “pink toads.”  If he laughs, the person who asked the question that made him laugh gets to be “it.”  Example: Player 1: “What did you have for breakfast?” “It”: “Pink toads!”  (If the “it” person laughs here, it would be Player 1’s turn to be it.)

Variation: Instead of saying “pink toads,” you can make up your own silly phrase, like “fluffy bathtubs,” “rainbow gophers,” or “a hairball.”

2.  Ghost – This one is really fun, but a little hard to explain.  The instructions are kind of long, but it’s worth it!

Player 1 starts the round by saying a letter ( like “b”).  Player 2 adds another letter, but making sure that there is actually a word that starts with those letters. (For example, you wouldn’t want to say “x” here unless you were sure there was a word that started with b-x-…. but I don’t think there is.) So say Player 2 adds the letter “l,” because he is thinking of the word “black.”  Now Player 3 adds “o,” Player 4 adds “c” and Player 5 can’t think of any other word but “block,” that starts with those letters, so he says “k.”  Since Player 5 ended the word, he is now 1/3 of a ghost.  When someone ends a word three times, they are a whole ghost, and they are out.  But they can still sort of play: any player who talks to or answers someone who’s out is an extra 1/3 of a ghost.  So if you only ended the word once, but you talked to an “out” player twice, you are out.

You can only end a word if it’s more than 2 letters long.  Example: If the word was b-i so far, if you said “t,” you would end the word (“bit”) but if the word was “b” so far and you said “y,” it wouldn’t count as ending a word because it’s only two letters.

Proper nouns are not allowed.

If you don’t know what letter to do next, you can just say a random letter.  If the next player doesn’t think you have a word in mind, or thinks you spelled it wrong, they can challenge you.  They just say “I challenge you” on their turn.  Then you have to say the word you were thinking of, or that you didn’t have a word.  If your word was right, the challenger gets 1/3 of a ghost, but if it was wrong, you get 1/3 of a ghost.

The game ends when one player ends by being the last one who’s not a ghost.

3.  Alphabet Game – Most people already know this one, but it’s a goody!  And there are a few variations that you might not have heard of.

Variations:

Sink ’em!: If, while playing the game, you pass a body of water, a junkyard, or a graveyard, shout “Sink ’em!”, “Junk ’em!”, or “Bury ’em!” respectively.  The first person to shout this makes everyone else start back at “A,” while he can continue where he left off.

Single: Every man for himself!  Each player races the others to see who can find the all the letters of the alphabet in order by looking on signs, license plates, anything outside (not behind you and not on your car) with letters on it!  The first person to get to “z” first, wins.

Team: Like single, except everyone works as a team to find letters, instead of competing with one another.

Backwards: Instead of finding the letters in order from a-z, find them from z-a.

4.  Plate-Names: Make each letter of a license plate ahead of you stand for a word.  Example: HWER could stand for “Hairy Warthogs Eat Rocks.”

Variation: Do this with the first letters of each word on a sign.  Example: Greenville City could stand for “Grumpy Crocodiles.”

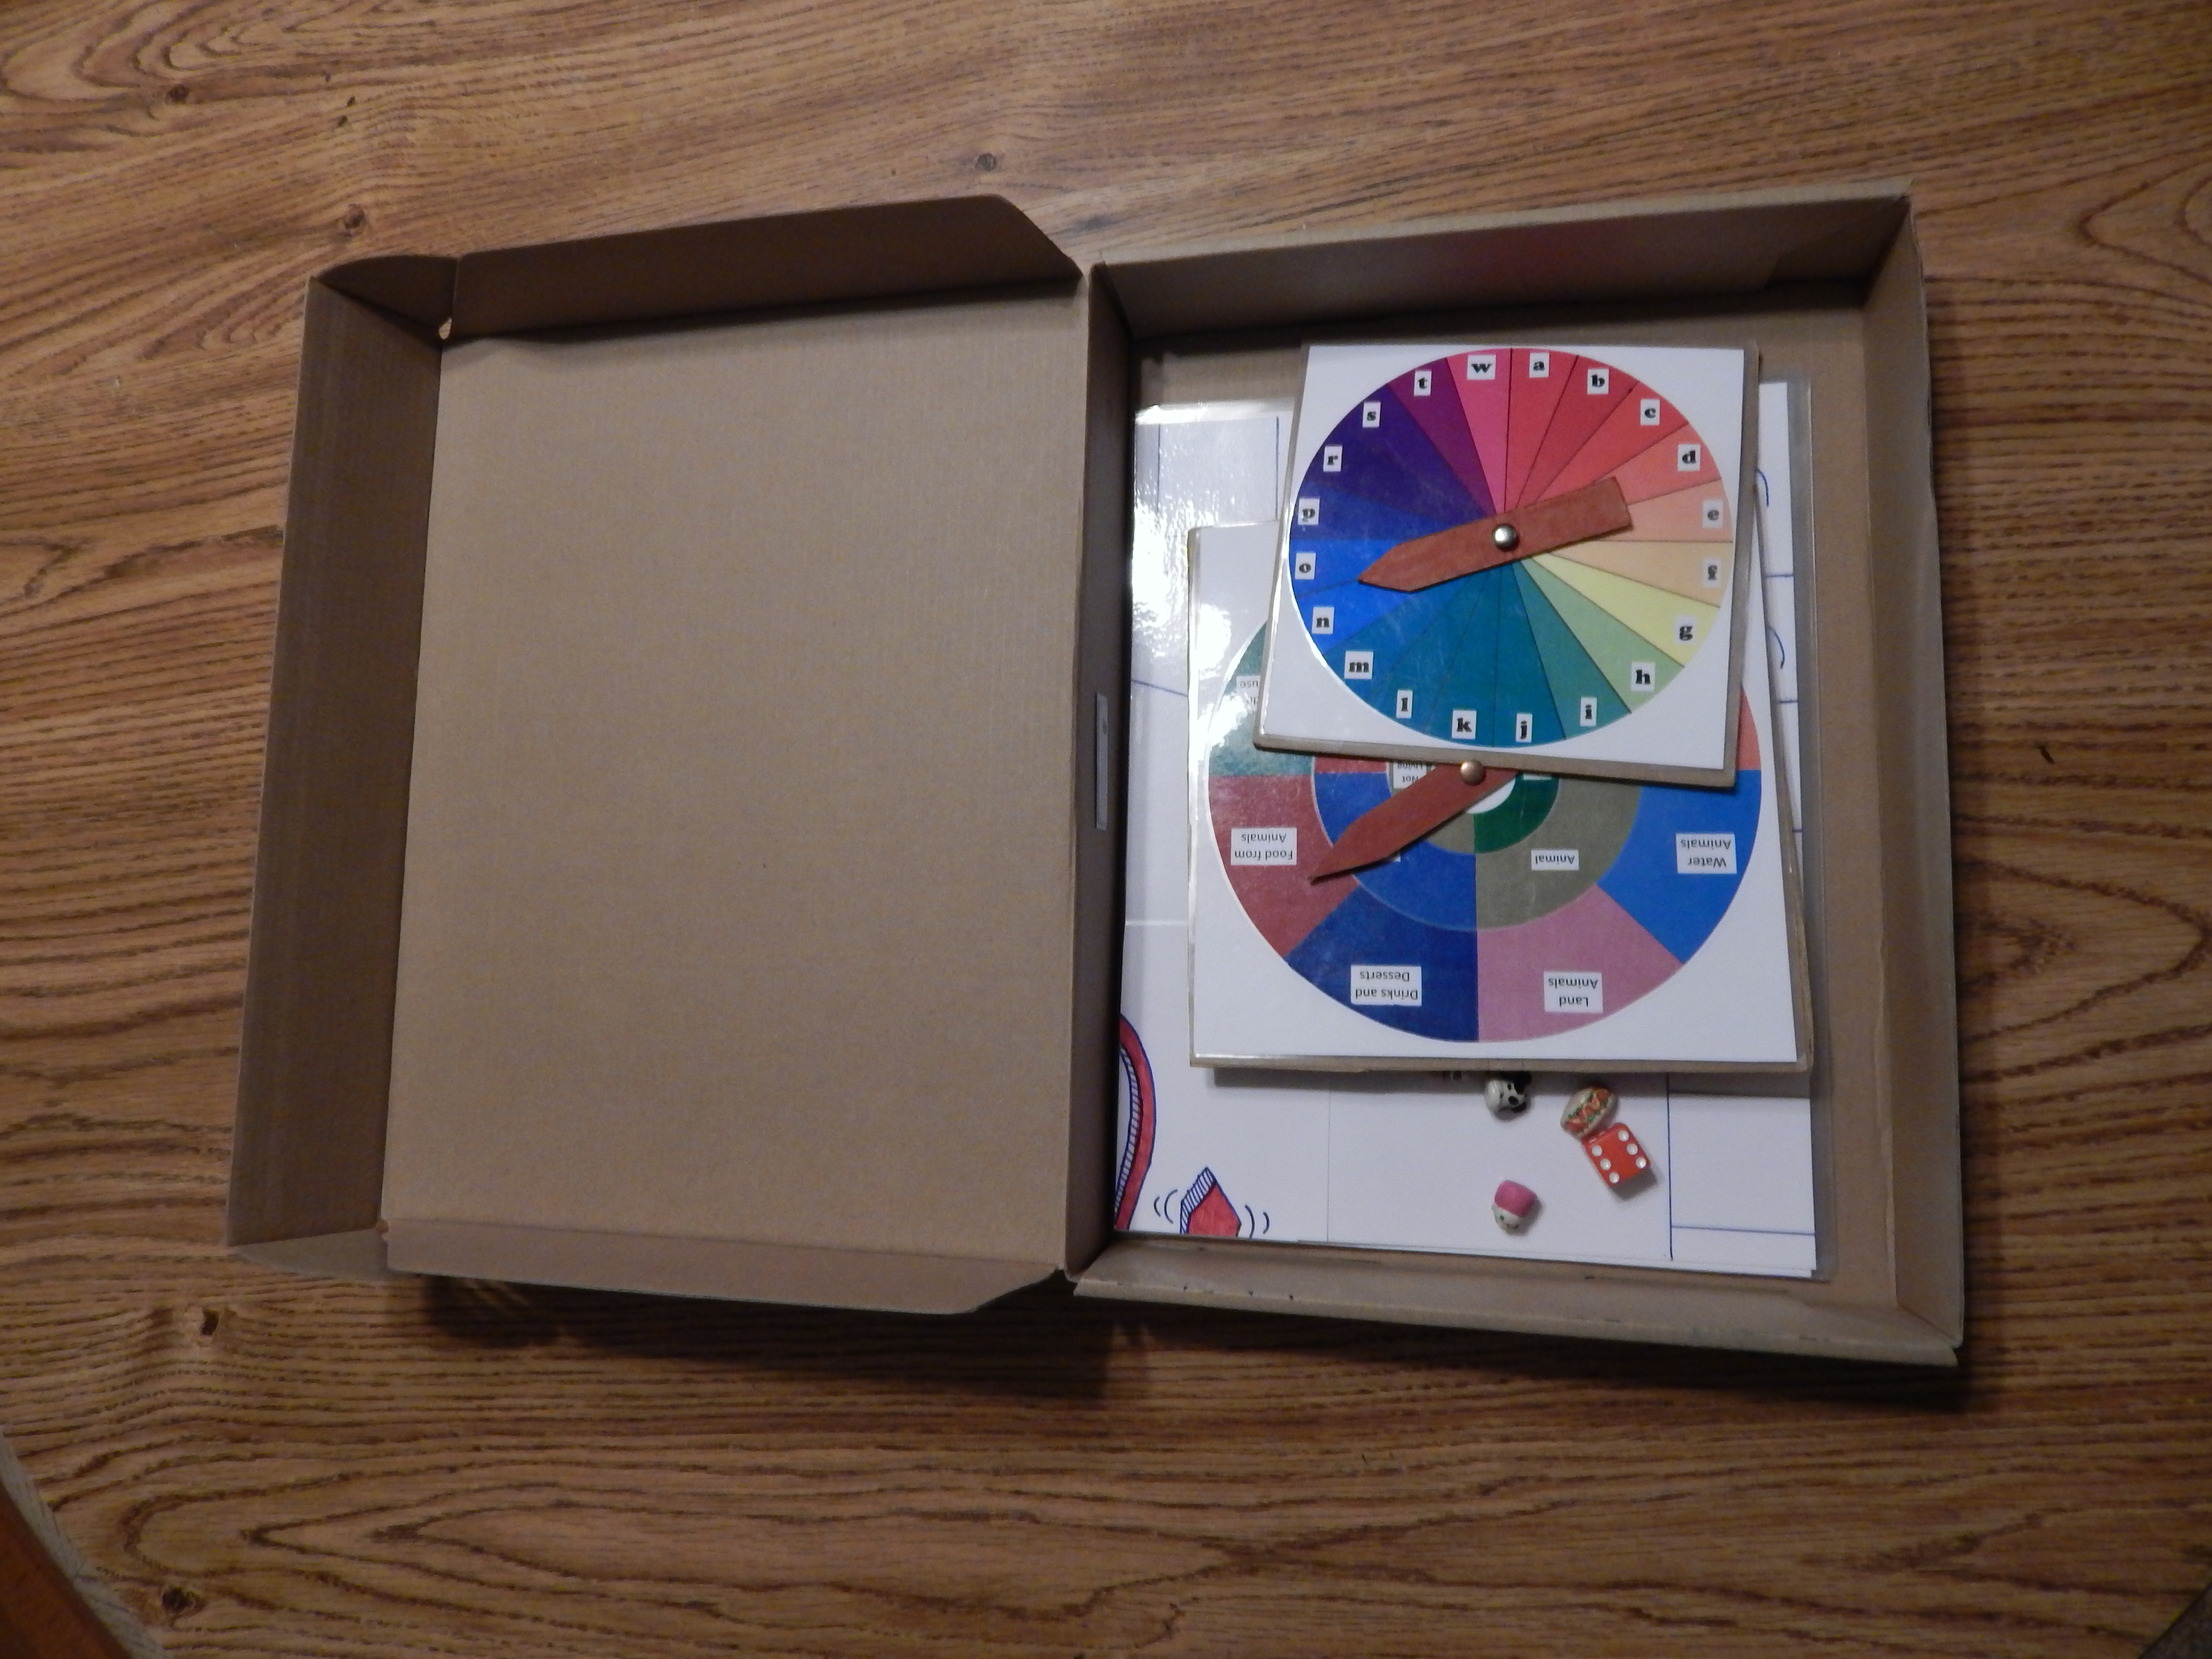
5.  Category Mania: Choose a category and try to get a certain number of things in that category for each letter of the alphabet.  Example: Category: Animal, Number: 2.  Try to get 2 animals that start with “a,” 2 with “b,” etc.  Try different categories like food, plants, and cars.

What is your favorite road trip game?  Are any of these games new to you?

***Allison***

Chopped!

-Allison (maple syrup 076-Allison (maple syrup 077

I made up a contest based on a TV show we saw maybe 2 times called “Chopped”.  “Chopped” is a cooking contest where the four contestants get mystery ingredients that they have to make into a dish in 30 minutes.  Our version of “Chopped” isn’t quite the same, but us kids and our cousins had lots of fun playing it!  Here are the rules:

1.  Anyone who doesn’t want to cook, or who isn’t able to can be a judge.  It works best if there are 3 or 4 other people who cook.

2.  Depending on how many people are playing, there are a certain number of rounds.  There must be one less round than the number of cooks (like musical chairs).  Here are some ideas for the different rounds: Drink, Dessert, Side, Snack. (You can’t really have a main dish because one of the rules is that you can’t use meat or eggs or anything that might be harmful if it’s undercooked.)

3.  The judge chooses two ingredients that the cooks must use.  Make the ingredients relevant to the round (Don’t use tomatoes and corn for the dessert round ☺).

4. The cooks have 7 minutes to make a dish containing the ingredients the judge chose, plus up to four more ingredients of their choice.  You may make the time shorter or longer as you wish.  The minimum of ingredients is 4 and the maximum is 6.

5.  When the time is up, the cooks have stop what they’re doing and bring their dish to the judge.  They have to have used at least 4 ingredients, not more than 6 ingredients, and the ingredients the judge chose; if they haven’t, they’re out.

6.  The cooks explain their food to the judges, then leave the room.

7.  The judge(s) decides which dish they think is the worst, and put the dish under a big bowl so that it’s hidden.  The judge calls in the cooks.

8.  The judge takes off the bowl hiding the dish, and announces who is “Chopped” (out of the game).  The player that got chopped gets to help judge the next round(s), and the other cooks get to keep cooking!

9. When it’s the last round and there are only two cooks left, whoever wins the round wins the game!

I hope you have as much fun playing this as we did!

***Allison***

30-Second Sketch: A Game

30-sec

The other day I made up a game called 30-Second Sketch and I thought I’d share it with you.  Here are the rules:

**************************************

For 3 or more players.

1. A player chooses a word to draw. (Example: ice cream)

2. Set a timer for 30 seconds.

3.  On “Go!”, someone starts the timer, and all the players must draw a picture of the chosen word in 30 seconds.  Everyone has to keep drawing until the 30 seconds is up, and stop drawing when the 30 seconds is up.

4.  When the time’s up, everyone compares drawings and votes on which drawing is the best. (It doesn’t have to be the most realistic, it can be the cutest, funniest, or whatever the players like.)  Whoever wins gets one point.  If there is a tie, each winner gets a point.

5. One round is finished.  The player to the left of the player who chose the first word gets to choose a word next.

6.  The first player to get a certain number of points first, wins!

*************************************************

My brothers and sisters and I had lots of fun playing this way, but here are some variations to try:

***********************************************

1. Make this into a board game by writing the words to draw on cards, and making a gameboard.  When someone gets a point, they move one space on the gameboard.

2.  Instead of each player voting on the best picture, everyone takes turns being the judge for one round, like in Apples to Apples or Picwits.

3.  You can take turns choosing words to draw or you can write several words on slips of paper and take turns choosing one each round.

4.  You can play with two people if the players make a decision together on the best picture.

5. You can play 20-Second-Sketch for a more challenging version, or 40-Second Sketch for an easier version.

***********************************

Happy drawing!

***Allison***


Hidden Pictures Post #2

How was your Christmas? Mine was great!  I’m back with a new post after taking a break for Christmas.

You can see my first hidden pictures post here.  Now for #2! I will give you some pictures, and you can try to find the hidden pictures within the pictures.  If you get stumped, there are answers at the bottom of the post.  Have fun!

-Allison (Nov. snow, hidden pictures) 002

#1. Can you find a stocking, the letter “b”,  a spiky butterfly, and an evergreen tree? (Hey! That even rhymes!)

-Allison (Nov. snow, hidden pictures) 001

#2. Can you find Little Red Riding Hood?

-Allison (Nov. snow, hidden pictures) 003

#3. This one isn’t exactly hidden, but can you see how this could be a face?

Answers: (Sorry for the sloppy writing – writing freehand on pictures on the computer is hard!)

#1.

-Allison (Nov. snow, hidden pictures) 002 - Copy

#2.

-Allison (Nov. snow, hidden pictures) 001 - Copy

#3.

-Allison (Nov. snow, hidden pictures) 003 - Copy

Did you find all the hidden pictures?  Did you find any that I didn’t?

***Allison***


Tidbits

I have lots of little things to post about, so I thought I’d just post them all together.  Here goes!

*************************************************************                                                                                             Sunset

Several days ago we saw this GORGEOUS sunset.  I seriously think this was the prettiest sunset I have ever seen.  The colors were so bright, and the clouds were all swirly.

-Allison(sunset) 005

Isn’t it gorgeous?!

-Allison(sunset) 003                                                                                              Scents

If you haven’t tried this, you should!  Put orange or clementine peels in a small pot.  Put some water in the pot, and add some cinnamon and whole cloves.  This makes your house smell amazing! -Allison(sunset) 024                                                                                         Surprise!

This is a gross but true story: We got our Christmas tree a couple of days ago, and the kids insisted that we move the furniture so we could put the Christmas tree in its customary spot by the window.  Since we moved the couch, we had to sweep all the dust up. My brother was trying to vacuum up a dust bunny, but it wasn’t going too well.  You’ll never guess why.  Do you give up? Ok: it didn’t sweep up well because it wasn’t dust at all – it was a dead frog!!  Yep, a really-truly dead frog.  Actually, it was more like a petrified frog chip, it was so dry and hard.  Why this is so funny is because that frog was the one that had hopped out of its cage months before, and we never knew what happened to it.  We thought maybe the cat got it, but nope!  My mom said that maybe the dead frog was what we had been smelling a while ago.  Gross!!

Oh, and one other little thing: Complete-the-Set game

This is just a little game I made up that’s fun to play while traveling or waiting for something.

1.  Choose one person to be “it” for the first round.

2.  The “it” person thinks of a set (primary colors, initials, etc.)

3.  “It” tells the other players all but one of the items in that set. (For example, if the set was “primary colors”, the “it” person could say “blue, red, and…”, or “red, yellow, and…”, but they couldn’t say “blue, red, yellow,” because there wouldn’t be any part of the set left to complete!)

4.  The other players take turns trying to complete the set.

5.  Whoever guesses correctly first gets to be the new “it”.

Have fun!

******************************************************

Happy Holidays!

***Allison***